Digital cameras, mostly DSLR and Mirrorless bodies, record lots of information about every photo you take – this is called EXIF metadata (EXchangeable Image File).
The unique information it records is attached to each image and stays embedded in the original RAW or JPG file (other file types may not have the capacity to carry EXIF). It can be very useful to have access to EXIF metadata for a number of reasons.
It’s nearly impossible to remember the exact camera settings for each shot you take when looking at your photos afterwards. But by having access to read your EXIF details means hours, days, weeks or even years after you’ve taken the shot you can still look back and see exactly what camera settings you used.
This can be very useful for photographers to learn from their mistakes as well as see what settings worked well in a particular situation. Some photographers use EXIF data to bench-test their camera’s ISO capabilities by taking numerous shots at different ISO levels and comparing them.
The following settings are recorded on most DSLR and Mirrorless cameras;
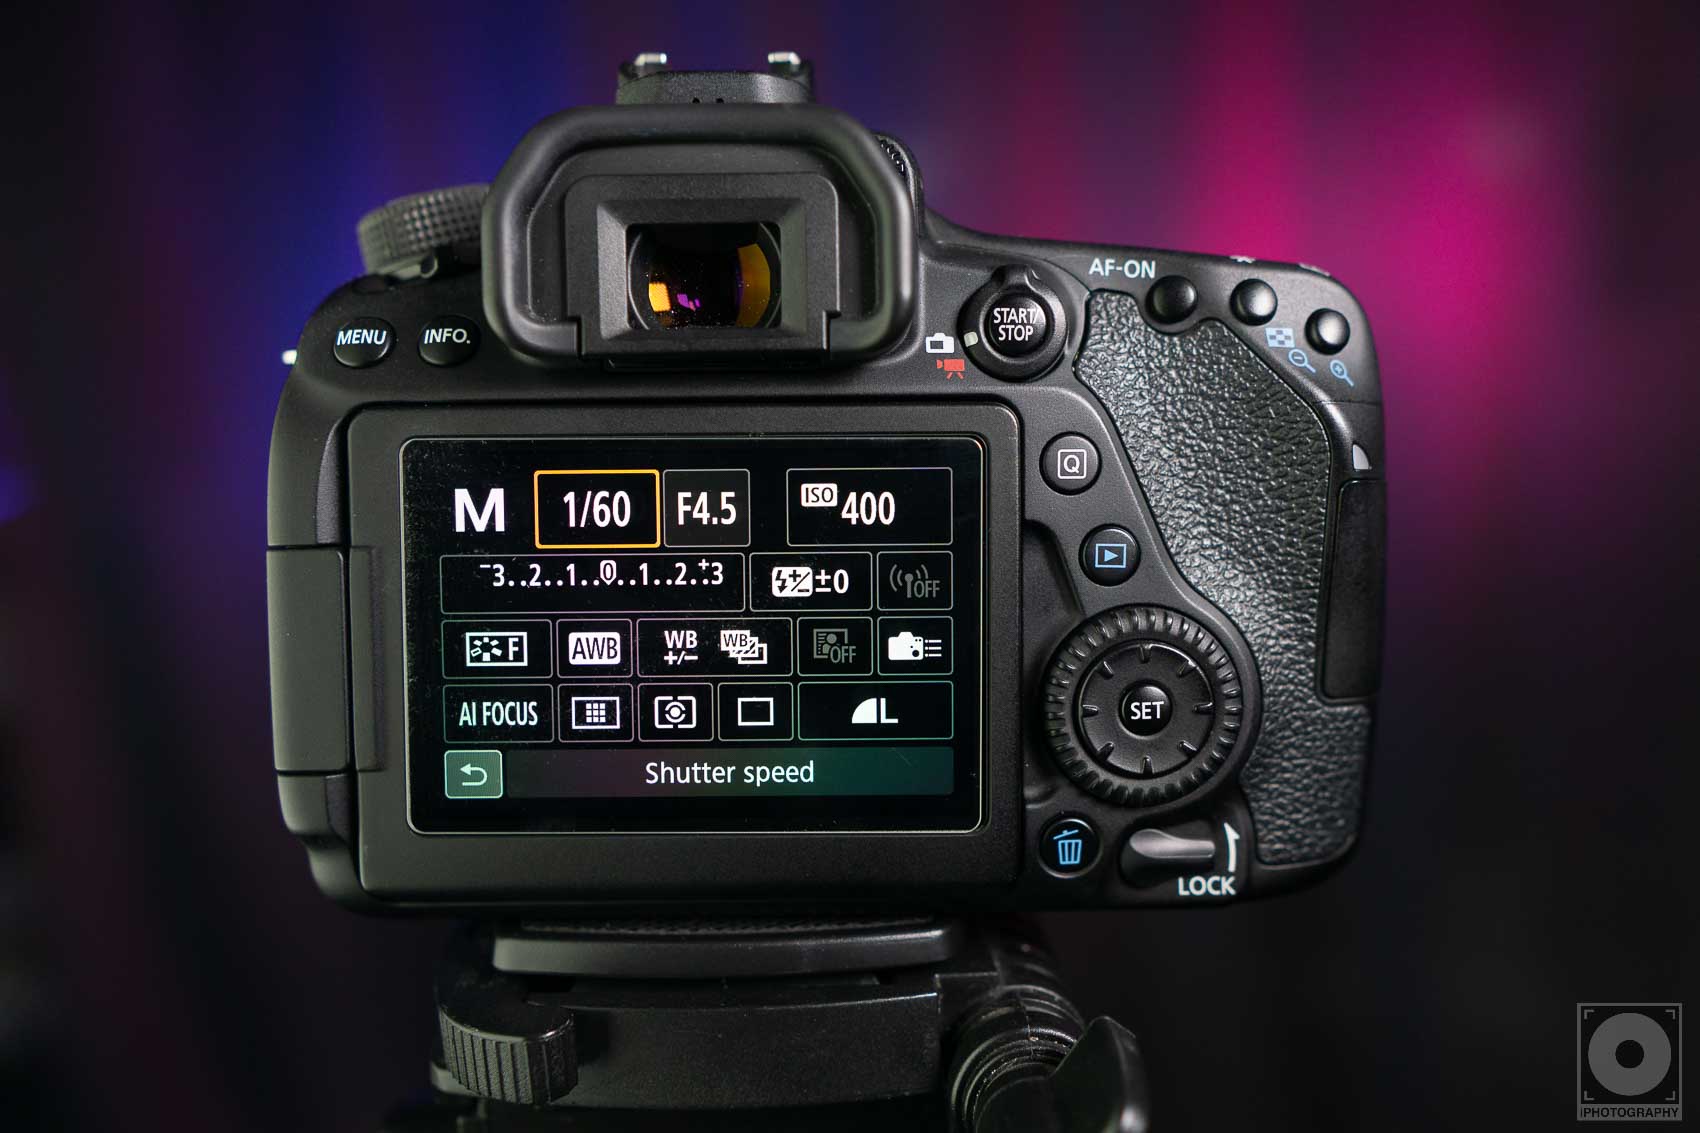
The EXIF data originates from your camera. Not all cameras capture and record EXIF in the same way.
Some cameras record very basic details (aperture, shutter speed, date and time). Others are much more advanced and collect more details than you’d expect (location through GPS, focal length, white balance, camera model etc).
Some of these details are ingrained in the process of capturing the image and can’t be changed, but other, optional elements, can be turned off or customised.
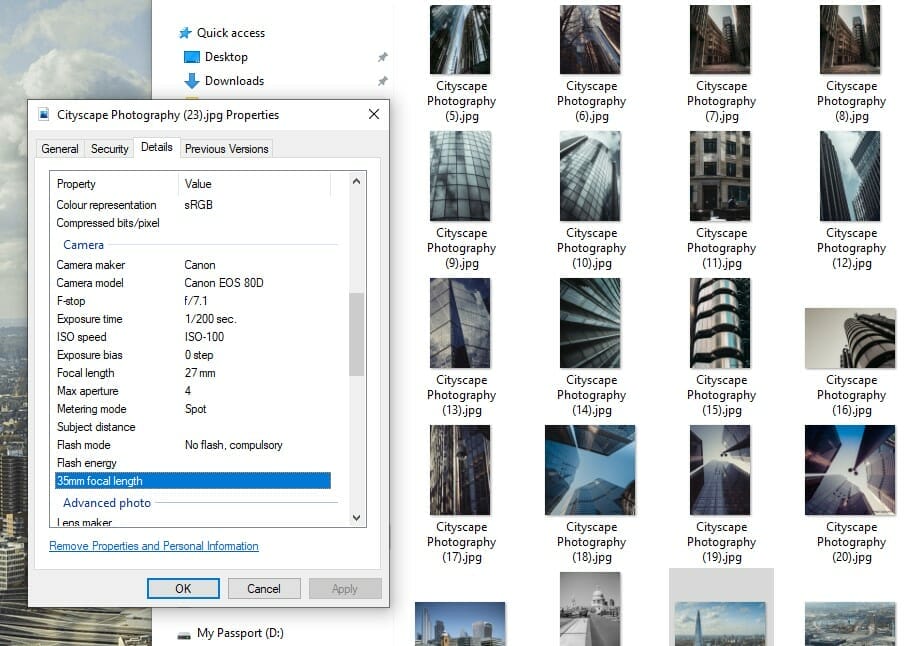
When you’ve uploaded your photos to your computer you view the EXIF in a number of ways. Most photo editing software, when opening RAW files, will automatically display some of the basic details (aperture, shutter speed and ISO), but you may have to dig deeper to see more.
On a windows computer for example, right-click on the photo file and select ‘properties’ at the bottom of the menu. Go to ‘details’ and scroll down to see all available data about that image.
To view EXIF metadata on Mac computer, open it up in Preview, which is usually the default app that displays photos. Select Tools > Show Inspector and click the ‘EXIF’ tab at the top of the Inspector. But if you’re just looking for a quick reminder of shutter speed, focal length, and aperture, you can right-click on an image in its folder and press “Get Info.”
You can also find web browser extensions to download that will also show you EXIF data where possible on an uploaded photo. Chrome and Firefox have compatible EXIF data readers for beginner photographers.
These 3 useful websites that’ll show you any EXIF data on a photo you’ve taken too;
Yes and no. You can’t change or alter basic details such as the aperture size or ISO settings you used – why would you want to anyway?
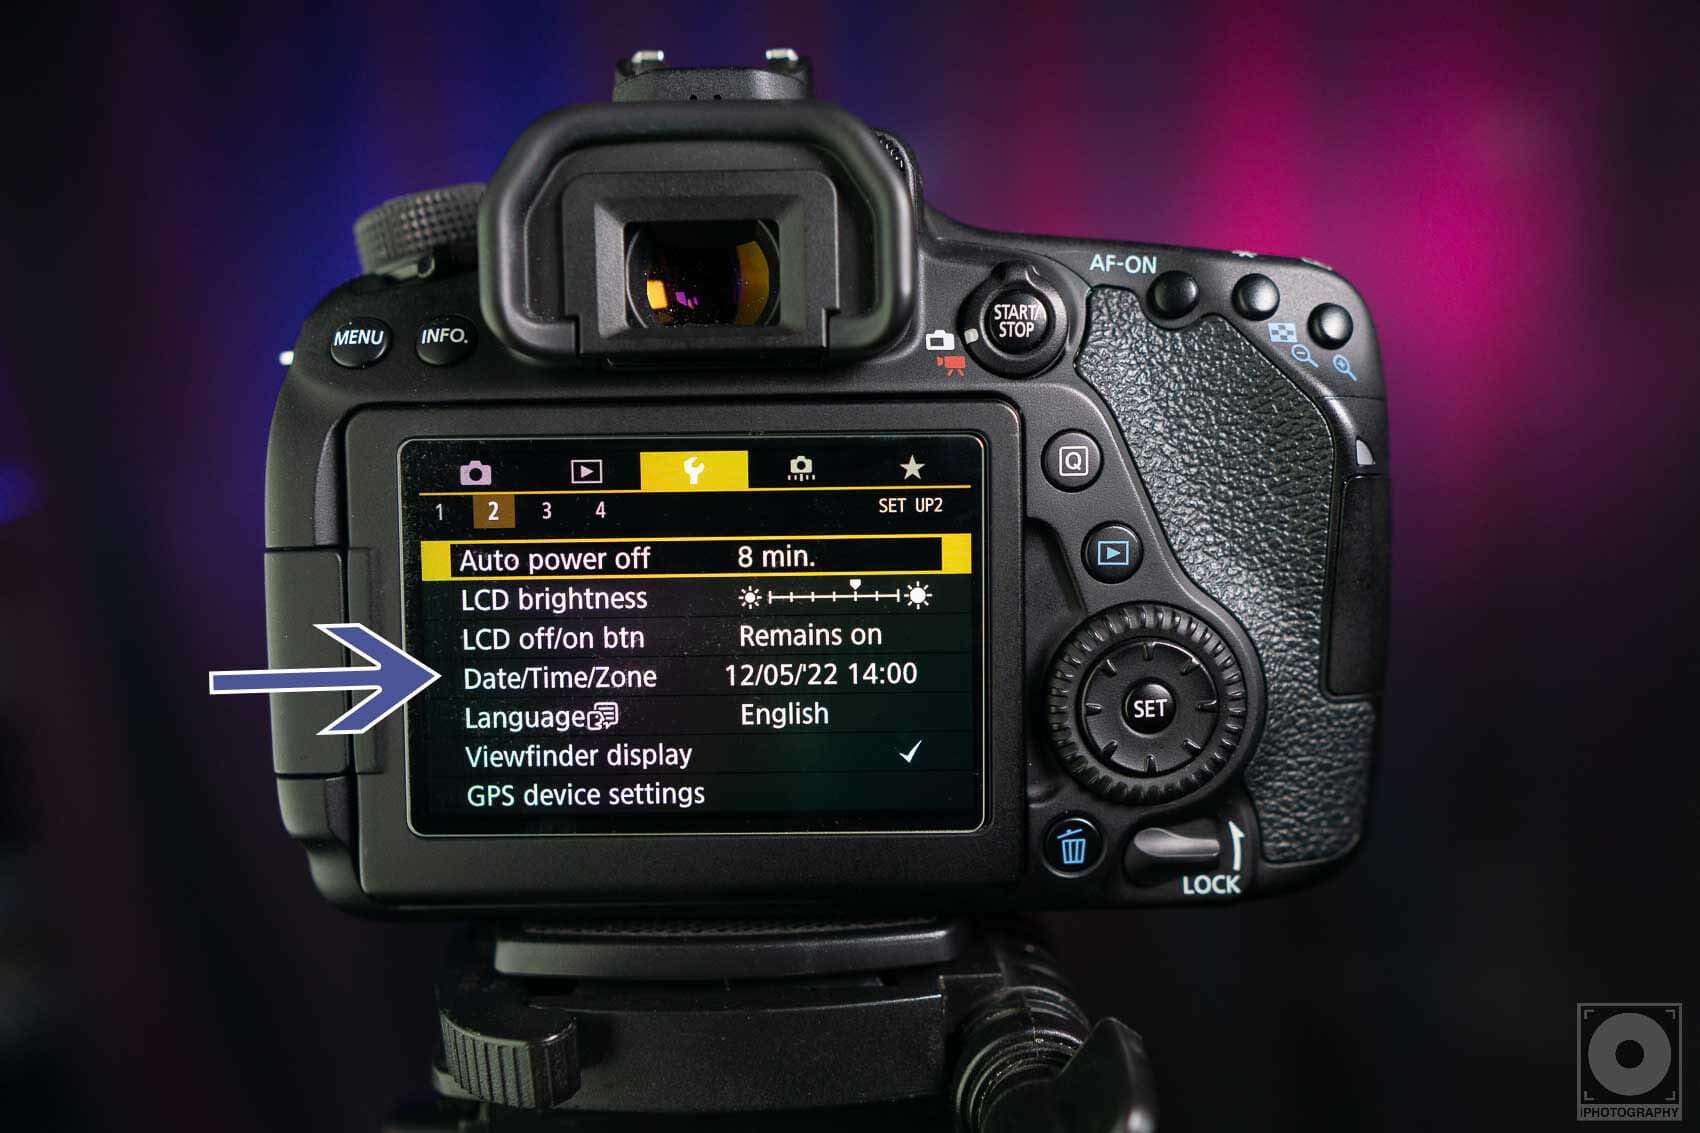
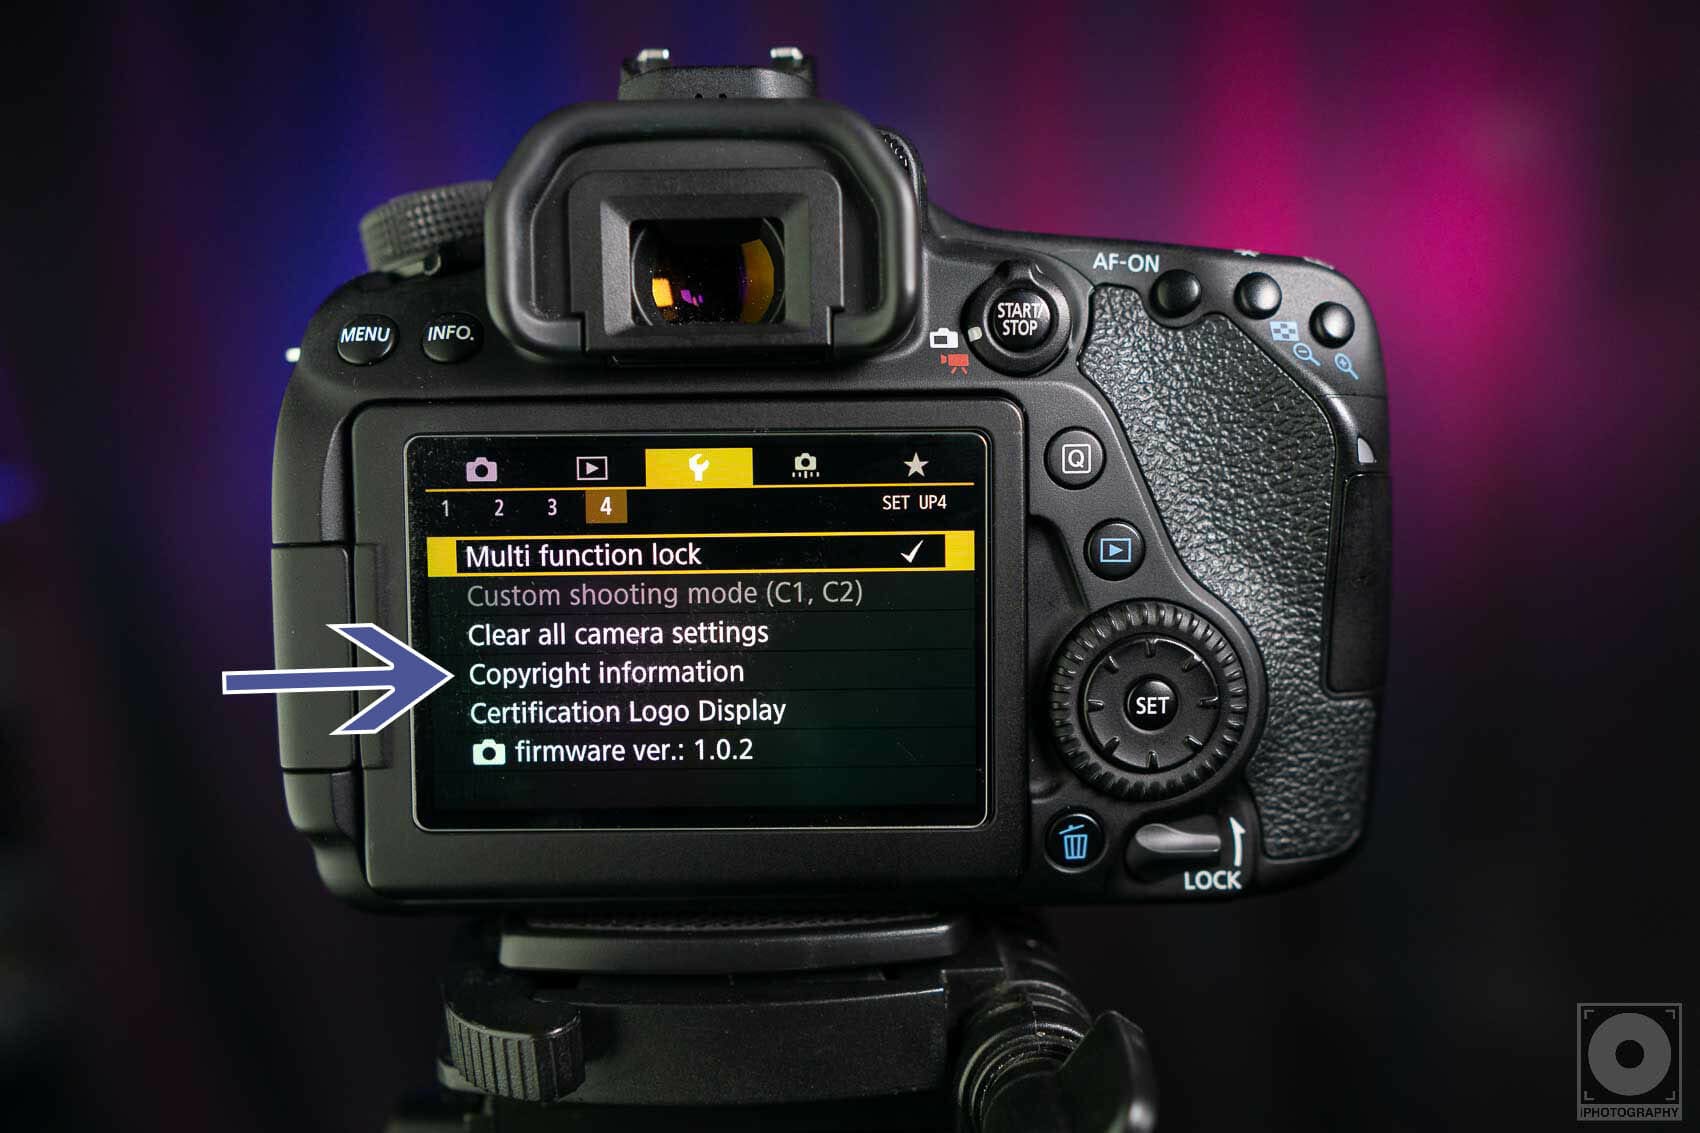
Information such as camera owner, and copyright owner, date and time can be changed in-camera. Have a look through your camera menu – it tends to be one of the last options in the system to see where you can add in your name as the camera owner, and input your name/photography brand name as the copyright owner and set the correct date and time zone.
When it comes to exporting photos there are photographers who prefer to omit all their EXIF data to protect the ‘secrets of how it was shot’. While this may seem unhelpful if you’re trying to learn more about photography from shooters you admire there may also be a practical reason as to why they leave it out.
EXIF metadata is still data and information like this in the digital world takes up space. The more data that is recorded the larger the file size will be compared to without.
If you’re a photographer uploading a photo to your website for example, space is everything. You’ll want to save as much space as possible, therefore omitting EXIF data when exporting your photos from Lightroom for example can make them faster to load on a webpage.
Paying attention to your camera’s EXIF metadata can be very helpful and revealing depending on your approach to photography. If you’re a photographer who likes to learn through sharing with a photo community then reviewing your EXIF and making positive changes can help improve your photography based on facts and evidence.
But some photographers prefer privacy and only like to share the final photo and not the ingredients – either way, the options of preserving and removing EXIF data is available across a number of platforms.
Bookmark and save this article about EXIF metadata for photographers so you can find it again in the future. If you’ve got any other questions about photography chances are you’ll find the answers in our other articles and tutorials below.
Discover TOP features in the Lightroom CC mobile app with this guide for enhancing your photo editing skills. For desktop and tablet too.
Shooting sunsets using amazing 5-in-1 magnetic lens filters from Kentfaith, the 1st choice for photo & video products.
Popular memory cards for photography – what’s the best SD card for your digital camera? Choose the right capacity and class speed in our guide
Learn the basics of photography – fast – with our FREE 60-Second Photographer online course. Each class is short and sharp with simple, actionable steps that give you immediate results.
x 30 lessons

© iPhotography™
Become a confident and competent photographer in less than 30 minutes!
Before you leave, make sure you’ve secured your FREE online photography course (worth £29.99)
Each class is just 60-seconds or less making it the fastest and easiest way to learn photography!