If you want to get into photo editing but are not really sure where to start let us tell you all about Lightroom. Taking an Adobe Lightroom class will help you enhance your digital photographs with just a few clicks and slides of a button.
I’m going to give you the full breakdown of what Lightroom is. I’ll also walk you through some of its amazing tools for photographers and where you can start a Lightroom class online to learn all about this wonderful photo editor.

Lightroom is photo editing software created by Adobe. Adobe is also the mastermind behind Photoshop. Lightroom was built off the back of Photoshop’s success as more and more photographers wanted dedicated software that was built with photography in mind.
Back in the film days we used to ‘edit’ photos in a darkroom, and in the digital age we do it in a ‘lightroom’!
Lightroom CC is a cloud-based software that allows you to edit photos in a number of different ways. You can brighten, darken, boost colours, sharpness, crop, straighten horizons and so much more. We’d have to create a full course to tell you everything you need to know about Lightroom, oh, actually, we did – click here!
Not only does Lightroom let you edit your photos you can also use it for cataloguing your whole photo library with different tags, locations, dates etc. This is great if you take lots of photos and travel a lot. A messy folder management structure is a photographer’s worst nightmare!
There are a couple of types of Lightroom software available currently – Lightroom Classic CC and Lightroom CC.
They are the same software (to some extent) but designed for different devices which we’ll come on to shortly.
The Creative Cloud (CC) aspect simply denotes that this generation of Lightroom is all cloud based. They used to be available as direct downloads and on CD’s (yes, remember them?).
Adobe’s Creative Cloud means that you can get regular updates if you’re subscribed to their Lightroom Creative Cloud plan and you can transfer images and presets between devices on the same account.
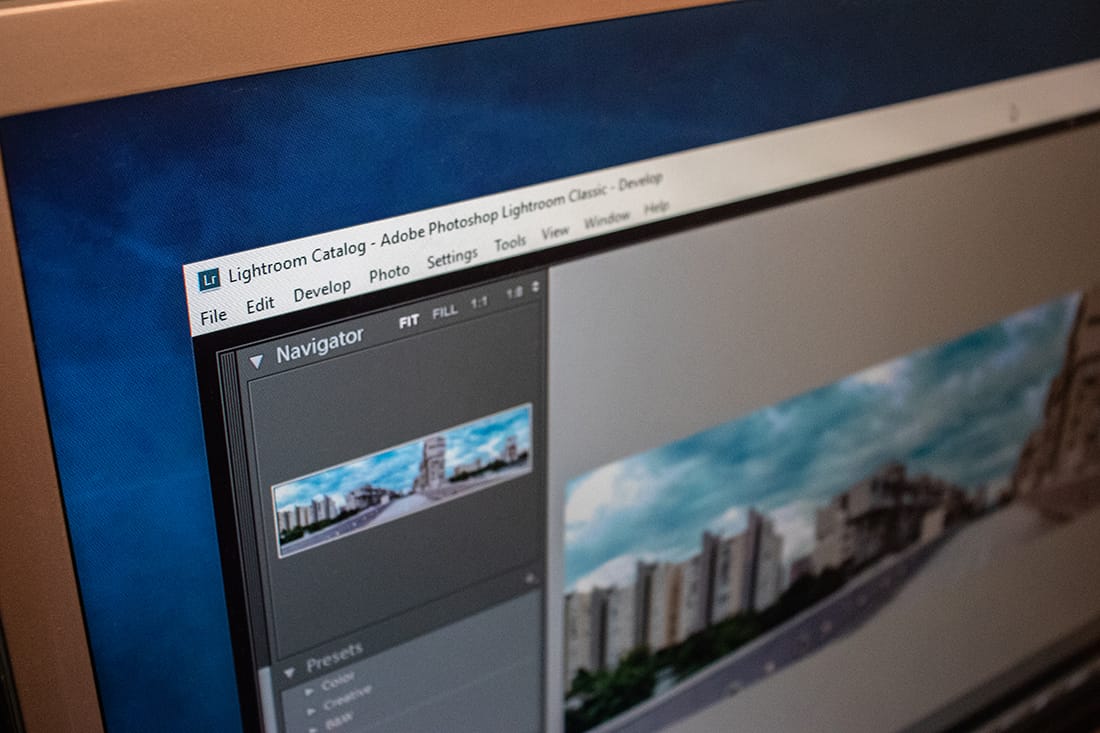
Since we’ve talked about the two versions of Lightroom it’s probably wise to tell you the differences between them so you know the capabilities. If you prefer to edit your photos on your laptop, mac or PC desktop then you’ll be using Lightroom Classic CC.
If you are a tablet or mobile photo editor then head to your iPhone or Android app store and download the Lightroom CC app. It is also possible to use the same Lightroom (Mobile) CC interface on the web too.
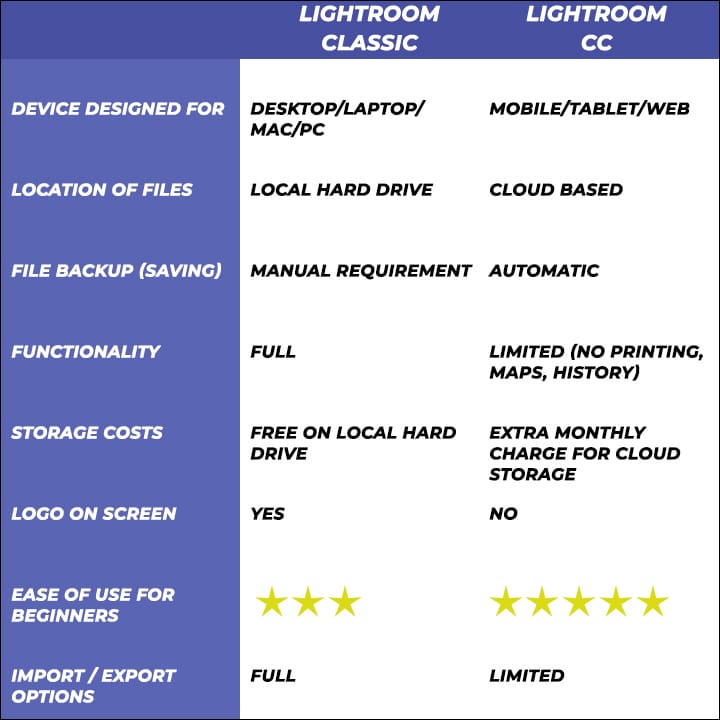
Here’s a quick overview of the main differences between the two versions of Lightroom;

Given that both versions of Lightroom are cloud based they will no doubt get updates so this comparison list could alter in the future. We’ve seen huge changes from Adobe Lightroom Classic CC 2019 compared to the 2021 edition for example.
If you are weighing up ‘Lightroom Classic v CC’ then you mainly need to think about the device, you’ll prefer to do your photo editing on. Lightroom CC, though a cut down version of Classic is available on all devices. Whereas Classic is only available to use on a computer.
Think of Lightroom Classic as the bigger brother of Lightroom CC. In the same way that Photoshop is the parent of Photoshop Elements if you’ve used that before. Lightroom CC is a response to people editing their photos on mobiles and tablets more often.
The only question to ask yourself is ‘do I want to edit my photos?’. If the answer is yes, then you’ll find Lightroom Classic or Lightroom CC useful.
It is designed for photographers and all the tools will help you easily improve your photos after taking them. Once you’ve taken a Lightroom class you’ll know what all the features and functions do and you’ll be a master in no time!
If you know you’ll never edit your photos and keep them pure then maybe photo editing software isn’t for you and that’s fine. Photo editing, though common in photography these days, isn’t mandatory.
The current version of Adobe Lightroom Classic CC and Lightroom Mobile CC is only available through an Adobe Creative Cloud subscription. They have a dedicated photographer plan which allows you to get the latest version of Lightroom Classic, Mobile and even Photoshop for a low monthly fee which is around $10/£10.
Some photographers disagree with this type of subscription model given that there are alternative softwares available for a one-off payment such as Affinity Photo and Luminar.
Look for offers online by searching ‘adobe lightroom classic download’. Or to buy Lightroom Classic direct click here for the latest Adobe plans.
Once you are registered for one of Adobe’s Creative Cloud plans look for the Lightroom download button to get the software on your laptop, PC or Mac.
If you want to use the mobile version of Lightroom CC you will still need a subscription plan but that’s all bundled in when you subscribe to Lightroom Classic and Photoshop, fortunately.

Just to give you a hint of the power that Lightroom Classic holds we’ve got 5 of our favourite Lightroom tools to share with you and how they can transform your photos.
The clarity tool is a great adjustment to use, as an example, on landscapes and fine art photographs.
Unless an adjustment brush is applied first then using clarity will affect the image globally so be careful where you want to enrich and not.
This essential Lightroom tool will darken the black areas creating a perceived contrast making your picture look sharper.
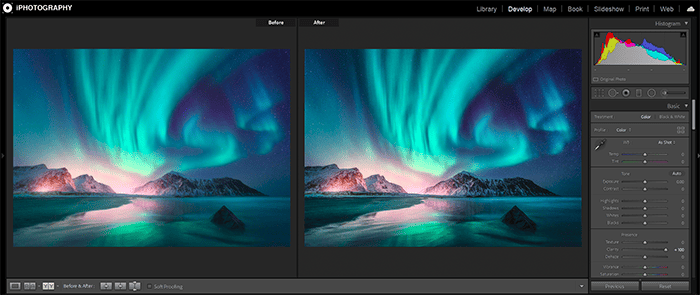
By the way, this is one of our favourite essential Lightroom tools. Getting an even exposure from foreground to background in landscapes can be tricky, maybe you get the scenery spot on, but your sky is a little overexposed – graduated filter to the rescue!
Drag out a gradient over your sky and adjust the exposure to bring back more details lost in the original.
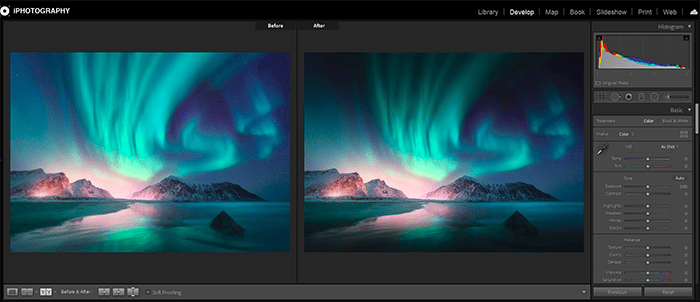
You’ll find the tints just under the colour temperature slider and it’s there as a secondary adjustment to your white balance.
Tints help adjust colours that the white balance wouldn’t normally change. You’ll be able to add more magenta or green depending on your shot.
For example, greens are good for landscapes and magentas are great for skin tone so give them a little nudge in the right direction to stop your shot looking flat.
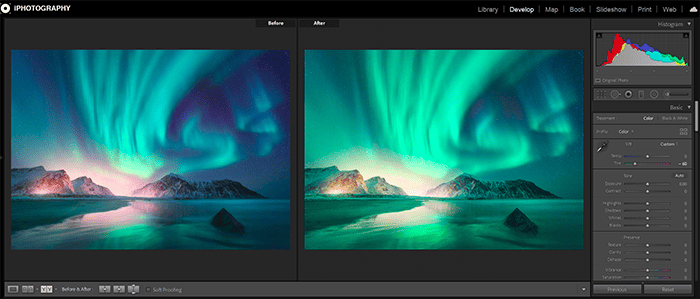
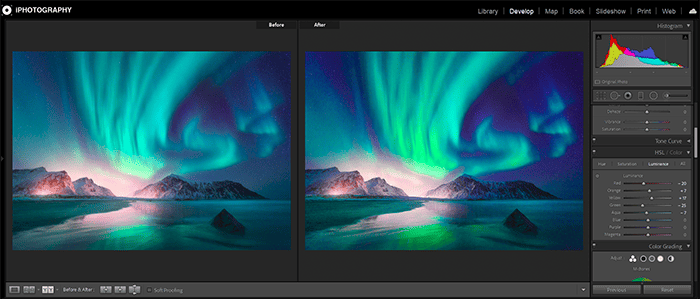
Hue, Saturation and Luminance sliders are a great little Lightroom tool that you should get to know as it can help you change colours of objects and features without using the adjustment brushes.
If you are a photographer with a flair for style then go crazy and shove those sliders around to make colourful and bold statements with your work. Just remember Hue means colour, Saturation is the amount of colour and Luminance is the brightness.
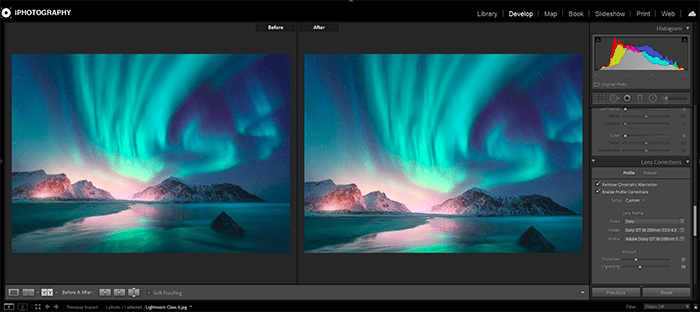
Shooting under 20mm? You should be using this essential Lightroom tool every time. Short focal lengths on cheaper lenses can create barrel distortion meaning the edges of the image curve due to the light conforming to the shape of the lens.
Profile Corrections will either automatically detect from the metadata what lens you shot on and correct the distortion, or you can select the closest option for your camera and lens. It will really straighten up your landscapes.
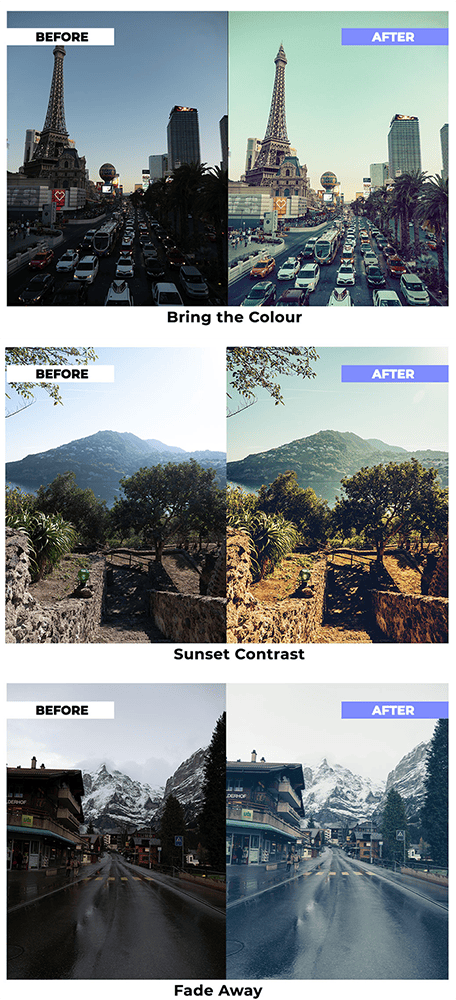
In the interest of speed, efficiency and consistency Lightroom presets were born.
A tool that has been rolled over and repeated in different ways across different photo editors. Photoshop has its actions, Luminar has its LUTs and Looks but Lightroom is where presets really started to shape the one-click editing generation.
Presets are by definition a predefined adjustment that can be applied to any photograph to give a consistent adjustment.
Now let’s clear things up – presets aren’t always a one-click solution despite the intention. Many photographers use presets to get 90% closer to their desired effect but still need to make refinements image by image.
Lightroom presets can be found all over the internet, some as weak as a baby kitten that does nothing visible for your photos. Others are like a volcano of over-adjustments. Fortunately for you, you’ve landed in the perfect spot in between.
iPhotography has a massive range of Lightroom presets available in 4 iconic collections for you to buy. You can buy them alongside our Lightroom class or separately.
If you just want to get right into photo editing then it’s best to join a Lightroom class to understand how to use the software.
iPhotography has got 2 Lightroom classes. Our Lightroom Classic has 29 individual lessons covering everything you need from importing and arranging your shots right through to basic and advanced editing and how to prep your images for export (print & online) too.
We’ve also got a bonus module dedicated to Lightroom CC in this flagship online course.
Discover the BEST way on how to clean a camera sensor using swaps, rocket blowers and pencil brushes to give your shots a dust-free finish!
Capture the magic of the night with our beginner’s guide to night photography. Learn tips and techniques for stunning results.
Master the art of solar eclipse photography with expert tips on equipment, settings, and precautions for stunning celestial images.
Learn the basics of photography – fast – with our FREE 60-Second Photographer online course. Each class is short and sharp with simple, actionable steps that give you immediate results.
x 30 lessons
© iPhotography™
Become a confident and competent photographer in less than 30 minutes!
Before you leave, make sure you’ve secured your FREE online photography course (worth £29.99)
Each class is just 60-seconds or less making it the fastest and easiest way to learn photography!