When starting out in photography you’ll hear and see the term F/stop everywhere you go -but what is a F/stop? What do they do to a photo? and how can you control them to your advantage? Well, let’s find out in this photography tutorial.
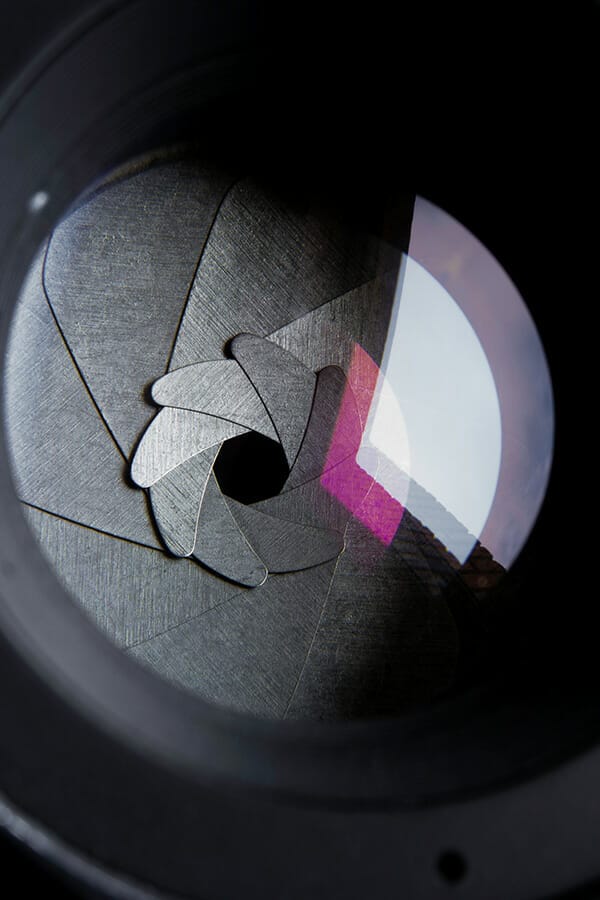
Image: The aperture of the camera is in the lens.
Inside the lens of all cameras is a hole that light passes through to reach your sensor. This light forms your photograph. But how much light reaches the sensor is controlled by the size of that hole – that’s what we call the aperture. The size of the aperture can be changed and in photography we use a scale called F/stops to grade the size of the aperture.
The ‘F’ in F/stop simply means ‘focal’ as it also determines how much of the photo you’re about to take will be in focus – but we’ll explain that later.
Apertures can be made larger and smaller to regulate the amount of necessary light needed to expose a photograph correctly. Small metal fins, called diaphragm blades, make the aperture close and open as instructed by your camera settings.
Too much light and it can be overexposed, too little and it’ll be underexposed. Choosing the right aperture is important for beginner photographers to learn.
F/stops are measured based on the following calculation;
For example, using a 100mm lens and with the aperture at 25mm your F/stop will be F/4 (100/25=4).
You don’t really need to sit and do the maths as all you’ll see on your camera is the F/stop numbers changing as you turn your dial, but now you’ll know what’s going on inside your lens when you’re doing that.
There are an agreed range of F/stops that have been in use in photography for decades. These are known as ‘full F/stops’. As technology advances camera manufacturers have been able to make smaller incremental size changes to apertures resulting in more F/stops becoming available. These are called half and third F/stops.
As a beginner on this photography tutorial it’s probably best to understand the full F/stop scale first and then the other stops will fall into place naturally.
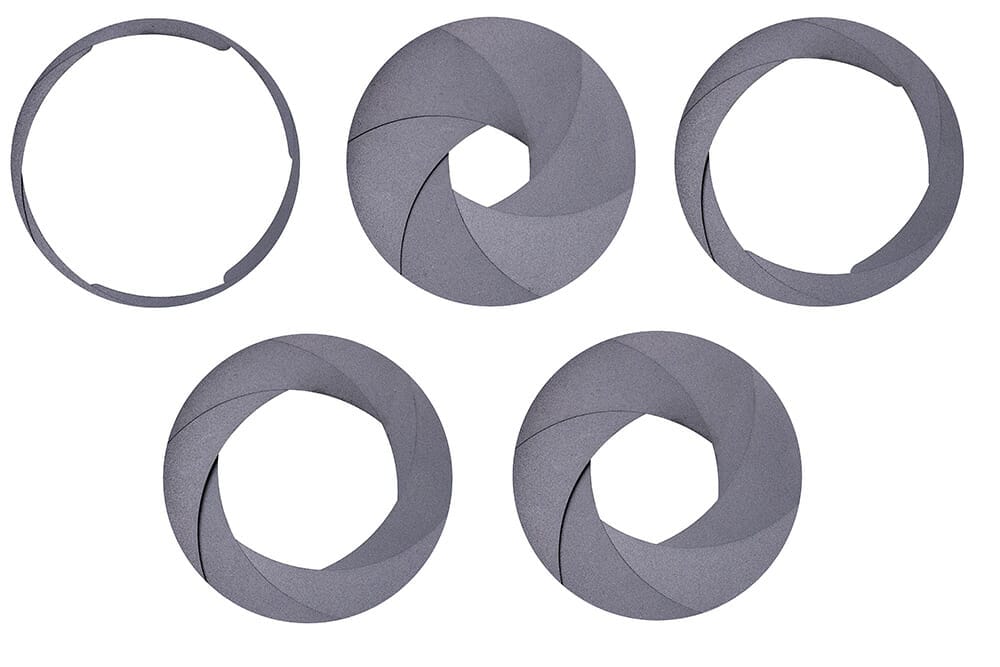
Image: Apertures of different sizes. The larger the hole the more light can pass through to the sensor/film.
Focussing upon the full F/stops first let’s look at the traditional scale;
The smaller F/stop number actually represents the larger aperture size. So the smaller the F/stop number (i.e F/1.4) means it lets in the most light compared to the others. F/32 is the smallest aperture on the scale, meaning it lets the least light in.
The difference between moving from one full F/stop to another is a 100% increase (or decrease in the amount of light). So for every change in full F/stop to the next one up or down the scale means your image will be twice as bright or dark.
As technology becomes more sensitive more F/stops have been added so you may see other F/stops appear on your camera screen like below…
(half and third stops are NOT in bold)
These half and third stops will make your shot 30-50% darker or brighter (depending on which way you move).
All lenses have a maximum aperture size. This is how big the aperture can be set at a certain focal length. You’ll see lenses advertised – Canon 50mm EF-S F/1.8 etc. This means the widest aperture on this lens is F/1.8. Most lenses all go down to F/22 at least.
Zoom lenses will display 2 max apertures. This is because, as we’ve discussed, F/stops are a result of the focal length divided by the aperture diameter – if the focal length changes (like it does on a lens) then you’ll have different F/stops. You may see zoom lenses advertised as Canon 18-55mm IS EF-S F3.5-F/5.6.
This means when shooting at 18mm the widest F/stop you can use is F/3.5. When shooting at 55mm the widest will be F/5.6

Image: Big aperture sizes are depicted as small F/stop numbers. Backwards, we know!
Now we know what F/stops are, let’s look practically at what they do in a photo. Given that small F/stop numbers offer the widest aperture, this means more light can get to the sensor creating a brighter exposure.
Firstly, use small F/stop numbers (ie. F/1.4) when you’re shooting in low light and need as much light as possible. Imagine walking into a dark room, though you can’t see it, your eyes automatically adjust and dilate (just like changing F/stops) to get more light into the retina so we can make the outline of objects.
The same goes for when you’re outdoors on a very sunny day. Your eyes will restrict and the pupils get smaller to reduce the amount of light entering otherwise it’ll be too bright. This is what you need to do with the camera when shooting on bright days – make the aperture smaller by choosing a larger F/stop number (i.e F/16).
You’ll spend a lot of time as a photographer switching between F/stops especially if you shoot outdoors a lot. As the weather changes, or your location does you’ll need to educate your camera to make sure it has enough light to ‘see’ the scene.
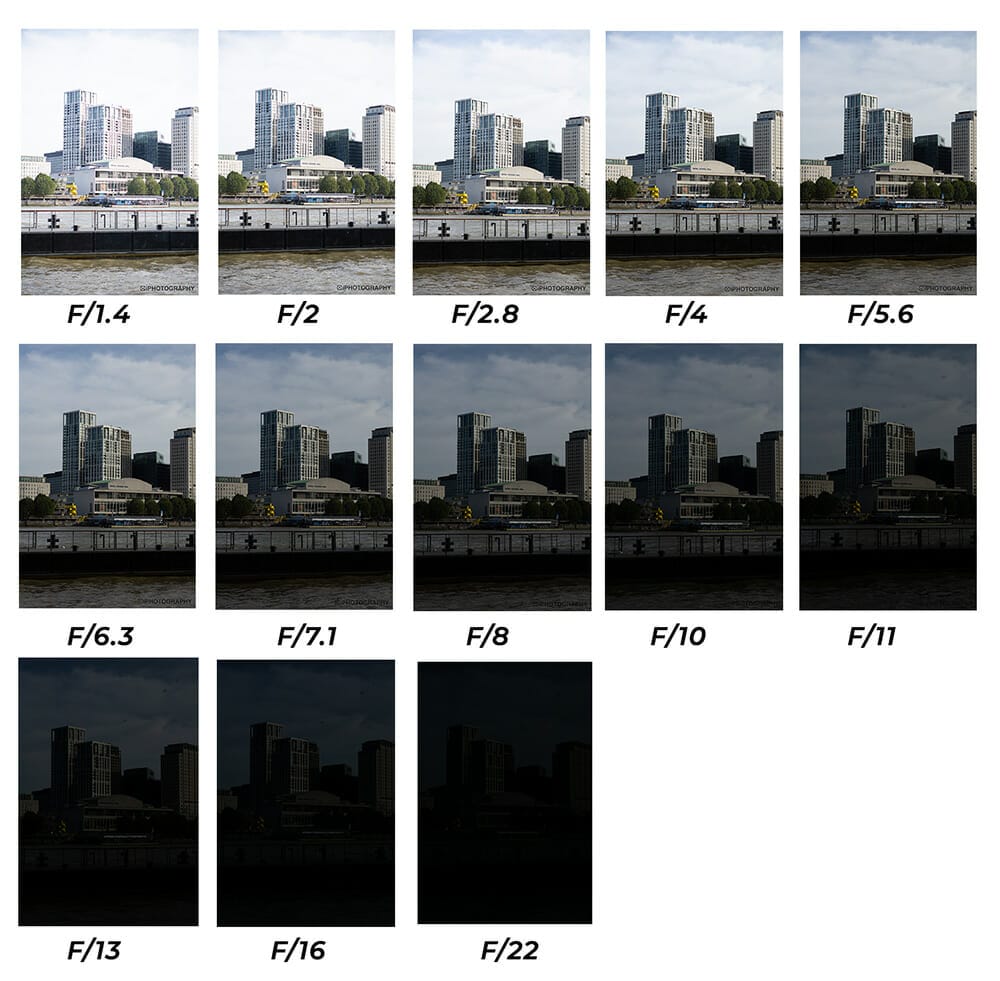
Image: As apertures get smaller less light reaches the sensor. Therefore photos get darker with smaller apertures.
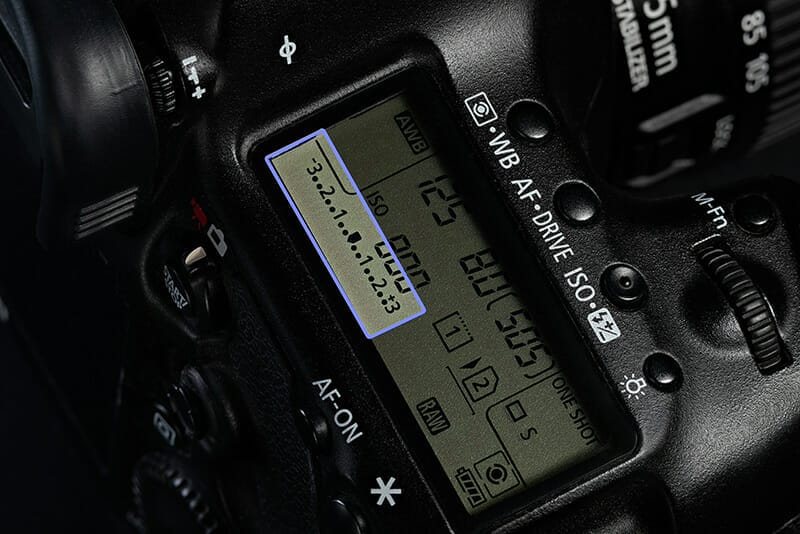
When you look through your viewfinder or on the back of your camera you should see an exposure scale. Most current DSLR and Mirrorless cameras will have one, but possibly older ones (and camera phones) won’t.
The scale goes from -2 to +2. The readout is based on your camera’s internal light meter and it’s going to guide you to choose the best F/stop based on the light coming from the scene in front.
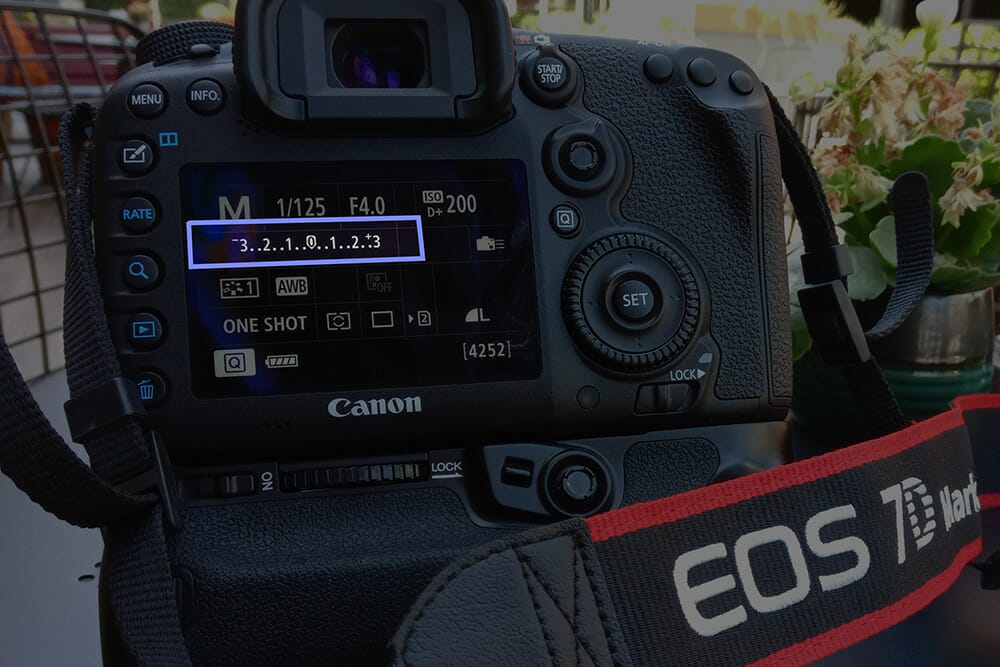
Once you’ve chosen your F/stop to take the shot look at the scale. If the arrow is pointing at 0 – perfect! This means the camera agrees you’ve chosen the best possible F/stop to get the most balanced exposure.
If the dial reads -2 or -1 this means you’re potentially underexposed and need to change the F/stop. For example if it reads -1 and you’re shooting at F/8, you need to open up to F/4 (not the next half or third shot – but the next FULL F/stop). Take the shot again and the scale should be at 0.
Conversely if the exposure scale says you’re at +2 for example then you’re currently overexposed and you need to make that aperture smaller. So if you’re shooting at F/8 again this time go 2 FULL stops smaller = F/22.
It’s a little bit trial and error as you’ll not always be shooting with full F/stops – sometimes it may be F/7.1 or F/3.5 for example. Either way, take note of the exposure scale and adjust the F/stop the right way to get the arrow back to 0.
While F/stops control the brightness of a photo they also control how much of the scene is in focus. This is what photographers call depth of field (or DoF for short).
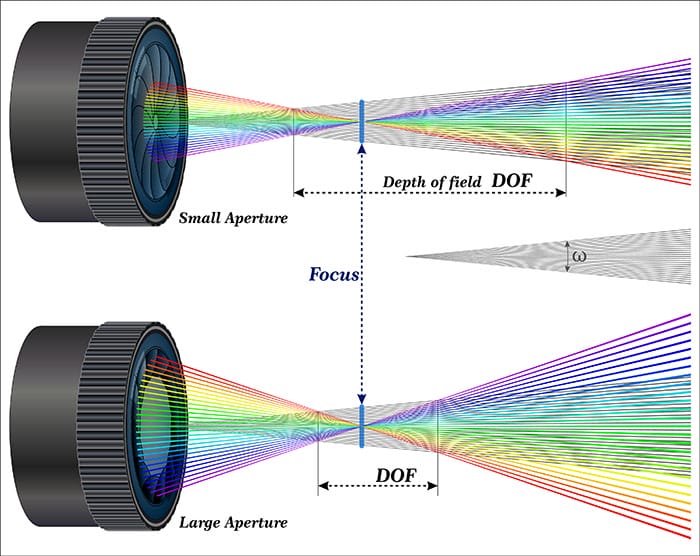
The DoF is determined by the F/stop. Smaller F/stop numbers give a shallow/narrow DoF. Larger F/stop numbers offer a wider/deeper DoF.
The shallower the DoF the less of your photo will be in focus. You’ve probably seen those photos with soft blurry backgrounds, that’s the result of using something like F/1.4. But if the background looks almost as sharp as the nearest object then a stop such as F/16 may be being used instead.
You can change the DoF by switching F/stop numbers but will affect the photos brightness at the same time.
Imagine shooting at F/16 on a sunny day and the photo’s brightness is great, but you want a blurry background and F/16 isn’t giving you that – what can you do without altering the brightness and F/stop?
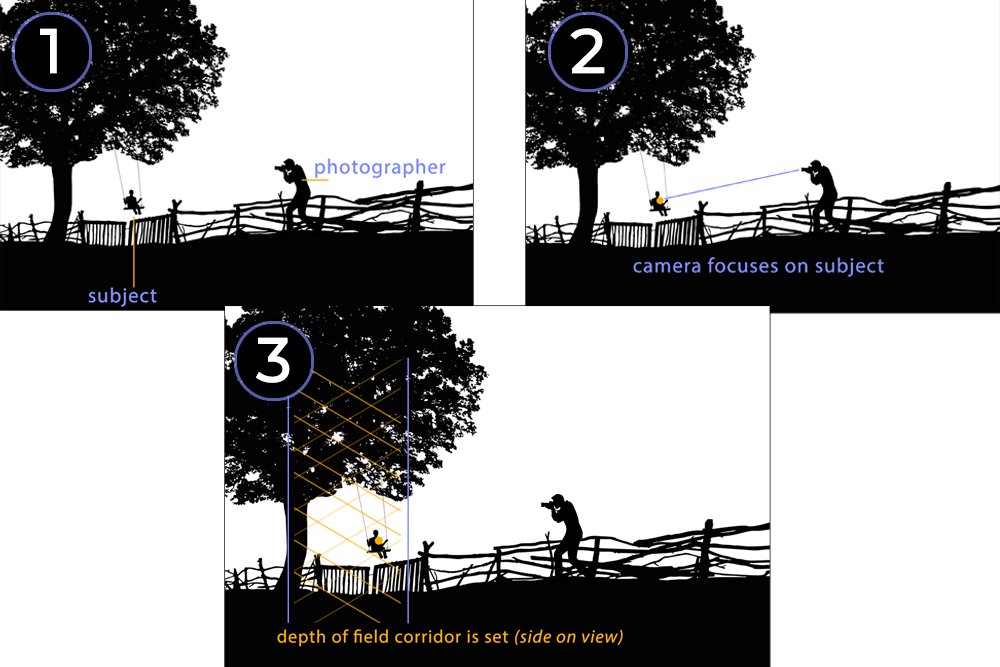
Change the distance! Yes, DoF is guided by the aperture (F/stop number) AND the distance between the camera, subject and background. Moving your subject further away from the background will increase the background blur (or bokeh).
But if your subject can’t move then you’ll need to move closer to it so the distance between the subject and the background is greater than the distance between the camera and subject.
Depth of Field is generally accepted as ⅓ in front and ⅔ behind the point of focus (but this changes with some lenses). If the area of focus around your subject was 5m (16.5ft) for example then 2m (6.6ft) would extend in front and 3m (9.9ft) behind it.
There’s no real need to get bogged down in the maths of it – we’re creative people after all. Instead if you need to work out the exact DoF download a DoF app to your phone to help you calculate based on your F/stop, focal length and distance to subject. PhotoPills is a very popular iPhone app to help you do this, but others are available.
That’s one huge photography tutorial you’ve just learned about F/stops! It isn’t easy and it’s a lesson you should review a few times over the next few days to help remember.
50% of learning is lost after the first 24 hours, so refresh your memory with these 5 tips about F/stops.
1. The smaller the F/stop number the brighter the photo.
2. Each change in full F/stop represents a 100% (or doubling/halving) in exposure.
3. Half and third stops allow smaller changes in exposure on digital cameras.
4. Use the exposure scale in your camera and keep it at 0 to avoid under/overexposure.
5. With every F/stop change your DoF will alter. Move the camera/subject’s distance to the background to affect DoF without changing the aperture size.
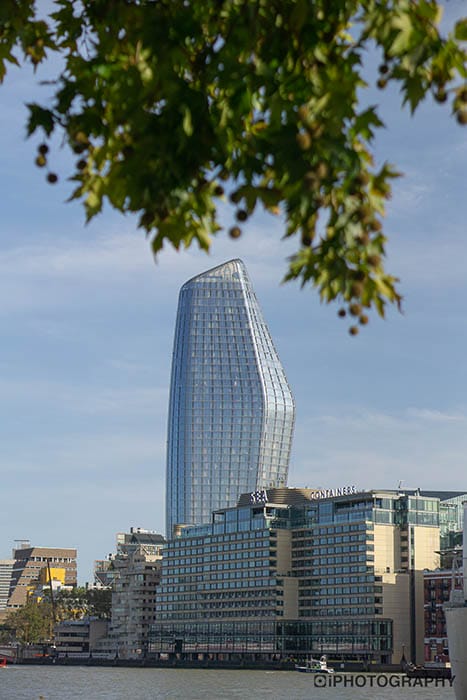
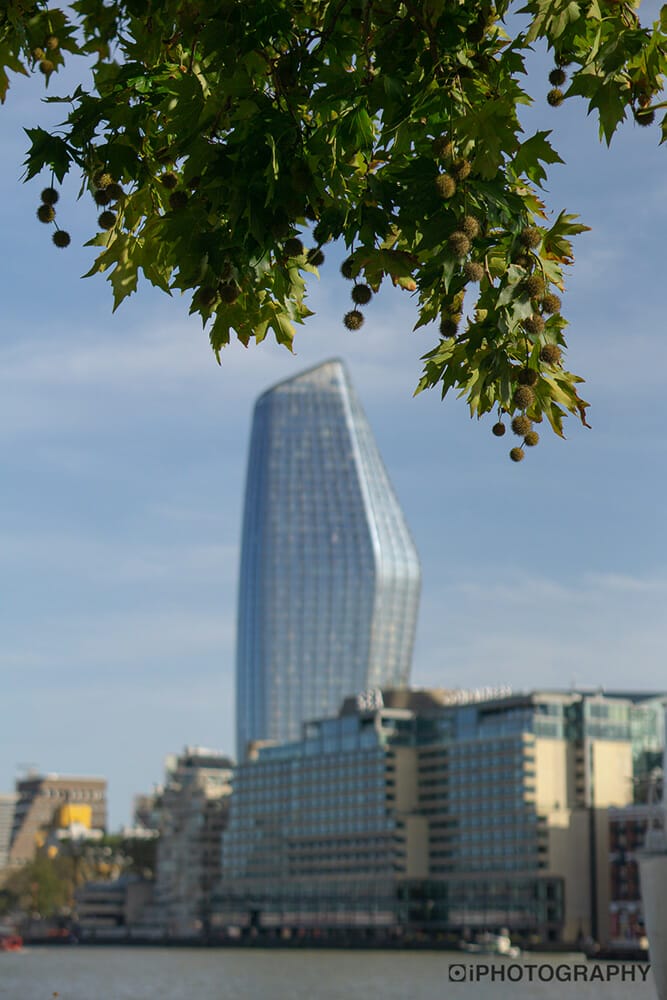
Image: Move the slider to how the depth of field changes when the focus point moves from the branches to the building.
If you want to know more about F/stops, shutter speed, ISO and all things photography for beginners then have a look at our iPhotography Course.
It’s designed for completely new starters split over 18 in-depth modules with no time limits.
You’ll learn everything you need to get started as a photographer regardless if you’re shooting with a high-end DSLR or even an iPhone.
If you want to know more about the course covers and all the other benefits you get when joining iPhotography click here to find out more.
Popular memory cards for photography – what’s the best SD card for your digital camera? Choose the right capacity and class speed in our guide
Discover the BEST way on how to clean a camera sensor using swaps, rocket blowers and pencil brushes to give your shots a dust-free finish!
Capture the magic of the night with our beginner’s guide to night photography. Learn tips and techniques for stunning results.
Learn the basics of photography – fast – with our FREE 60-Second Photographer online course. Each class is short and sharp with simple, actionable steps that give you immediate results.
x 30 lessons

© iPhotography™
Become a confident and competent photographer in less than 30 minutes!
Before you leave, make sure you’ve secured your FREE online photography course (worth £29.99)
Each class is just 60-seconds or less making it the fastest and easiest way to learn photography!