 Stephen Walton
The use of flash photography can never be underestimated. It’s not only an emergency device in low light situations but also a creative tool leading to photos that no other type of light can capture.
In this complete beginners flash photography tutorial we’ll walk you through everything you need to know to get started.
The difference between flash photography equipment and continuous lights is that flash lights emit a pulse of light triggered by a camera’s shutter button. Flash units don’t emit light constantly like continuous lights.
With that said some studio grade strobe (another word for flash) do have a flash tube and continuous light bulb built into the unit. This gives you the best of both worlds.
There are a few types of flash units available for photography. They all have pros and cons and are aimed at different levels of photographers.


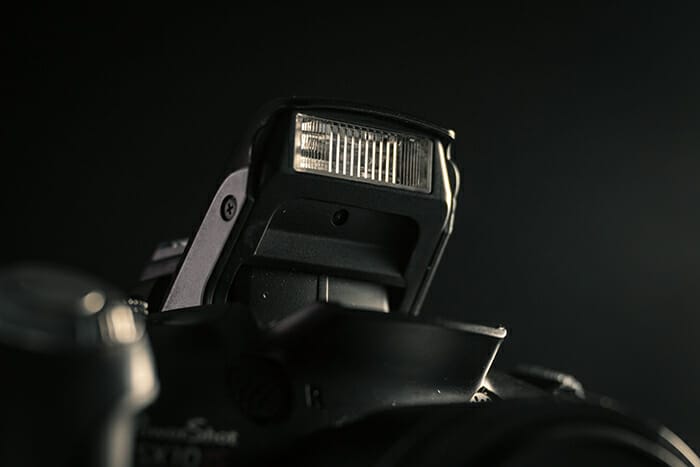
Most DSLR cameras and Mirrorless have a small built-in or pop-up flash. When your camera is in AUTO mode, the built-in light meter will decide whether there is enough light. If there isn’t enough light, it will pop up the flash automatically and fire.
Direct flash photography like this is generally seen as an emergency device. Because the flash is small and points in one direction it’s quite limiting and harsh on a subject. It’s best to use the pop up flash when you’re out of options.
Given that the light from a pop up flash is direct it results in red eye on a portrait.
Red eye occurs when light from the flash is too fast for the pupil to close. The light from the flash passes into the eye, reflects off the back of the eye and out through the pupil. It’s the blood behind the eye that gives the red look.
Some digital cameras have built in infrared beams that are quickly emitted milliseconds before the flash fires to restrict the size of the pupil so the red eye effect doesn’t happen. You may find a dedicated red eye reduction option in your camera menu.
You’ll hear different terms used to describe an off-camera flash. Some of these are brand-specific such as speedlight/speedlite – as used by Canon for their flash units. If you hear someone talk about ‘speedlight for beginners’ the mean off-camera flash.
We’ll stick to the term ‘off-camera flash’ in this guide so you don’t get confused.
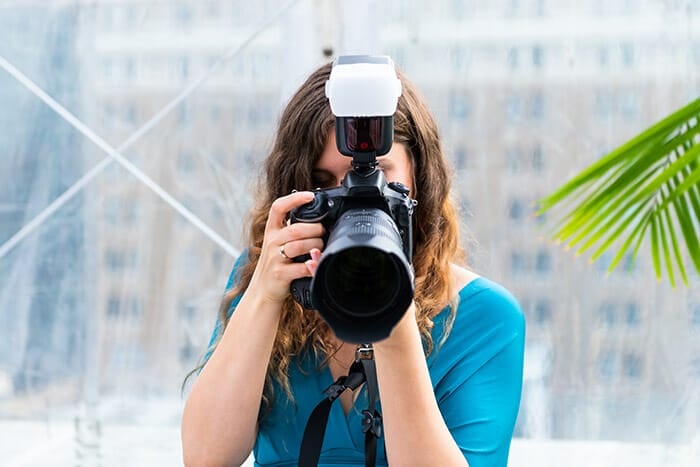
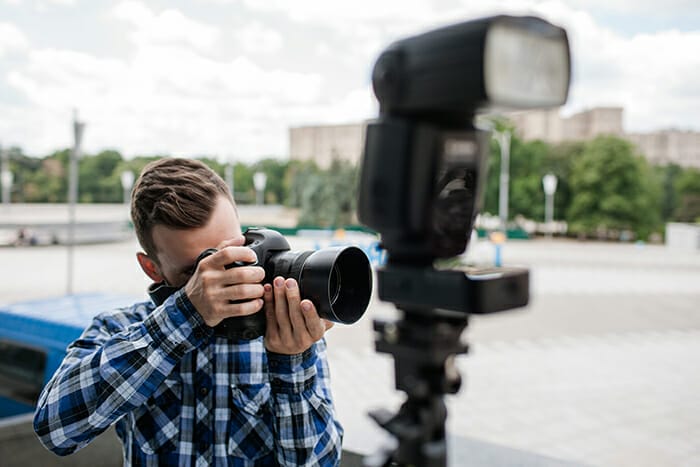
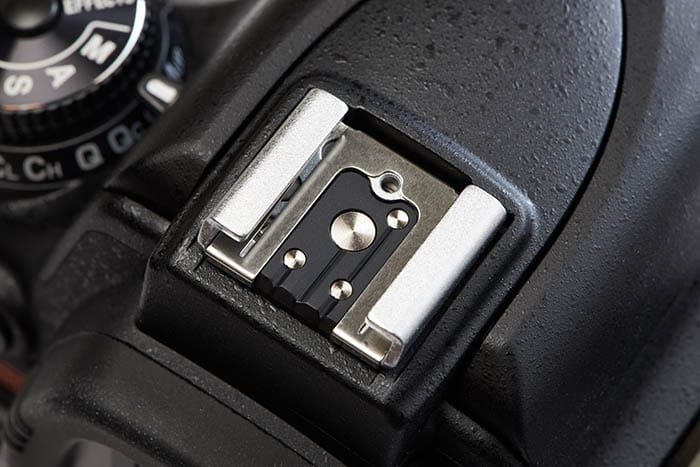
Off-camera flashes are units that can be mounted on to your camera’s hot shoe plate as well as used remotely. They are battery powered so you can set the flash output independently and also angle the flash in multiple directions.
Off-camera flashes are the upgrade to using a pop up flash. When the flash unit is mounted onto the hot shoe some photographers will refer to this as on camera flash settings.
If you are looking to buy an off-camera flash, look for one with a rotating and tilting head in order to bounce the light off walls or surfaces. You can, with wireless triggers, use multiple flashes at the same time, controlled by one camera. This gives you more creative options to have lights set in different positions all working at the same time.
Pay attention to the flash guide number too. All off-camera flashes have a guide number which represents the power output of the flash. The higher the number, the more powerful the flash. GN (Guide Numbers) range from 2-60.
Guide Numbers are a calculation of the distance to the subject (in metres) multiplied by the F/Stop.
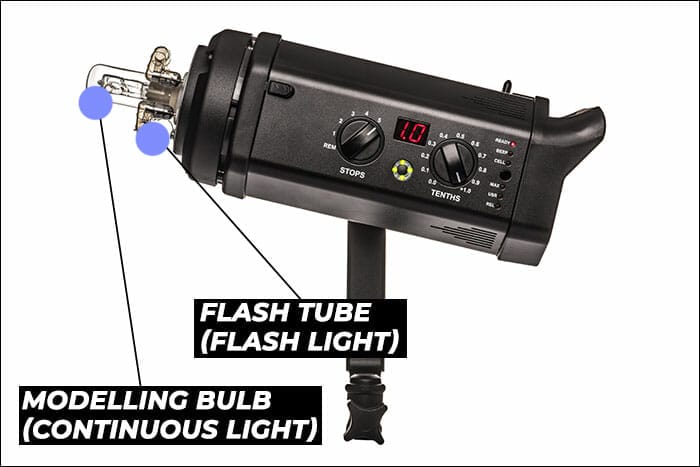
If you want to upgrade again from an off-camera flash then strobe heads are the next step.
They are primarily used by studio photographers but battery-powered units are available to use outdoors. You’ll find a large jump in price to upgrade to a strobe head so only consider it as an option if you’re going to use it a lot.
As we mentioned earlier strobe heads have two bulbs built in – one for the flash and one for a continuous light. The benefit of having both is that the continuous light allows you to prefocus on your subject if you’re shooting in low light. A standard pop up or off-camera flashes doesn’t give you this option which can make focussing tricky.
Strobe heads are mounted on to light stands which are another expense to consider along with a sandbag/light stand weight to stabilise the whole set up.
If you aren’t using a pop up camera flash or mounting your off-camera flash to your hotshoe then you’ll need a way of connecting your flash unit to your camera. There are two ways;
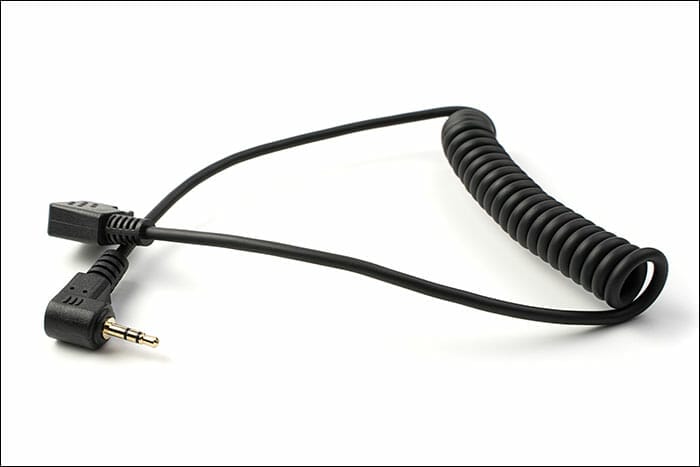
The cheapest and most reliable way to fire your off-camera flash is by using a flash sync cord. A curly cable that you connect your flash to your camera using dedicated flash sync ports on your flash and camera. Not all DSLR and Mirrorless cameras have a flash sync port. It’s important to make sure your model is compatible.
Though it’s cheap and reliable, flash sync cables still limit the distance that you can move as well as potentially being a trip hazard. Despite that they are worthwhile having in your kit bag if the alternative (below) fails.
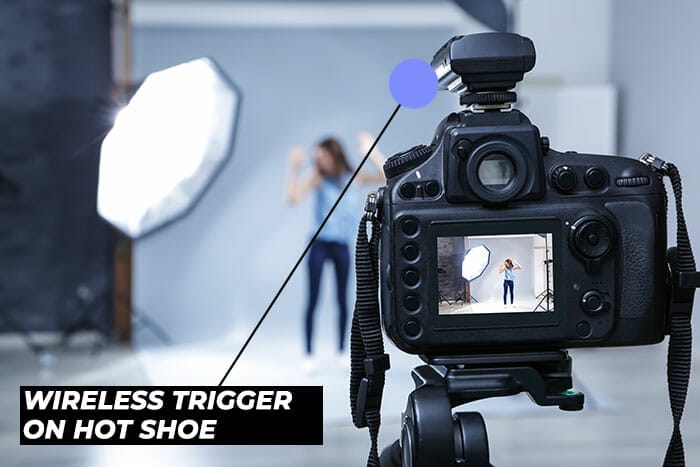
The alternative is to use remote/wireless triggers. Using a remote trigger allows you to fire off-camera flashes and strobe heads when they’re not mounted to your camera.
These triggers work by either infrared or radio waves. Pocketwizards are currently the most common brand of remote flash triggers. You’ll need to make sure the version you purchase is compatible with your DSLR model.
Wireless triggers come in two parts – master and slave. The master unit slides onto the hot shoe of the camera and the slave unit is attached to the off-camera flash/strobe head.
While wireless triggers work over a greater distance than a flash sync cable they have been known to be sensitive to strong light and flashing lights from emergency vehicles.
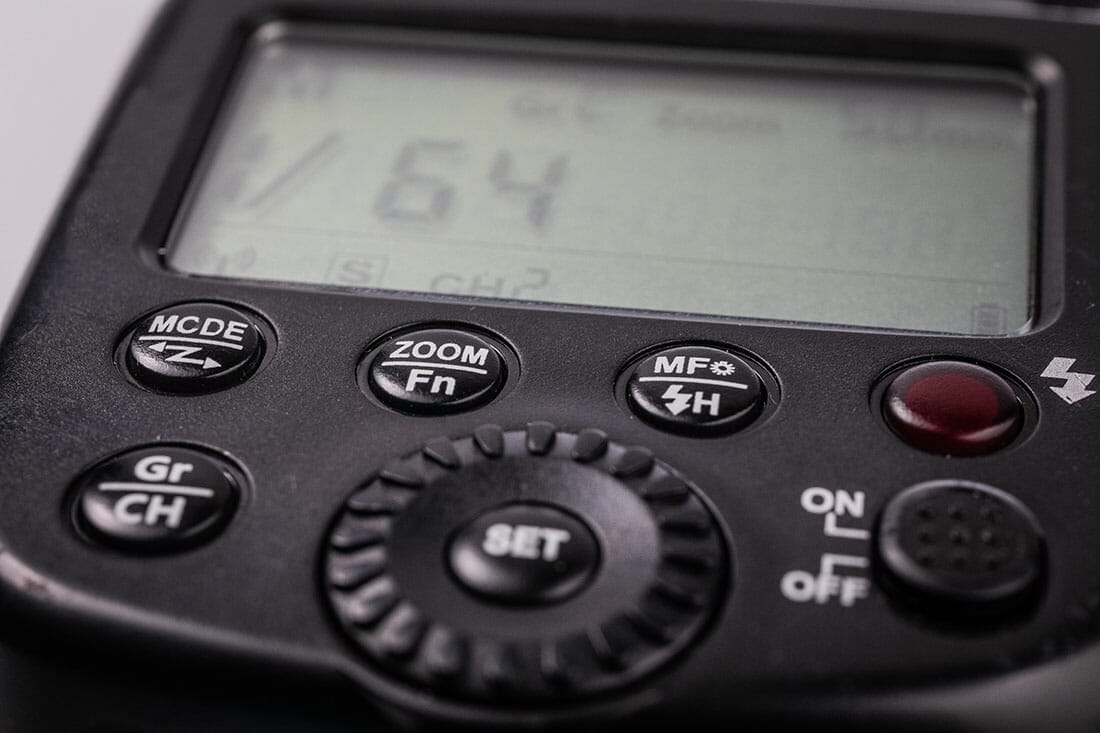
On the back of an off-camera flash unit you’ll have 2 options as to how it operates.
However it’s expressed (TTL / ETTL / iTTL) this means the off-camera flash takes a reading of the ambient light and distance to the subject in the scene and makes its best guess as to how much light is needed in the flash output.
TTL is basically auto mode for beginners of flash photography and is the best place to start when learning flash photography.
As you may expect, manual power mode gives you full creative control over the flash power output. It’s a more advanced mode for flash users and isn’t recommended if flash photography is new to you.
It takes time to balance out the amount of flash power you need so instead of changing flash power and then camera settings, just change one – the flash.
Choose the exposure settings you want in-camera (F/stop, shutter speed, ISO) and then take some test shots. With each test shot, increase or decrease the flash power output until the exposure looks correct.
Given that manual flash is a more advanced technique for photographers we won’t go into much more detail in this guide for beginners.
You can also use flash exposure compensation (FEC for short) button to improve your ambient exposure alongside the flash.
The FEC is adjusted by pressing a button and turning the dial on the back of the flash. It has a little lightning bolt symbol and a +/-.
When you dial the FEC to the minus side, the flash unit attached will provide less light by that amount as compared to the main overall exposure. Generally speaking flashes allow you to increase or decrease the amount of flash exposure applied to your scene. Most cameras go from -3 to +3 in 1/3 stop increments.
What’s the best camera mode to use with flash photography for beginners? Well let’s have a look at the 2 options outside of full auto and full manual modes and you can decide what’s best for you.
Aperture priority is a camera mode many beginners use when they want to start stepping away from AUTO. While on the whole it works fine there is a downside.
If you want a wide depth of field in your scene you’ll require an aperture such as F/11 or higher. This means the flash will need to be brighter to balance the exposure. A brighter flash means more power which means batteries can drain faster.
Shooting in A/Av mode means that your shutter speed could slow down to compensate for the smaller aperture in this example which could result in motion blur occurring in your shot if there’s a moving subject.
Instead it’s better to use a wider aperture when shooting in A/Av mode when shooting with an off-camera flash.
Your camera’s shutter speed setting isn’t compensated for by the flash. If you’ve got a slower shutter speed you’ll need to stabilise your camera regardless – your flash won’t magically save you.
Shutter Priority is possibly a better camera setting to use for flash photography outside of AUTO and Program modes.
You’ll need to make sure you choose the right shutter speed though as there are limitations when using on camera flash (as well as off-camera flash)
All flashes have a maximum flash sync speed meaning there is a limit as to how fast the flash can fire in line with the shutter speed. When you get it wrong (and choose a shutter speed too fast) you’ll see black bars across your shot. This is the shutter doors already starting to close while the flash is firing causing it to appear in the exposure.
Maximum sync speed varies for different cameras and flash units, but they’ll range between 1/160th – 1/250th. With that said it is possible to go faster on some very high end flashes.
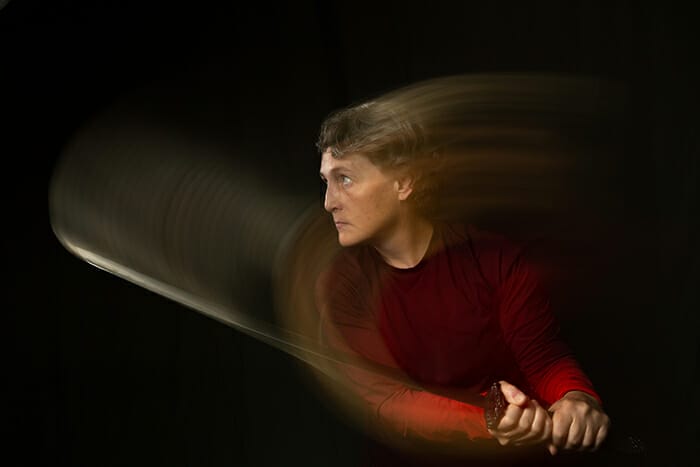
If you want to get creative with your flash then look at using front curtain sync. When used in combination with a slow shutter speed you can fire the flash at the start of the exposure which gives a crisp outline to your subject.
But during the rest of the exposure cycle (after the flash has fired) any motion will be blurred – just like a normal long exposure photo.
It’s used effectively in light trail photos and other creative light tricks.
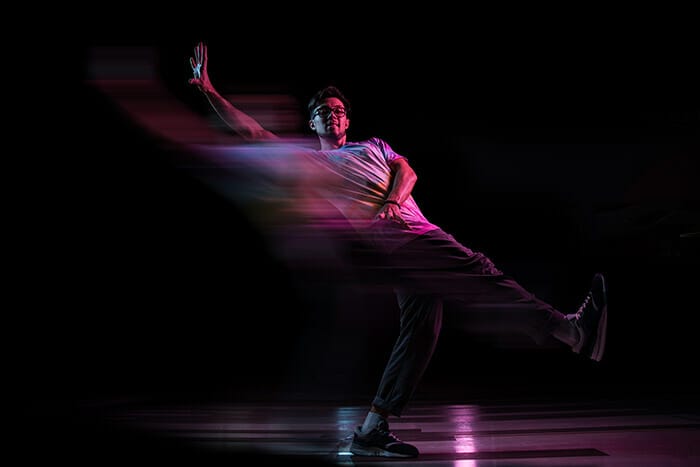
Rear curtain flash sync is just the opposite to the front curtain. This time the flash will fire at the end of the exposure cycle. Meaning until that point anything that moves during the exposure will be blurred and then the flash will fire to capture a clearer version of your subject.
Let’s recap and summarise this flash photography tutorial by giving your 5 top tips for using a camera flash.
1. Avoid pop-up / built-in flashes unless you’re out of all other options. This harsh and direct flash photography only leaves subjects looking flat with heavy drop shadows around them distracting the viewer.
2. Use the right camera mode for the type of image you want to take. If you are shooting portraits then consider Aperture Priority or Program mode alongside your flash. But for motion then use Shutter Priority instead – but remember the max sync speed your flash allows.
3. Bounce your flash if you want it to spread wider. Use a reflector or white surface (wall/ceiling) to reflect your light off. This will spread the light further and make it softer on your subject.
4. Use TTL mode when you’re starting out with your flash before you want to go manual.
5. Remote flash triggers give you more creative control on where you can place your flash relative to your camera.

Shooting sunsets using amazing 5-in-1 magnetic lens filters from Kentfaith, the 1st choice for photo & video products.

Popular memory cards for photography – what’s the best SD card for your digital camera? Choose the right capacity and class speed in our guide

Discover the BEST way on how to clean a camera sensor using swaps, rocket blowers and pencil brushes to give your shots a dust-free finish!
Learn the basics of photography – fast – with our FREE 60-Second Photographer online course. Each class is short and sharp with simple, actionable steps that give you immediate results.
x 30 lessons

© iPhotography™
Become a confident and competent photographer in less than 30 minutes!
Before you leave, make sure you’ve secured your FREE online photography course (worth £29.99)
Each class is just 60-seconds or less making it the fastest and easiest way to learn photography!