 Stephen Walton
Many camera lovers adore black and white photography, and it is often thought of an upper-class style of imagery. It is, after all, the very root of modern photography and can make an image look classical and sophisticated.
Capturing a strong, effective black and white image can be extremely satisfying. Great black and white photography relies heavily on a good understanding of tone, texture and contrast. Far from being boring, black and white images can be dramatic and emotive – if you know what you are doing!
Before you start on a B&W adventure, you really need to appreciate and understand how tones in B&W work, compared to coloured images. This is because when you take a picture and convert all the colours into shades of grey, suddenly the lighting, tone, contrast, shape, and texture become the major striking elements.
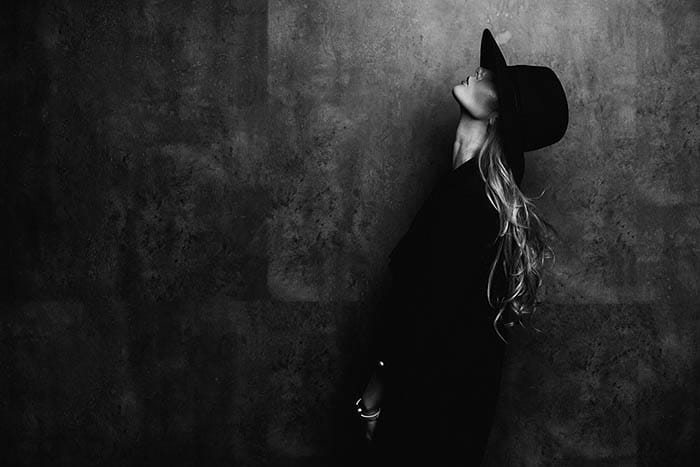
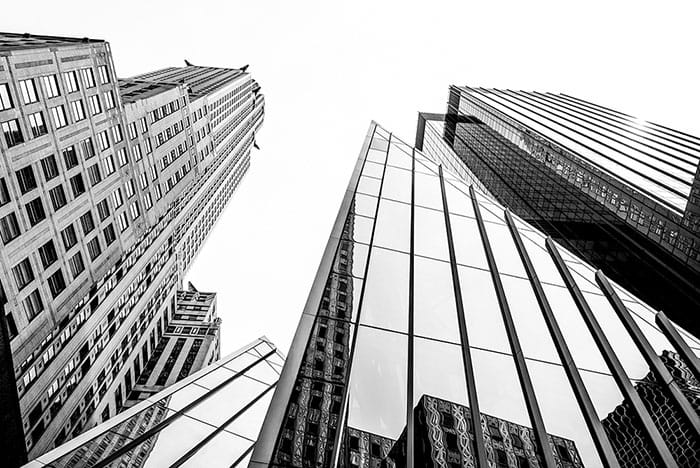
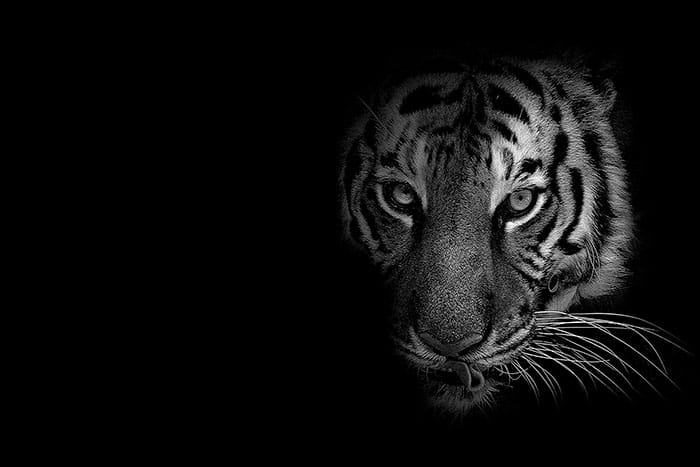
There are some subjects that work better in black and white than others such as portraits and architecture.
Why these though?
Well for portraits black and white enhances emotion and feeling, the distracting colour is all stripped away, and it allows the audience to connect with the subject’s eyes, body and expression.
With architectural photography, buildings demonstrate their best shape and form in black and white, it helps us see their strong structural lines in clear definition from the background, providing you’ve positioned the camera correctly!
Subjects such as flowers, food, close up and abstract photography don’t always work as well as there is a level of colour needed in those areas to help an audience understand the story and content of the shot.
Monochrome doesn’t exclusively mean black and white, it translates to ‘one colour’ so if you image is all red, with different shades then that’s monochrome too!


If you’re the technical type of photographer who loves an accessory or gadgets, then you may find black and white lens filters helpful to your shooting. They aren’t designed solely for B&W photos despite them being named after certain colours.
Here are 3 examples;
Yellow – Yellow filters are a staple diet amongst black and white photographers. Blue skies are darkened, which helps to increase the separation with the clouds. Other colours like green, red, orange and yellow will appear brighter.
Red – Reds will turn white and green foliage appear very dark. If you want red flowers to pop then use this filter but be aware that light green turned also into white, so surrounding grass can blend in. It works best on close up or macro shots.
Blue –Probably not the most popular filter but still useful. Warm colours will be darkened, and red turned into black, which can help to separate elements in a colourful photo. It also increases mist in landscapes which can help to emphasize a moody and atmosphere.
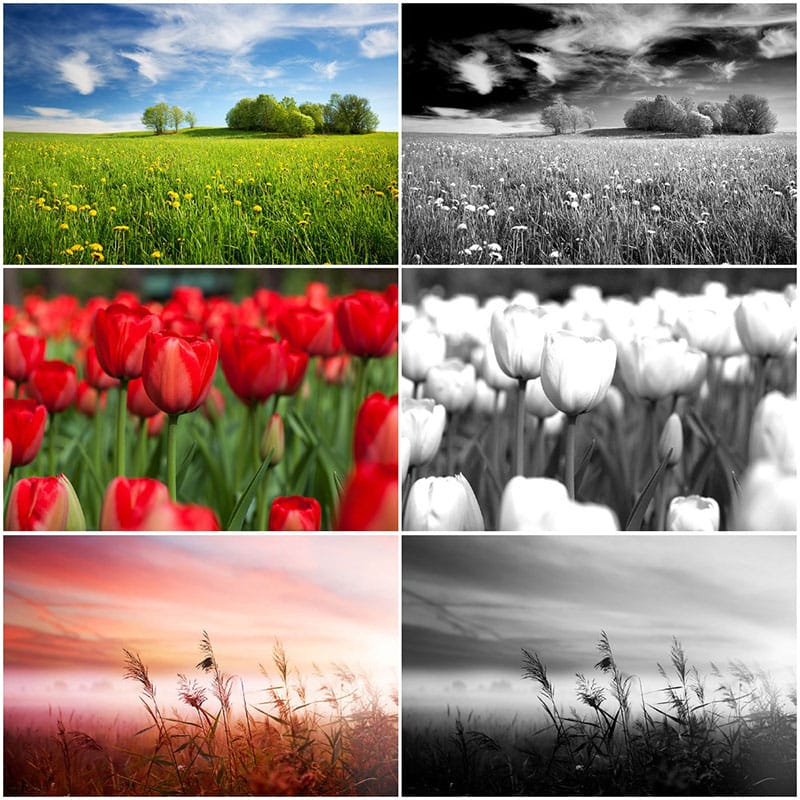
Image: Effect of blue filter (top), red filter (middle), yellow filter (bottom)
In black and white photography, we use the terms high key and low key when discussing lighting. These terms refer to the level of contrast between light and dark in a photo.
High Key is where the image consists of mostly black and white (or light and dark), with few or no middle grey tones. It is used to focus the viewer on the subject. The background should be bright, but the lighting on the main subject diffused – this then produces light, clean looking high key images.
The final image should look clean-cut and neat, the outline of your subject needs to be well defined and impactful to achieve that high key look. Keep an eye out for subjects that have strong shapes to them such as buildings, trees and mountains.
Small apertures such as F/11-F/22 are ideal for high key photographs as they reduce the transition between white and black tones, making the image look more contrasted. Strong lighting is also a good accompaniment to small apertures so wait for strong sunshine high in the sky if you don’t have bright lights.
Ultimately, remember for high key – The deeper the black, the bright the white.
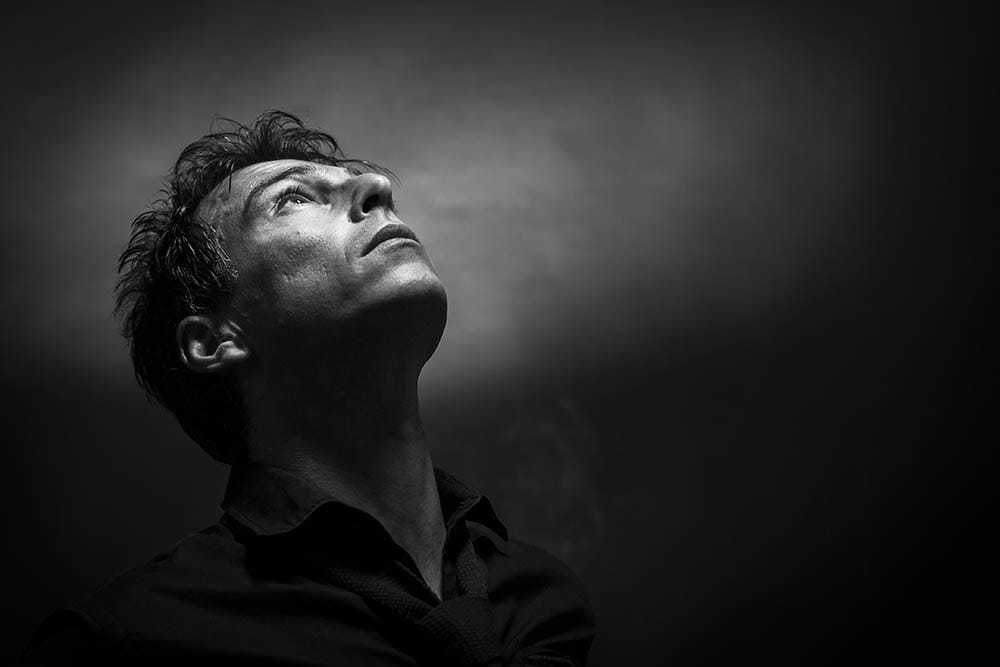
Low key photography is a low-contrast image, where the tones of the highlights and shadows are all very similar (mostly very dark tones). It is a particularly useful technique for creating intense photographs with added mood or emotions. This is why dramatic black and white portraits tend to be shot in a low key style.
Try to ensure that no light falls onto your background, keep it very dark (even black if possible), the only thing that should be lit is your main subject. The further away your subject is from the background, the darker it will appear.
Soft lighting is more suited for low key, cloudy days or normal household lighting should suffice as you’re simply looking for an even spread of light that you can place you subject in the path of.
Wide apertures around F/4- F/5.6 will help the camera ingest more light making the transition from shadows to highlights longer, making for a low contrasted image. Keep to one light source and block out others if necessary.
A low key photography will look dark and intriguing, the lure of the shadows draws a viewers attention in further looking for more detail. These enticing images look great if you are trying to create mood and atmosphere which we’ll come on to shortly.
Remember high key is high amounts of light. Whereas low key is the low amounts of light.
What we mean by that is ‘should I use the black and white presets on my camera to get the best black and white photograph?’
Well, only you can truly answer that question, but let us help you inform on how to make the decision. There are 3 ways to take a black and white photograph with a digital camera.
If like to save space on your memory card and shoot in JPEG that’s fine. But you’ll need to spend to time editing your favourite pictures into black and white afterwards.
The benefit of this is that you can select which ones to convert as opposed to all of them, and you’ll still have colour version if you make a copy.
It’s a brave decision to shoot everything in black and white as you’ll never be able to change it back to colour or do creative colour splash techniques. It’s fine if you’re just playing about for the first time and your just focusing on getting the shapes and angles right.
Every camera brand converts images to black and white differently. In the same way that B&W lens filters do. Therefore, by shooting your black and white photographs in JPEG it means you’ll never be able to change the filtration style afterwards.
Despite the size of raw files reducing your memory card space this is probably the best option for taking B&W images. Simply because the camera will still allow you to use a black and white preview on your LCD screen.
Measure up the angle, composition, and tone of the shot appropriately but your final photograph will be in colour. This will allow you to edit the raw file into B&W using different filtration modes and contrast levels – and if you don’t like it, you’ve still got the colour version to fall back on.
Why haven’t we said shoot RAW + JPEG then?
Well, it’ll just take up more space than RAW alone and as long as you have software such as Photoshop, Lightroom or GIMP then you’ll create the JPEG once you’ve edited it. At least the JPEG will look exactly how you want it then!
When you want to convert a colour photo to black and white, never just convert it to grayscale, because this will just reduce all colour channels (RGB) to an identical, unsaturated level. Your image will then need a lot of work, and it will also usually produce very dull, flat images.
Instead, using Photoshop for example, what you need to do is simple:
1. Desaturate the image (while keeping the RGB channels intact).
2. Fine-tune the images contrast levels using the curves tool or contrast slider.
3. Adjust the shadows and highlights in certain areas using brush masks.
Watch this video to see this in action. If you use Photoshop the process is the same, but the tools are laid out differently.
If you want to get more creative with your black and white editing, then try making a dramatic colour splash on your image. See how to do it here.
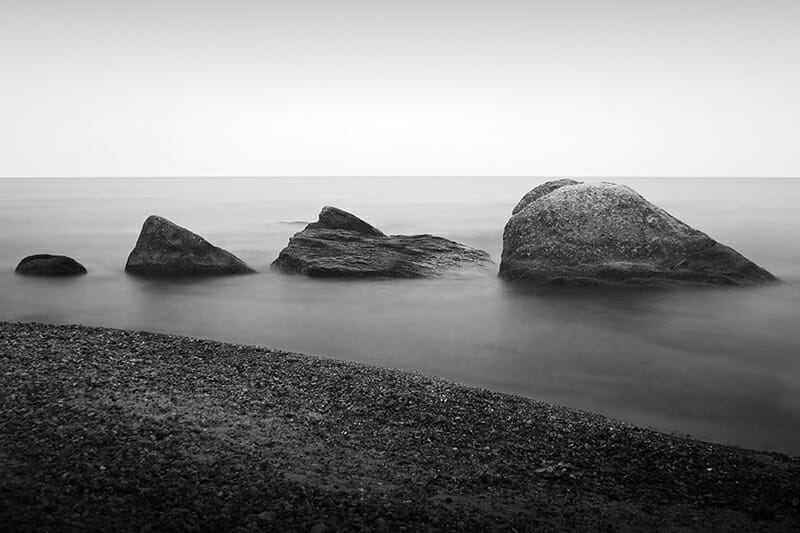
One of the wonderful things about black and white photography is its ability to draw in on the audience’s emotions and tell a story. If you want to create a feeling of loneliness, emptiness, sadness – black and white images work perfectly. Think along the lines of stormy skies, eerie forests, broken windows or a misty path.
The colour black holds (and portrays) power, fear, intimidation, grief and mystery. You can use these to connect with your audience and manipulate their emotions. It is possible to provide additional depth and perspective, whilst also creating elegant and modern images.
If you are an iPhotography course member combine what you have previously learnt in modules 5 and 9 about composition, contrast, lighting, and shutter speeds. This will help your black and white photographs to become very powerful, dramatic, impressive and striking pieces of modern art.
Look for bright or illuminated objects in dark surroundings, use friends and family to pose for you in a dark room with little light. Alternatively, simply get outside on a stormy day to capture the moody sky.
Hopefully these black and white photography tips and tricks will help you understand how to take better monochrome photographs.
If you’re a member of iPhotography then we’d love to see your monochrome results in the feedback gallery. Alternative tag us in your mono shots on Facebook, Twitter and Instagram.
If you aren’t already a member then get on board and join one of our online photography courses here.

Discover TOP features in the Lightroom CC mobile app with this guide for enhancing your photo editing skills. For desktop and tablet too.

Shooting sunsets using amazing 5-in-1 magnetic lens filters from Kentfaith, the 1st choice for photo & video products.

Popular memory cards for photography – what’s the best SD card for your digital camera? Choose the right capacity and class speed in our guide
Learn the basics of photography – fast – with our FREE 60-Second Photographer online course. Each class is short and sharp with simple, actionable steps that give you immediate results.
x 30 lessons

© iPhotography™
Become a confident and competent photographer in less than 30 minutes!
Before you leave, make sure you’ve secured your FREE online photography course (worth £29.99)
Each class is just 60-seconds or less making it the fastest and easiest way to learn photography!