 Stephen Walton
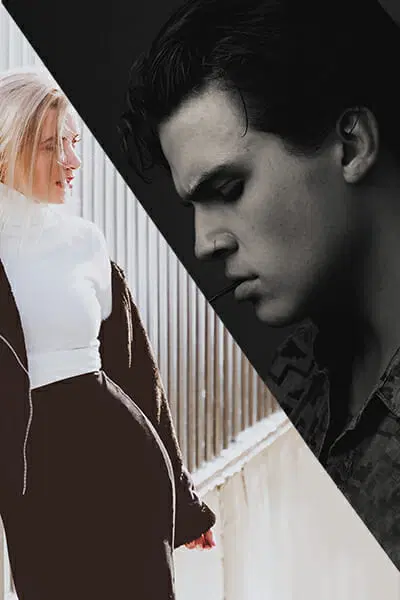
Too many new photographers get low key lighting mixed up with high key. It really shouldn’t be that hard to get straight, so we’ve got some little tips to iron out these confusing terms.
Low key lighting is invariably used a lot in portrait photography, but it can be applied elsewhere. It’s a means of creating atmosphere through lighting and not location.
This is why you’ll see it used more commonly in a photography studio. The problem we’ve been finding is that too many people are getting high and low key mixed up.
So, if it’s one of those confusing photography terms that’s always got you guessing then let us tell you how to unravel the riddle!
Let’s start off nice and simple with some clear mnemonics.
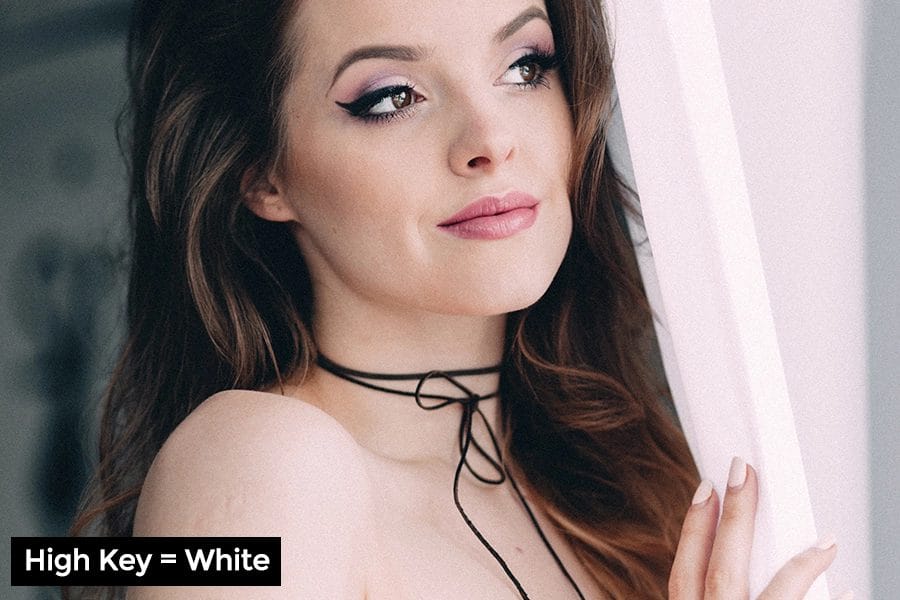
OK so think of high key lighting needing a HIGH light. Think about the highest light you can see – it should be the sun. It’s the highest point of light for everyone.
And when you’re taking pictures outdoors your shots are probably going to be more high than low key. You won’t get low key shots from bright sunshine.
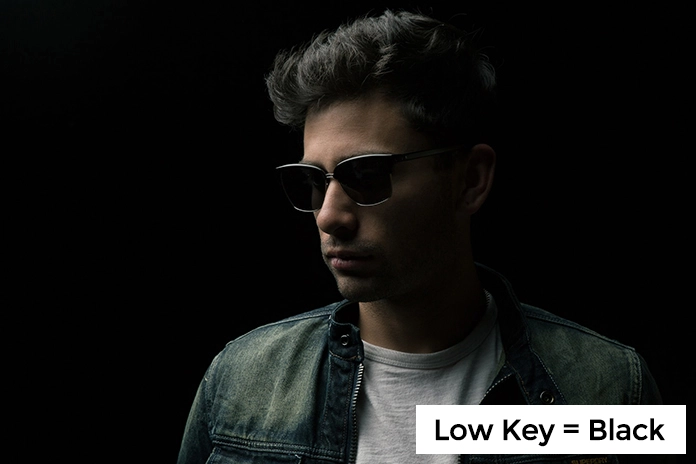
Therefore, with that approach in mind think about how low key lighting needs a LOW amount of light. A low amount of light sounds very dim, very dark and that’s exactly what you need.
Consider a candle and how it’s not very bright, it’ll cast some light, but it never really brightens a whole room. That’s the type of light you need for low key lighting.
If it’s not totally clear yet, then let’s explain it another way…
Let’s assume the words high and low are colours. ‘High’ sounds like a loud bright colour, something like white. Whereas ‘low’ conveys ideas of darkness and shadow, so maybe we should associate it with black.
It’s a simple thought process, but when you see a high key black and white picture, you’ll notice there’s more white than black. Of course, it’s the opposite for low key – more black than white.
Fingers crossed it’s really starting to hit home now, but if not let’s put the whole thing into practise and we’ll show you how to take a high and low key shot.

We already know high key lighting is bold and bright. It will conceal most shadows and really bathe your subject in light, so the easiest way to do that is with sunlight.
Head outdoors on a sunny day and position your subject so they are facing the sun. You’ll notice that there’s only a couple of shadows maybe under their nose and chin but otherwise that’s it.
With your subject posed, meter your exposure but maybe open your aperture one stop wider to overexpose your shot. This will really hide any shadows and focus on the bright highlights. When it comes to editing, simply add a little more contrast to make the image really pop.
Read more about high key photography in this guide.
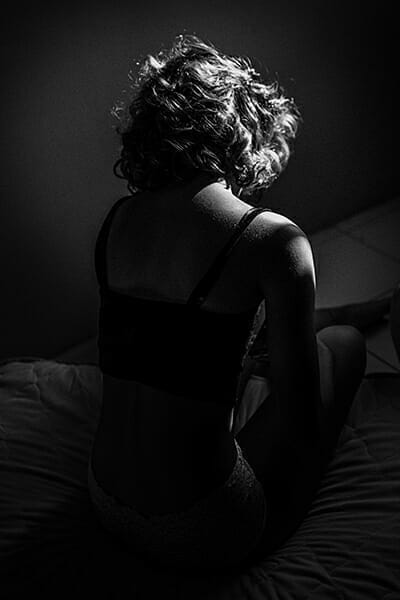
You could technically shoot low key shots outdoors, but you’ll need to some external lighting. But the simplest way is to shoot low key is at home.
Block out all the ambient light, close the curtains but leave the door slightly ajar for a ray of light to peak through. Low key light should reveal and disguise your subject at the same time. Hiding parts makes it seem sinister whereas revealing features helps frame the story.
Don’t feel that you need to get your subject’s full face in the light. Try just lighting part of their face to leave more questions lingering.
You’ll find that low key lighting will be awash with shadows. The long gradual transition from light to dark areas is what signifies low key lighting. The longer the transition the more low key it is. Short transitions are more akin to high key lighting.
Read more about low key photography in this full tutorial.
Hopefully that’s helped you out a little more, if you needed the help that is. It may seem simple now but when you’re starting out there are so many photography terms that seem confusing and backwards. Don’t get us started on why a big aperture is a small f/stop number! OK, one last reminder:
High Key = Bright, Light & White
Low Key = Dark, Black & Shadows
If you’ve got any more tips, tricks or hacks regarding low and high key lighting then let us know, you never know who you’ll be helping. Don’t be embarrassed if you want to ask us directly about some terms or acronyms that bends your mind sometimes. This is what we are here for!

We’re are always around to help you out. Drop us a message on Facebook, Twitter and Instagram pages. Just leave us a comment, and we’ll get back to you asap. If you’ve found this guide useful then we’d love to know!

Shooting sunsets using amazing 5-in-1 magnetic lens filters from Kentfaith, the 1st choice for photo & video products.

Popular memory cards for photography – what’s the best SD card for your digital camera? Choose the right capacity and class speed in our guide

Discover the BEST way on how to clean a camera sensor using swaps, rocket blowers and pencil brushes to give your shots a dust-free finish!
Learn the basics of photography – fast – with our FREE 60-Second Photographer online course. Each class is short and sharp with simple, actionable steps that give you immediate results.
x 30 lessons

© iPhotography™
Become a confident and competent photographer in less than 30 minutes!
Before you leave, make sure you’ve secured your FREE online photography course (worth £29.99)
Each class is just 60-seconds or less making it the fastest and easiest way to learn photography!