Are you ready to unlock the secrets of capturing breathtaking cityscapes through your lens? Whether you’re a photography enthusiast or just someone looking to up their Instagram game, shooting cityscapes can be a thrilling and rewarding experience.
In this guide, we’ll take you through the ins and outs of how to shoot cityscapes like a pro.

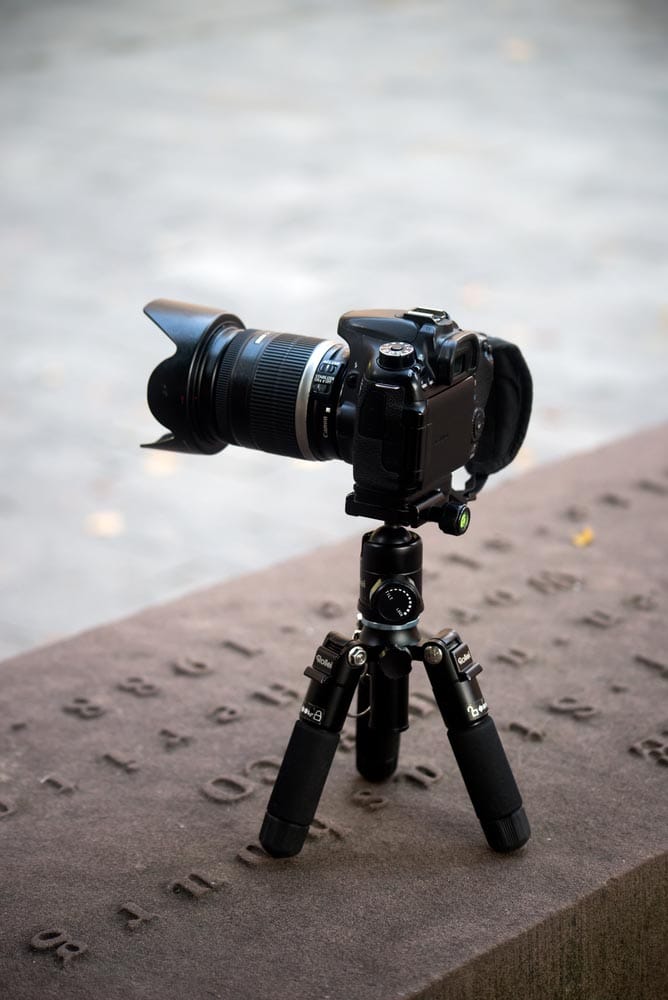
Firstly, before you hit the streets with your camera, it’s essential to have the right gear. While you don’t need the most expensive equipment to get started, having the basics can make a world of difference in your cityscape photography.
If you’re just beginning, a good quality DSLR or mirrorless camera is ideal. These cameras offer manual settings that allow you to control exposure, aperture, and shutter speed, giving you more creative freedom.
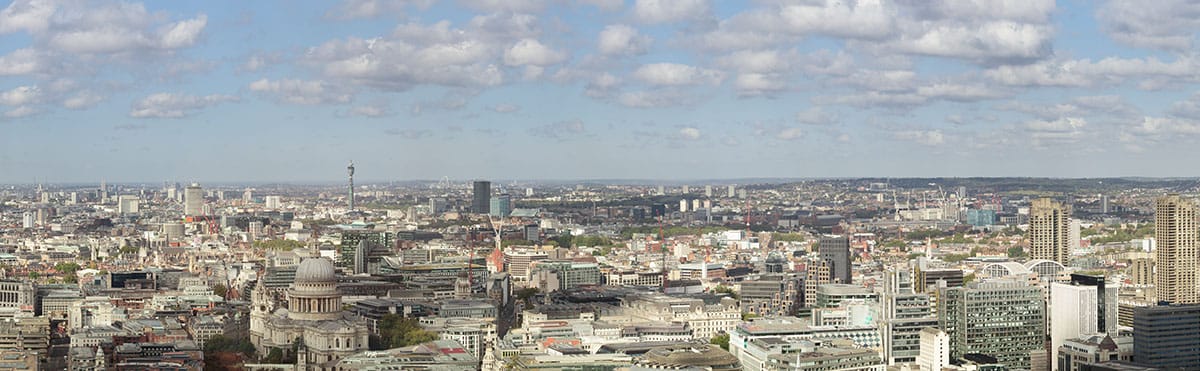
For cityscape photography, a wide-angle lens is your best friend. It allows you to capture more of the cityscape in a single frame, making it easier to create those stunning panoramic shots.
Don’t forget a sturdy tripod. It’s crucial for keeping your camera steady, especially when shooting in low light conditions or using slower shutter speeds to capture the city’s lights.
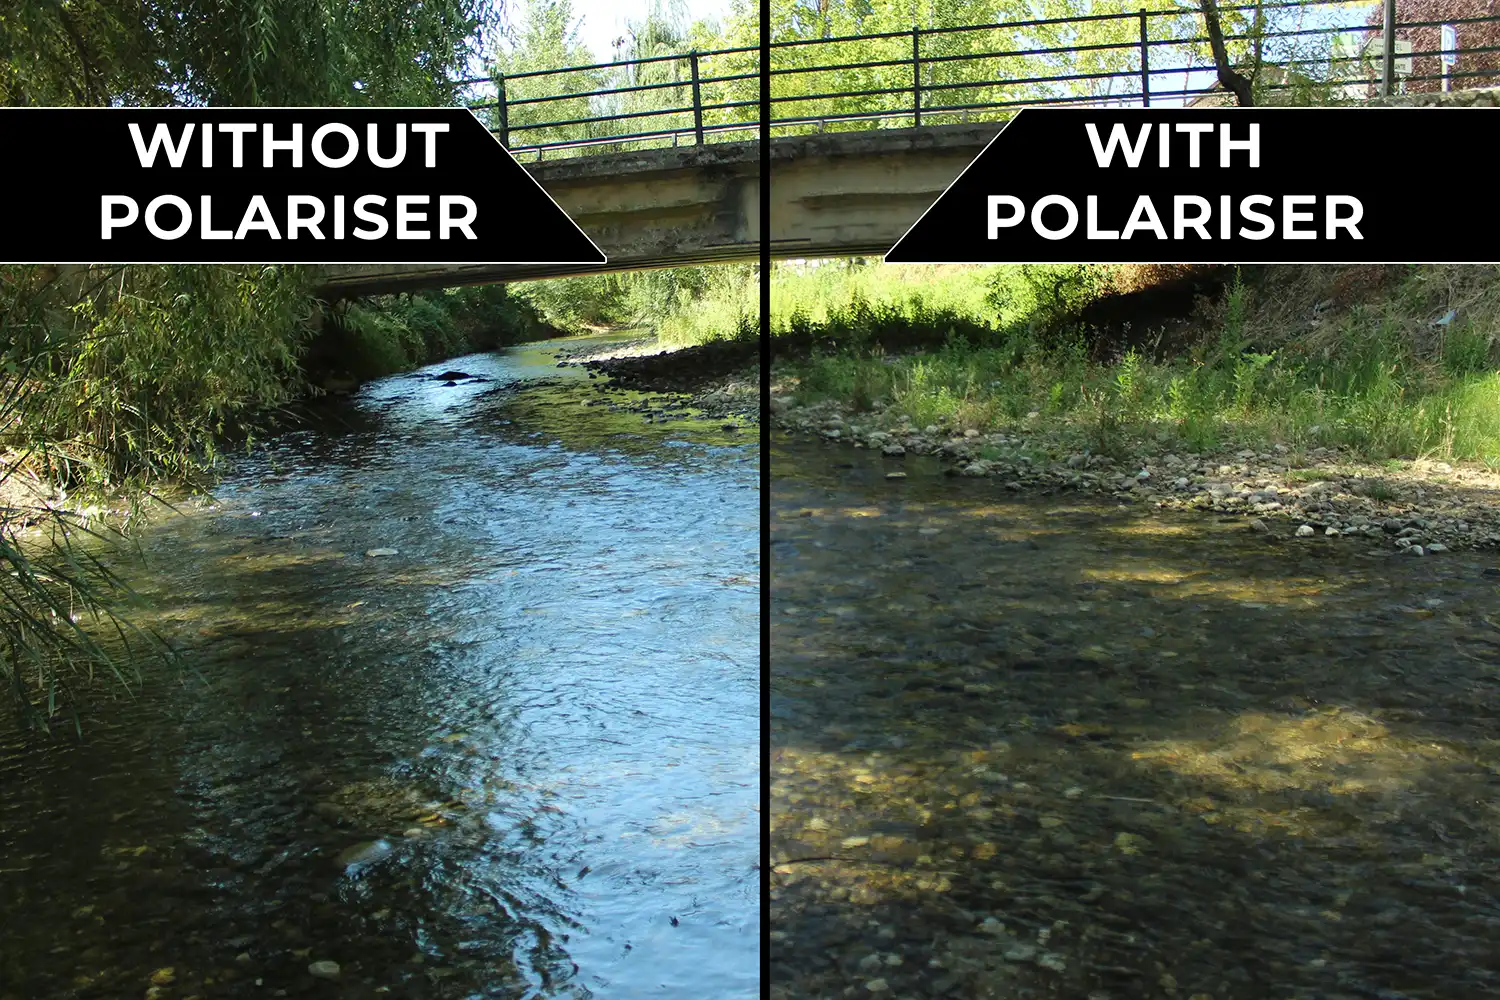
Consider investing in neutral density (ND) and polarising filters. ND filters help control exposure, while polarising filters reduce glare and enhance colour saturation.
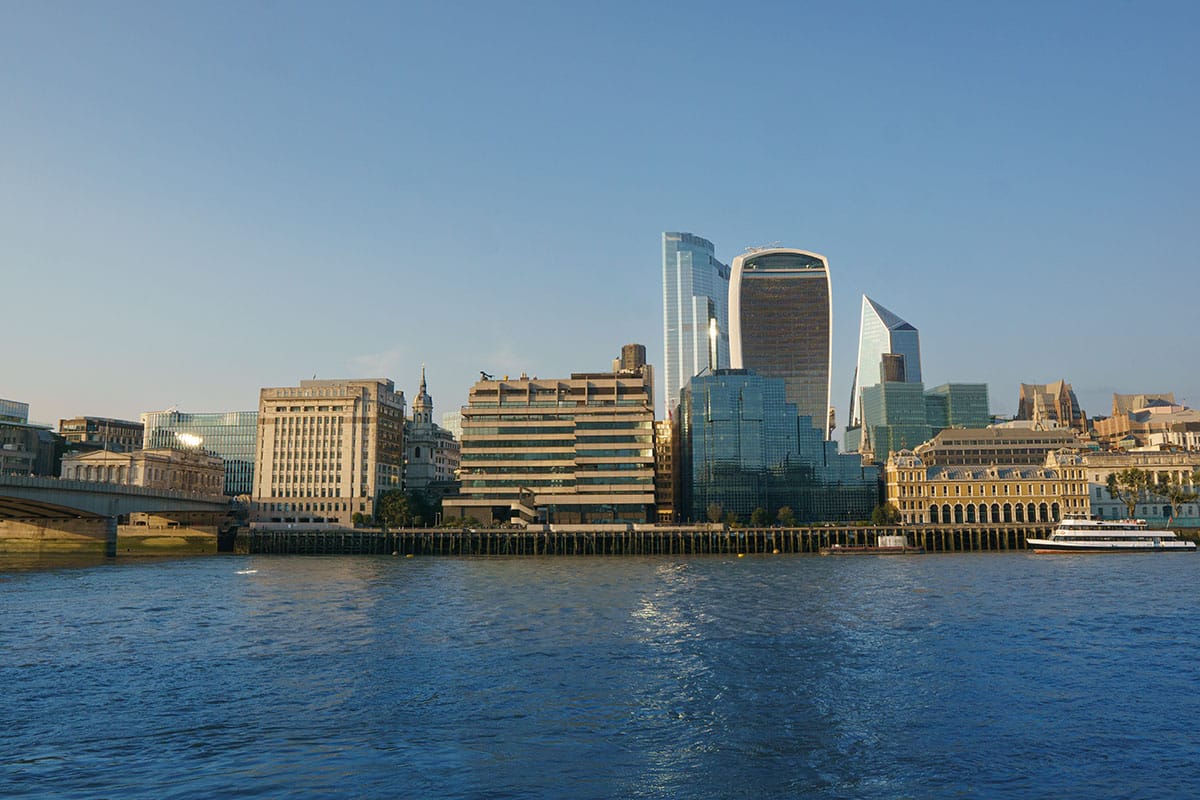
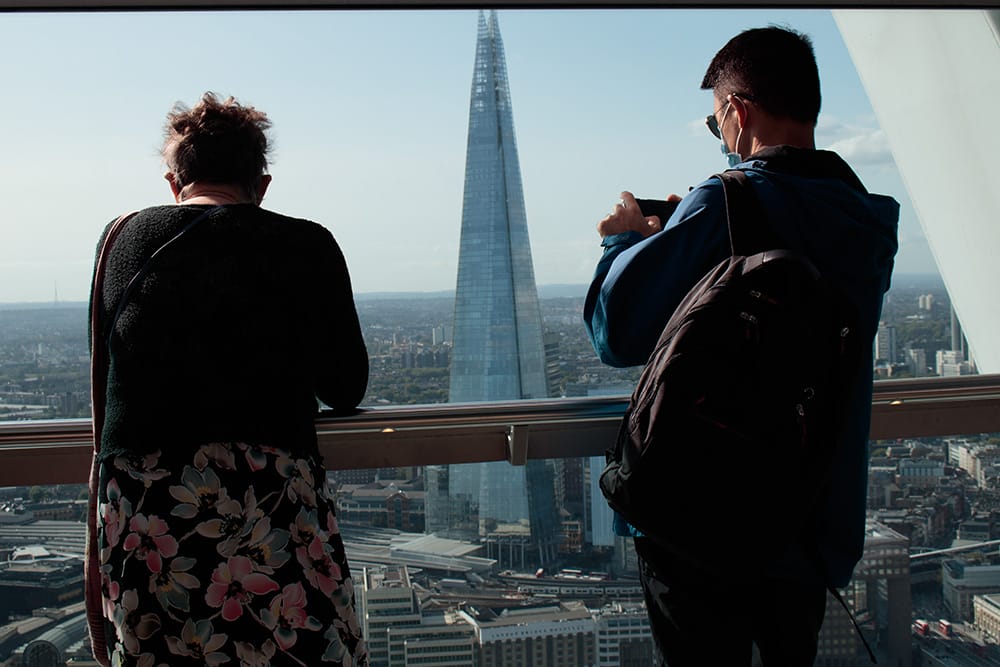
Now that you have your gear ready, it’s time to pick the perfect location for your cityscape shoot. Cityscapes vary greatly, so choose your spot wisely.
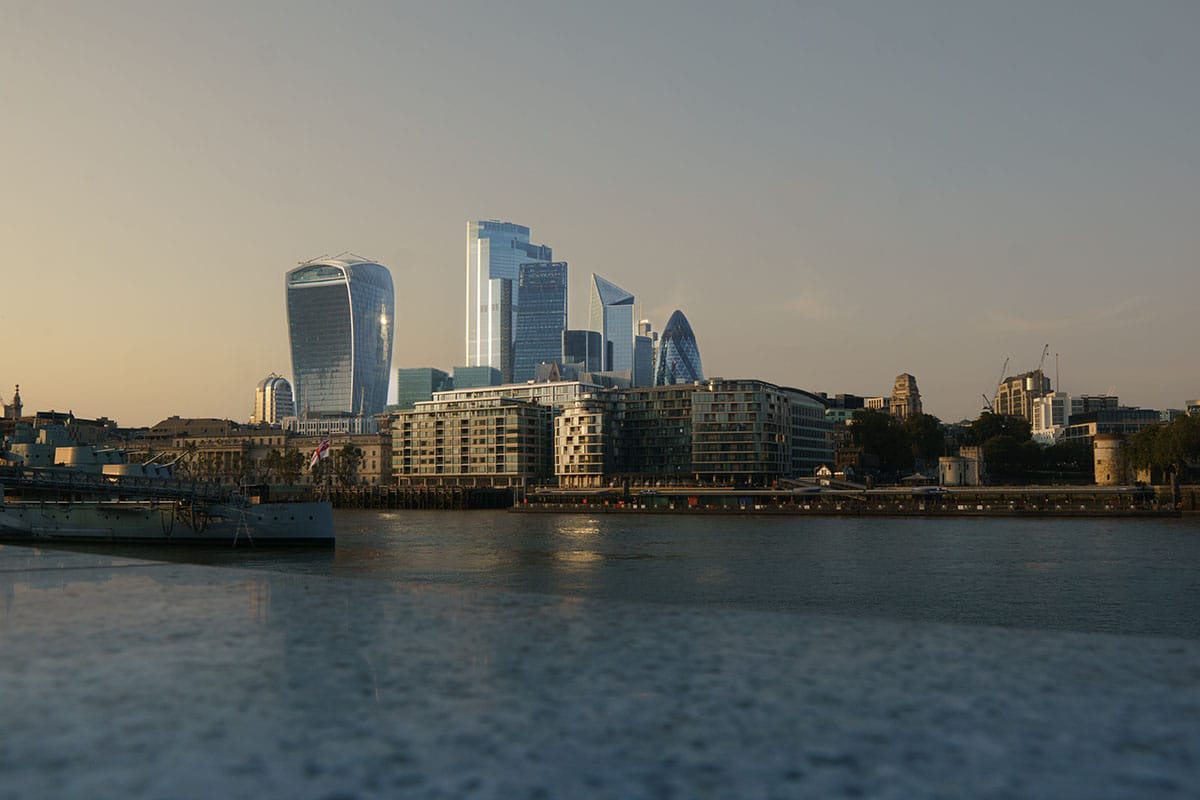
Start by researching iconic spots in your city. Look for places with a mix of modern skyscrapers, historic landmarks, or beautiful natural elements. Online forums and social media can be great resources for finding hidden gems.
The magic often happens during the golden hours—sunrise and sunset. These times provide soft, warm light that can transform an ordinary cityscape into something extraordinary. Additionally, the city lights come alive after dark, offering another exciting opportunity for night photography.
Before your actual shoot, consider doing a scouting trip during daylight hours. This will help you identify the best angles, compositions, and vantage points for your photos. You can even use smartphone apps like Google Maps to plan your shots.

Now that you’re at your chosen location, it’s time to get familiar with your camera settings. Don’t be intimidated; it’s easier than you think.
To have full control over your exposure, switch your camera to manual mode. This allows you to adjust settings like aperture, shutter speed, and ISO individually.
If you’re just starting out, consider using aperture priority mode. This lets you control the aperture, while the camera automatically adjusts the shutter speed and ISO for proper exposure.
Keep your ISO as low as possible to minimise noise in your photos. Start at ISO 100 and only increase it, if necessary, in low-light conditions.
For capturing light trails from cars or smoothing out water in rivers or fountains, experiment with long exposures. Set your camera to a slow shutter speed (e.g., 10-30 seconds) and use your tripod for stability.
Next, you should focus on the composition of the cityscape. Pay attention to the following aspects to make your images stand out.
Divide your frame into a 3×3 grid (see rule of thirds) and place key elements along the grid lines or at the intersections. This simple rule can add balance and interest to your shots.
Use natural or architectural lines in the cityscape to guide the viewer’s eye through your photo. Roads, bridges, and buildings can serve as effective leading lines.
Add depth to your images by including a foreground element. It could be a tree, a street sign, or even a person. This creates a sense of scale and draws the viewer deeper into the scene. Look for symmetry in buildings or patterns in the cityscape. These elements can create visually striking compositions.

Cityscapes offer a dynamic range of lighting conditions, from the soft hues of sunrise to the dazzling brilliance of city lights at night. Experimenting with different types of light can elevate your photos.
The final step in shooting cityscapes like a pro is post-processing. While it’s essential to get the best shot in-camera, a little editing can enhance your images further.
By following these tips and techniques, you’ll be well on your way to capturing stunning cityscapes that will leave your friends and followers in awe. Remember, practice makes perfect, so don’t be discouraged if your first attempts aren’t masterpieces.
Keep shooting, exploring, and refining your skills, and you’ll see your cityscape photography soar to new heights. Happy shooting, urban explorers!
Find everything you need to know in this guide to polarizer lens filters for photography. How do they work and which is the best to buy?

Discover TOP features in the Lightroom CC mobile app with this guide for enhancing your photo editing skills. For desktop and tablet too.

Shooting sunsets using amazing 5-in-1 magnetic lens filters from Kentfaith, the 1st choice for photo & video products.
Learn the basics of photography – fast – with our FREE 60-Second Photographer online course. Each class is short and sharp with simple, actionable steps that give you immediate results.
x 30 lessons

© iPhotography™
Become a confident and competent photographer in less than 30 minutes!
Before you leave, make sure you’ve secured your FREE online photography course (worth £29.99)
Each class is just 60-seconds or less making it the fastest and easiest way to learn photography!
