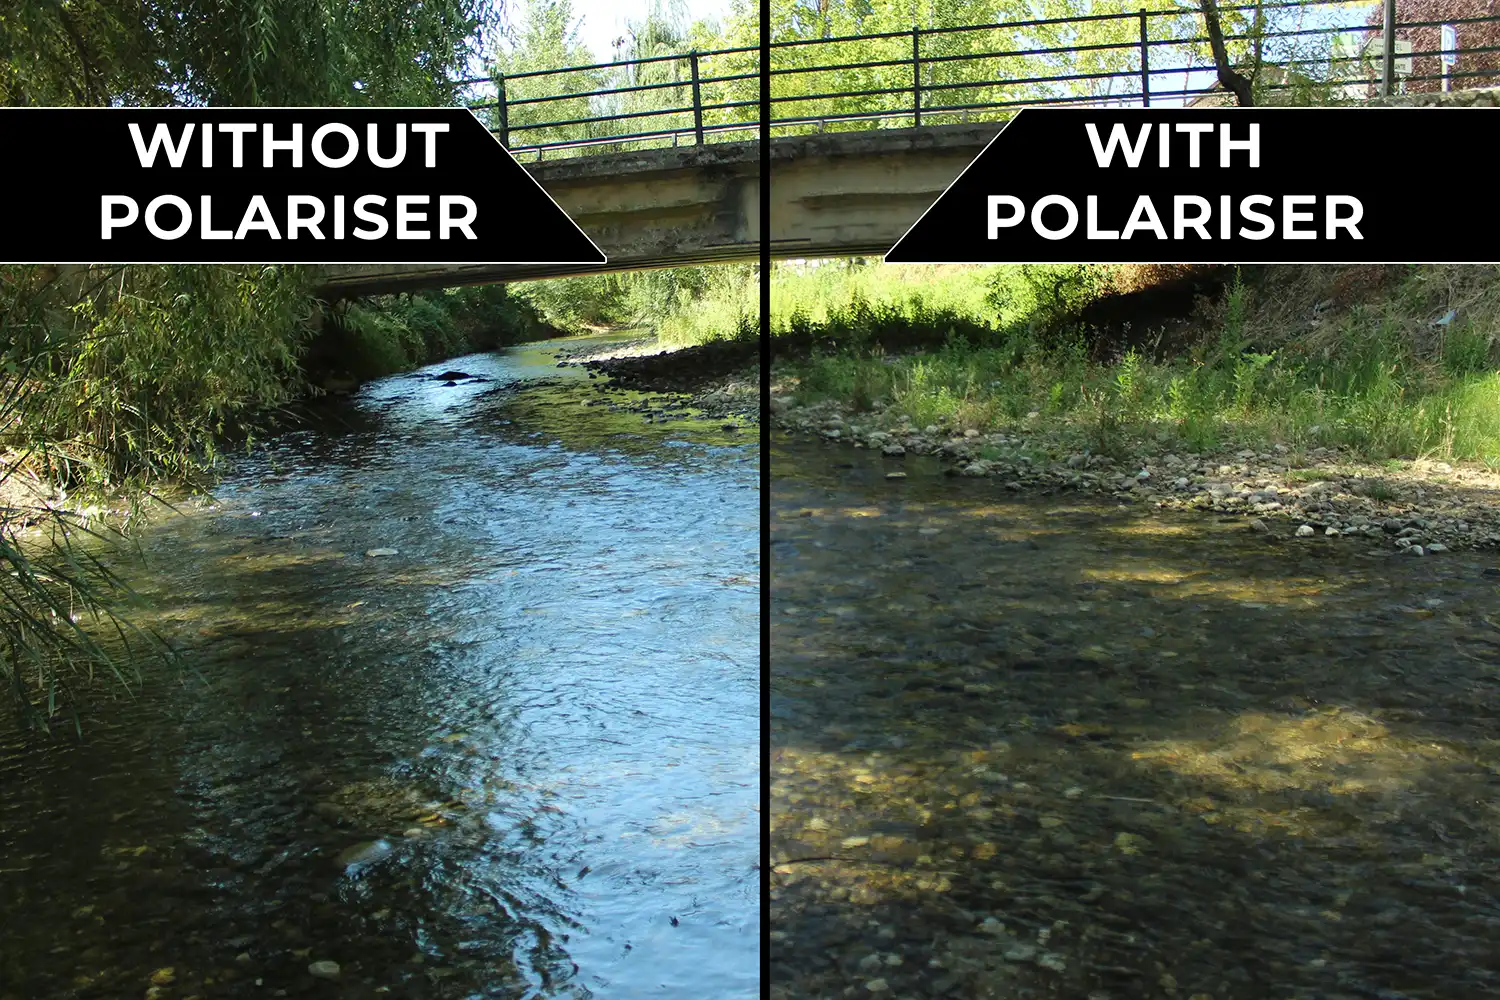
• Home
  • Blog
  • How to Photograph Smoke for Amateur Photographers

How to Photograph Smoke for Amateur Photographers

Image by Herman van der Walt (iPhotography Student)

If you’re interested in taking cool pictures of smoke, you’re in for a creative adventure! Photographing smoke can give you mesmerising and magical images.

As a beginner with a digital camera, it’s important to understand some camera basics and tricks to get the best smoke photos. In this guide, I’ll break it down step by step, so you can always capture sharp and fascinating smoke pictures.

Camera Settings for Smoke Photography

Start by switching your camera to manual mode (M). This lets you have full control over the settings and get the results you want.

Keep your ISO low (around 100-200) to reduce any noise and keep the image quality nice and clear.

Choose a small aperture (higher F-stop value) like F/8 or higher. This way, the smoke and everything around it will be in focus. Use a relatively fast shutter speed to freeze the smoke’s movement. Start with around 1/200th of a second and adjust as needed.

Image by Tony Matthews (iPhotography Student)

The Problems with Smoke Photography

Smoke can be tricky to capture because it’s transparent and delicate. Good lighting is essential to make the smoke stand out. Try using different types of light—natural or artificial, or both—to achieve different effects.

Smoke is always changing shape and moving around. Be ready to adjust your camera settings and position as the smoke moves, so you can capture interesting patterns.

Choose a clean and simple background that makes the smoke pop. A plain wall or something with contrasting colours can be perfect.

Image by Barbara Coulson (iPhotography Student)

Lighting Techniques for Smoke

To make smoke look amazing, place your light source behind it to create a backlit effect. This will make the smoke stand out and show its shape and texture. Play around with different angles and intensities of light to get the look you want.

You can also try side lighting to create drama and highlight the texture of the smoke. Position the light at an angle to create cool shadows and highlights.

Image by Barry Tetchner (iPhotography Student)

How to Focus on Smoke

Autofocus may not work well with smoke because it doesn’t have clear edges. If you use autofocus, choose a single focus point that covers the area where the smoke will be. Half-press the shutter button to lock focus and then frame the shot.

Manual focus can be more reliable for smoke photography. Switch your lens to manual focus mode and turn the focus ring until the smoke looks sharp in the viewfinder or on the screen. Zoom in on the preview to make sure it’s perfectly focused.

Extra Tips for Smoke Photography

Different materials can give you unique smoke patterns. Try using incense sticks, candles, cigars, or even smoke bombs to create different shapes and textures.

Since you might be using slower shutter speeds and shooting in low light, using a tripod will keep your camera steady and prevent blurry shots. This is especially important when focusing manually.

For the best quality and flexibility when editing later, shoot in RAW format. It gives you more options to adjust exposure, white balance, and other settings later on.

Smoke Photography: Summary

In conclusion, photographing smoke can be a fun and rewarding adventure. By understanding your camera settings, overcoming challenges, and using lighting and focusing techniques, you can capture stunning and sharp smoke photos.

Don’t be afraid to try new things, be patient, and let your creativity guide you in exploring the captivating world of smoke photography.

WHAT'S INCLUDED

FREE Photography Course

Become a confident and competent photographer in less than 30 minutes!

FREE

Photography Course

Perfect for Beginners

Before you leave, make sure you’ve secured your FREE online photography course (worth £29.99)

Each class is just 60-seconds or less making it the fastest and easiest way to learn photography!