If you want to make your photos look more like how you actually saw the scene then you may find bracketing photography useful. By exposure bracketing your pictures you can reveal the subtle tones in shadows and highlights that our eyes can detect but our camera (in just one shot) can’t.
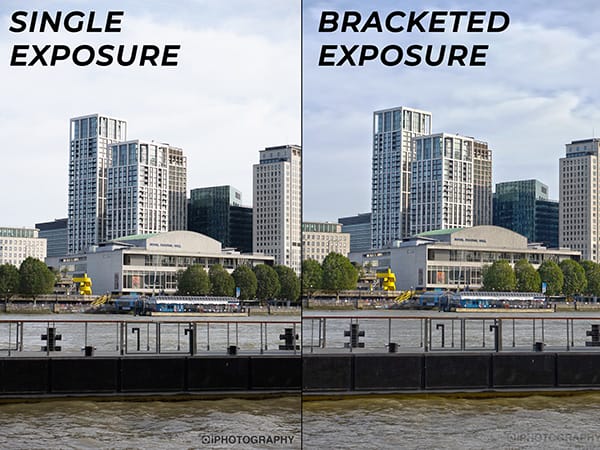
The basic bracketing definition is the process of taking multiple shots at different levels of brightness and merging them together for a great dynamic range.
Our eyes can see more than a single shot from your camera. We see about 11 F/stops of light. A camera can see about 3 F/stops of light at one moment. By bracketing a scene we can capture a more detailed, toned and realistic photograph closer to how we saw it with our own eyes.
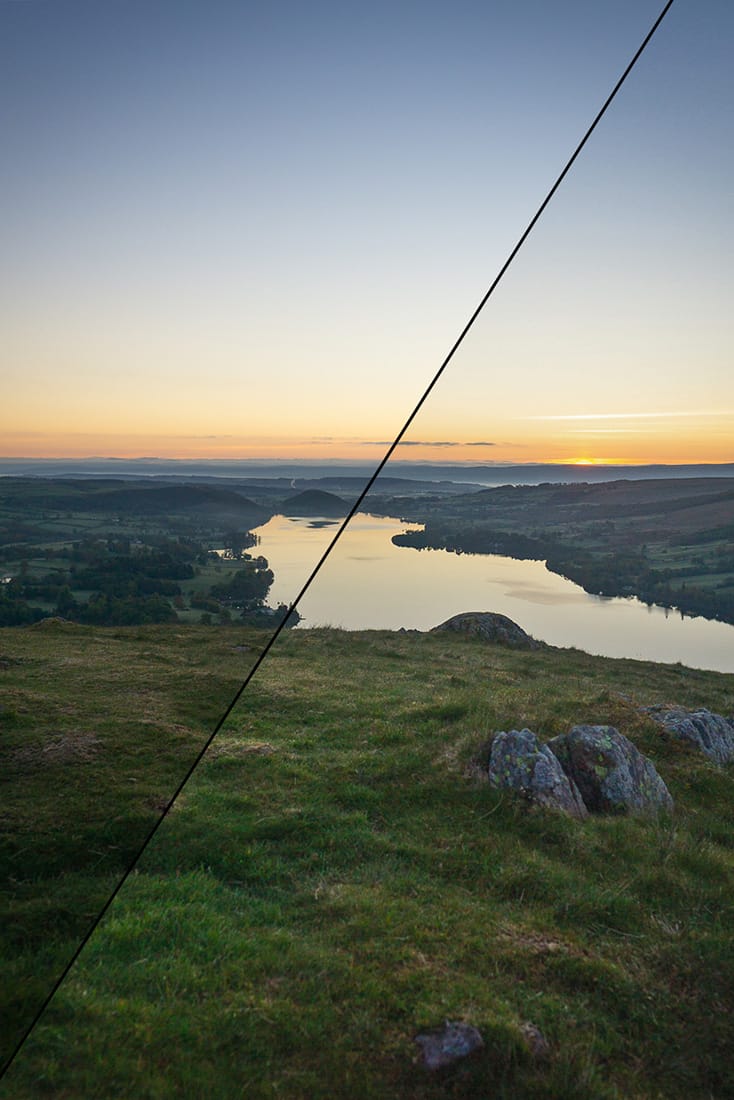
This means bracketing landscape photos can deal with the issues of heavy shadows when shooting under strong lighting (i.e midday sun, sunset).
Landscape photographers regularly use bracketing photography to increase the dynamic range of their photos to great success.
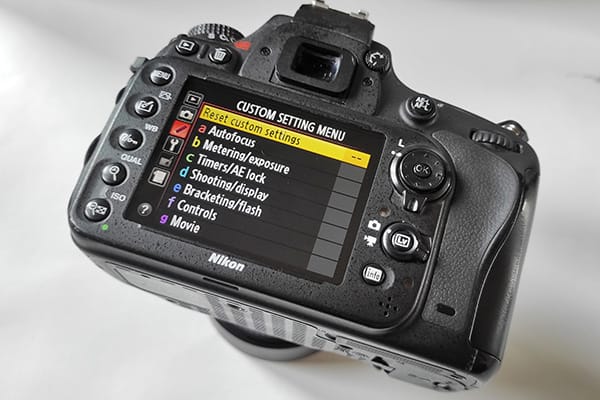
Given that there are 2 ways to bracket a photo with a digital camera these days then YES your camera will be able to bracket without an issue.
Most DSLR or Mirrorless cameras whether it’s a Canon 90D, 7D Mark ii, T6i 80D or a Nikon will be geared up to allow you to bracket your photos. Have a look through the menu system of your camera for options such as AEB, HDR or anything with the phrase ‘bracketing’ to get you started.
Whether you bracket manually or use your camera’s built-in AEB or HDR modes then you can still achieve similar results – but you may need to do more work when doing it manually, which we’ll cover later on.
Bracketing may alter the shutter speed or aperture (by equivalent amounts) depending on your camera, or preference if you choose to bracket manually.
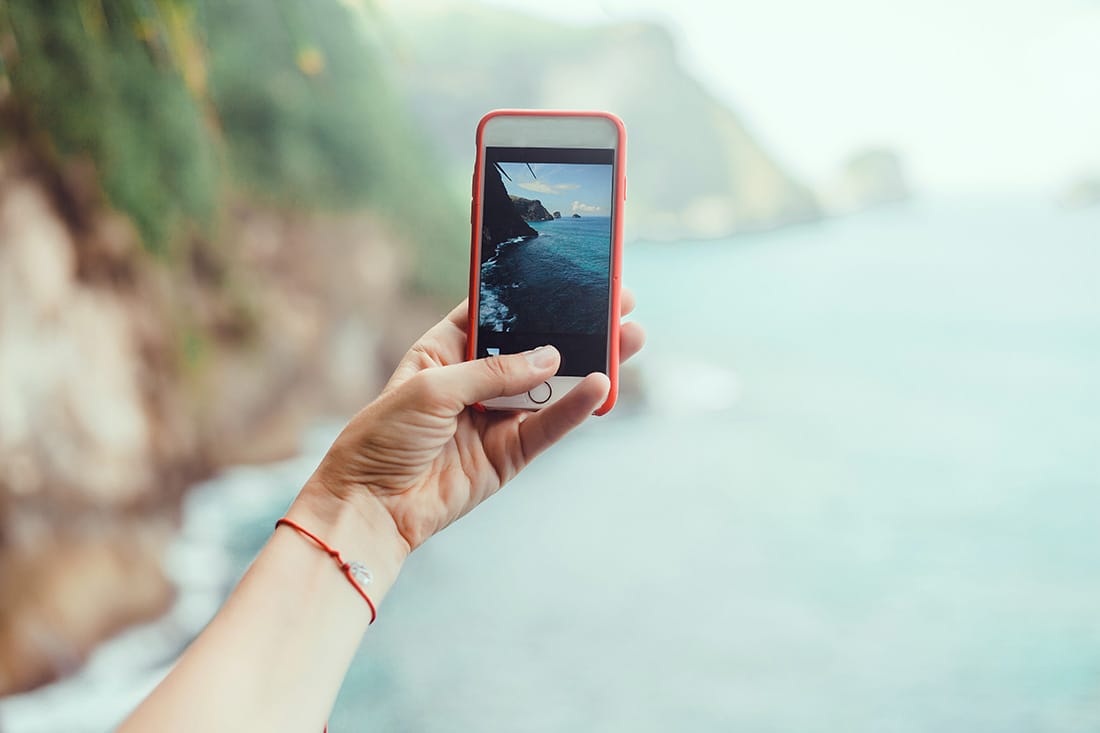
While it may not seem so straight forward to bracket photos with an iPhone it is still possible. You could do it manually still and merge those shots in editing afterwards. But if you would prefer to do it all in-camera then look to see if your iPhone has a HDR function – this is an automated bracketing process that the camera will take full control of.
Results may not always be ideal so instead we’d recommend downloading a bracketing photography app such as;
● Camera+ 2
● TADAA
● Camera Pixel
● Pro Camera
● Photoleap
● Hydra
HDR photography iPhone is a fun way to teach yourself the power of dynamic range wherever you go without having to bring your DSLR along.
HDR stands for High Dynamic Range – it’s the resulting look of a bracketed photograph. We’ve got some HDR photography tips about where to use this process (and when not).
The highly detailed and texture-rich effect that HDR photography gives can sometimes get overused and abused which results in poor quality photos looking over-sharpened and hyper-realistic (i.e. fake). There are certain times to use and stay away from bracketing and HDR photography.
There may be one or two exceptions to this rule, but generally, human skin looks awful under HDR conditions. In portraiture, the aim is to flatter your subject – HDR will not do this. Instead, it will bring out their wrinkles, pores, and blemishes. If you intend to make money off portraits, this isn’t the way to do it.
For documentary-styled B&W photos, you may be able to use HDR a bit more liberally though on portraits, if you want that gritty and aged effect.
With animals, you can be less concerned, but still, use it with caution. Their fur is meant to look soft and layered, not coarse and sharp.
Using HDR on an interesting skyscape is sometimes, sadly, overlooked by new photographers. In landscape photography the ground is just as important as the sky above it so why not treat it to some HDR?
If the sky looks dark and moody then HDR will only serve to emphasise that effect.
It shouldn’t be used to create a mood that doesn’t already exist (e.g. a sunny day).
It should only be used to enhance what is already there in the landscape or foreground action.
1. Don’t use HDR when your scene is low contrast – misty/foggy/dull days are bad choices for HDR photography.
2. HDR won’t ‘fix’ your photo or to make it better when you weren’t considering it beforehand.
3. It is rubbish for silhouettes – you can’t bring out detail when you didn’t shoot any in the first place!
4. Don’t use HDR photography to remove shadows. If you don’t want shadows in the first place, get more light in your exposure.
5. HDR photography is best used when the contrast of the scene exceeds your camera’s range.
6. Could you apply HDR photography on real estate? Yes! It can help bring out the detail in darker areas of a room or where trees cast shadows on the property. It makes the real estate look striking and prominent.
AEB is your camera’s built-in reference to bracketing. It simply means auto exposure bracketing.
Most DSLR and Mirrorless cameras will have this function though it could be called something different with each manufacturer so double check your user manual.
AEB will ask you;
● How many shots do you want to take?
● And what incremental change (per shot) in exposure do you want?
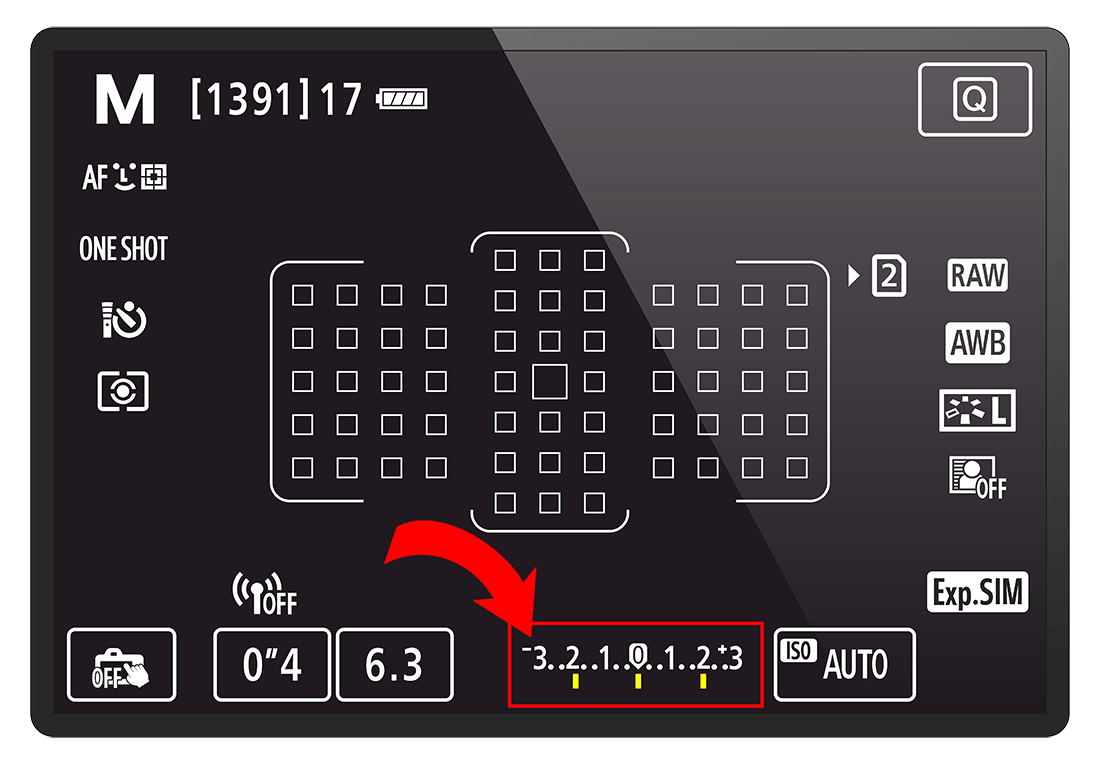
Depending on your camera this may read as ‘5 shots ½ EV’ (meaning each of the 5 shots will be taken half a F/stop or shutter speed stop different from the other).
Other cameras, Sony Alphas, for example, may display bracketing just as ‘1.0EV or 3.0EV’ – this means that your selected number of shots will cover whichever exposure range you choose. The higher the EV (exposure value) number the greater the dynamic range it’ll be trying to capture.
For example, if you start at F/8 and choose ‘3 shots 3.0EV’ then your camera will take;
(again your camera may alter the aperture size OR shutter speed. This differs from camera to camera, but the changes are equivalent.)
● One shot a stop under the current exposure level (F/5.6)
● One shot at the current exposure level (F/8)
● One shot a over under the current exposure level (F/11)
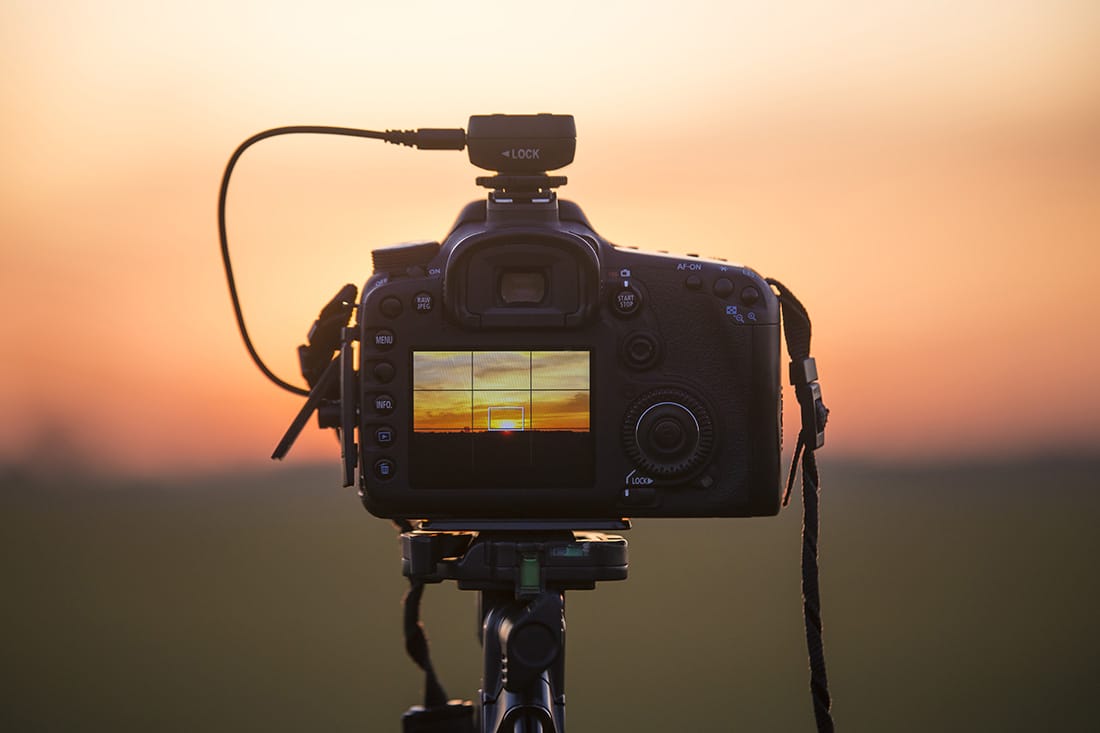
You’ll also be able to see this spread of shots represented on your exposure scale on the back screen or through your viewfinder. Each little marker under a number shows at what exposure level each shot will be taken.
After you’ve taken the shots (which may require a single or multiple clicks of the shutter button) each camera will behave differently with what appears on-screen next. Some will only provide you with a merged version of the bracketed shots and others will give you all the individual exposures and the merged version.
This allows you to export it to Lightroom or Photoshop and merge them with more finesse and changes. The camera may ask you how you’d like the final bracketed shot(s) delivered – merged or individual.
Without making this too technical and confusing HDR and AEB are virtually the same thing. It is the process of how the final result is achieved is done a little differently.
Auto exposure bracketing requires 3 – 5 images being taken at varying exposure values over and under the metered exposure value.
Whereas HDR photography takes 3 images and blends them in-camera to create a sampled version. HDR is a more automated (and locked downed) process; whereas AEB gives you more control over the exposure range. You may find HDR photography a good place to start and move on to AEB the more confident you get.
How to take HDR photos is even easier than AEB. If your camera has a HDR function then select any available exposure settings and get shooting. It’s so simple and a feature you can leave turned on if you shoot landscapes all the time to be honest.
HDR photography software may be useful to enhance your shot further depending on the look you are trying to achieve. In Lightroom you could use the clarity and texture sliders to increase the effect with one image.
In Photoshop you could use the shadows and highlights tool to enhance the range of detail on a single shot too.
If you want to know more about how to do HDR photography then check out iPhotography’s separate article for more information and tips.
Bracketing photography primarily works on the basis of changing the exposure through aperture F/stops or shutter speed. But it is possible to follow a similar process that doesn’t change the F/stop or shutter speed at all, but instead changes the ISO level.
ISO bracketing is sometimes seen as a better way to bracket exposures as it means the depth of field won’t change. Taking multiple exposures across a wide range of F/stops means the depth of field will change in each shot. When you come to blend those images together you can end up with a confusing depth of field that looks too deep or shallow for the exposure.
ISO bracketing may be a better solution to keep the depth of field fixed for your composition but still offer a wider dynamic.
We all know the issues of raising ISO levels (digital noise) but as long as you’re aware of your camera’s limitations then you should be OK.
Given that ISO bracketing photography isn’t a widely accepted method of exposure bracketing cameras don’t have the function automated like HDR. Instead you’ll need to do it manually by taking 3-5 shots at different ISO levels. If you shoot in manual mode your F/stop or shutter speed won’t change.
Start at 100 and shoot up to 800 ISO. Take all the shots and then layer them together in editing and erase/mask through areas you want to delete to reveal the best dynamic range. You may want to try ISO bracketing if you enjoy astrophotography for example.
The whole overall idea of bracketing is to photograph what you are actually seeing and how you are seeing it. If you’ve ever said to yourself ‘I can’t seem to capture what I saw’ then do some bracketing research as to what your camera is capable of and then get shooting.
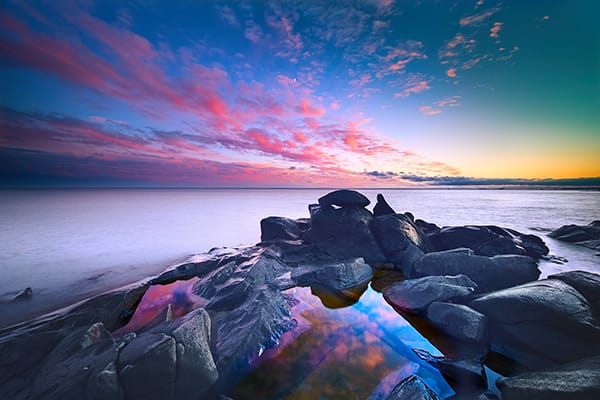
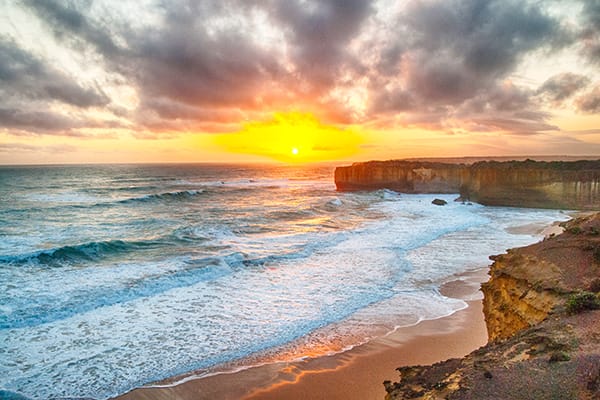
Bracketing landscape photography is almost a standard practice amongst many professionals. The reason for this is because when shooting at sunrise and sunrise (typical times for landscape photography) they’ll be faced with heavy shadows, backlighting and dark foregrounds.
Bracketing allows them to expose the detail in the shadows in one shot and stop the highlights in the sky from being blown out in others. The histogram on the final merged shot should look like an arch without the edges being clipped.
If you want to read more about getting great exposure then check out this article. We’ve also got a great landscape photography guide which is perfect for beginners to discover what you need to get started.

Discover TOP features in the Lightroom CC mobile app with this guide for enhancing your photo editing skills. For desktop and tablet too.

Shooting sunsets using amazing 5-in-1 magnetic lens filters from Kentfaith, the 1st choice for photo & video products.

Popular memory cards for photography – what’s the best SD card for your digital camera? Choose the right capacity and class speed in our guide
Learn the basics of photography – fast – with our FREE 60-Second Photographer online course. Each class is short and sharp with simple, actionable steps that give you immediate results.
x 30 lessons

© iPhotography™
Become a confident and competent photographer in less than 30 minutes!
Before you leave, make sure you’ve secured your FREE online photography course (worth £29.99)
Each class is just 60-seconds or less making it the fastest and easiest way to learn photography!
