 Stephen Walton
If you’ve spent time editing your photographs in Photoshop, you’ll know that the layer blend modes have multiple effects. It may seem easier to scroll through all the options to see which one fits your design best.
But instead of aimlessly scrolling, I’ve put together a brief overview as to what each of Photoshop’s layer blend modes does to the colours in your document.
“Normal” is the default blending mode for Photoshop layers. It has no effect on the layers beneath them.
Dissolve only reveals the pixels below when the opacity of the layer is reduced. The pixels below are revealed through a dither pattern (noise) whose intensity is based on the opacity.
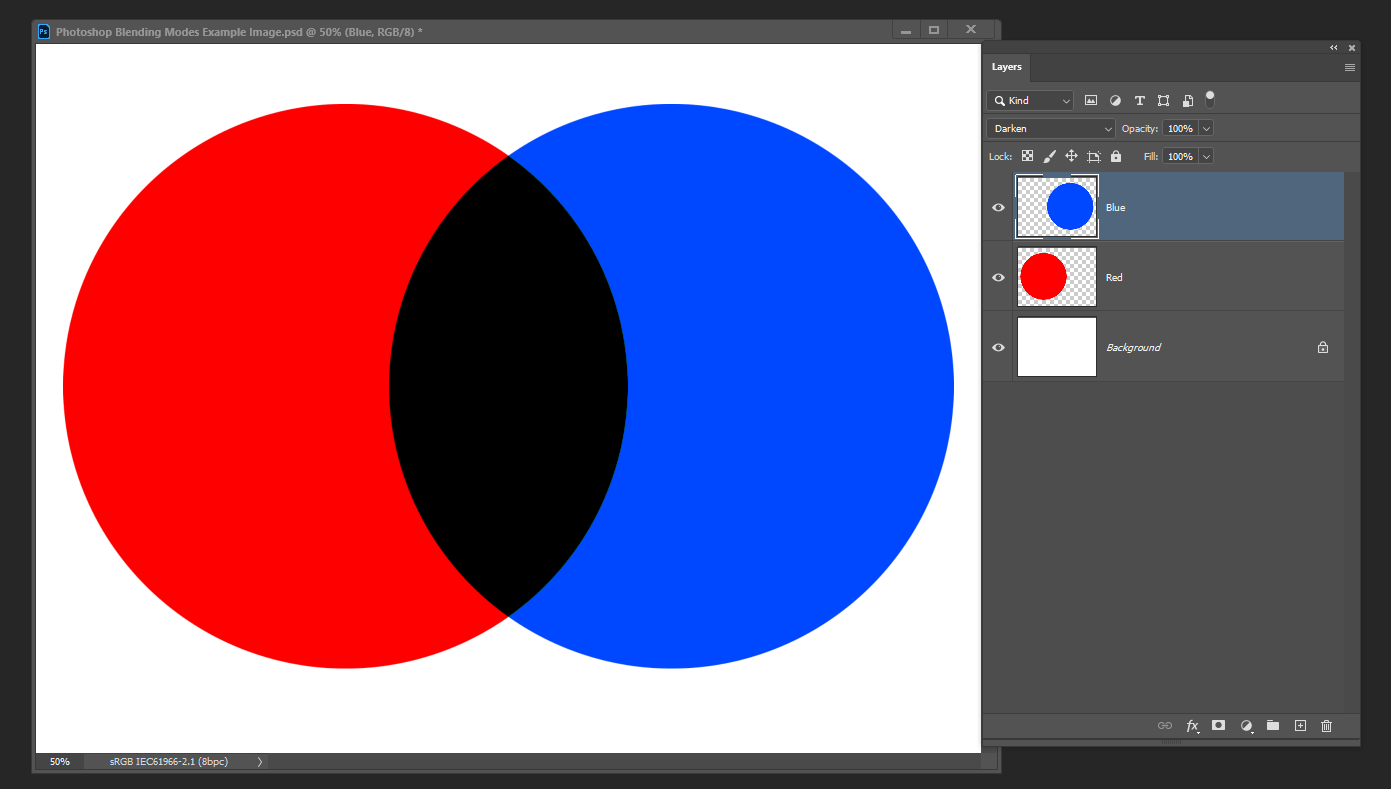
Darken blend mode compares the base and blend colours, and it keeps the darkest of the two. If the blend layer and the base layer colour are the same, then there is no change.
This blending mode multiplies the luminosity of the base colour by the blend colour. The resulting colour is always a darker colour. White produces no change, while the black pixels remain.
This gives you a darker result than multiply by increasing the contrast between the base and the blend colours resulting in more highly saturated mid-tones and reduced highlights.


Linear burn decreases the brightness of the base colour based on the value of the blend colour. The result is darker than multiply but less saturated than colour burn. Linear burn blends differently when fill is adjusted, compared to when opacity is adjusted.
The darker colour blending mode is very similar to darken. The difference is that darker colour looks at the composite of all the RGB channels, whereas darken looks at each RGB channel individually to come up with a final blend.
The lighten blending mode takes a look at the base colour and blend colour, and it keeps whichever one of the two is the lightest. If the blend colours and the base colours are the same, then no change is applied. As with the darken blending mode, lighten looks at the three RGB channels separately when blending the pixels.
The lighten blending mode takes a look at the base colour and blend colour, and it keeps whichever one of the two is the lightest. If the blend colours and the base colours are the same, then no change is applied. As with the darken blending mode, lighten looks at the three RGB channels separately when blending the pixels.
The colour dodge blending mode gives you a brighter effect than screen by decreasing the contrast between the base and the blend colours, resulting in saturated mid-tones and blown highlights. The effect is very similar to the result you would get when using the dodge tool to brighten up an image.
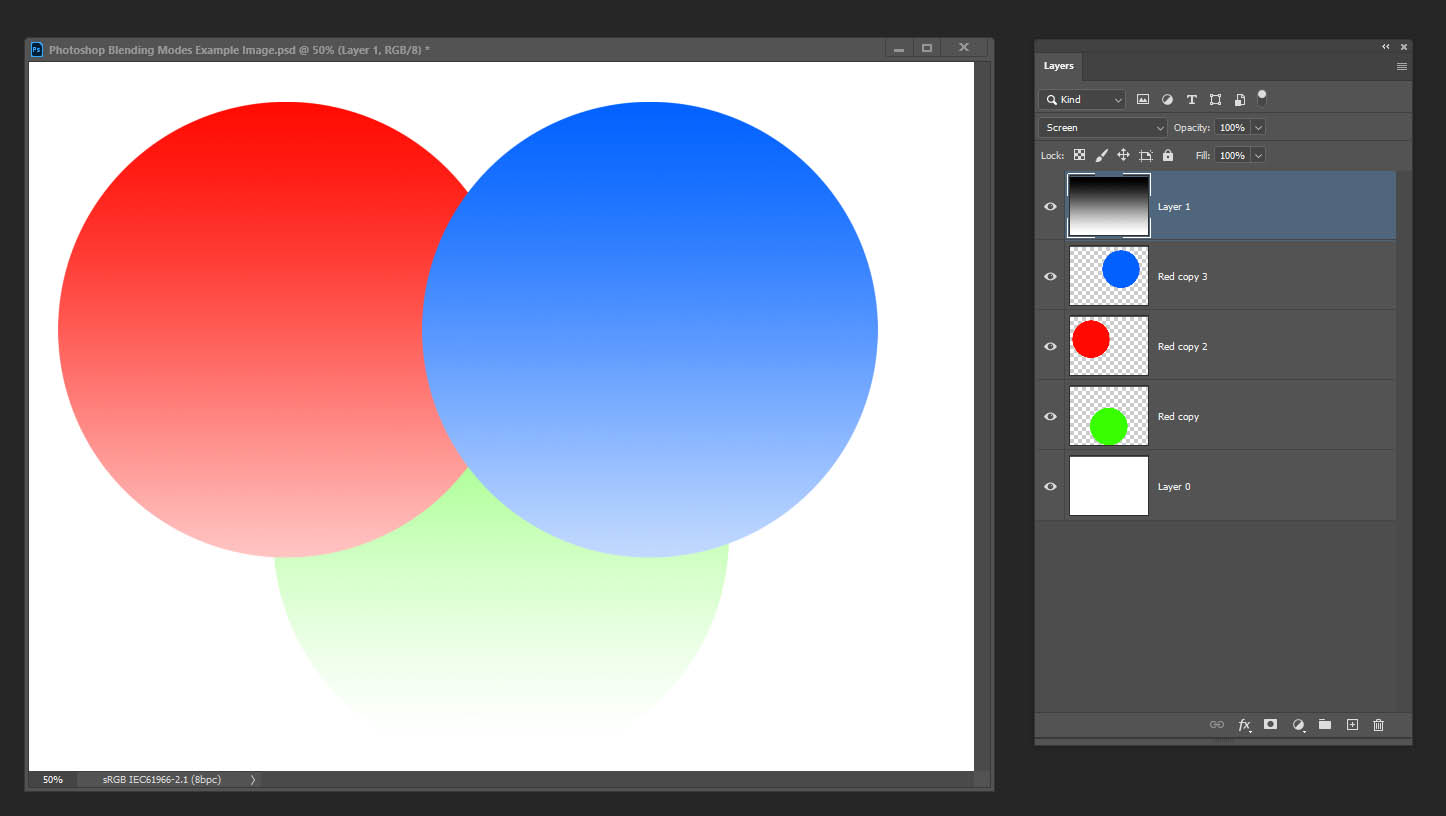
Linear Dodge (Add) produces similar but stronger results than screen or colour dodge. This blending mode looks at the colour information in each channel and brightens the base colour to reflect the blend colour by increasing the brightness. Blending with black produces no change.
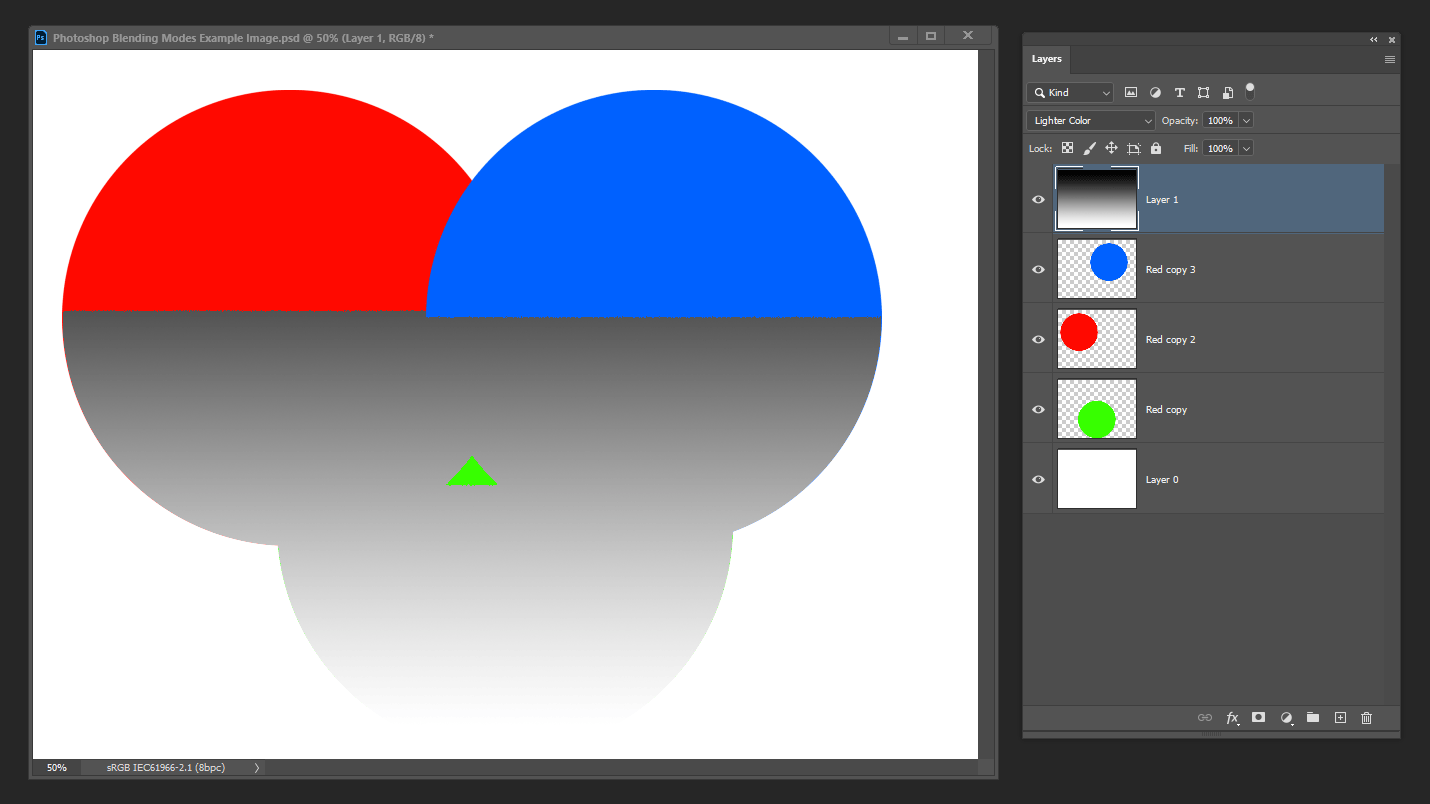
Lighter Colour is very similar to Lighten. This blending mode does not blend pixels. It only compares the base and blends colours, and it keeps the brightest of the two. The difference is that lighter colour looks at the composite of all the RGB channels, whereas lighten blend mode looks at each RGB channel to come up with a final blend.
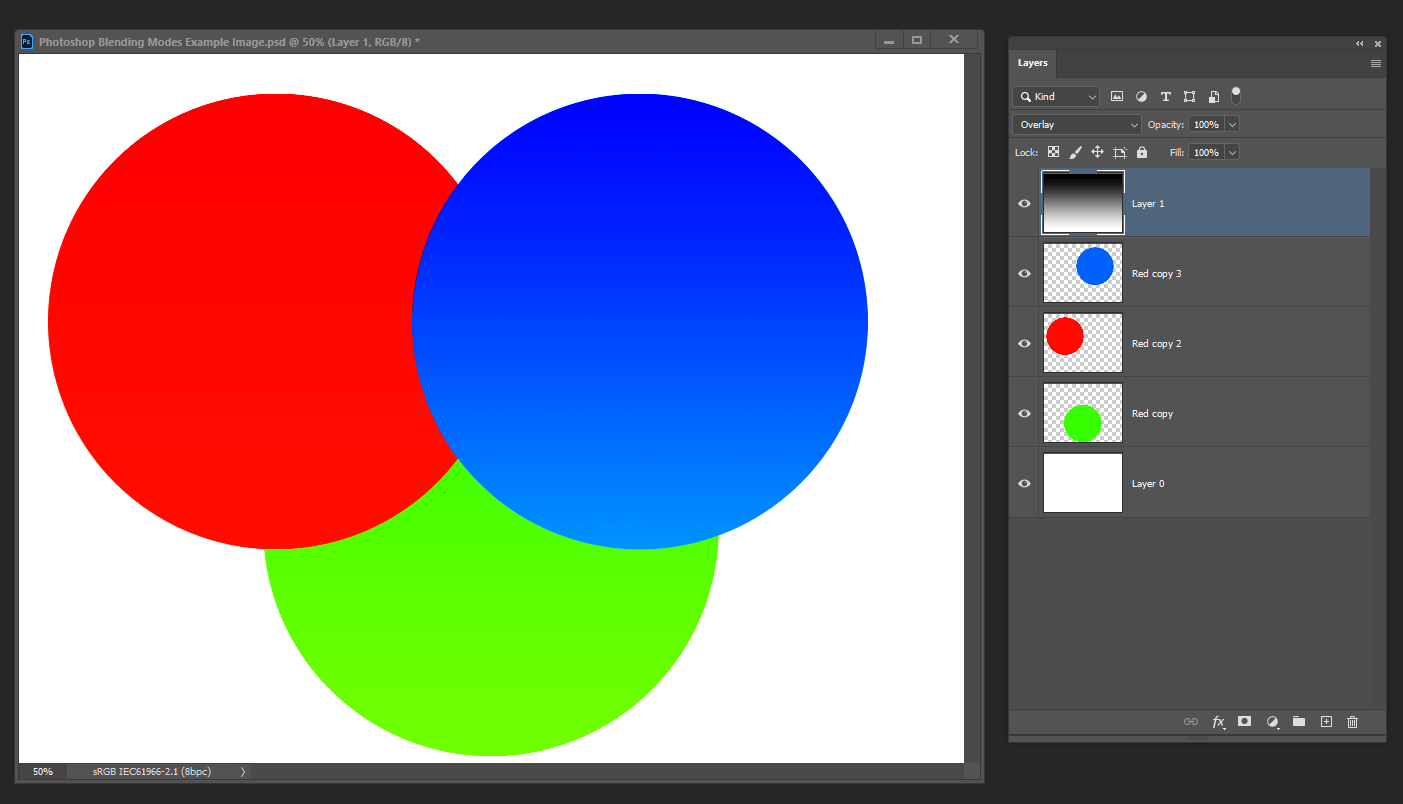
It is a combination of Multiply and Screen with the base layer always shining through. Overlay uses the screen blending mode at half strength on colours lighter than 50% grey. And the multiply blending mode at half strength on colours darker than 50% grey.
Another way of thinking about overlay is by thinking of shifting mid-tones. Dark blend colours shift the mid-tones to darker colours, light-tones shift the mid-tones to brighter colours.
Soft Light is very much like overlay. It applies either a darkening or lightening effect depending on the luminance values, but in a much more subtle way. You can think of soft light as a softer version of overlay without the harsh contrast.
Hard Light combines the multiply and screen blending modes using the brightness values of the blend layer to make its calculations. Overlay uses the base layer. The results with hard light tend to be intense. In many cases, you will have to reduce the opacity to get better results.
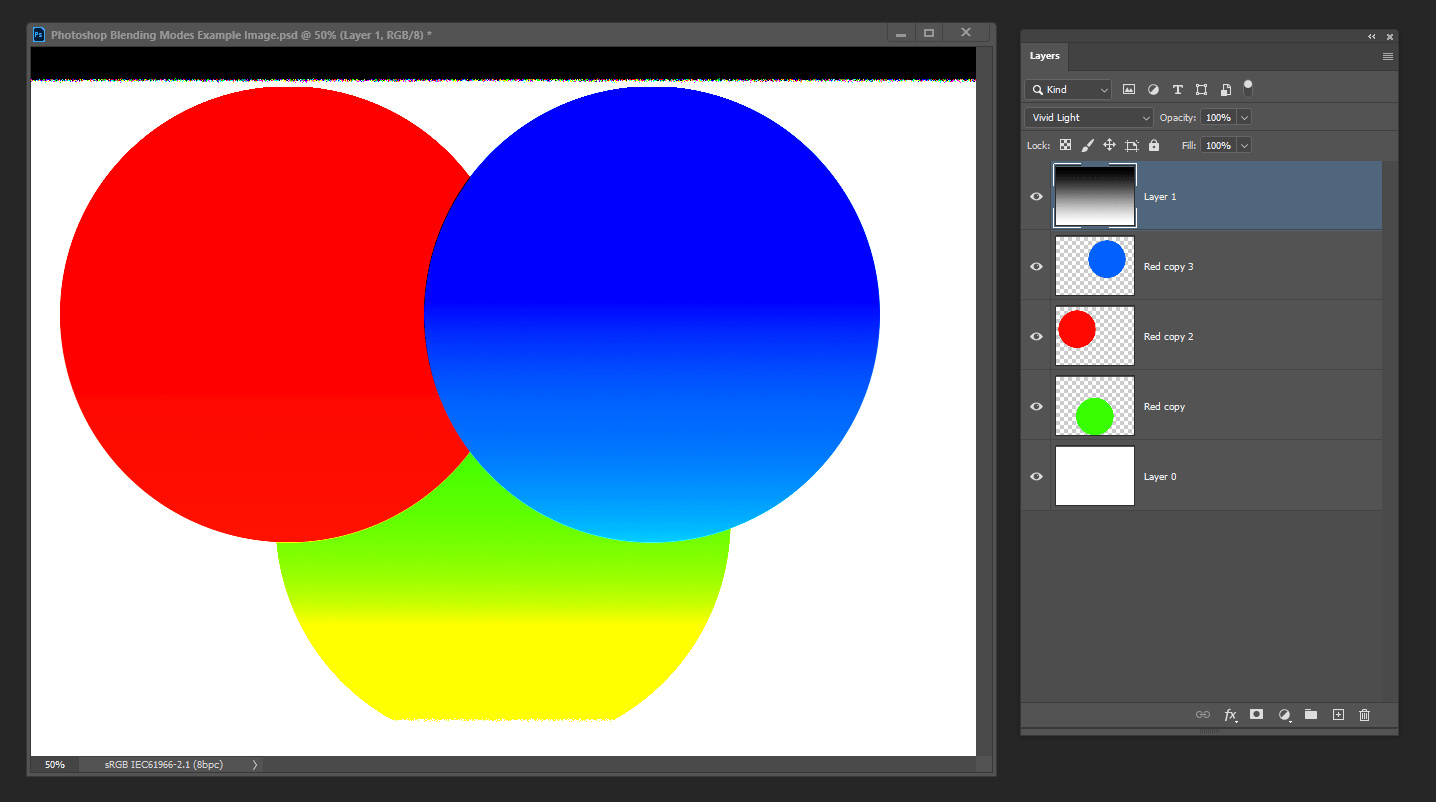
You can think of vivid light as an extreme version of overlay and soft light. Anything darker than 50% grey is darkened, and anything lighter than 50% grey is lighten. Vivid light is one of those blending modes where you may want to adjust the opacity since 100% opacity is generally too strong.
Linear Light uses a combination of the linear dodge blending on lighter pixels and a linear burn on darker pixels. Typically, the resulting colours are extreme, and you may want to use the opacity or dill sliders to adjust it.
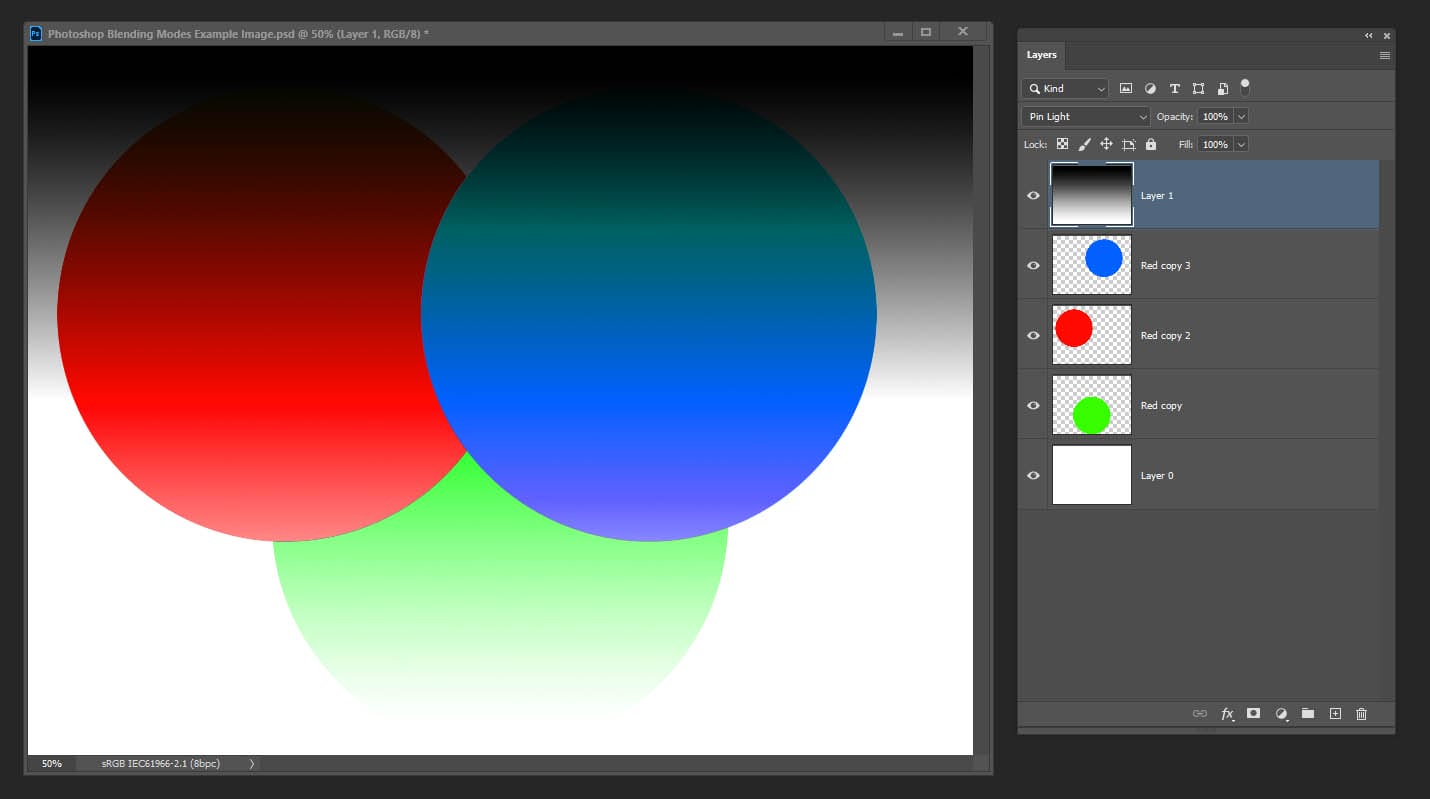
Pin Light is an extreme blending mode that performs a darken and lighten blending mode simultaneously. It can result in patches or blotches, and it completely removes all mid-tones.
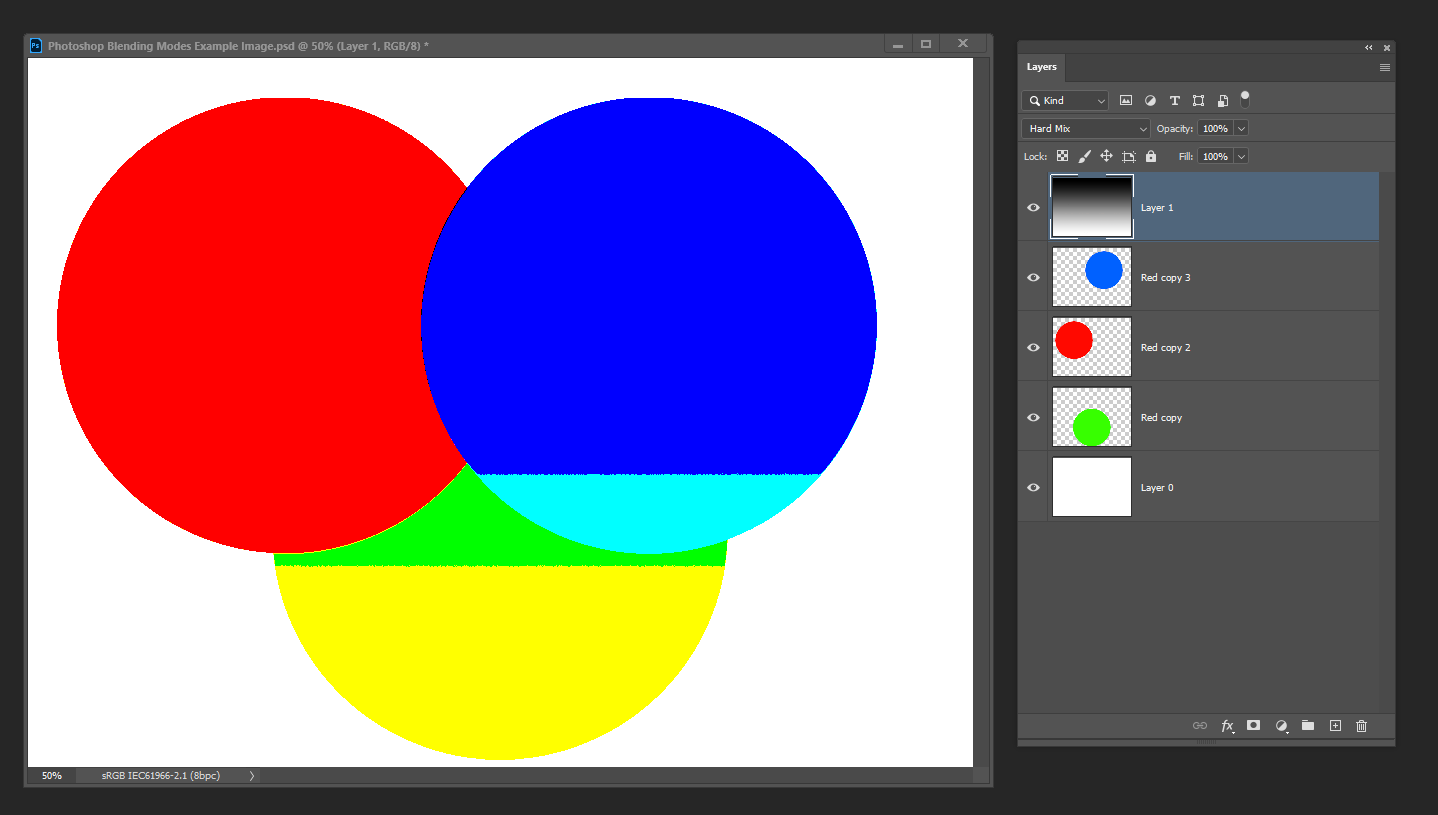
Hard mix is the seventh blending mode in the contrast group and the seventh of the special 8 blending modes. It applies the blend by adding the value of each RGB channel into the blend layer to the corresponding RGB channel in the base layer.
The resulting image loses a lot of detail, and the colours can only be black, white, or any of the six primary colours – red, green, blue, cyan, magenta, or yellow.
The difference blending modes uses the difference of the base and blend pixels as the resulting blend. White inverts the colours of the base layer. This blending mode can be extremely useful for aligning layers with similar content.
Exclusion is very similar to the difference mode. Blending with white inverts the base colour values, while blending with black produces no change. However, blending with 50% grey produces 50% grey.
The subtract blending mode subtracts pixel values from the base layer. This blending mode drastically darkens pixels by subtracting brightness. Black has no effect. Only as the blend values get brighter, does the result get darker.
Divide produces the opposite effect as subtract mode. White has no effect. Only as the blend values get darker, does the result get brighter. Dark areas of the blend layer produce bright colours, while the light areas of the blend layer produced a very small change.
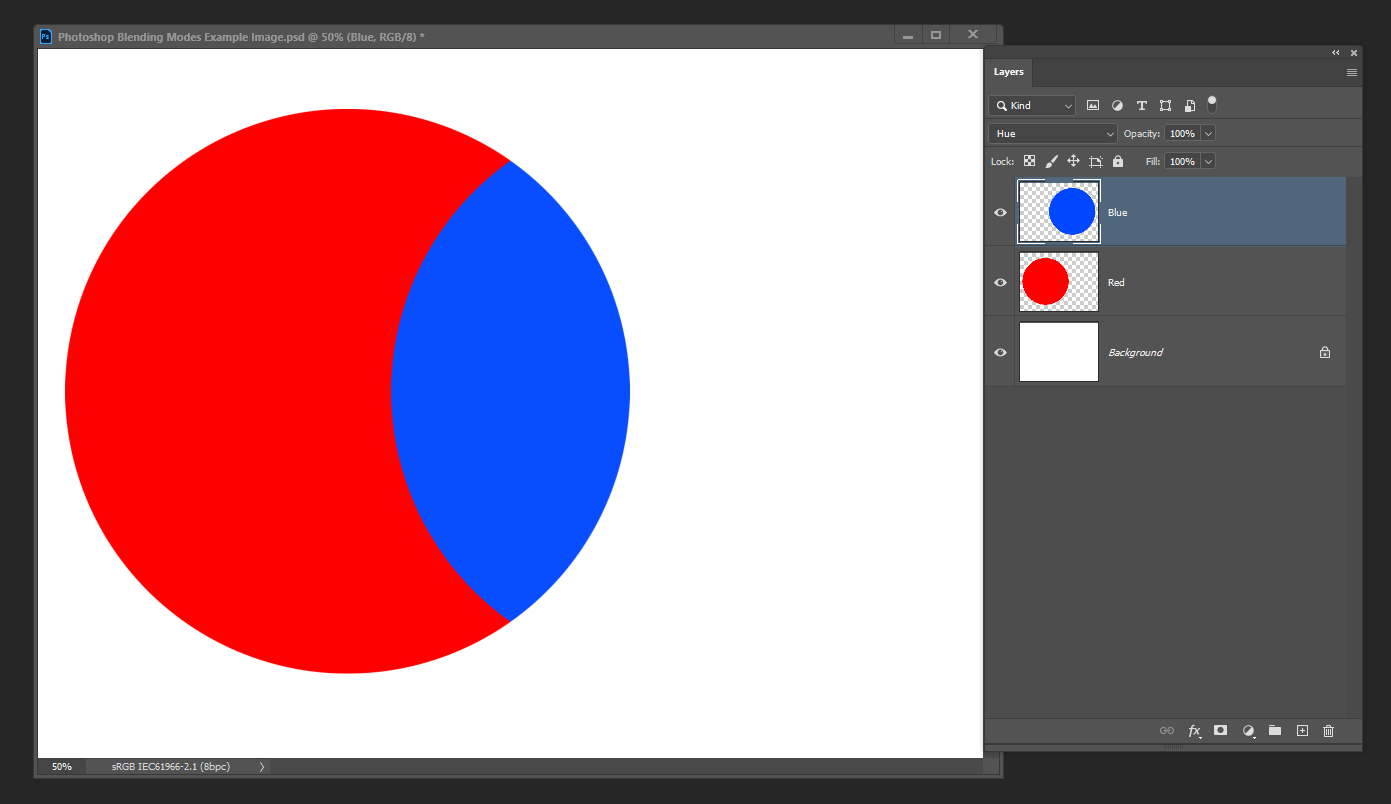
The hue blending mode preserves the luminosity and saturation of the base pixels while adopting the hue of the blend pixels. Hue can be used to change hues in a layer while maintaining the tones and saturation of the original.
The saturation blending mode preserves the luminosity and hue of the base layer while adopting the saturation of the blend layer. A black-and-white blend layer also turns the image into greyscale because none of the pixels in the luminosity layer have saturation.
The Colour Blending Mode preserves the luminosity of the base layer while adopting the hue and saturation of the blend layer. The colour blend mode is the ideal Blending Mode for colouring monochromatic images.
Also, colour, along with the luminosity blending mode, is the second pair of Commuted Blending Modes.
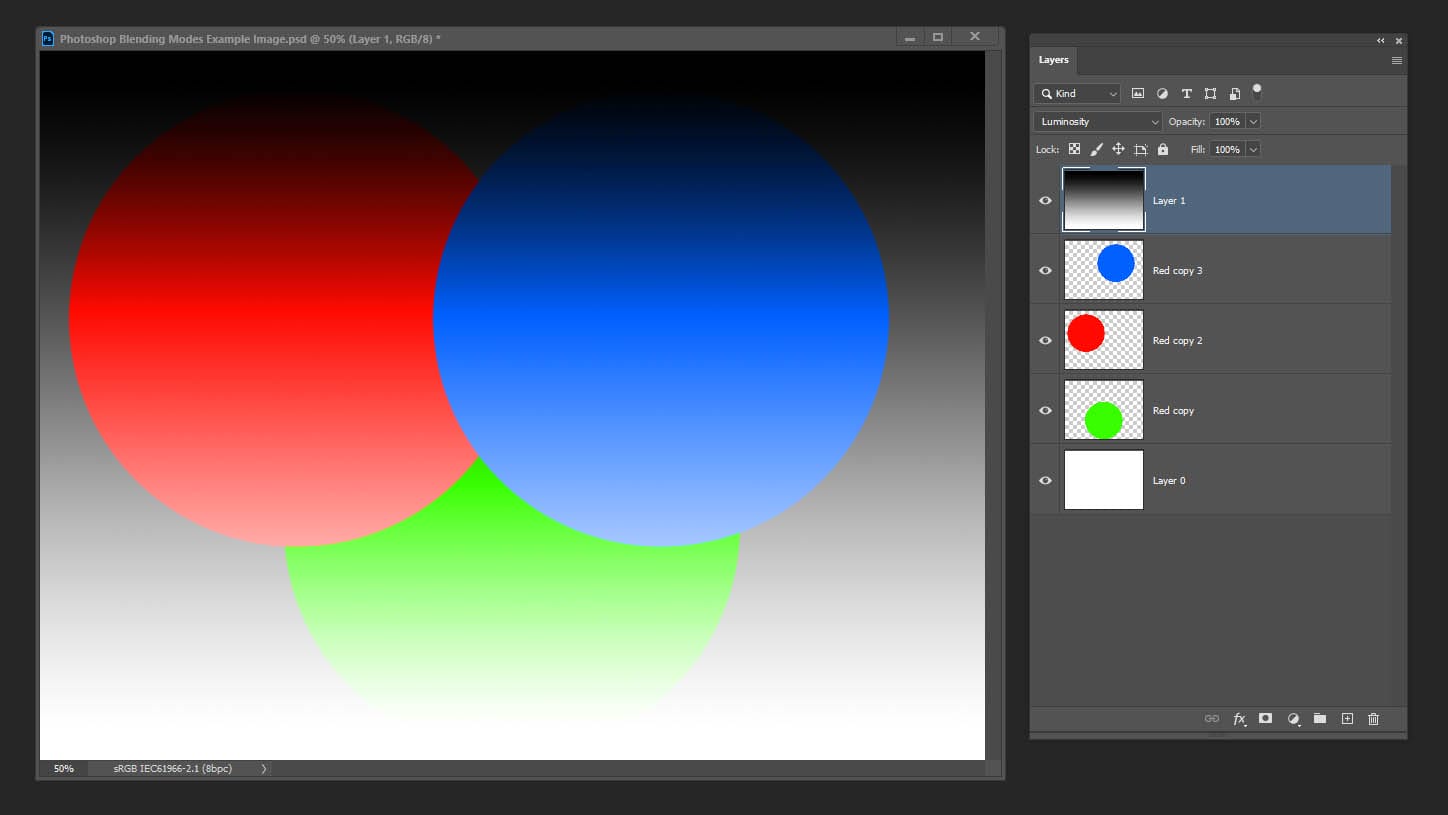
Luminosity preserves the hue and saturation of the base layer while adopting the luminosity of the blend layer.

Shooting sunsets using amazing 5-in-1 magnetic lens filters from Kentfaith, the 1st choice for photo & video products.

Popular memory cards for photography – what’s the best SD card for your digital camera? Choose the right capacity and class speed in our guide

Discover the BEST way on how to clean a camera sensor using swaps, rocket blowers and pencil brushes to give your shots a dust-free finish!
Learn the basics of photography – fast – with our FREE 60-Second Photographer online course. Each class is short and sharp with simple, actionable steps that give you immediate results.
x 30 lessons

© iPhotography™
Become a confident and competent photographer in less than 30 minutes!
Before you leave, make sure you’ve secured your FREE online photography course (worth £29.99)
Each class is just 60-seconds or less making it the fastest and easiest way to learn photography!