It’s not something photographers consider deeply when starting out, but colour spaces are important. Choosing the correct colour space for your photography, either when shooting, or editing, can change the final look of your image, whether it’s being printed or posted online.
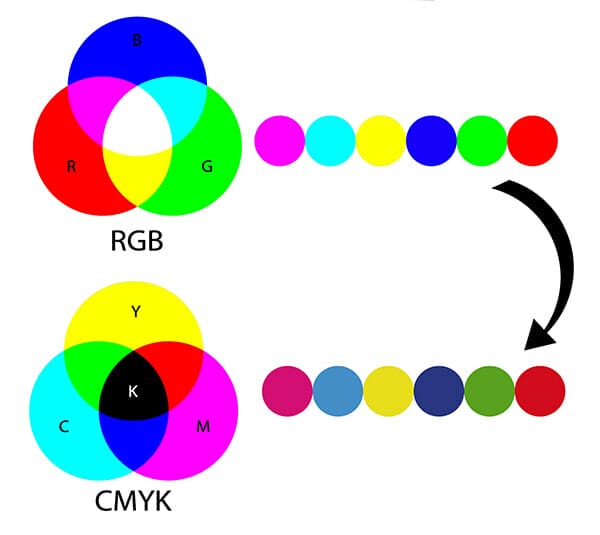
Colour spaces are the range of available colours that can be used to create an image. The space covering all the included colour in each space is referred to as a gamut.
Some colour spaces have wider gamuts than others, meaning they have more colours and tones from which to render the view of your image.
Depending upon where you want to display your image (print or digital display) then you’ll need to choose the correct colour space in which to show off the best colours in your photo.
Your camera, computer monitor, and mobile devices generally have a different colour space to printers. It’s good to know which space you shooting, editing and viewing (or printing) your photos in.
The 4 most common colour spaces currently available are sRGB, Adobe RGB, ProPhoto RGB and CMYK. But all render colour a little differently depending upon the tones included in their profiles.
For example, JPG photos can contain up to 16 million colours, though but no single colour space will display all those colours. Instead, each space allows for you to use a wider or smaller range of those 16 million colours in the photo.
Given the size of these spaces it means photos taken in Adobe RGB for example, have more vibrancy, whereas sRGB will have more subtle tones.
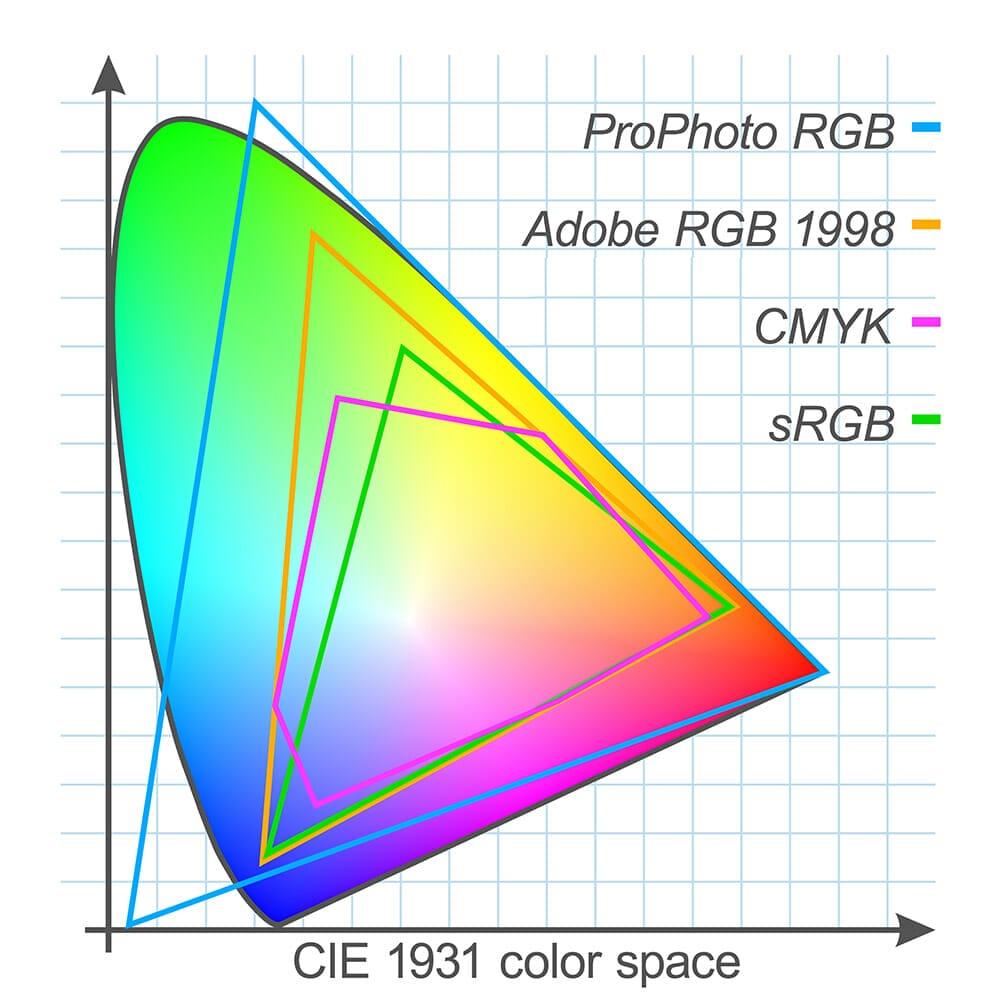
Adobe RGB was created by Adobe Systems Inc. in 1998 to improve the gamut range of sRGB.
Adobe RGB is a larger colour space which results in more vibrant images. Another benefit is that you can convert images to sRGB for monitors (and online use) Adobe RGB is a space that’s sometimes too big to be displayed on an average screen.
sRGB means Red, Green and Blue. Though it’s the smallest colour space, it’s still the most used and supported by the online world.
sRGB is the standard colour space for most web-based images. But remember as it is a smaller colour space, so colours are less vibrant. Plus because of the small gamut, you can’t convert to wider colour gamuts such as Adobe RGB or ProPhoto RGB later on.
ProPhoto RGB retains a colour space larger than sRGB and Adobe RGB, in fact it’s even larger than what our eyes can see.
It was designed for specific Kodak printers to render colours. But the downside to this is that only very specific high-end inkjet printers are able to print using ProPhoto RGB files.
You can still convert ProPhoto RGB spaced files into sRGB and Adobe RGB. But remember that pretty much no digital screens can display the full potential ProPhoto RGB.
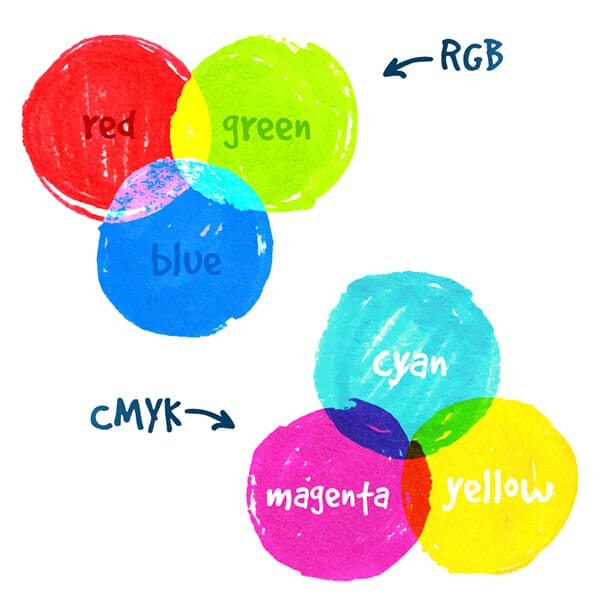
The CMYK colour space works in the opposite way to Adobe RGB. In the printing process the inks subtract brightness from white (cyan, magenta, yellow and black are known as subtractive primaries) by layering cyan, magenta, yellow and black to achieve a certain hue.
CMYK is a popular choice amongst photo printers but it’s starting to gain competition from sRGB which we’ll discuss later.
If you like to shoot RAW, it makes no difference because a RAW file is an uncompressed file that has no colour space until it’s edited.
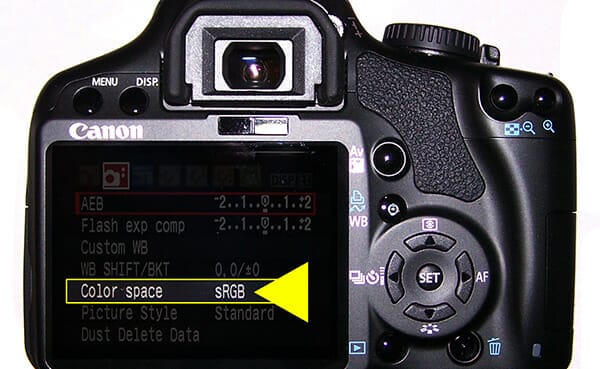
It is possible to choose a colour profile in-camera (typically Adobe RGB or sRGB) but this only affects the image preview but not the file itself (if you’re shooting in RAW).
If you are shooting in JPEG though it’s important to think about what you want to do with the images afterwards, before you shoot. Are you going to print? Or prefer to post online? If you’re unsure shoot with the largest colour space available to your (Adobe RGB for most as you can always convert down to sRGB later, but not the opposite way).
Even though we said that ProPhoto RGB is the largest colour space, that’s not an option available to shoot on most digital cameras. Instead opt to shoot in Adobe RGB.
Did you know that most high-end printing companies use Adobe RGB monitors because they include all the colours that appear in the CMYK colour space (handy!)
It’s sensible to make sure that your monitor is displaying colours using the Adobe RGB space so that you can edit your photos accurately.
It is possible to get an sRGB monitor but remember due to the size of this colour space you’ll never see an accurate representation of what your colours will look like when printing photos unless you are always sending your photos to companies that print using sRGB printers.
Ultimately it’s best to check with your printers (or your home printer) which colour space it uses to print photos.
Printing an image that’s saved in Adobe RGB (a large colour space) but it the printer is using CMYK (a small colour space) can lead to dull-looking images.
sRGB is the best profile for posting images on the web. Some browsers can’t handle anything besides sRGB anyway.
Have you ever edited your photo, saved it and uploaded it to the web – and it’s come out all flat? It’s because you haven’t changed your colour profile to the right one for your final destination.
When using Photoshop simply use the EDIT>CONVERT TO PROFILE option. It tends to be a better conversion rather than EDIT>ASSIGN PROFILE tool as the later causes an unwanted shift in tones.
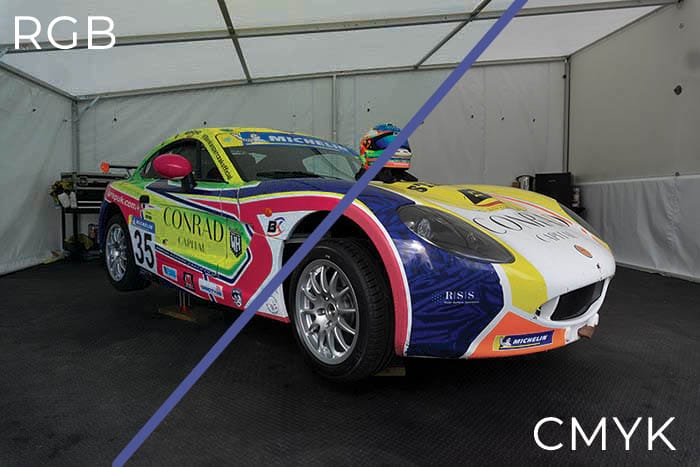
You’ll see a significant jump in colours, especially in yellows and reds when changing from Adobe RGB to CMYK for example.
Hopefully the idea of colour spaces is a little clearer and more understandable for you now if you’ve never investigated it before. Don’t forget to check out our other amazing iPhotography photo guides. Packed with helpful tips and inspiration to improve your photography in understandable, practical steps.
Discover the BEST way on how to clean a camera sensor using swaps, rocket blowers and pencil brushes to give your shots a dust-free finish!
Capture the magic of the night with our beginner’s guide to night photography. Learn tips and techniques for stunning results.
Master the art of solar eclipse photography with expert tips on equipment, settings, and precautions for stunning celestial images.
Learn the basics of photography – fast – with our FREE 60-Second Photographer online course. Each class is short and sharp with simple, actionable steps that give you immediate results.
x 30 lessons
© iPhotography™
Become a confident and competent photographer in less than 30 minutes!
Before you leave, make sure you’ve secured your FREE online photography course (worth £29.99)
Each class is just 60-seconds or less making it the fastest and easiest way to learn photography!