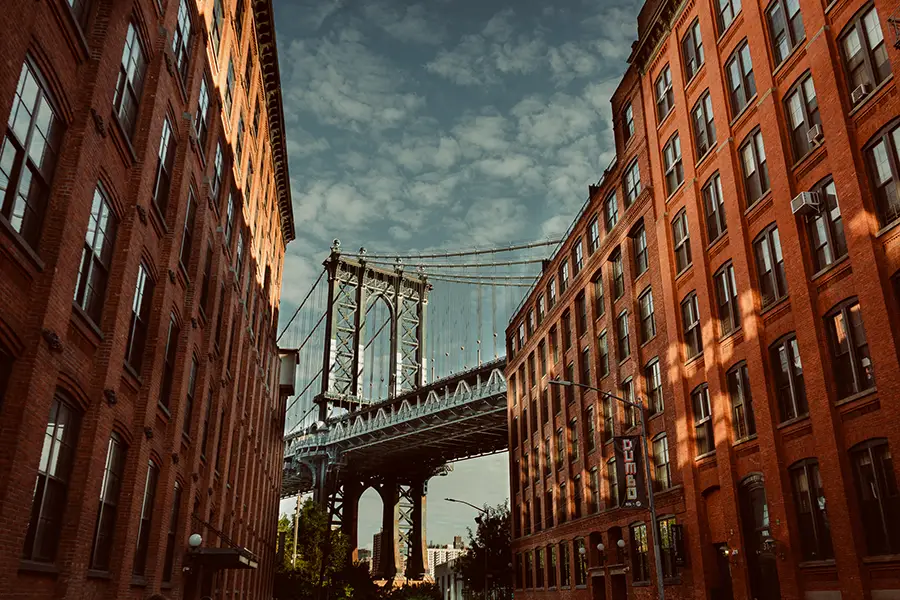
If you’ve ever been to New York, or you’re planning to, you need to visit Brooklyn. Taking photos of New York isn’t a completed project until you’ve crossed the Easy River and discovered DUMBO.
This is the first story from our iPhotography New York workshop. We visited Brooklyn and spent time photographing the iconic bridges as well as the beautiful cityscapes looking across the river to Manhattan.
DUMBO is a very popular area of Brooklyn, given its proximity to Manhattan, and spectacular views, it’s become a hotspot for tourists and photographers. The best time to visit DUMBO is early.
I arrived around 9:30 am and it was already busy. You’ll have to contend with finding a good place to set up your camera around all the tourists as well as the traffic (sometimes they close the roads off, but there are also cars parked constantly on the streets, making a clean, empty shot of the Manhattan Bridge hard to capture.
DUMBO stands for Down Under the Manhattan Bridge Overpass and is best viewed at the cross street of Washington and Water Street facing north. There are a few sturdy boxes to stand on which elevates you above the street shooters and gives photographers a slightly better view of the Manhattan Bridge.


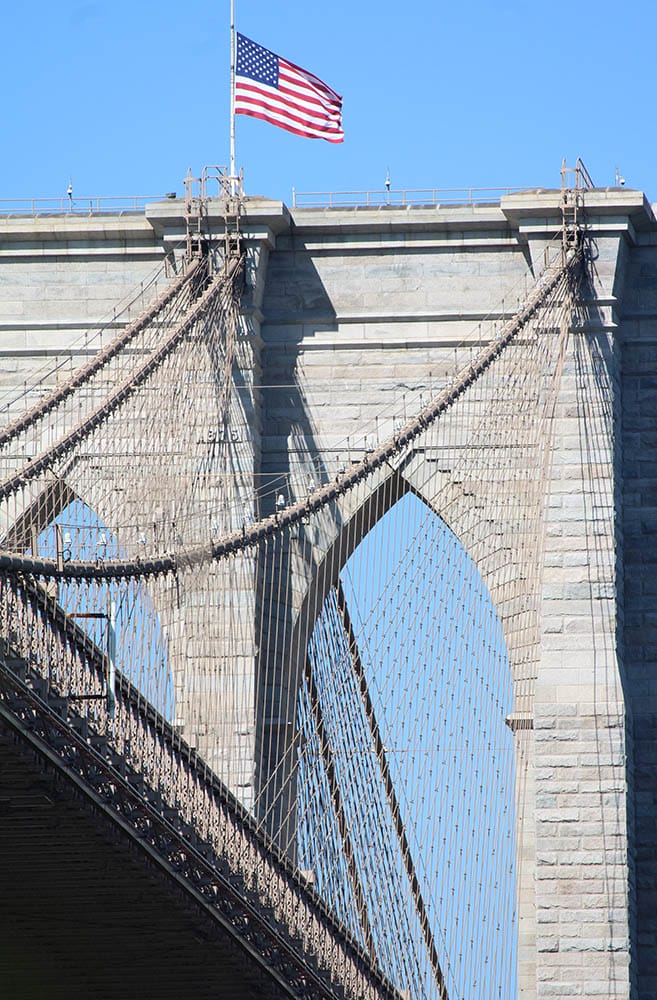
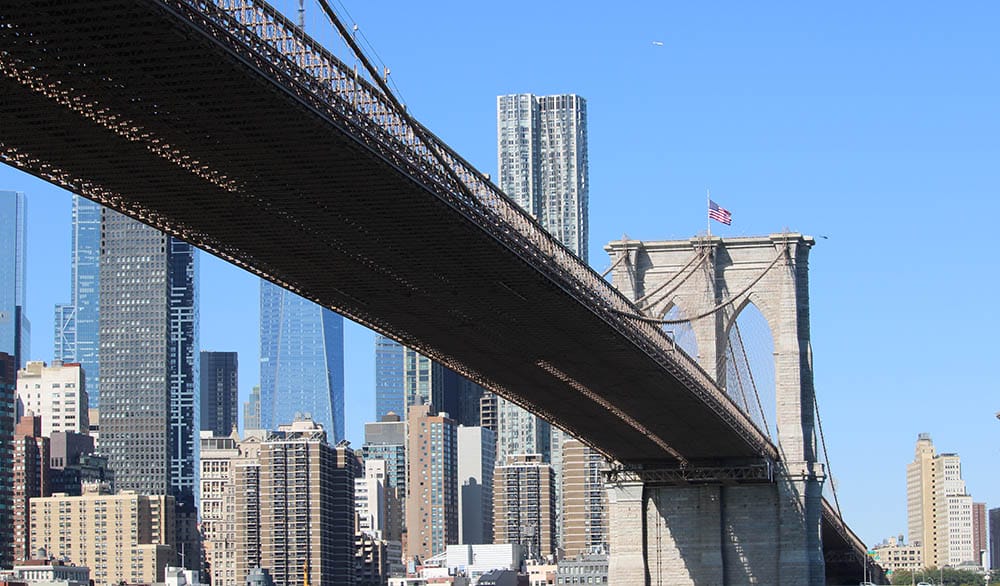
The bridge has been immortalised in cinematic history appearing on the poster for the movie ‘Once Upon a Time in America’ (1984) and its popularity has only grown over the years.
You can either decide to include the street level furniture, tourists and cars in your DUMBO photo or tilt the camera up to shoot the bridge alone. Given the position of the sun, on a bright sunny day you’ll have to battle with strong shadows on the buildings, making an even exposure tricky.
I’d suggest opting to embrace the high contrast look in black and white or try bracketing so you can even out the difference and get a better dynamic range in the photo.
If you’ve got a 200mm lens (or longer) then look out for finding a spot where you can photograph the Manhattan Bridge with the Empire States Building also included through the arch of the lower stanchions. You won’t see it as obviously with a wide lens.

After we’d taken enough photos of the Manhattan Bridge, we moved north into Main Street Park where you get a closer view of the bridge but also a great vista across the East River of the Manhattan skyline.
While it was a bright and sunny day when I visited, I think if you waited until sunset, you could capture the long shadows and warm golden colours reflecting off the skyscrapers.
Either way, you’ll be in a prime spot for shooting New York cityscapes from the mound in Main Street Park which elevates you above the tourists and allows you to include some of the beautiful foliage lining the park.
The key to getting cityscapes and skylines looking perspectively accurate is to take your photos straight-on at the opposing skyline. Don’t angle your camera, stand directly opposite so that the shape of the buildings is as accurate as possible. Distortion can happen when shooting at acute angles with wide lenses, so it’s best to keep the camera parallel to the view.

When we were in Main Street Park, the group of photographers I was leading in this New York workshop were given a challenge…
…5 different photos of the Brooklyn Bridge, captured at different focal lengths and angles…
The aim of the photo challenge was to force their creative minds to look for different elements about the bridge. It’s easier to fall for the iconic views of any landmark, but it takes a conscious mind to seek out the shots that others don’t get and thus capture something unique.
I saw everyone take to the challenge so well. They all moved off to find different viewpoints and angles. It was interesting to see other photographers at work and how they all wanted to capture unique photos that no one else had.
I think it’s important to challenge ourselves as photographers from time to time. It stops us being lazy and only capturing the shots that everyone expects from famous landmarks and iconic views.
Try it for yourself next time you’re out. Give yourself 10 minutes to take different photos of the same location. Avoid the obvious and look closer at the location’s smaller elements.


Further south of Main Street and Brooklyn parks are the old foundations of Old Pier One. This is another iconic view of the Manhattan cityscape that I wanted to visit in this workshop.
The aim was to use the old wooden foundations as sequential leading lines out across the river towards the Manhattan skyline. We found two different spots to take this shot. Both worked really well to draw the attention to the skyscrapers in the background while giving opposing foreground interests; one looked spacious and allowed the negative space between the rows of wooden foundations to give depth.
The second spot filled the foreground with the foundations and allowed them to taper to the background, giving a contrast between the old and new of New York industries.
To simplify the shot, we decided to use ND filters to shoot longer exposures and calm the movement of the water. We had to time our shots carefully as there was a lot of traffic on the East River from jet skis to ferries, pleasure cruisers to barges. It was quite a challenge to make sure only the water looked blurred and nothing else.

These photos of New York from Brooklyn and the Manhattan Bridge were just the first part of our workshop trip. Look out for the next stories from our adventure. If you like the idea of joining us on a iPhotography photo walk or workshop keep an eye out on our dedicated booking page to find out when the next event is.
Photo walks are perfect for photographers of all experience levels. They give you the opportunity to meet new photographers, share tips, get help and better understand your camera and what makes great photos.
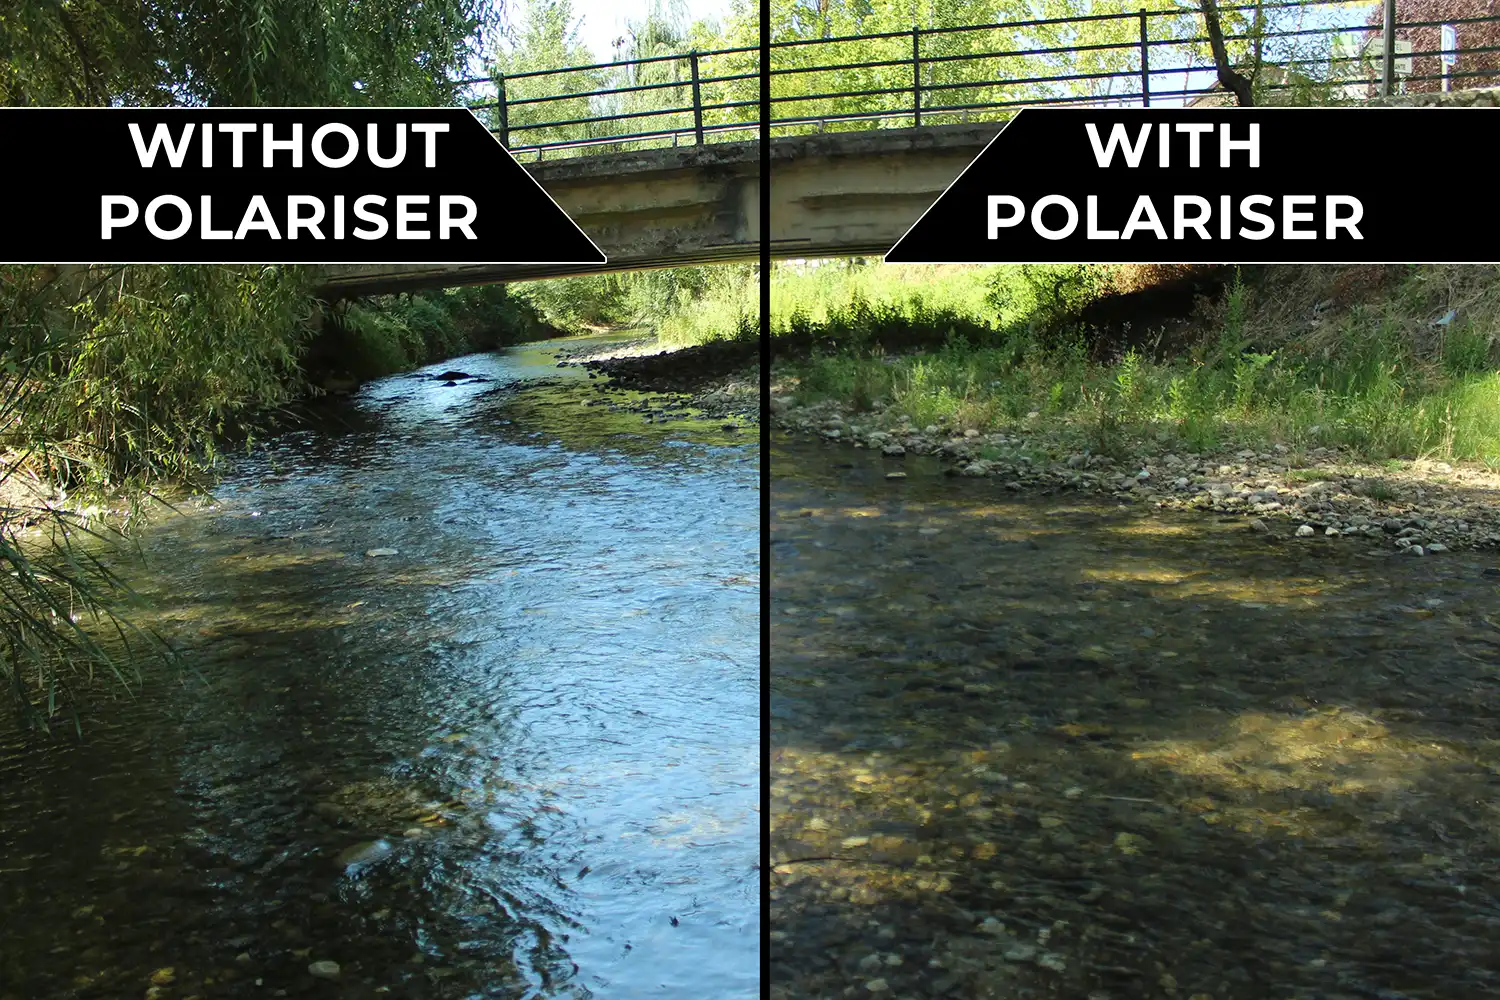
Find everything you need to know in this guide to polarizer lens filters for photography. How do they work and which is the best to buy?

Discover TOP features in the Lightroom CC mobile app with this guide for enhancing your photo editing skills. For desktop and tablet too.

Shooting sunsets using amazing 5-in-1 magnetic lens filters from Kentfaith, the 1st choice for photo & video products.
Learn the basics of photography – fast – with our FREE 60-Second Photographer online course. Each class is short and sharp with simple, actionable steps that give you immediate results.
x 30 lessons

© iPhotography™
Become a confident and competent photographer in less than 30 minutes!
Before you leave, make sure you’ve secured your FREE online photography course (worth £29.99)
Each class is just 60-seconds or less making it the fastest and easiest way to learn photography!
