 Stephen Walton
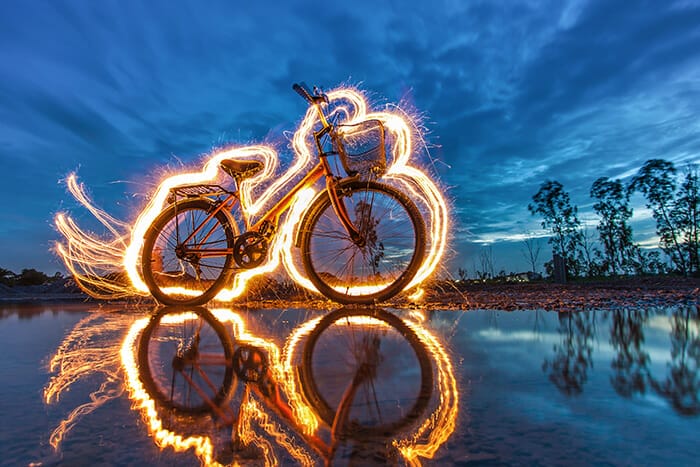
Painting with light is what photography is all about – literally that’s the translation of the word! Photographers put that term to the test by shooting in the dark to capture incredibly artistic and magical swirls of light. We’re going to show you a full light painting photography tutorial going step by step and making it easy for any beginner to follow along.
To get started with light paintings you’re going to need a few specific items – but they don’t have to be expensive.
Firstly, you’ll need a camera (obviously) but one with manual controls so you can change your shutter speed. All DSLR and Mirrorless cameras should have this function, and even some camera phones these days.
Unless you’ve got a friend to help you out then having a timer on your camera to start the shot is really helpful – we’ll explain why shortly.
Secondly, a tripod is required. It doesn’t have to be top of the range, just something that’s sturdy enough not to shake from a slight breeze.
And finally, a light. This could be as basic as using the torch on your phone or you could invest in a battery-powered LED panel if you’re shooting outdoors. Having a portable light source will give you more creative freedom.
Let’s keep this simple as a light painting can get really complex with multiple lights, different timings and stacking images etc. But in the first instance, you need to pick out a good location – somewhere that your camera is shielded from the wind.
Setting up from indoors pointing outwards is a popular trick a lot of light painting photographers try. It means the weather doesn’t affect the camera and cause any shake.
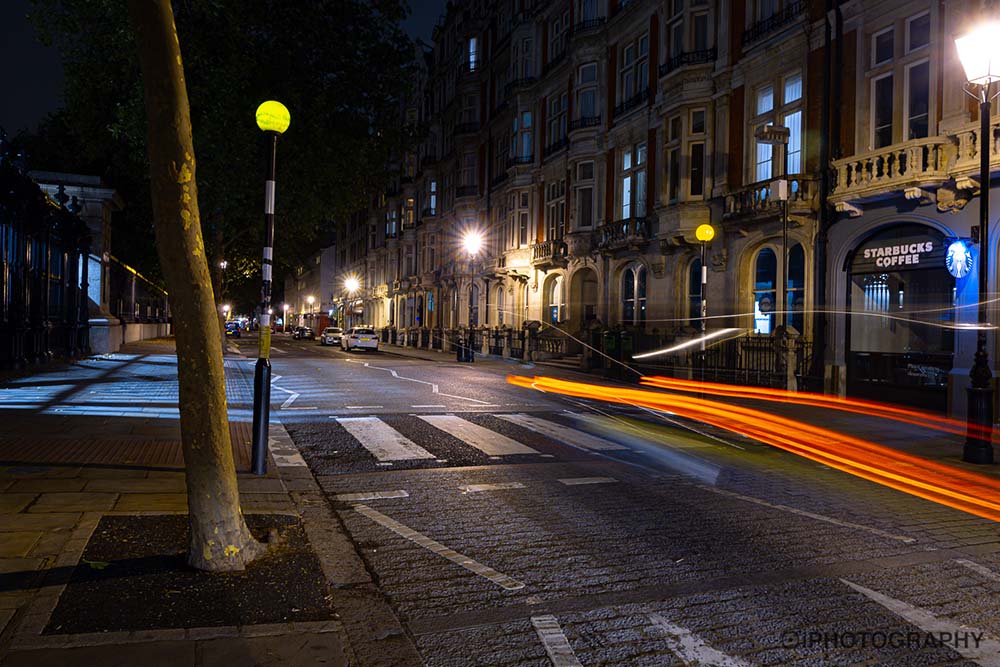
As you’ll be shooting in low light (a dark room or at night) then it’s still important to understand the composition. Even though the background may be dark, it may not be completely invisible on the final shot. Make sure whatever location you choose to set up for your light painting isn’t messy. You could start off in your back garden; it doesn’t have to be exotic when first practising your light paintings.
It’s also worth looking out for other lights that could end up in your shot. House lights, streetlights, car headlights – whatever they are they could be distracting (especially if they’re moving like car headlights). Position your camera in a direction that will put all the attention on your light painting and little else.

Now that the camera is pointed in the right direction, time to dial in those all-important settings.
Shoot in RAW – it’s going to give you way more flexibility when it comes to editing – in fact, always shoot in RAW if you’re unsure. It’s never a bad thing.
You can shoot in either manual (M) or shutter priority (S/Tv) mode for light paintings as you need full control over the shutter speed. If you’re using an iPhone for light painting, then look for a ‘pro’ mode to change the shutter speed.
The shutter speed determines how long your camera’s sensor is exposed to light for. The longer it’s exposed the more light that is captured and any movement of a light source that occurs while the shutter is open is captured too.
As with many things in photography it’s all trial and error as to what shutter speed you’ll need based on your light painting. We’ll look at problem solving shortly if your shot doesn’t look how, you want it.
Firstly, we’d recommend slowing your shutter speed down to ½ a second. This should give you enough time to capture a healthy amount of movement during the exposure.

If you’re shooting in S/Tv mode, then your camera will figure out what aperture and ISO you need to balance the exposure. But be aware that this could cause the ISO level to be raised so much you’ll end up with a grainy photo.
If you’re using AUTO ISO, then put an upper limit of around 3200 just to be on the safe side. Most cameras should be able to handle that comfortably and you can reduce noise appearance in editing later on to an extent.
Turn off your camera’s Long Exposure Noise Reduction setting (LE NR). The problem with it is that it will cause your exposure time to double in length. This is because the camera takes a second black exposure to help remove noise. But like we said before if your ISO level isn’t crazy high then the camera will be naturally controlling the noise levels anyway.

It’s not as hard as it may seem, but you’ll need to help your camera out as much as possible as it’s not perfect – no matter how much money you’ve spent on it!
If your friend is helping out and holding the light, then use a single spot C-AF (continuous autofocus) mode and get them to shine the light towards the camera in the position they’re going to stand. Focus on that light and either…
A. Keep your finger half-pressed on the shutter button.
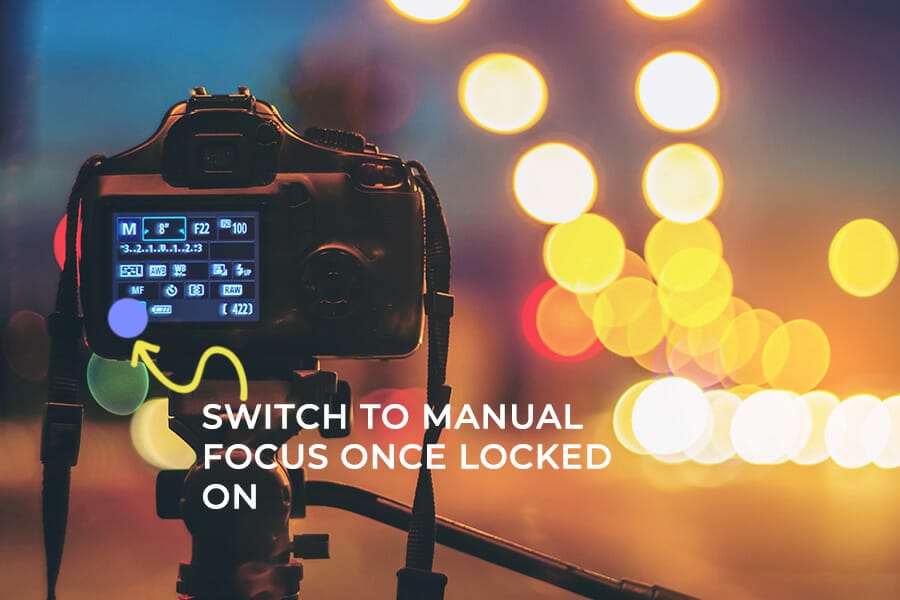
B. Switch your lens now to manual focus (MF) so that the focus position stays the same and you can take your finger off the shutter button for the moment. Make sure your friend stays in the exact same position though otherwise, they may move out of the focal plane.
It’s up to which method of focussing you choose as not all cameras/lenses have MF options.
If you have it available, BBF (back button focus) is an alternative option to try. This means you can keep focus locked without accidentally pressing fully down on the shutter before you’re ready.
If your lens has an IS / VR (Image Stabilization / Vibration Reduction) feature, then turn it OFF before you do light painting photography. The mechanics of the stabilisation can fool your camera during a long exposure resulting in a blurry image.
Just before you take the shot get your friend to start waving the light around in a pattern for starters.
It’s important they start before you press the shutter button. Otherwise, you’ll get a little ball of light in the final shot that shows the starting point – the aim is to make the light painting look like a fluid brush stroke.
We mentioned earlier that a timer on your camera is really useful, and this is why. It’s best not to directly touch the camera when you’re using a slow shutter speed. Even little touches can cause camera shake and spoil sharpness. Use a 2, 5 or 10 second timer to prep your shot.
This is also useful if you don’t have a friend to help and you need to be the photographer AND the model. Using a timer will give you time to start the countdown and get in shot.
You can also use a remote shutter release cable. That’s a little controller on the end of a wire you plug in to your camera to allow you take the shot while you stand away from the tripod – it’s like a bomb detonator (but with less disastrous consequences!)
Listen to the camera to start and end the shutter cycle so you know when to stop the light painting. It may take a moment or two to process as its processing a large amount of data (and even more so if you’ve shot a burst of photos).
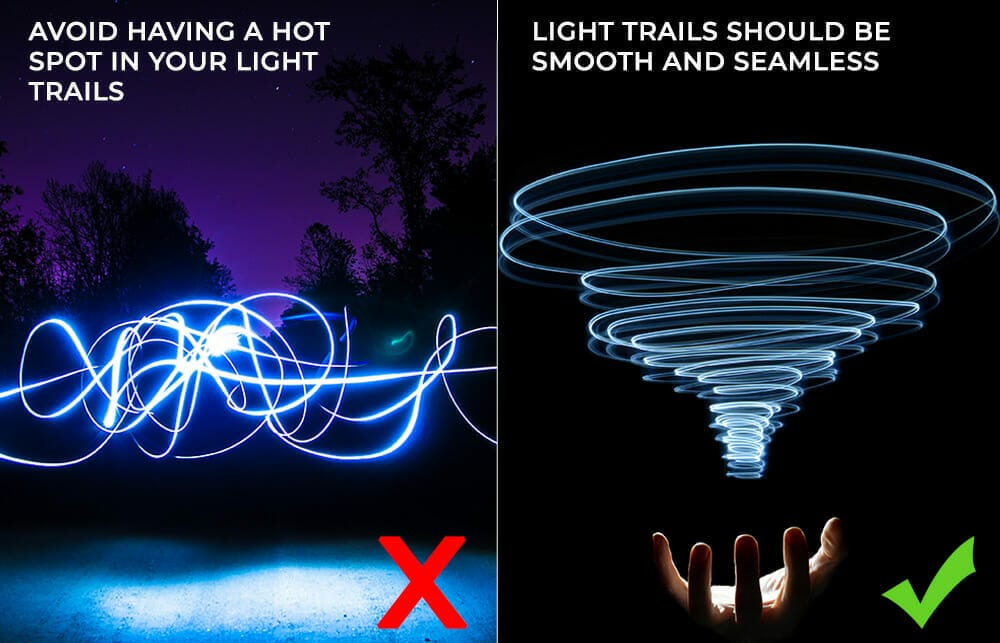
It’s important to zoom in on the back of your camera and assess the outcome. Look for that little ball of light which can occur at the start if your friend hasn’t moved the light before the shot was taken.
Also look for sharpness. To some degree it’s not going to be a crystal clear shot as movement with a slow shutter is meant to be blurred – it’s an oxymoron in truth to say ‘make sure it’s sharp’ but what we’re saying is make sure it’s clear enough to see the edges of the light painting clearly enough.
If you’re happy with the shot – don’t straight up and repeat it. What’s the point? If it worked then look to build on it and do something different next time. It could be a case of trying one (or more) of the following;
● Use a slower shutter speed and give more time to a more elaborate light painting.
● Instead of using light to draw a basic shape, it could be pointed at an object to illuminate instead.
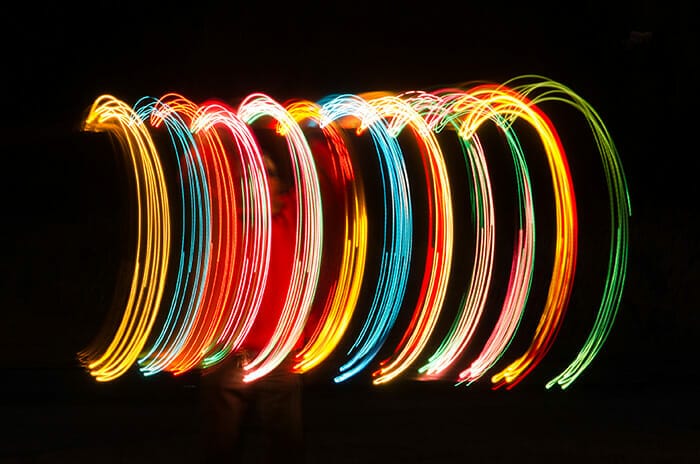
● Think about adding some colour to your lights. LED RGB light panels are perfect for this but even putting a small colour lighting gel over your phone’s torch would work too.
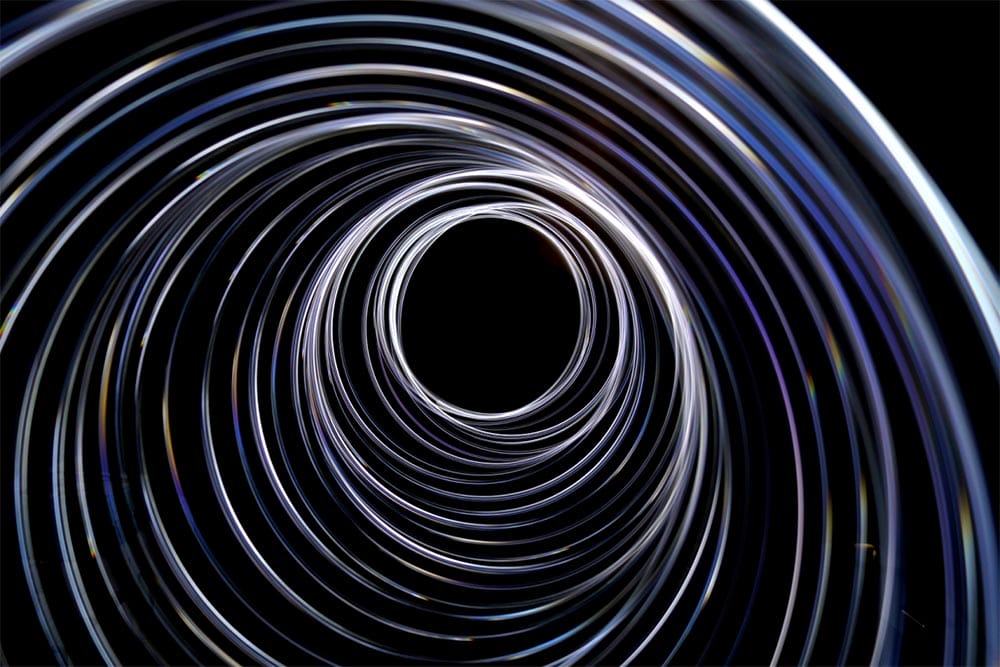
● Make the shapes you draw more elaborate; Names, spirals, boxes – think 3D!

Now despite following all these steps it’s possible that your shot doesn’t work out 100%. This is because light painting isn’t an exact science – it’s more fun that way!
If your shot looks too dark on the back of the camera then you need more light. You can do this by slowing your shutter speed down further. Maybe go from ½ second to 1 or 2 seconds instead.
Conversely, if your image is too bright – maybe the histogram is clipping in the highlights or the background is becoming more visible, then make your shutter speed faster. For example, take it from ½ second to 1/30th instead. But remind yourself (or your friend) there’s less time to draw the light painting so they need to move faster!
There is a huge world to unlock in light painting photography, we’ve only scratched the surface in this light painting photography guide. Have a look at some of the other techniques you can discover.
● Night Scenes
● Stars
● Light Trails
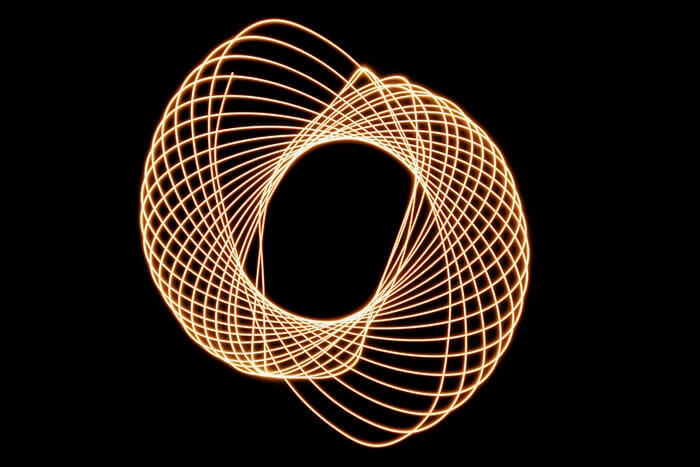
● Physiograms
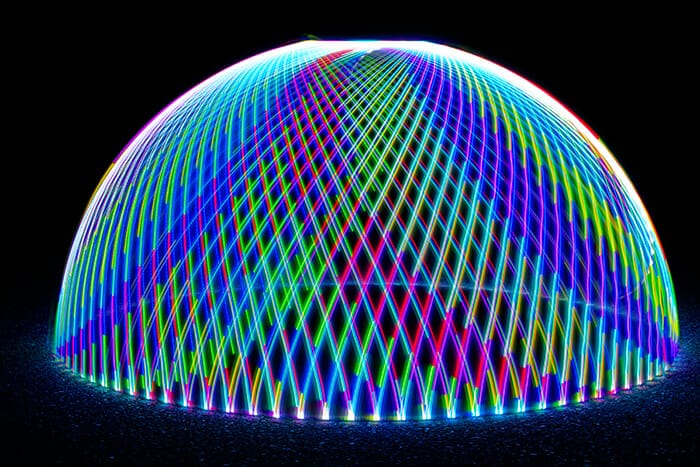
● Light Domes
● Light Tracing
They all work on the same principle of time and light – you just need the ability to slow down the shutter speed and what you do with the light source during that exposure time is down to your creativity.

Let’s just recap everything in this quick step by step guide for light painting photography. If you want to learn more creative light tricks, join our dedicated course.
1. Lock your camera onto the tripod or a stable surface so it will not move and produce any camera shake while taking the photographs during the long exposure.
2. Focus the camera on your subject using manual focus or C-AF.
3. In Manual or Shutter Priority mode set the shutter speed to your desired exposure time, but you need to experiment with this. Results will vary depending on your camera and the particular environment you are shooting in.
4. Set the camera to self-timer mode, so that when you press the shutter release, you don’t shake the camera too much. Alternatively, use a remote shutter release or app if your camera is Wi-Fi enabled.
5. Make sure that the subject does not go outside of the edge of the frame, by performing a check, so that the subject knows the size of their ‘canvas’.
6. Turn off any lights if you are indoors.
7. Release the shutter and tell the subject to begin painting.
8. Review the photograph.
9. Use the same procedure and repeat with different angles, lights, colours etc. Tweak your settings as necessary.

Discover TOP features in the Lightroom CC mobile app with this guide for enhancing your photo editing skills. For desktop and tablet too.

Shooting sunsets using amazing 5-in-1 magnetic lens filters from Kentfaith, the 1st choice for photo & video products.

Popular memory cards for photography – what’s the best SD card for your digital camera? Choose the right capacity and class speed in our guide
Discover TOP features in the Lightroom CC mobile app with this guide for enhancing your photo editing skills. For desktop and tablet too.
Shooting sunsets using amazing 5-in-1 magnetic lens filters from Kentfaith, the 1st choice for photo & video products.
Popular memory cards for photography – what’s the best SD card for your digital camera? Choose the right capacity and class speed in our guide
Learn the basics of photography – fast – with our FREE 60-Second Photographer online course. Each class is short and sharp with simple, actionable steps that give you immediate results.
x 30 lessons

© iPhotography™
Become a confident and competent photographer in less than 30 minutes!
Before you leave, make sure you’ve secured your FREE online photography course (worth £29.99)
Each class is just 60-seconds or less making it the fastest and easiest way to learn photography!