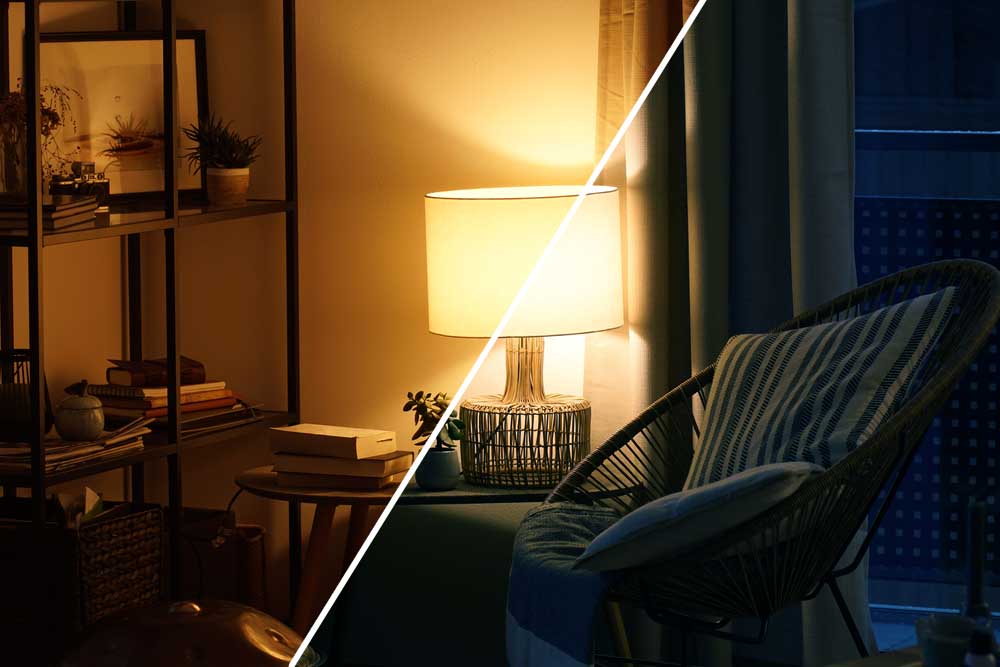
Have you ever taken a photo and wondered why the colours didn’t turn out quite right? Maybe the scene looked warm and cosy in real life, but your photo turned out with an unnatural blue tint. This may likely be down to the white balance setting of your camera.
The answer to achieving accurate and vibrant colours in your photos lies in understanding and mastering white balance which I’ll explain in this perfect guide for photographers.
Before we dive into the nitty-gritty details, let’s start with the basics. White balance is essentially your camera’s way of ensuring that the colours in your photos look true to life, just as your eyes perceive them.
Our eyes are incredibly adaptive, allowing us to see objects as having consistent colours regardless of the lighting conditions. But cameras, well, they need a little help to get it just right.
Why should you care about white balance? Because getting it right can make or break your photos. When you get white balance wrong, your photos can appear too warm (yellow or orange), too cool (blue or green), or even entirely out of whack. Accurate white balance helps your photos look more realistic, appealing, and professional.


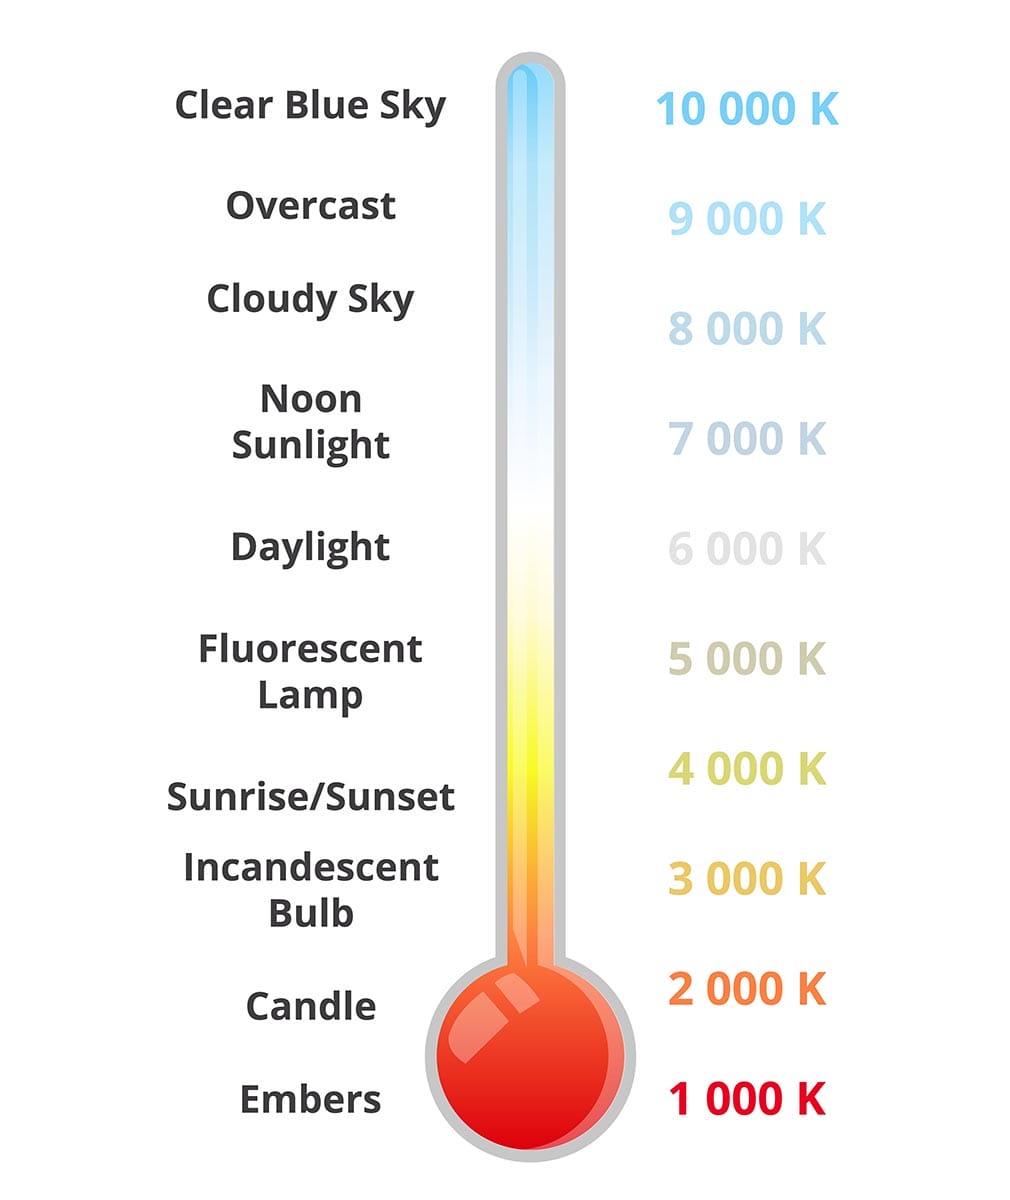
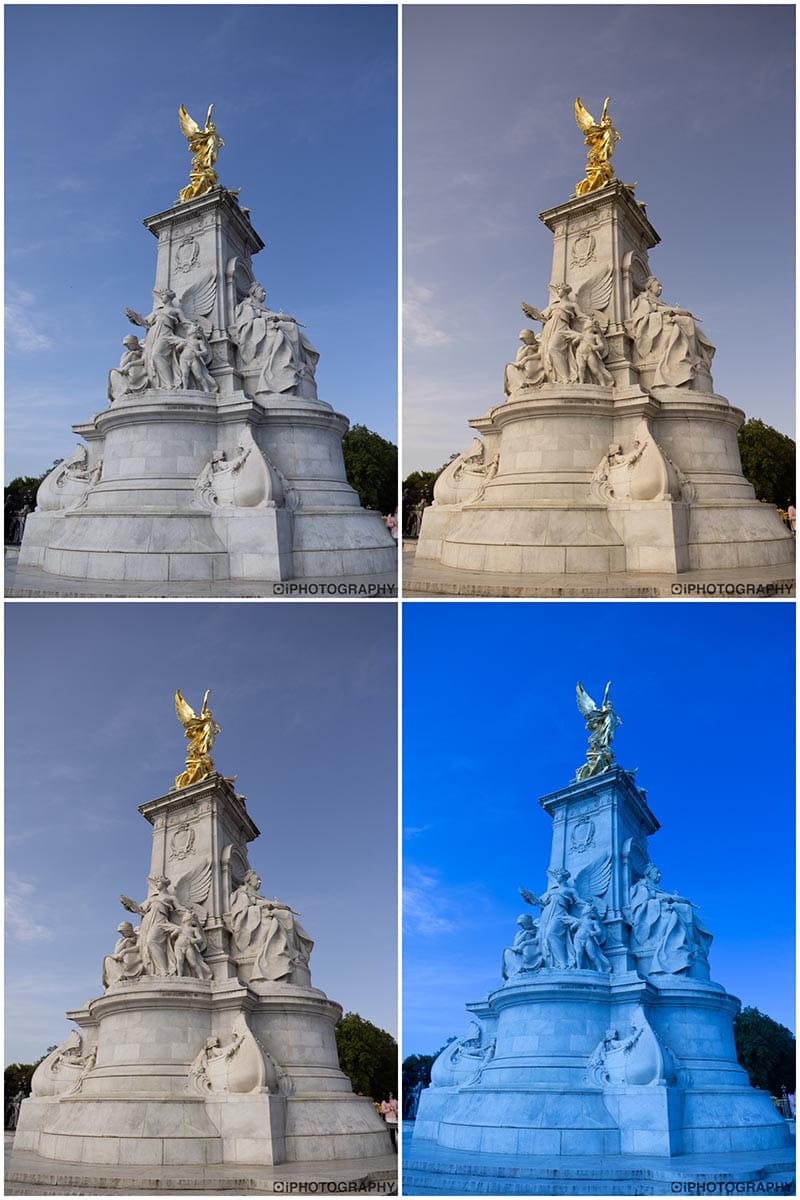
In photography, we measure the colour of light in units called Kelvin (K). The colour temperature scale ranges from cool (bluish) to warm (reddish). At the cool end of the spectrum, you have higher Kelvin values (e.g., 10,000K), which represent blue light, like the light from an overcast sky. On the warm end, you’ll find lower Kelvin values (e.g., 2,700K), resembling the warm, orange glow of a sunset.
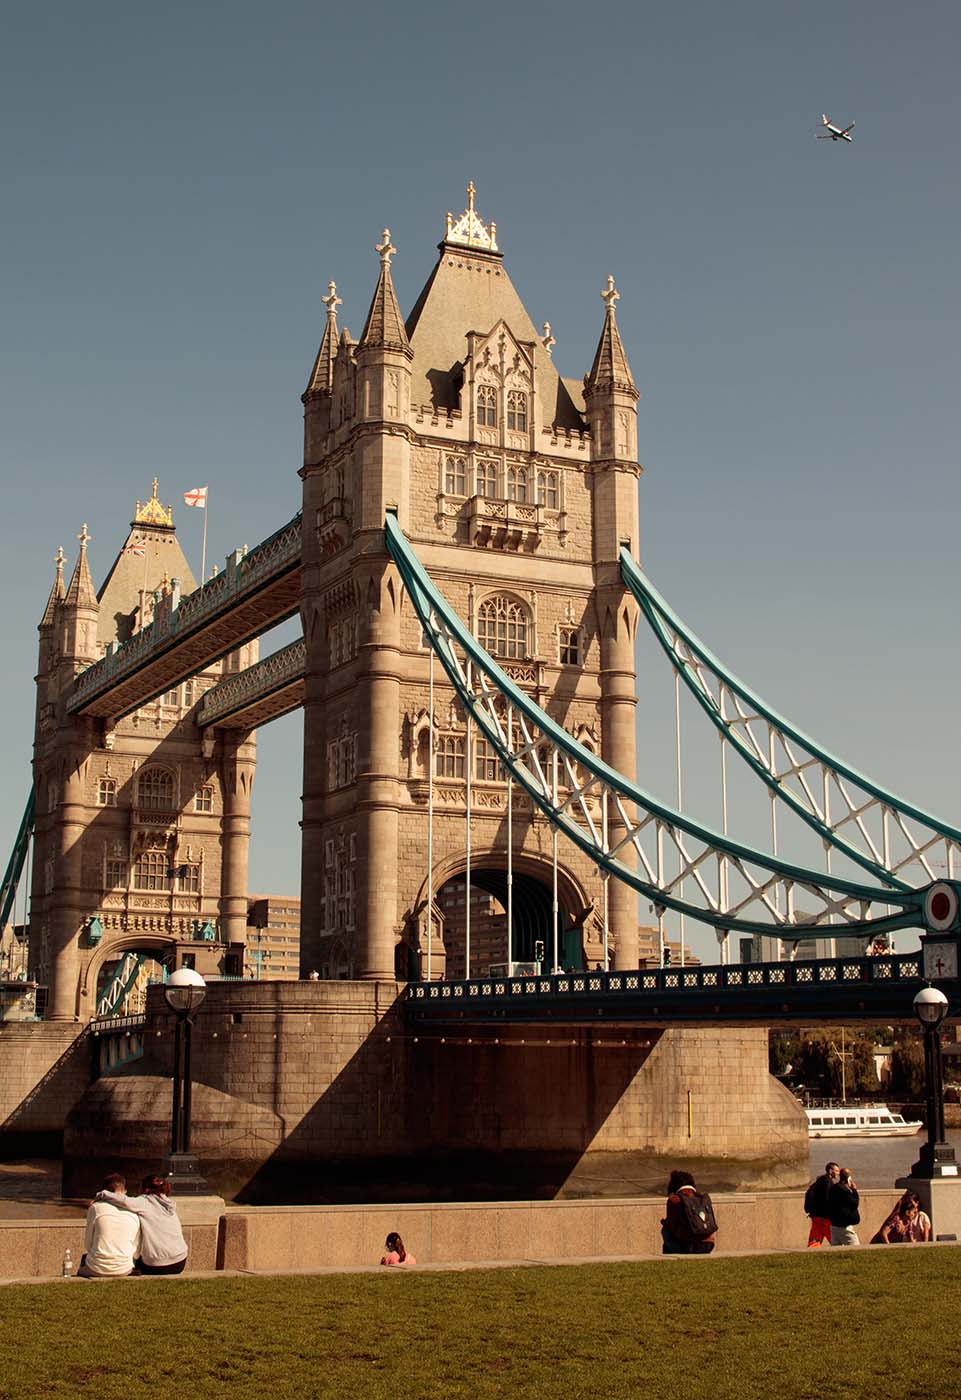
Imagine you’re taking a photo indoors under fluorescent lighting, which tends to be cooler in colour temperature. If your camera is set to a daylight white balance (around 5,500K), your photo might come out with a bluish hue because the camera expects the light to be warmer than it actually is. To correct this, you need to adjust the white balance to match the light source’s colour temperature.
Most cameras have an “Auto White Balance” mode that tries to guess the correct white balance setting based on the scene’s lighting conditions. While AWB can be pretty reliable in many situations, it’s not always foolproof, especially in challenging or mixed lighting environments. That’s where manual control of white balance becomes crucial.
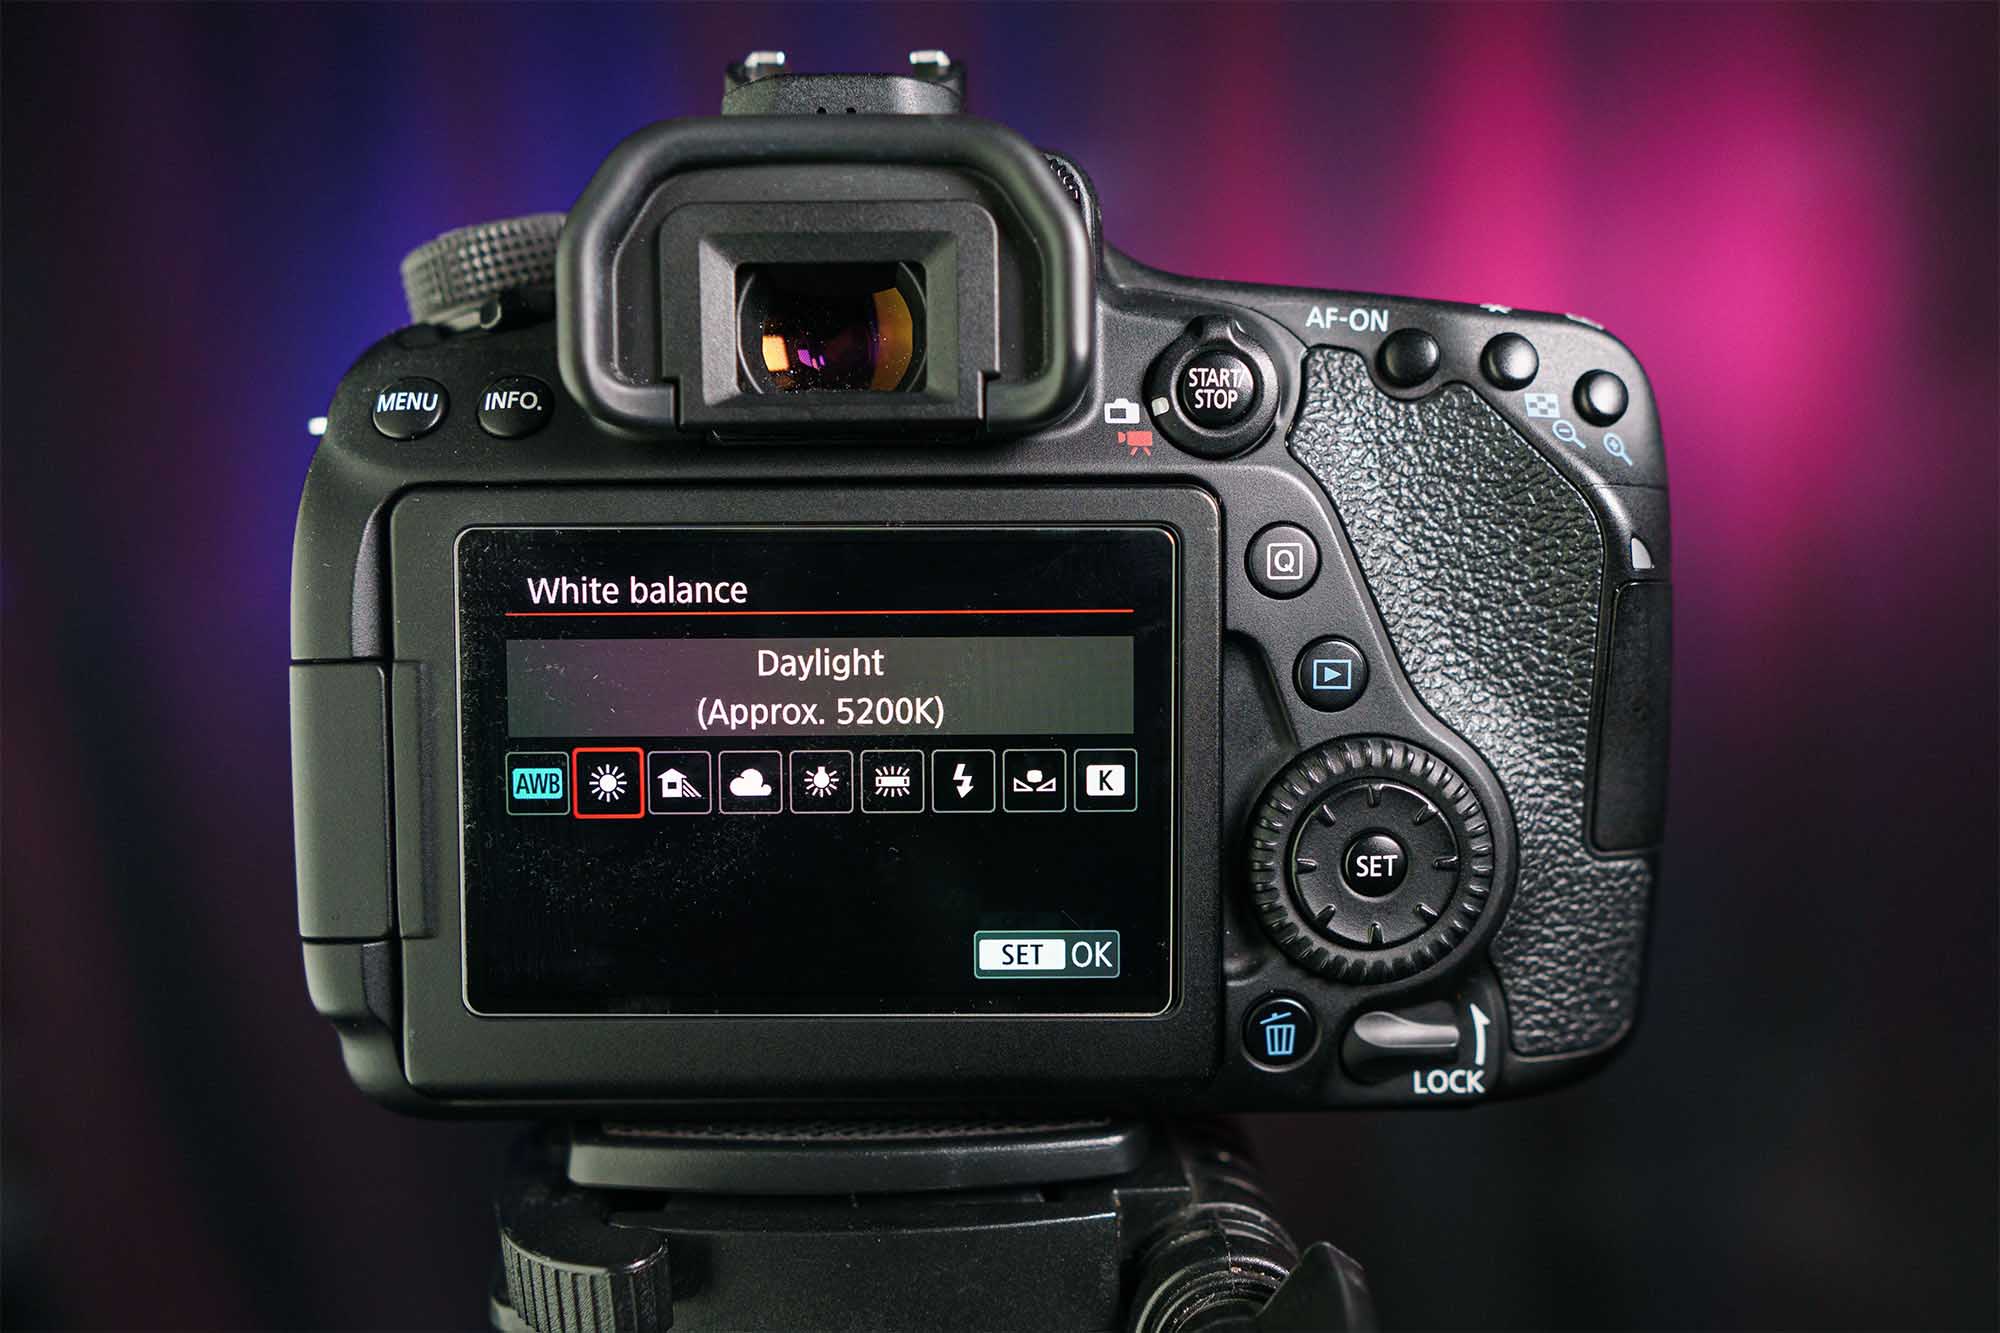
To gain full control over your white balance, switch your camera to a manual mode or a white balance preset.
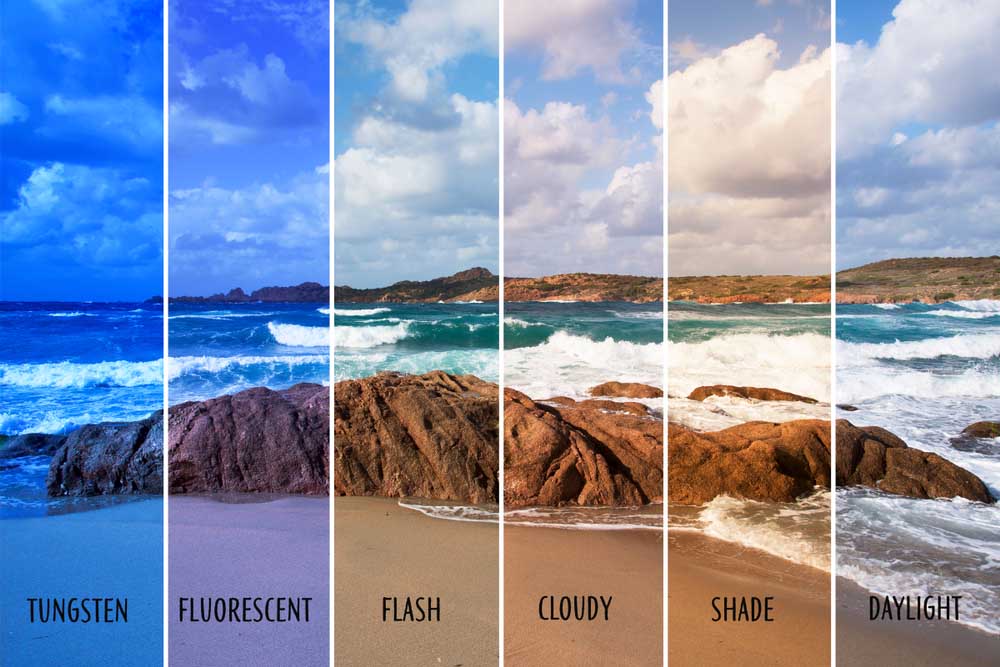
You’ll typically find white balance presets for common lighting situations like daylight, cloudy, tungsten (indoor), fluorescent, and flash. Choosing the right preset will help your camera adjust to the scene’s colour temperature.
Now that you have a basic grasp of white balance, let’s talk about what can go wrong when you get it wrong.
When your white balance setting doesn’t match the lighting conditions, it can result in unnatural colour casts. For example, if you shoot indoors with a daylight white balance setting, your photos may look overly blue. Conversely, using a tungsten white balance setting in daylight can make your pictures appear too warm or yellow.
Getting white balance wrong can also lead to a loss of mood and atmosphere in your photos. Think about a beautiful sunset on a tropical beach. If you don’t adjust your white balance to capture the warm, golden hues of the sun, your photo might lose that breathtaking ambiance and appear dull.
Inconsistent white balance can cause colour variations in your photos. This is particularly noticeable in portrait photography, where different skin tones can appear dramatically different if not captured with the correct white balance. Your subject might end up looking sickly or unnatural.
Now that you understand the importance of white balance and the problems it can solve, let’s explore how to adjust it in your camera settings.
As mentioned earlier, most cameras offer a range of white balance presets. These presets are designed to match common lighting conditions, making it easy to get accurate colours in your photos. Here’s a quick rundown of some common presets:
In addition to presets, many cameras allow you to set a custom white balance. To do this, you’ll need a neutral white or grey reference, such as a white card or even a white piece of paper.
Now that you know how to adjust white balance settings in your camera, it’s time to master some techniques that will help you make the most out of this essential photography skill.
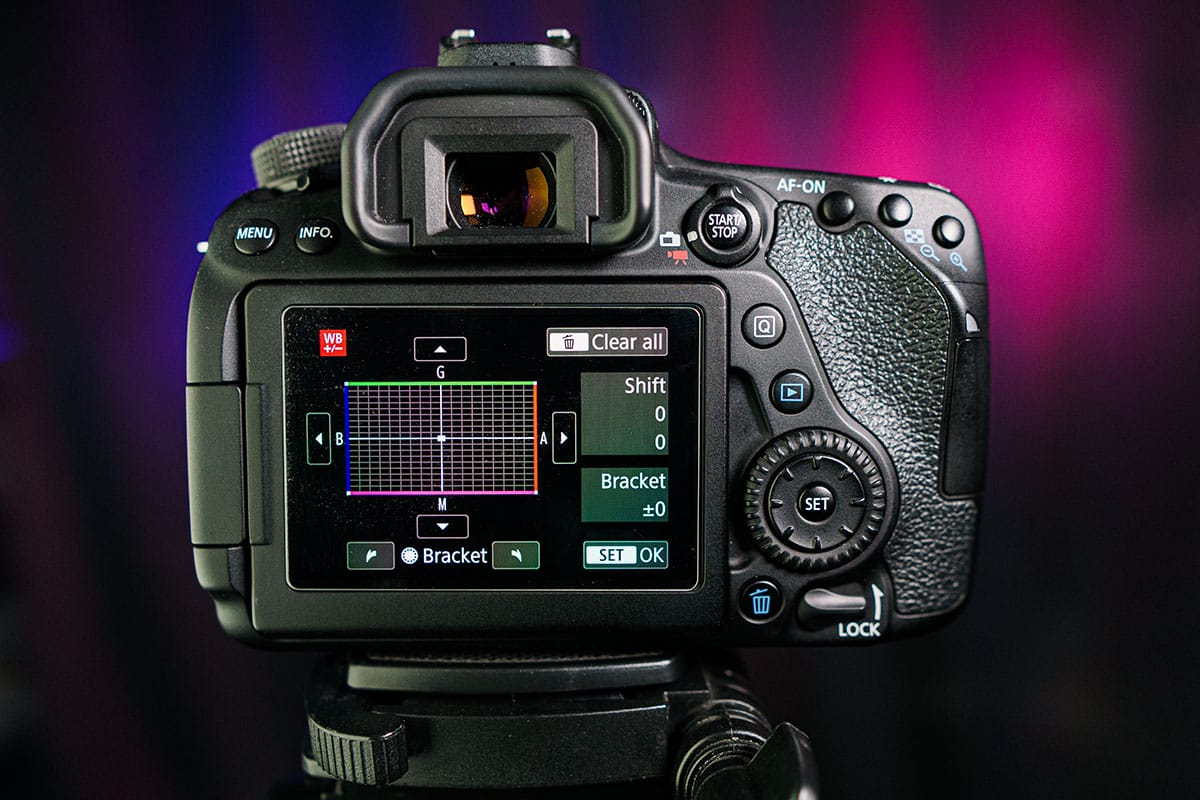
Bracketing isn’t just for exposure; you can also use it for white balance. This technique involves taking multiple shots of the same scene with different white balance settings. It’s especially useful when you’re unsure which setting will give you the best results. Later, during post-processing, you can choose the shot with the most accurate colours.
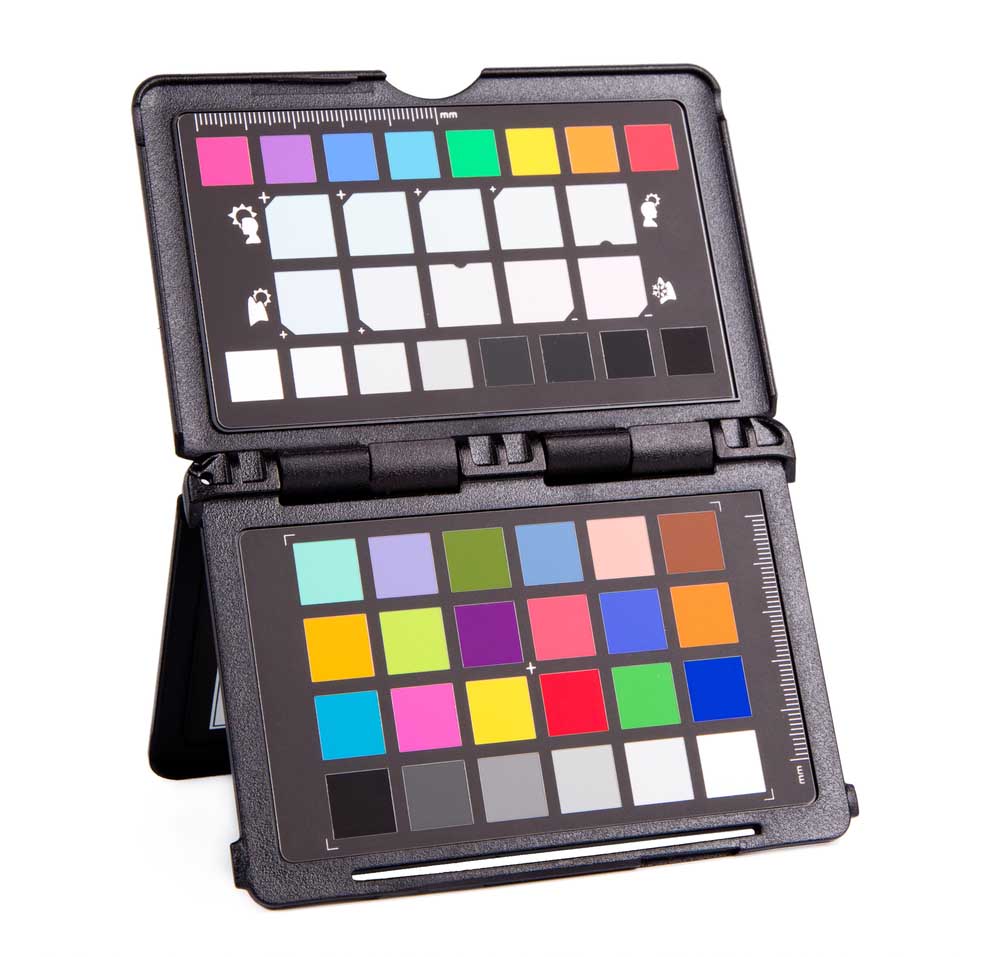
Professional photographers often carry a grey card or a colour checker with them to ensure precise white balance. These tools provide a consistent reference for white balance adjustments, ensuring that colours are true to life. Using them can be a bit more advanced, but they are invaluable for demanding photo shoots.
If your camera allows it, consider shooting in RAW format. Unlike JPEG, RAW files contain all the data captured by your camera’s sensor, including white balance information. This means you can adjust white balance during post-processing without any loss of image quality. It provides incredible flexibility and can salvage photos that might have otherwise been ruined by incorrect white balance settings.
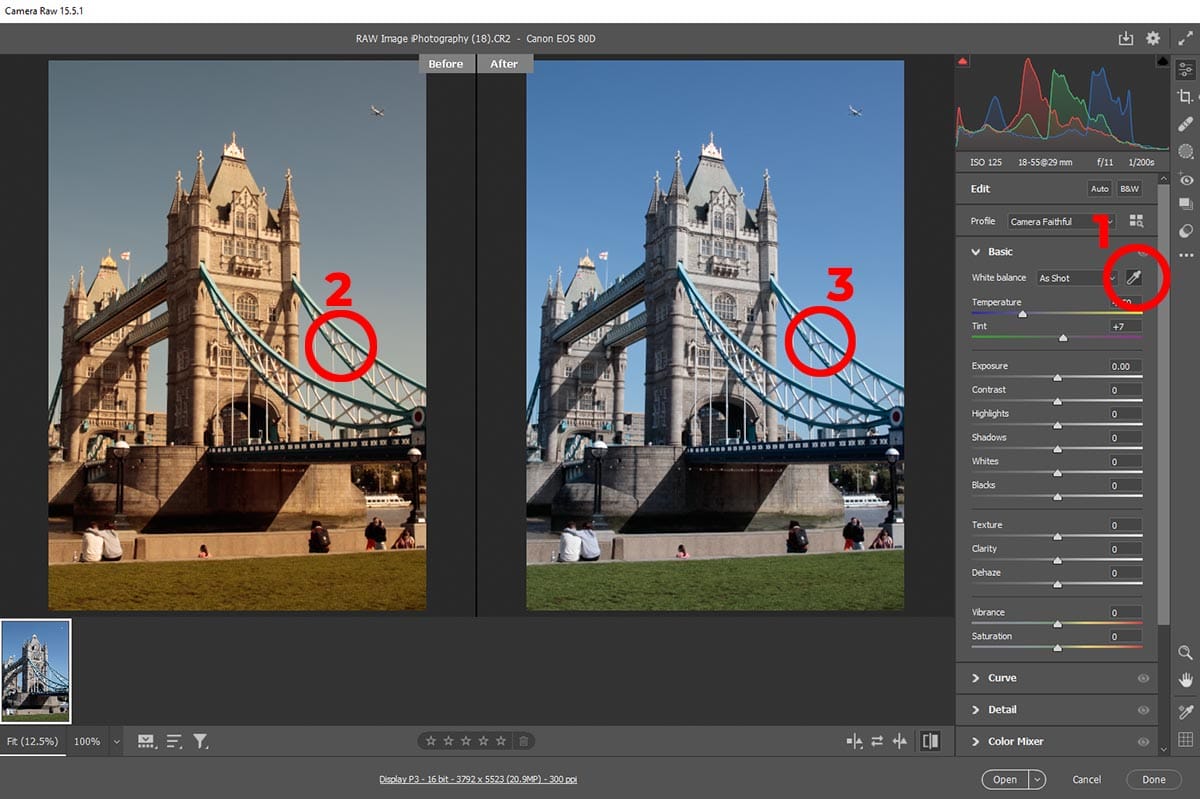
While getting the white balance right in-camera is ideal, there are times when you may need to tweak it during post-processing. Whether you’re shooting in RAW format or working with JPEGs, photo editing software provides powerful tools for fine-tuning white balance.
Firstly, most photo editing software, like Adobe Lightroom or Photoshop, offers white balance adjustment sliders. These sliders allow you to fine-tune the colour temperature and tint of your image. You can experiment with them to achieve the desired look and correct any colour issues that may have arisen during shooting.
Secondly, some editing software includes an eyedropper tool that allows you to select a neutral or grey area in your photo. The software will then adjust the white balance based on that selection, helping you correct any colour casts.
Lastly, many photo editing apps and software also come with preset filters or profiles designed to fix common white balance issues. These can be a quick and convenient way to correct white balance without diving deep into manual adjustments.
Finally, you’ve now unlocked the secrets of white balance, an essential skill for capturing accurate and vibrant colours in your photos. From understanding the science behind it to mastering various techniques, you’re well on your way to becoming a pro.
Remember, practice makes perfect, and don’t be discouraged by occasional mistakes. Photography is all about learning and growing, and now that you have a solid grasp of white balance, you’re ready to embark on a colourful journey through the world of photography.

Discover TOP features in the Lightroom CC mobile app with this guide for enhancing your photo editing skills. For desktop and tablet too.

Shooting sunsets using amazing 5-in-1 magnetic lens filters from Kentfaith, the 1st choice for photo & video products.

Popular memory cards for photography – what’s the best SD card for your digital camera? Choose the right capacity and class speed in our guide
Learn the basics of photography – fast – with our FREE 60-Second Photographer online course. Each class is short and sharp with simple, actionable steps that give you immediate results.
x 30 lessons

© iPhotography™
Become a confident and competent photographer in less than 30 minutes!
Before you leave, make sure you’ve secured your FREE online photography course (worth £29.99)
Each class is just 60-seconds or less making it the fastest and easiest way to learn photography!
