(iPhotography may make small commissions from links in this article.)
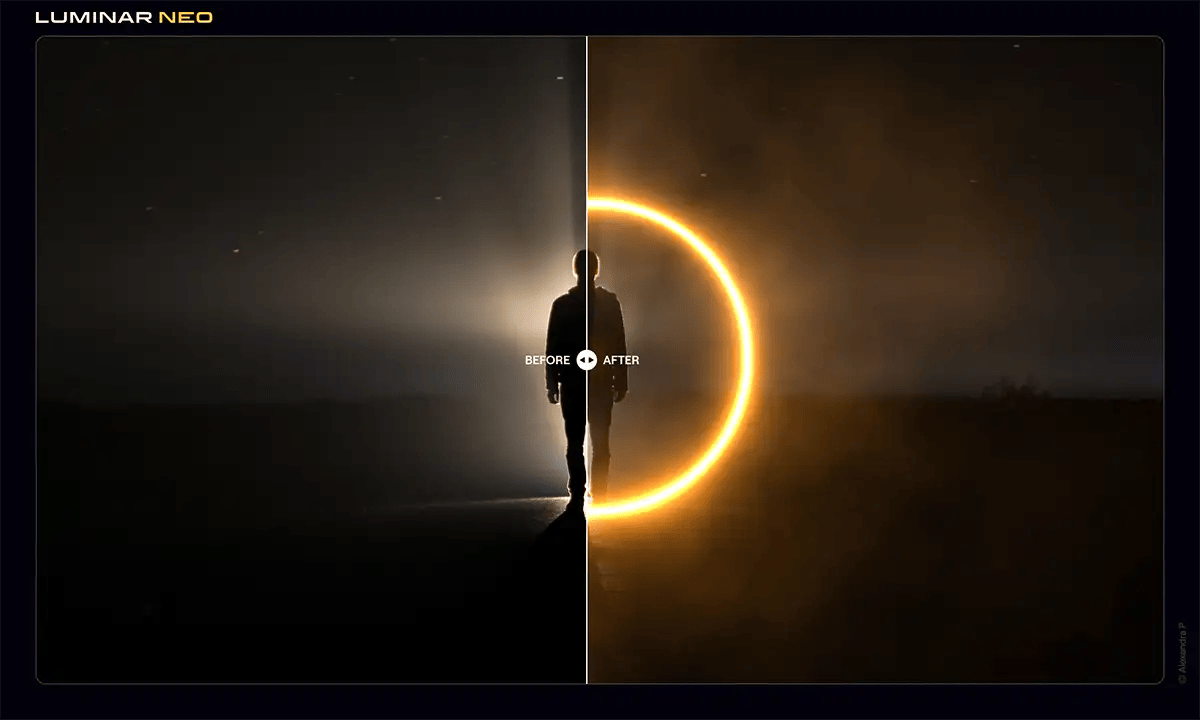
What was once achieved by expensive and cumbersome lighting equipment and numerous, tedious adjustments on a physical photo set is now easily done with Luminar Neo’s dynamic Neon & Glow feature. For a vibrant and unique touch to your photos or an otherworldly, futuristic vibe, Neon & Glow is your go-to tool.
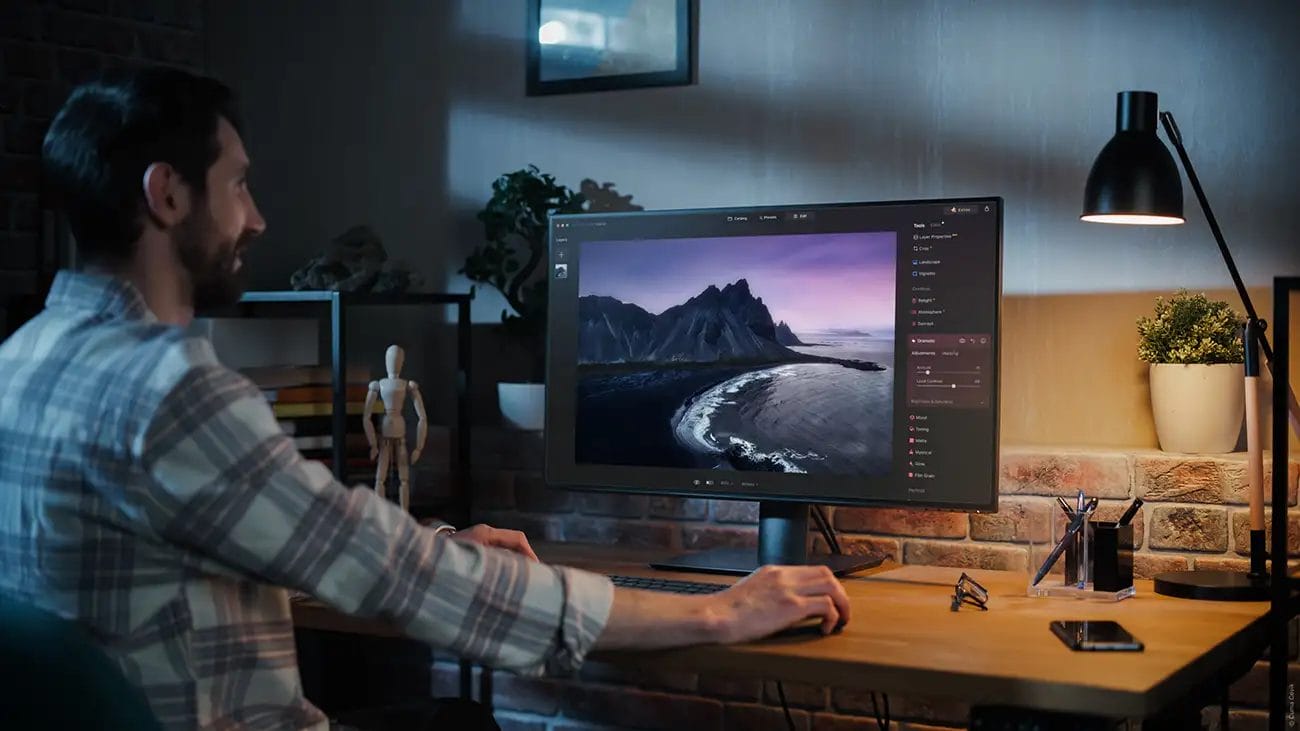
With its user-friendly editing workflow, Luminar Neo combines innovation with creativity using the latest in advanced AI photo editing technology, putting a powerful set of photo editing tools at your fingertips that will add an extra dimension of creativity to your photographs.
Whether you’re looking to effortlessly retouch portraits or transform landscapes with presets and backgrounds, Luminar Neo provides precision detail adjustment of colors and tones. This allows you to maintain the flexibility to create your unique style through customizable templates and features, such as Neon & Glow, which we’ll be exploring in detail here.
In this comprehensive guide, we’ll delve into the intricate details of Neon & Glow, providing you with the insights and techniques you will need to bring out your full creative potential.
Experience the world of photo editing AI with Luminar and get $10 USD OFF 12 and 24-month plans when you enter the promo code ‘iPhotography’.
From enhancing radiance and vibrancy to creating captivating neon effects, this feature offers a diverse range of options to elevate your images and is an accessible yet impactful way to make every photo truly stand out.
The Neon & Glow feature in Luminar Neo allows you to enhance your photos with a range of creative effects. Whether you’re looking to add vibrant colours and radiance or create a neon effect, this feature has got you covered. It’s an invaluable addition to your photo editing toolkit.
Neon & Glow offers two distinct approaches, giving you control over how you apply these effects to your images. You can choose to manually draw a selection, which provides precise control over where the effects are applied, or you can utilise the automated object recognition feature, allowing the software to intelligently identify objects within the image and apply the effects automatically.
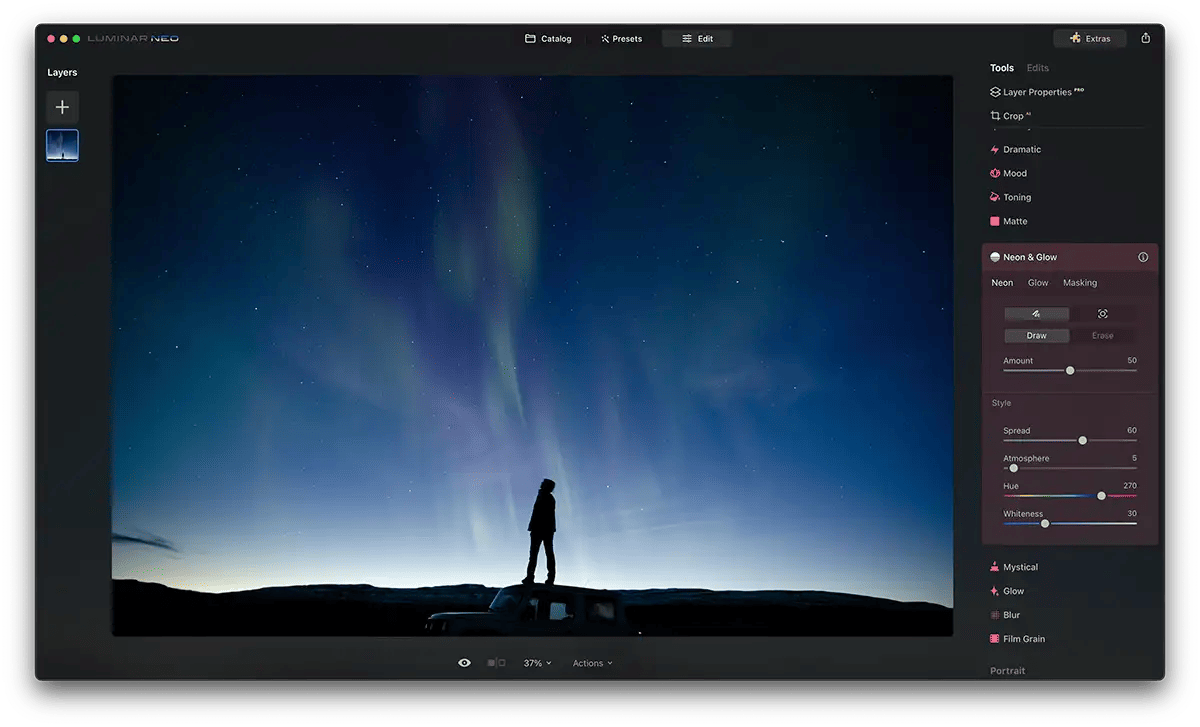
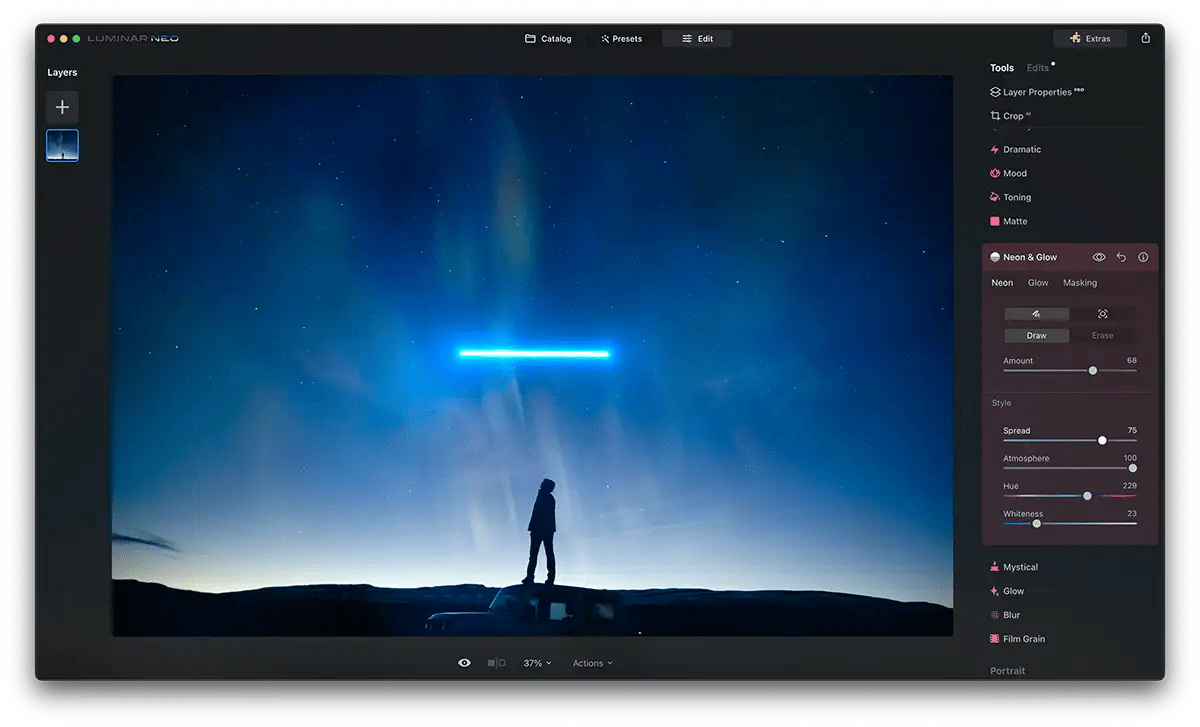
The Neon effect is all about adding that eye-catching radiance to your photos, giving you the flexibility to achieve the precise look you envision.
For precise control over where the neon effect appears in your image, the “Draw” option is your go-to choice. By clicking the “Draw” button, your cursor transforms into a pencil icon, allowing you to draw your desired areas for the neon effect freely. Should you need to remove any parts of the effect, the “Erase” button is your trusty ally.
Fine-tune the size of the erase tool with the provided sliders to make precise adjustments. To control the neon intensity, you can seamlessly adjust the “Amount” slider, offering you complete mastery over the effect’s strength and thickness. Explore additional options like “Spread,” to control the glow’s extension, “Atmosphere” for ambient effects, “Hue” for precise colour manipulation, and “Whiteness” for adjusting white tones.


If you’re looking for a more automated approach, Luminar Neo’s “Object recognition” feature is here to help. This ingenious tool automatically identifies objects in your image and applies the neon effect accordingly.
To fine-tune the intensity, adjust the “Amount” slider. Manage the neon effect’s distance by tweaking the “Indent” setting. For even more detailed adjustments to your object selection, click the “Refine Object” button.
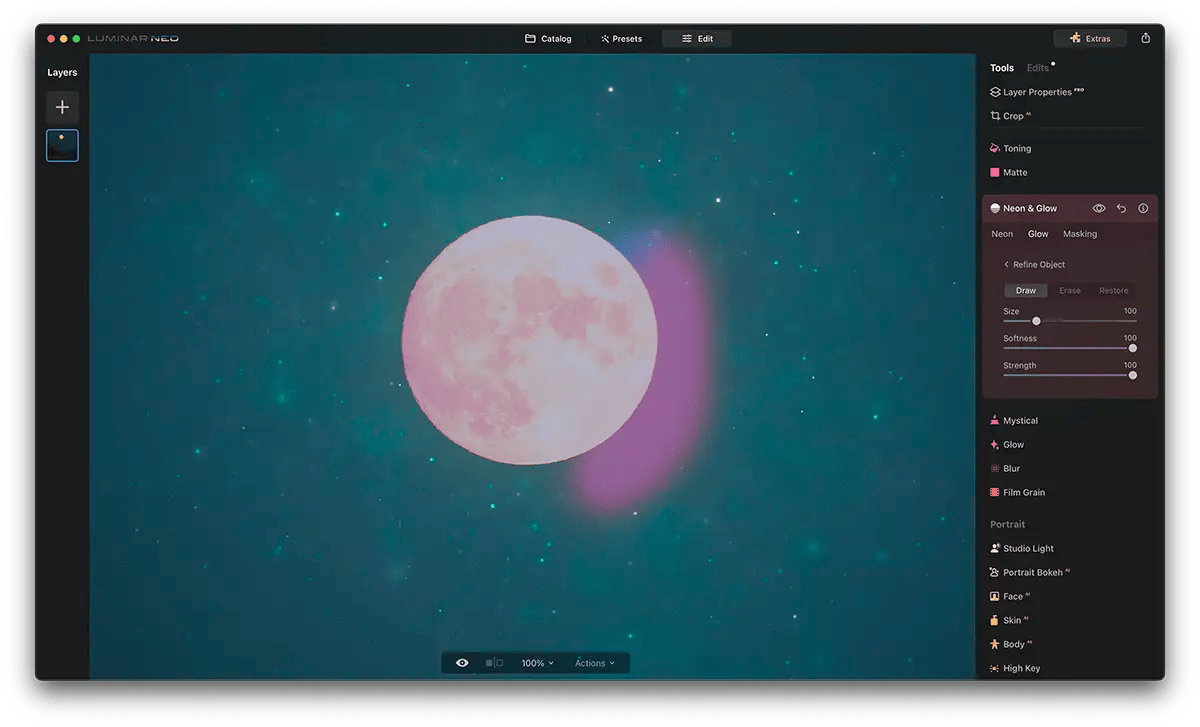
The “Refine Object” feature is where you can fine-tune your selection with utmost precision. Within this tool, you can draw to add, erase to remove, or restore areas to your selection. Adjust the brush’s size, softness and strength to ensure your editing is accurate and detailed.
Step 1: Open your image in the Luminar Neo app and select the “Edit” tab to access the tools.
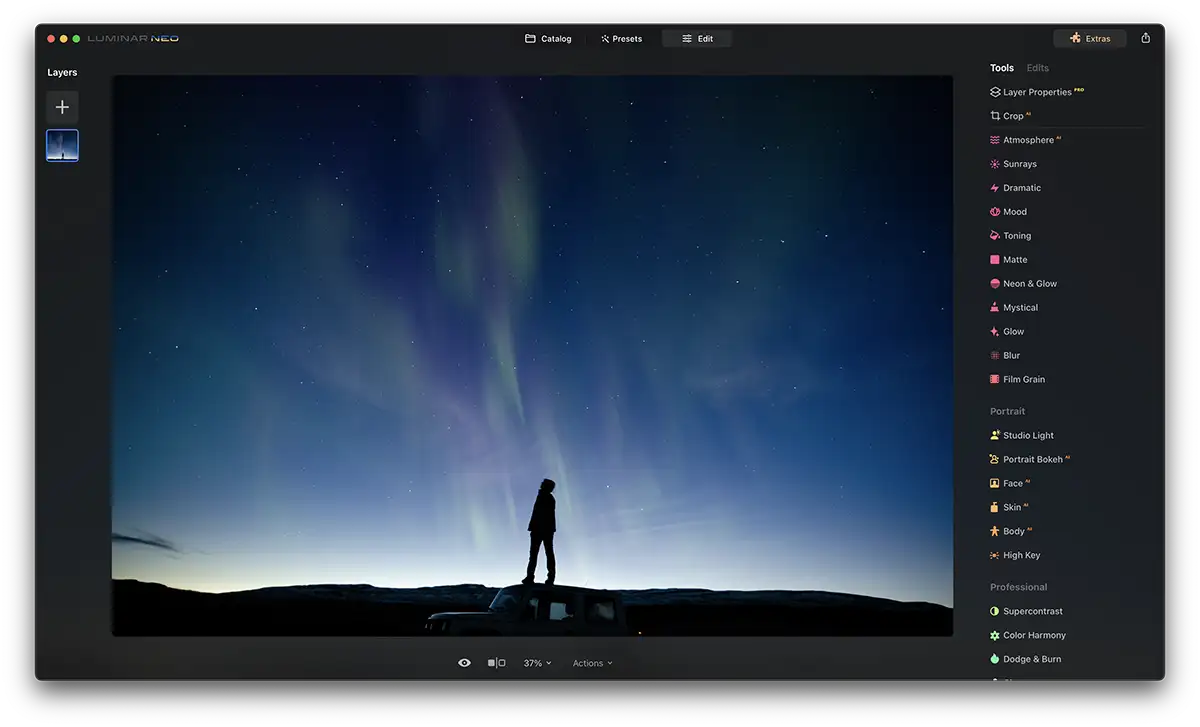
Step 2: Select “Draw” or “Automatically Select Object” and draw over the areas where you want to apply the effect by clicking and dragging your cursor over the image.
Step 3: Fine-tune the effect by adjusting the intensity or thickness, using the “Amount” slider.
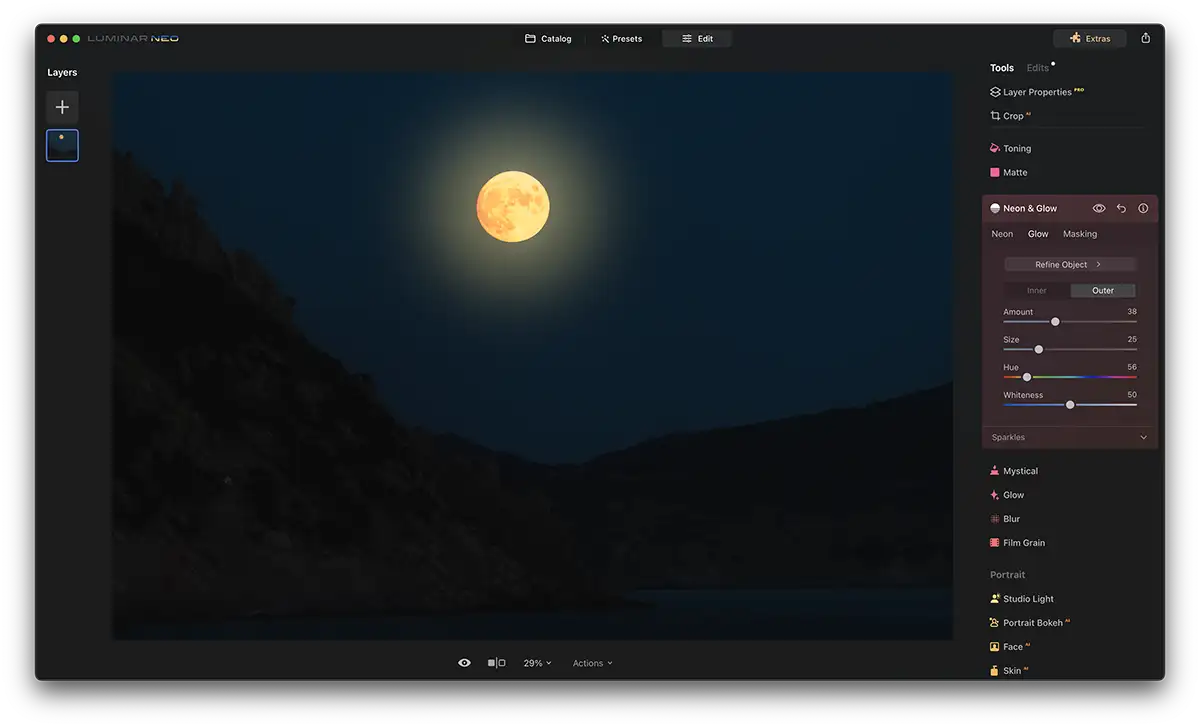
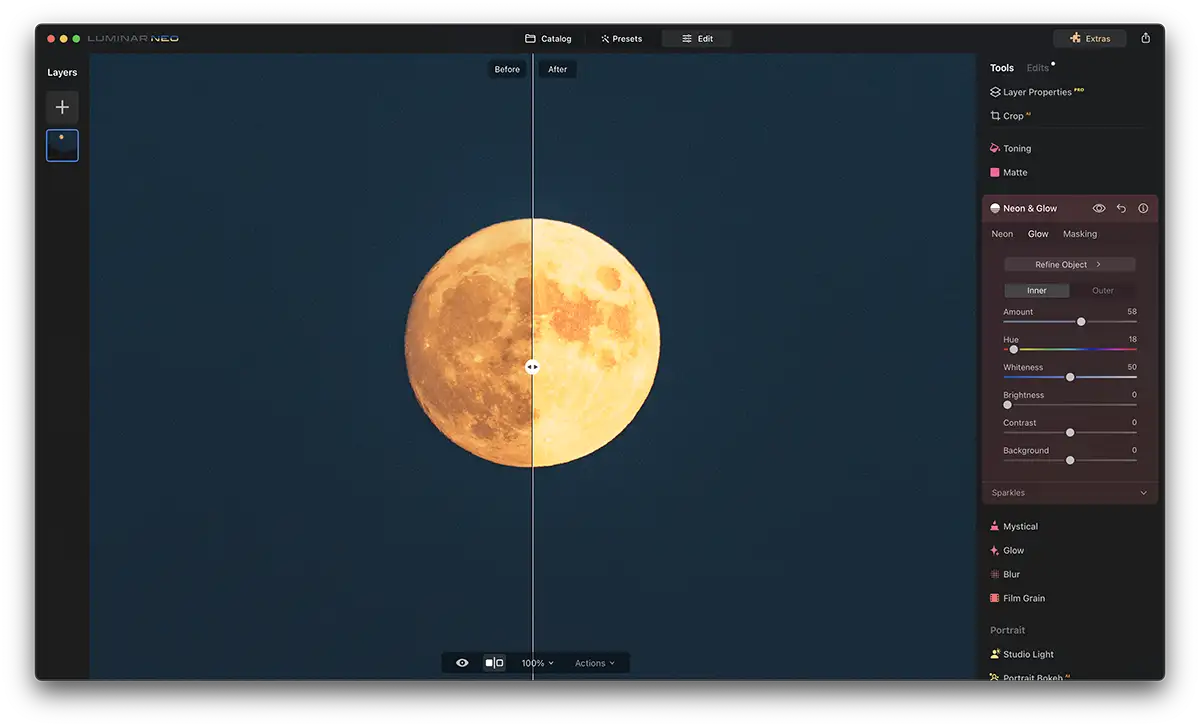
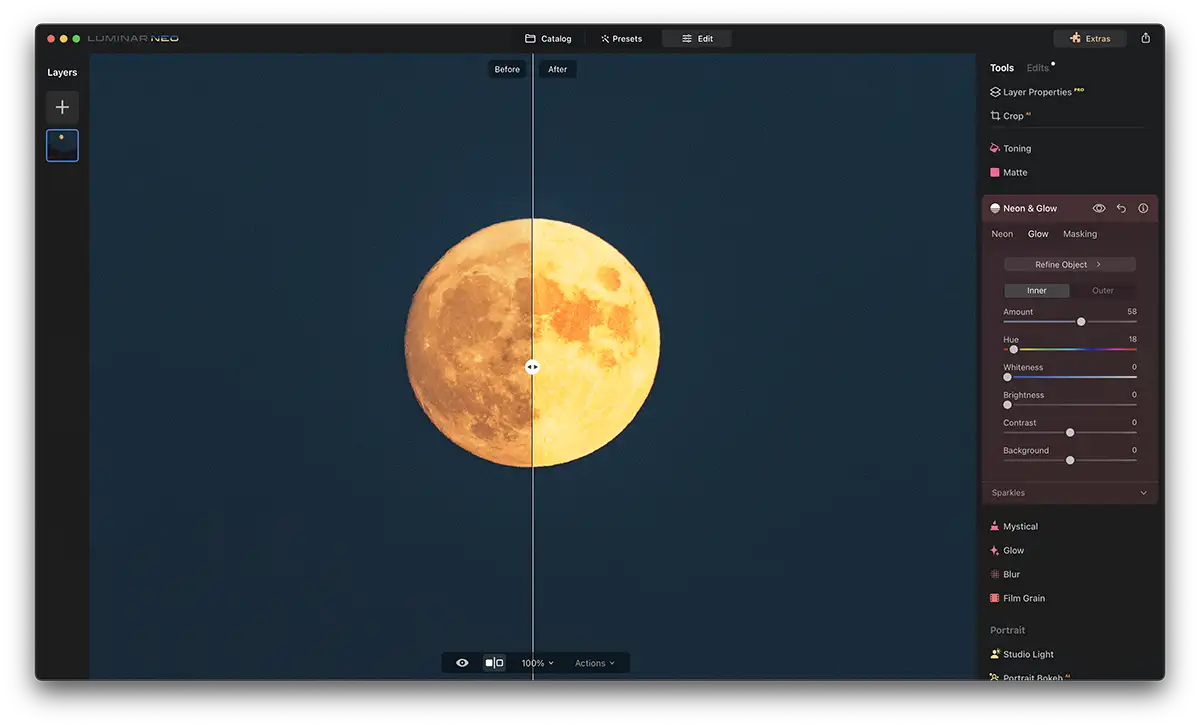
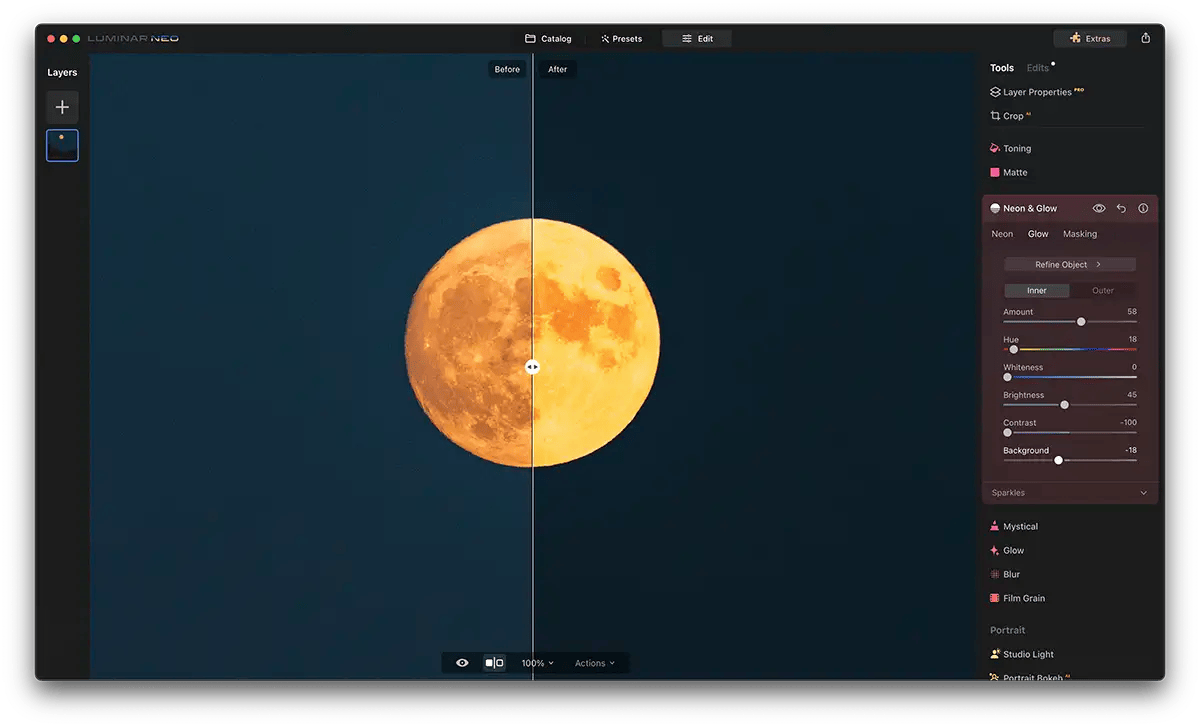
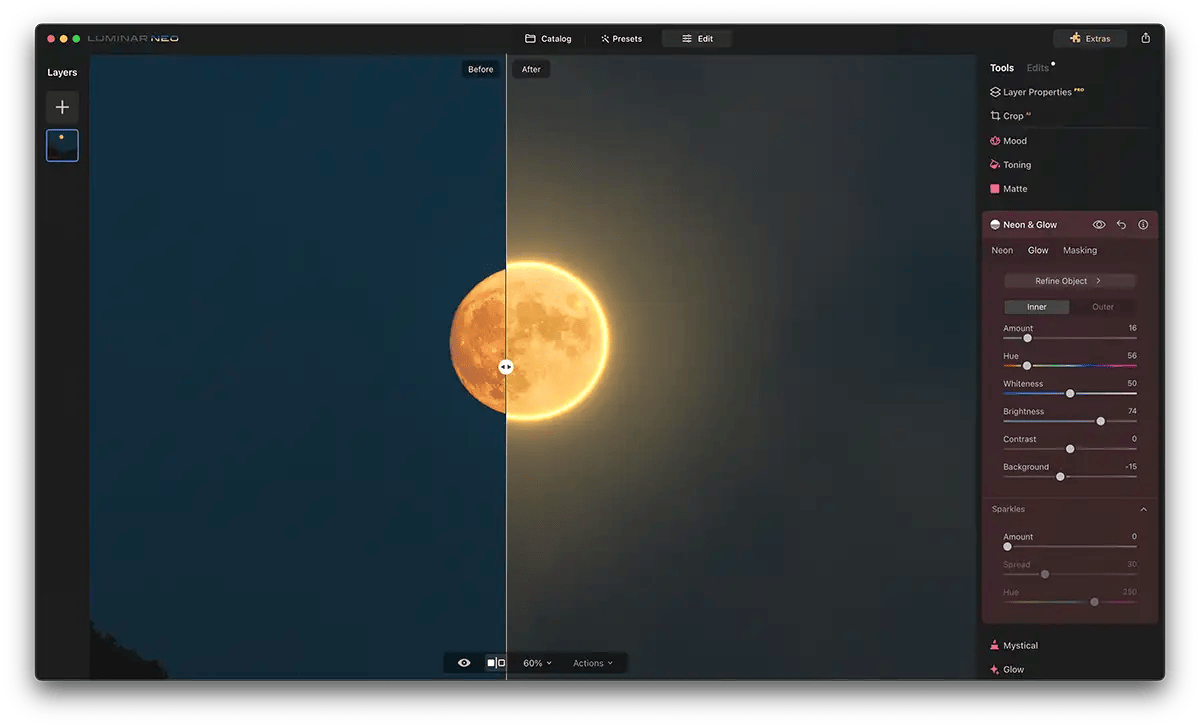
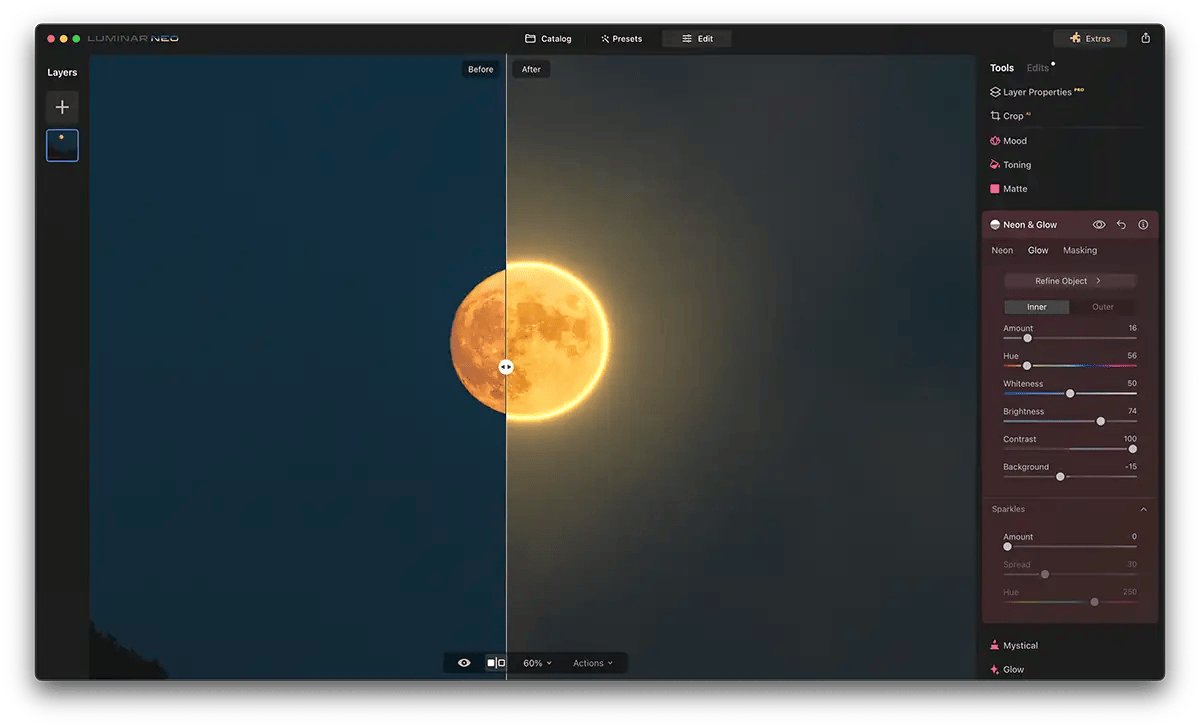
Glow adds a radiant touch to your photos, and it comes with two distinct options: “Inner” and “Outer.” These options give you the power to enhance specific areas of your object with the perfect glow effect, ensuring your creative vision is beautifully realised.
The “Inner Glow” option is designed to apply the glow effect to the interior of the selected object. You can control the thickness and intensity of the inner glow with the “Amount” slider. Manipulate the colour range of the glow with the “Hue” setting and regulate the strength of white tones with the “Whiteness” option. To fine-tune the brightness, contrast, and background of your glow, you have dedicated sliders for each.
Step 1: Select “Inner Glow”
To apply the glow effect to the interior of the selected object, find the “Edit” tab, select “Neon & Glow,” then click on “Glow,” where you’ll then find the “Inner Glow” option.
Step 2: Control Thickness and Intensity
Use the “Amount” slider to adjust the glow’s thickness and intensity.

Step 3: Manipulate the Glow’s Colour
Fine-tune the colour range with the “Hue” setting in “Inner Glow.”
Step 4: Regulate Whiteness
Adjust the “Whiteness” to control the strength of white tones in the inner glow.
Step 5: Fine-Tune Brightness, Contrast, and Background
Utilise dedicated sliders for brightness, contrast and background for further adjustments.
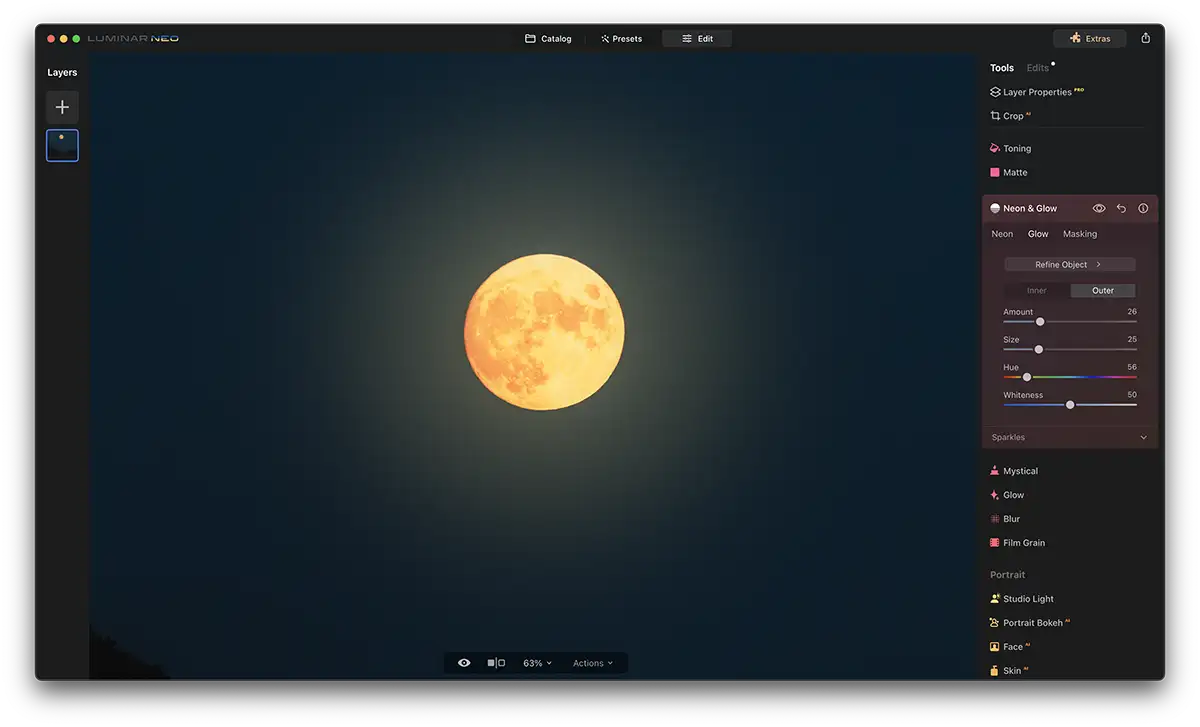
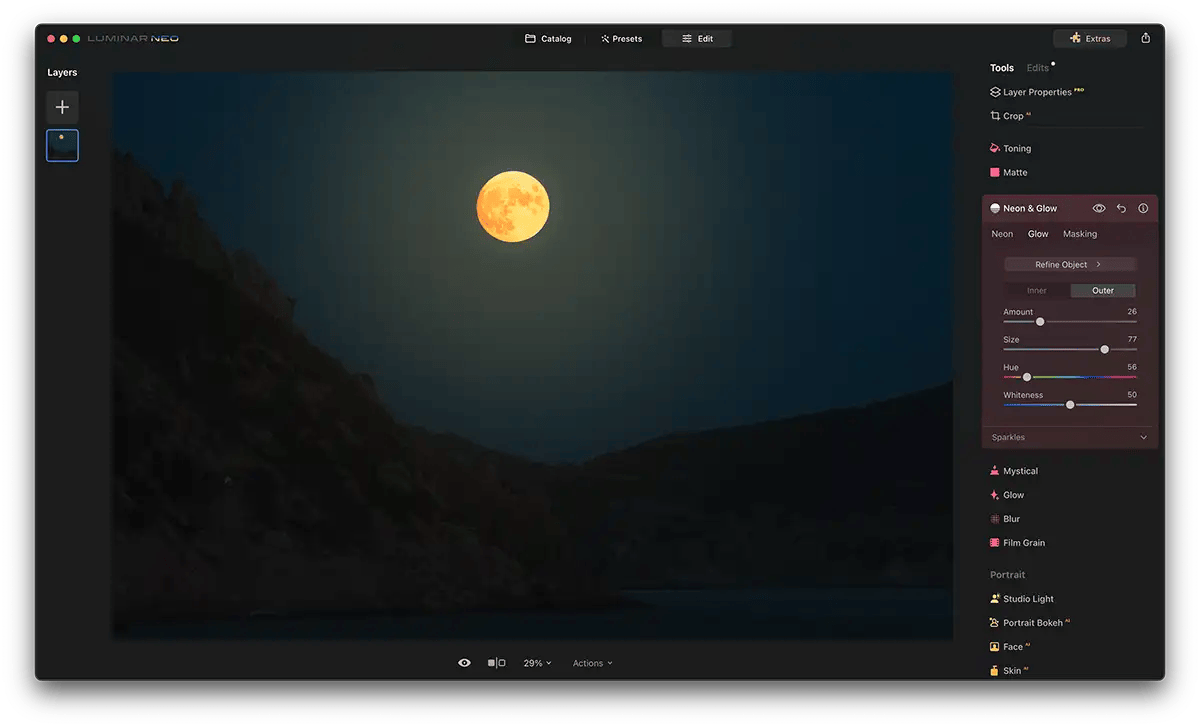
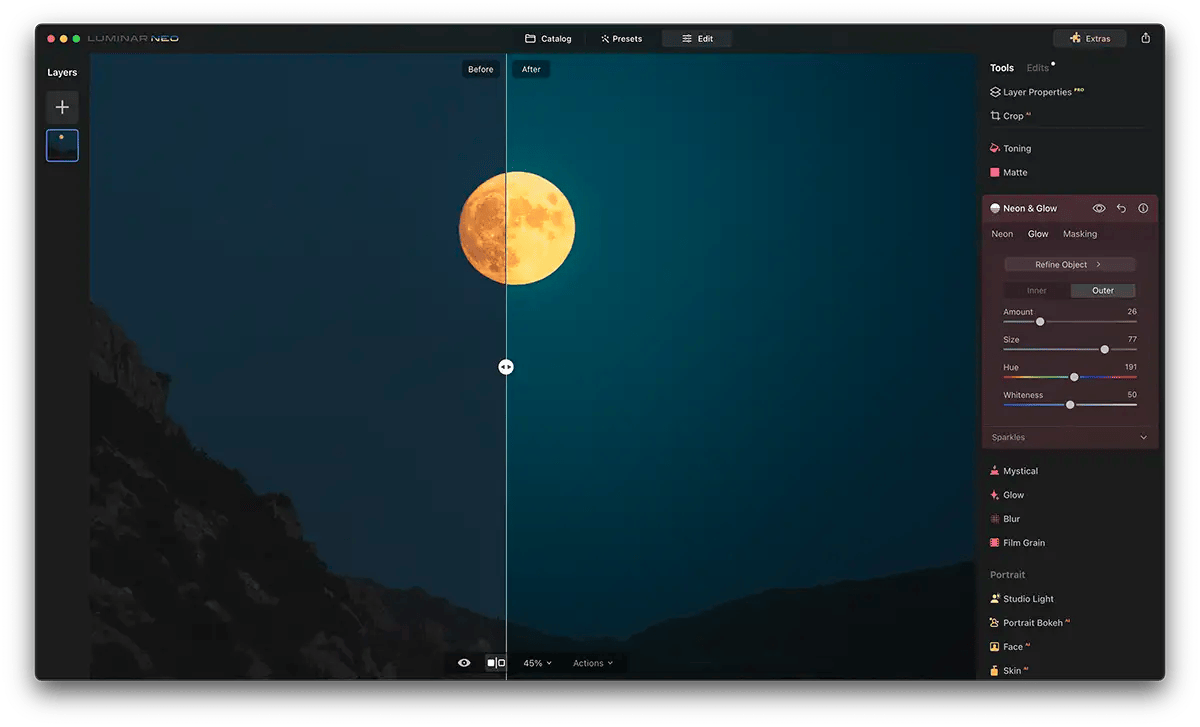
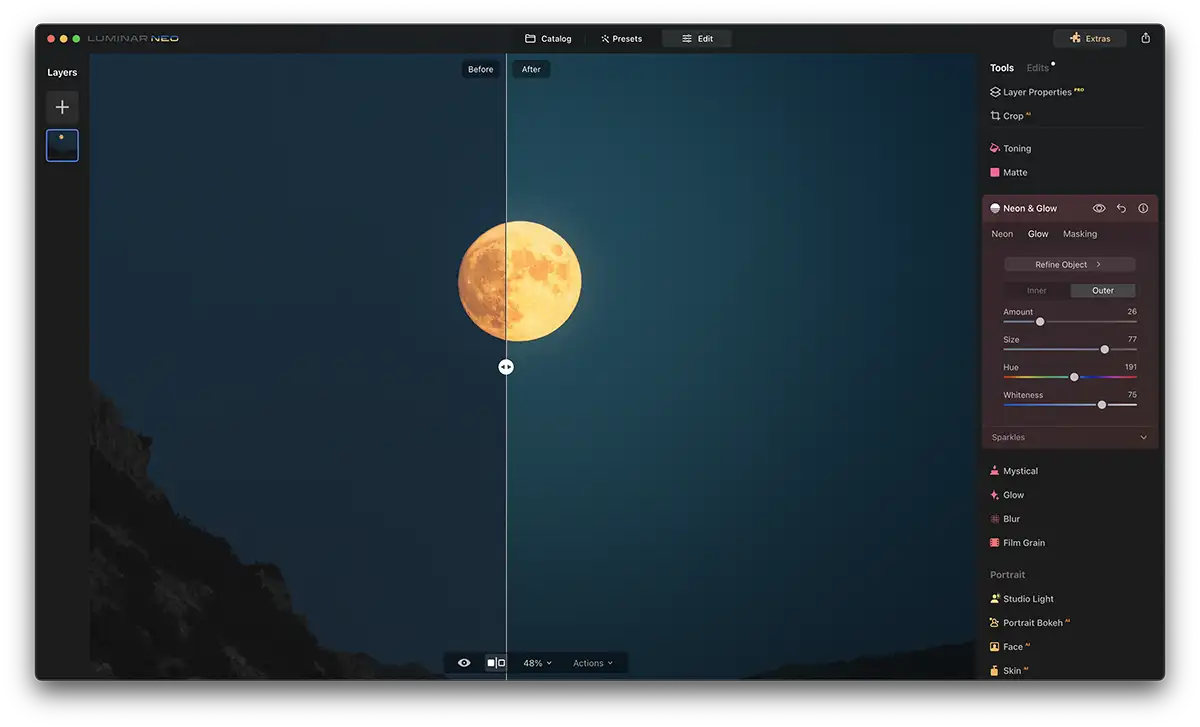
Choose the “Outer Glow” option to apply a radiant effect to the outer surface of your selected object, creating a captivating halo or border around it. Adjust the “Amount” slider for thickness and intensity and the “Size” slider for the spread. Manipulate the colour range with the “Hue” setting, and fine-tune the whiteness for the perfect luminosity.
Step 1: Select “Outer Glow”
To apply a radiant effect to the outer surface of the selected object, find the “Edit” tab, select “Neon & Glow,” then click on “Glow,” where you’ll find the “Outer Glow” effect.

Step 2: Control Thickness and Intensity
Use the “Amount” slider to adjust the glow’s thickness and the intensity of the outer glow.
Step 3: Adjust the Glow’s Spread
The “Size” slider determines the reach of the outer glow surrounding the object.
Step 4: Manipulate the Glow’s Colour
Fine-tune the colour range with the “Hue” setting in “Outer Glow.”
Step 5: Regulate Whiteness
Adjust the “Whiteness” to control the strength of white tones in the outer glow.
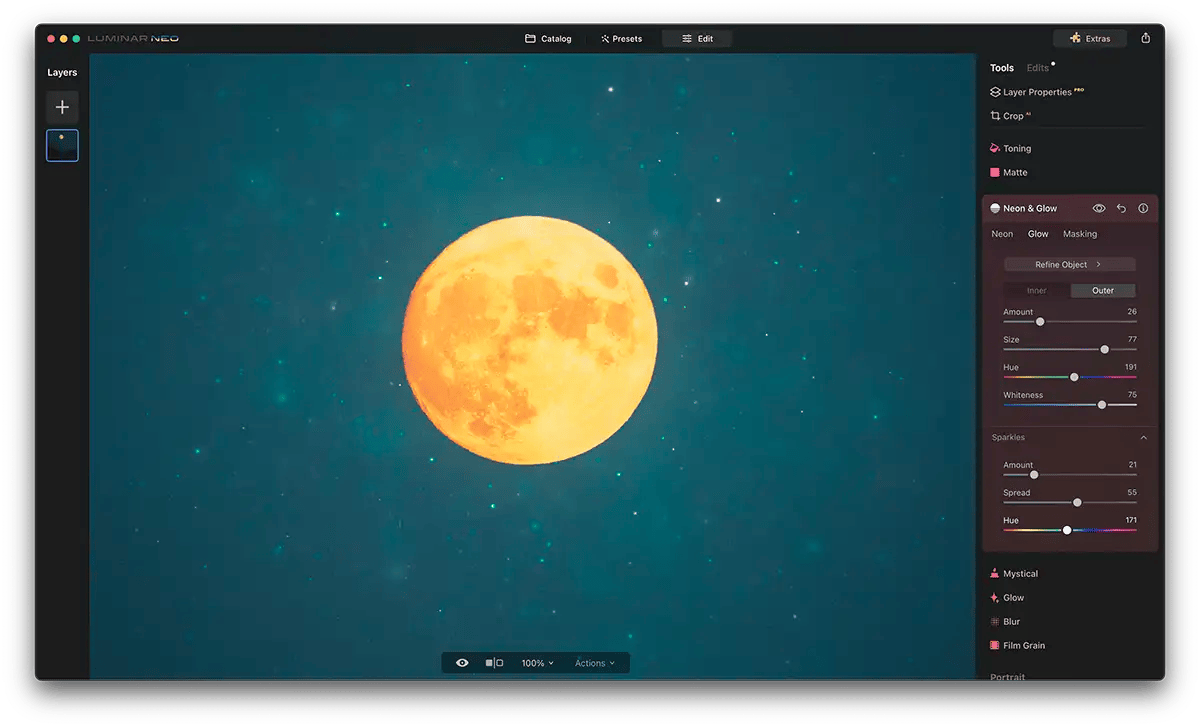
“Sparkles” serves as the final flourish, offering control over the thickness, spread, and hue of the sparkles within your neon effect. This element adds that extra dash of brilliance, enhancing the overall allure of the glowing aesthetic.
The “Softness” slider controls the softness of effects. A higher value creates a gentler blend between the affected and unaffected areas of the image.
Use the “Brightness” slider to control the brightness of the effect. Adjust it to make the glow more or less intense, depending on your creative preferences.
The “Contrast” slider allows you to set the contrast in the areas of the image to which the Glow tool is applied. It determines how well-defined and distinct the variations in brightness appear throughout the image.
The “Style” section is a pivotal part of shaping the appearance of the effects. Here, you can adjust the spread, atmosphere, hue, and whiteness to achieve your desired aesthetic. These options provide you with the tools to customise the effect according to your creative vision.
The “Spread” option allows you to control the extent of the added effect, determining the degree to which it enhances the luminosity. You can generate a unique atmospheric effect with “Atmosphere,” which influences the background surrounding the glow, enhancing the visual impact.
The “Hue” setting allows you to manipulate the colour range of the glow in your neon effect, letting you select the perfect colour palette. Additionally, you can regulate the strength of the white tones within the glow effect with the “Whiteness” option, tailoring the effect to your preferences.
Now that we’ve explored every facet of the Neon & Glow tool, it’s time to put our knowledge into practice. Let’s walk through a real-life example and see how these tools can transform an ordinary photograph into a captivating work of art.
To maximise the potential of Neon & Glow, precision in selection stands as a fundamental principle — whether manually drawing or using object recognition. Meticulousness in adjusting the effects ensures accurate application and freely experimenting with the various customisation options enables you to create your preferred aesthetic.
By following these guidelines and experimenting with different settings, you can achieve the best possible results from Neon & Glow.
Explore its full capabilities in the Luminar Neo app and let your imagination run wild. With the power of these tools at your fingertips, there is no limit to what you can create.
Thanks to our friends at Luminar iPhotography readers can now get $10 USD OFF 12 and 24-month plans when you enter the promo code ‘iPhotography’.
Find everything you need to know in this guide to polarizer lens filters for photography. How do they work and which is the best to buy?

Discover TOP features in the Lightroom CC mobile app with this guide for enhancing your photo editing skills. For desktop and tablet too.

Shooting sunsets using amazing 5-in-1 magnetic lens filters from Kentfaith, the 1st choice for photo & video products.
Learn the basics of photography – fast – with our FREE 60-Second Photographer online course. Each class is short and sharp with simple, actionable steps that give you immediate results.
x 30 lessons

© iPhotography™
Become a confident and competent photographer in less than 30 minutes!
Before you leave, make sure you’ve secured your FREE online photography course (worth £29.99)
Each class is just 60-seconds or less making it the fastest and easiest way to learn photography!
