 Stephen Walton


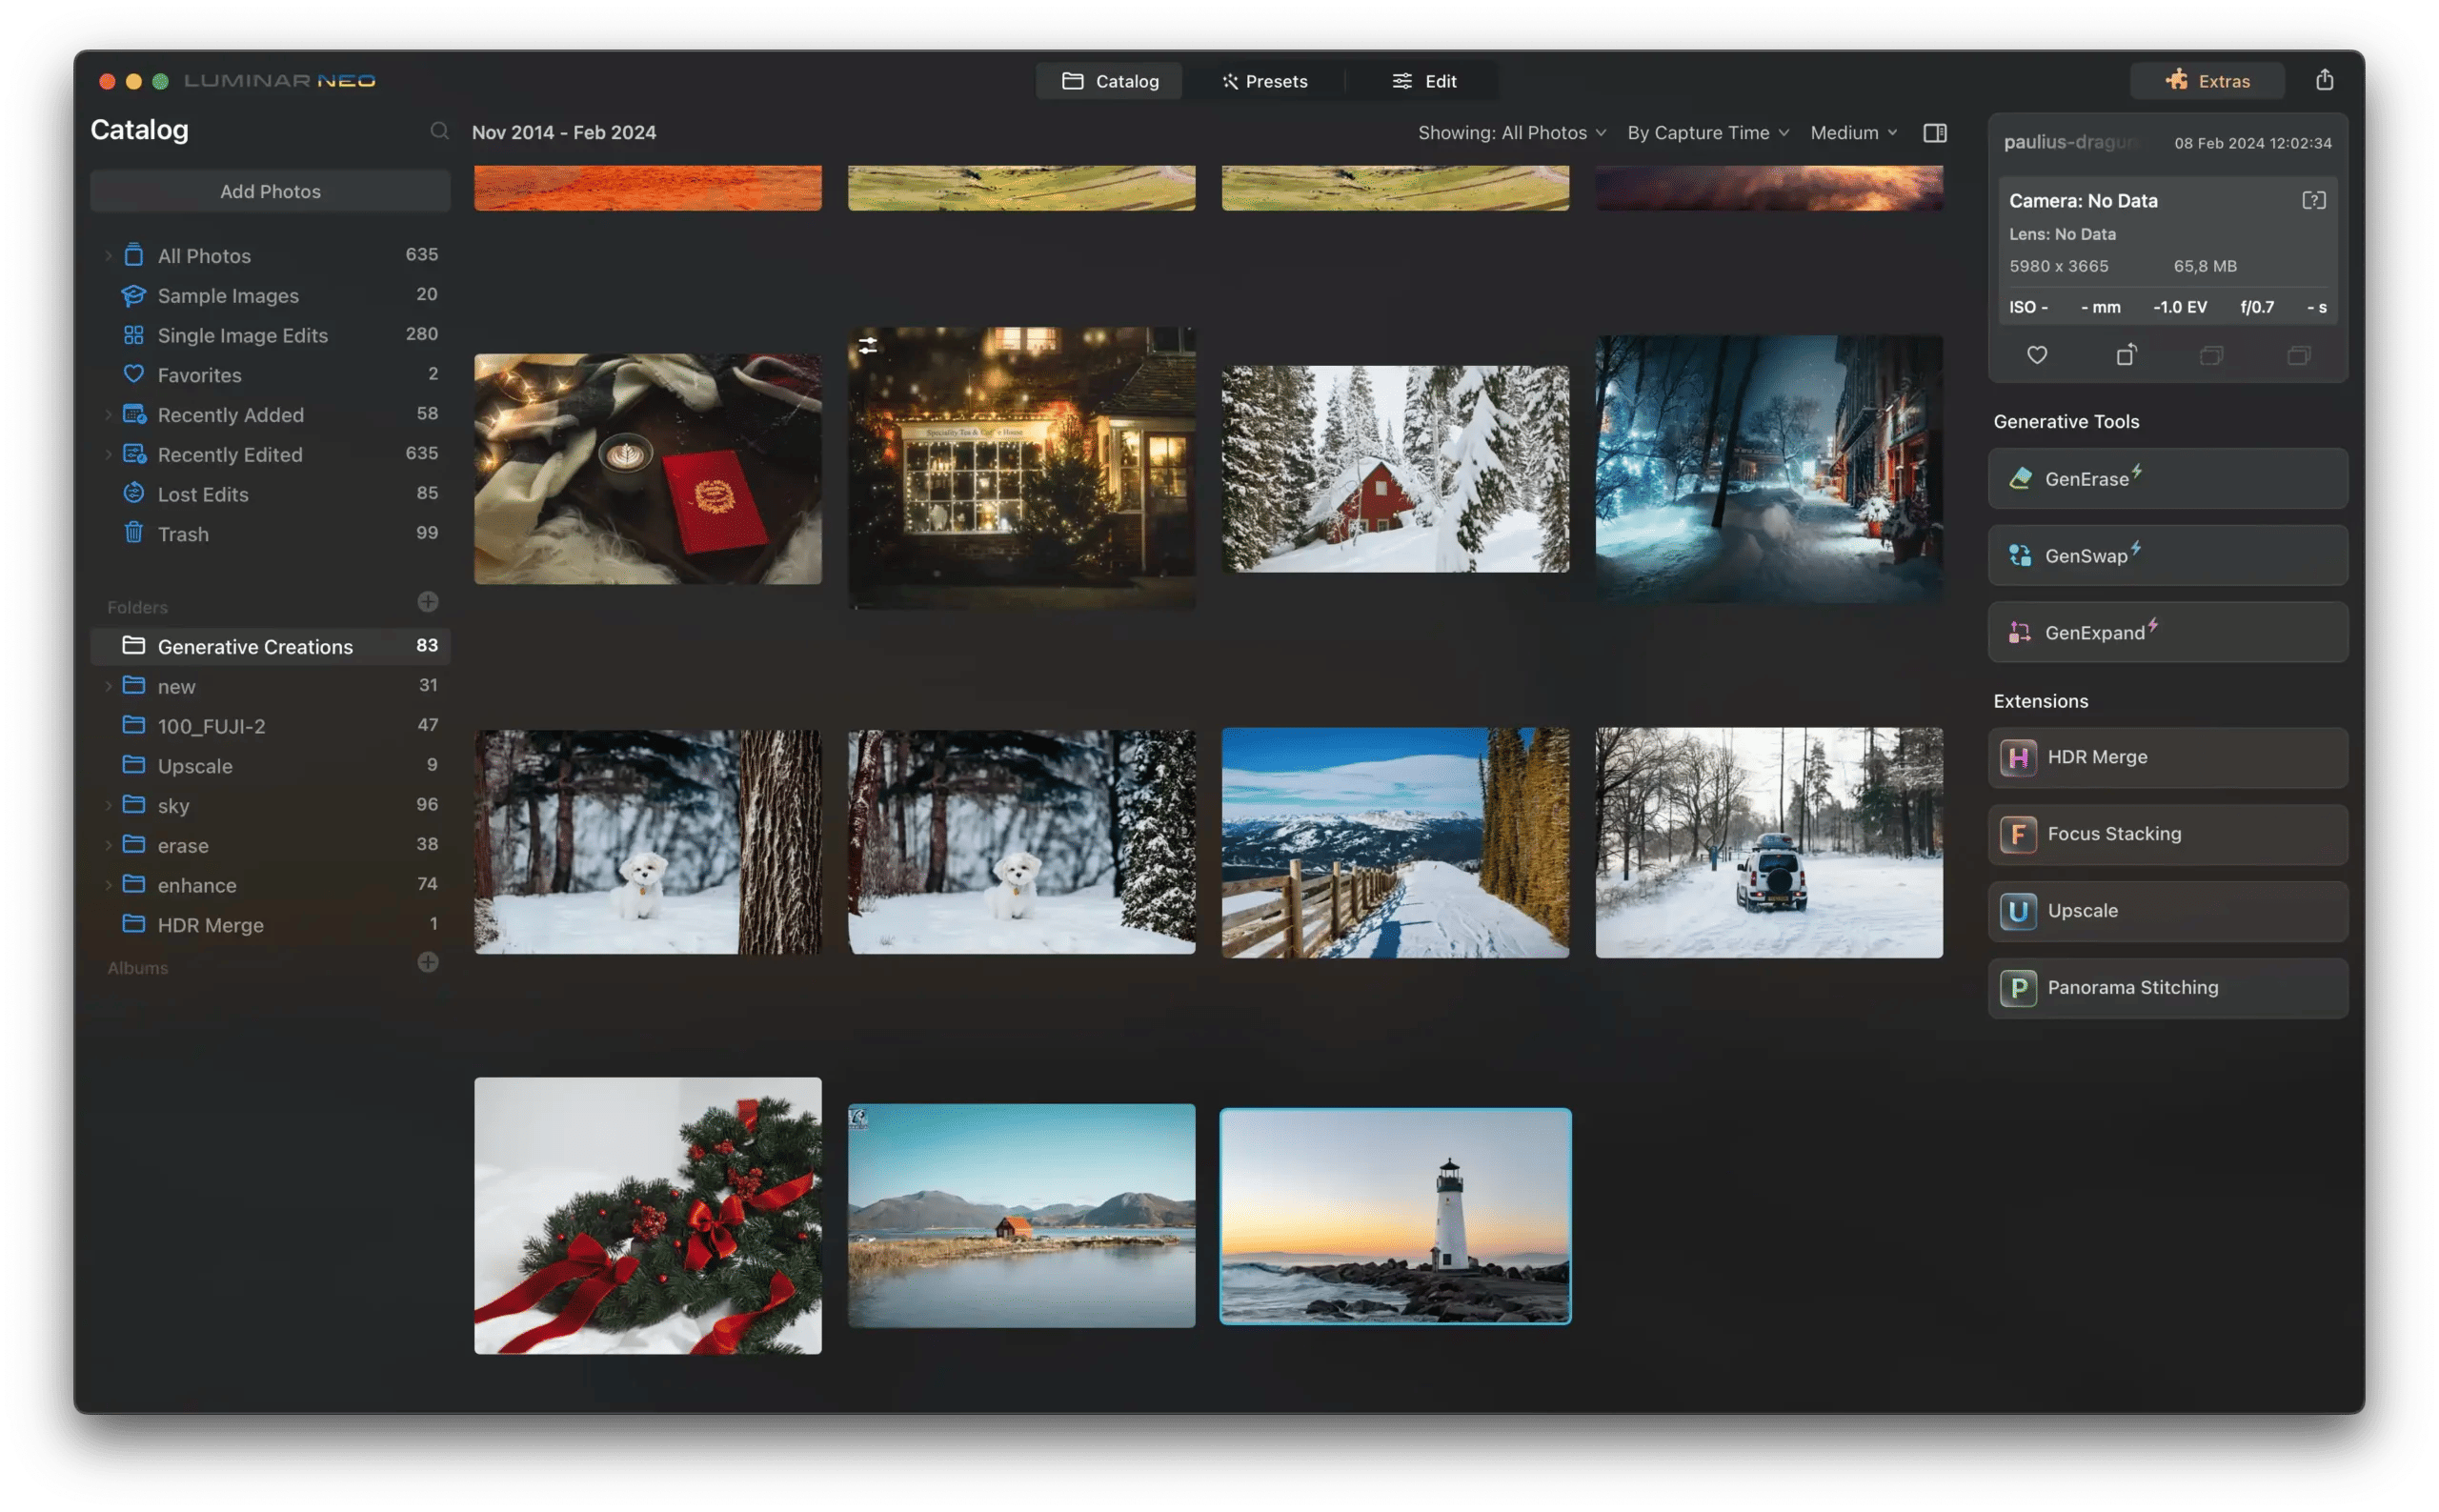
Luminar Neo’s groundbreaking next-gen AI tool, GenSwap, offers photographers the ability to effortlessly replace specific elements within images using AI-generated visuals.
This advanced technology opens doors to endless creativity, enabling the enhancement and transformation of photographs with unparalleled ease.
At its core, GenSwap harnesses the power of generative AI technology and seamlessly integrates with Luminar Neo’s other features. In this comprehensive tutorial, we’ll explore how this tool empowers photographers to reimagine their images for infinite creative possibilities.
Experience the world of photo editing AI with Luminar and get $10 USD OFF 12 and 24-month plans when you enter the promo code ‘iPhotography’.
Developed by Skylum, Luminar Neo is a powerful and innovative photo editing software, tailored to cater to photographers of all skill levels.
With an emphasis on user-friendly interfaces and AI-driven functionalities, its meticulously crafted design offers photographers an array of intuitive tools and features that simplify and enhance the photo editing process.
Luminar Neo streamlines editing workflows, enabling you to achieve stunning results — from enhancing colors and details to more advanced tasks like replacing objects that interfere with your composition. Its suite of features is designed to serve as your creative companion, providing an accessible yet robust platform to amplify your creative potential and artistic vision.
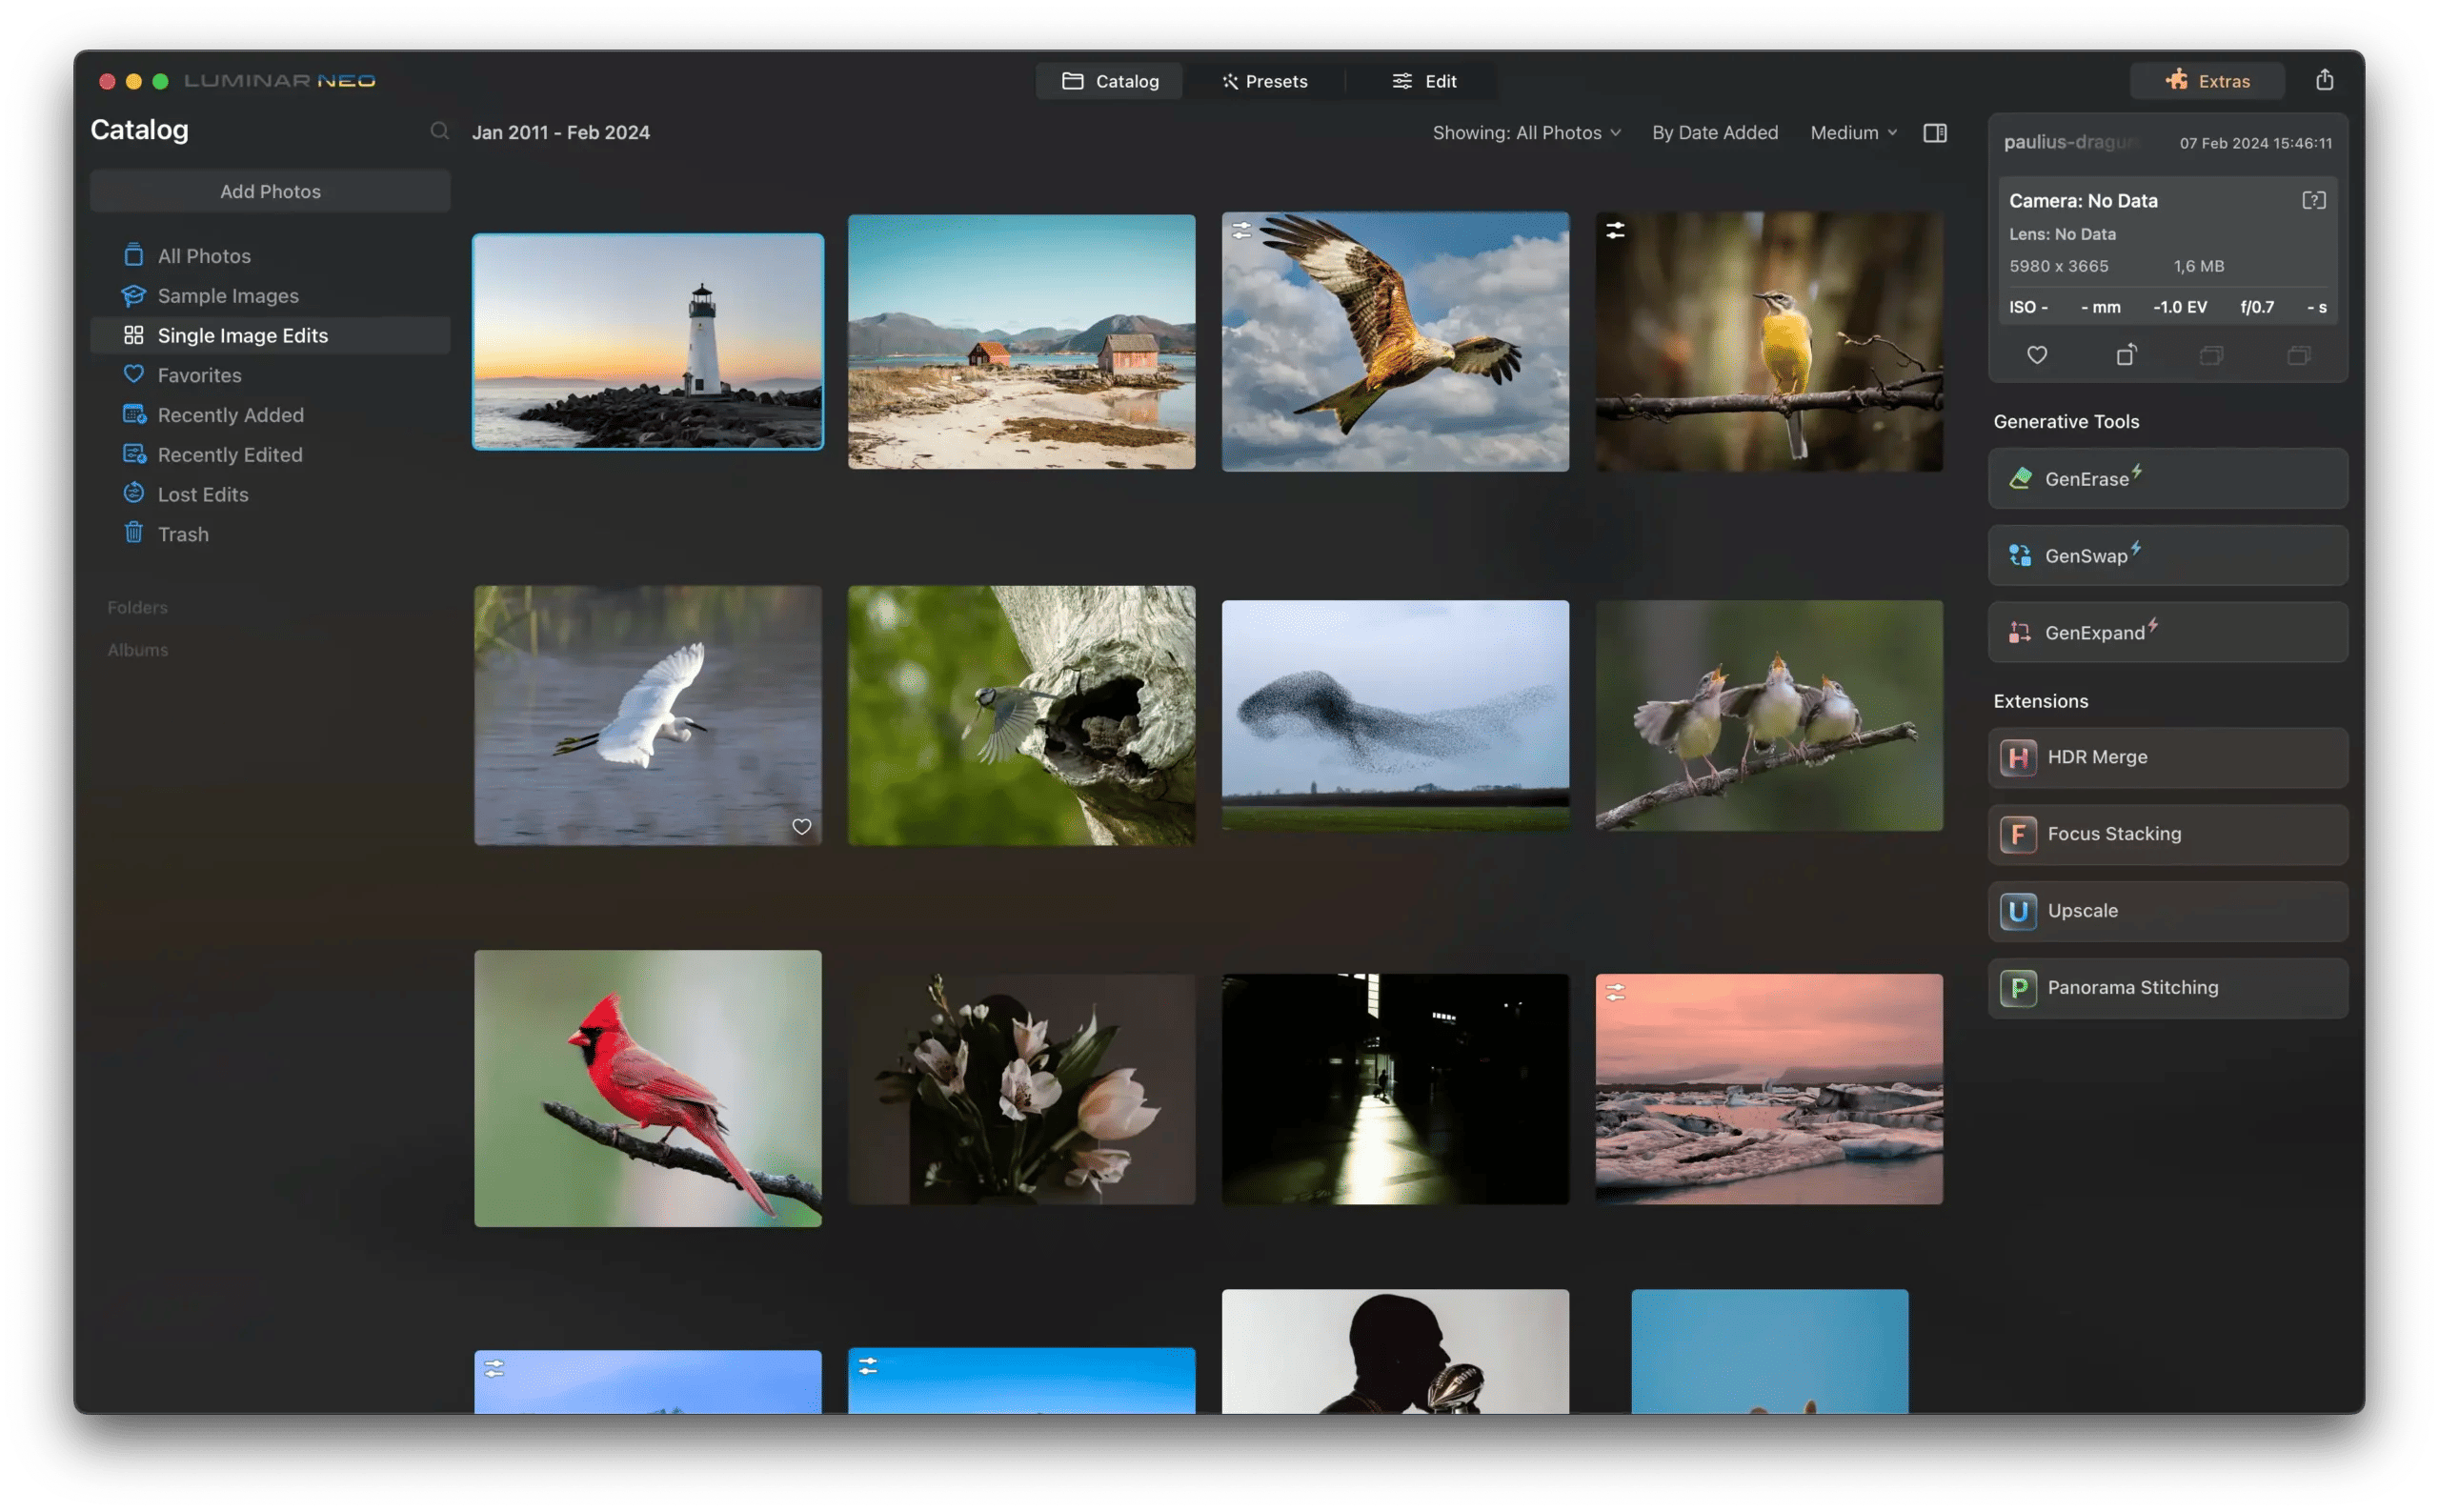
Luminar Neo stands out as a versatile photo editing tool compatible with both Windows and macOS. Sporting a suite of over 20 AI-driven features. This software has garnered notable recognition, including the esteemed Red Dot Design award in 2022.
Additionally, it secured the title of Best Imaging Software at the TIPA World Awards for two consecutive years: 2022 and 2023. Its intuitive interface caters to photographers of all levels, welcoming beginners and seasoned professionals alike.
For a deeper dive into the world of Luminar Neo, explore the official website.

GenSwap offers an intuitive interface to effortlessly introduce new elements and also substitute them for preexisting objects within an image.
Whether you want to replace an unsightly tree with a more picturesque one or insert a dynamic element like a bird in the sky, GenSwap elevates your photos to new levels.
Not only that, but with GenSwap you can incorporate imaginative elements in your images as well as swap out realistic objects with more fantastical alternatives. From adding delicate butterflies to introducing majestic unicorns — anything is possible.


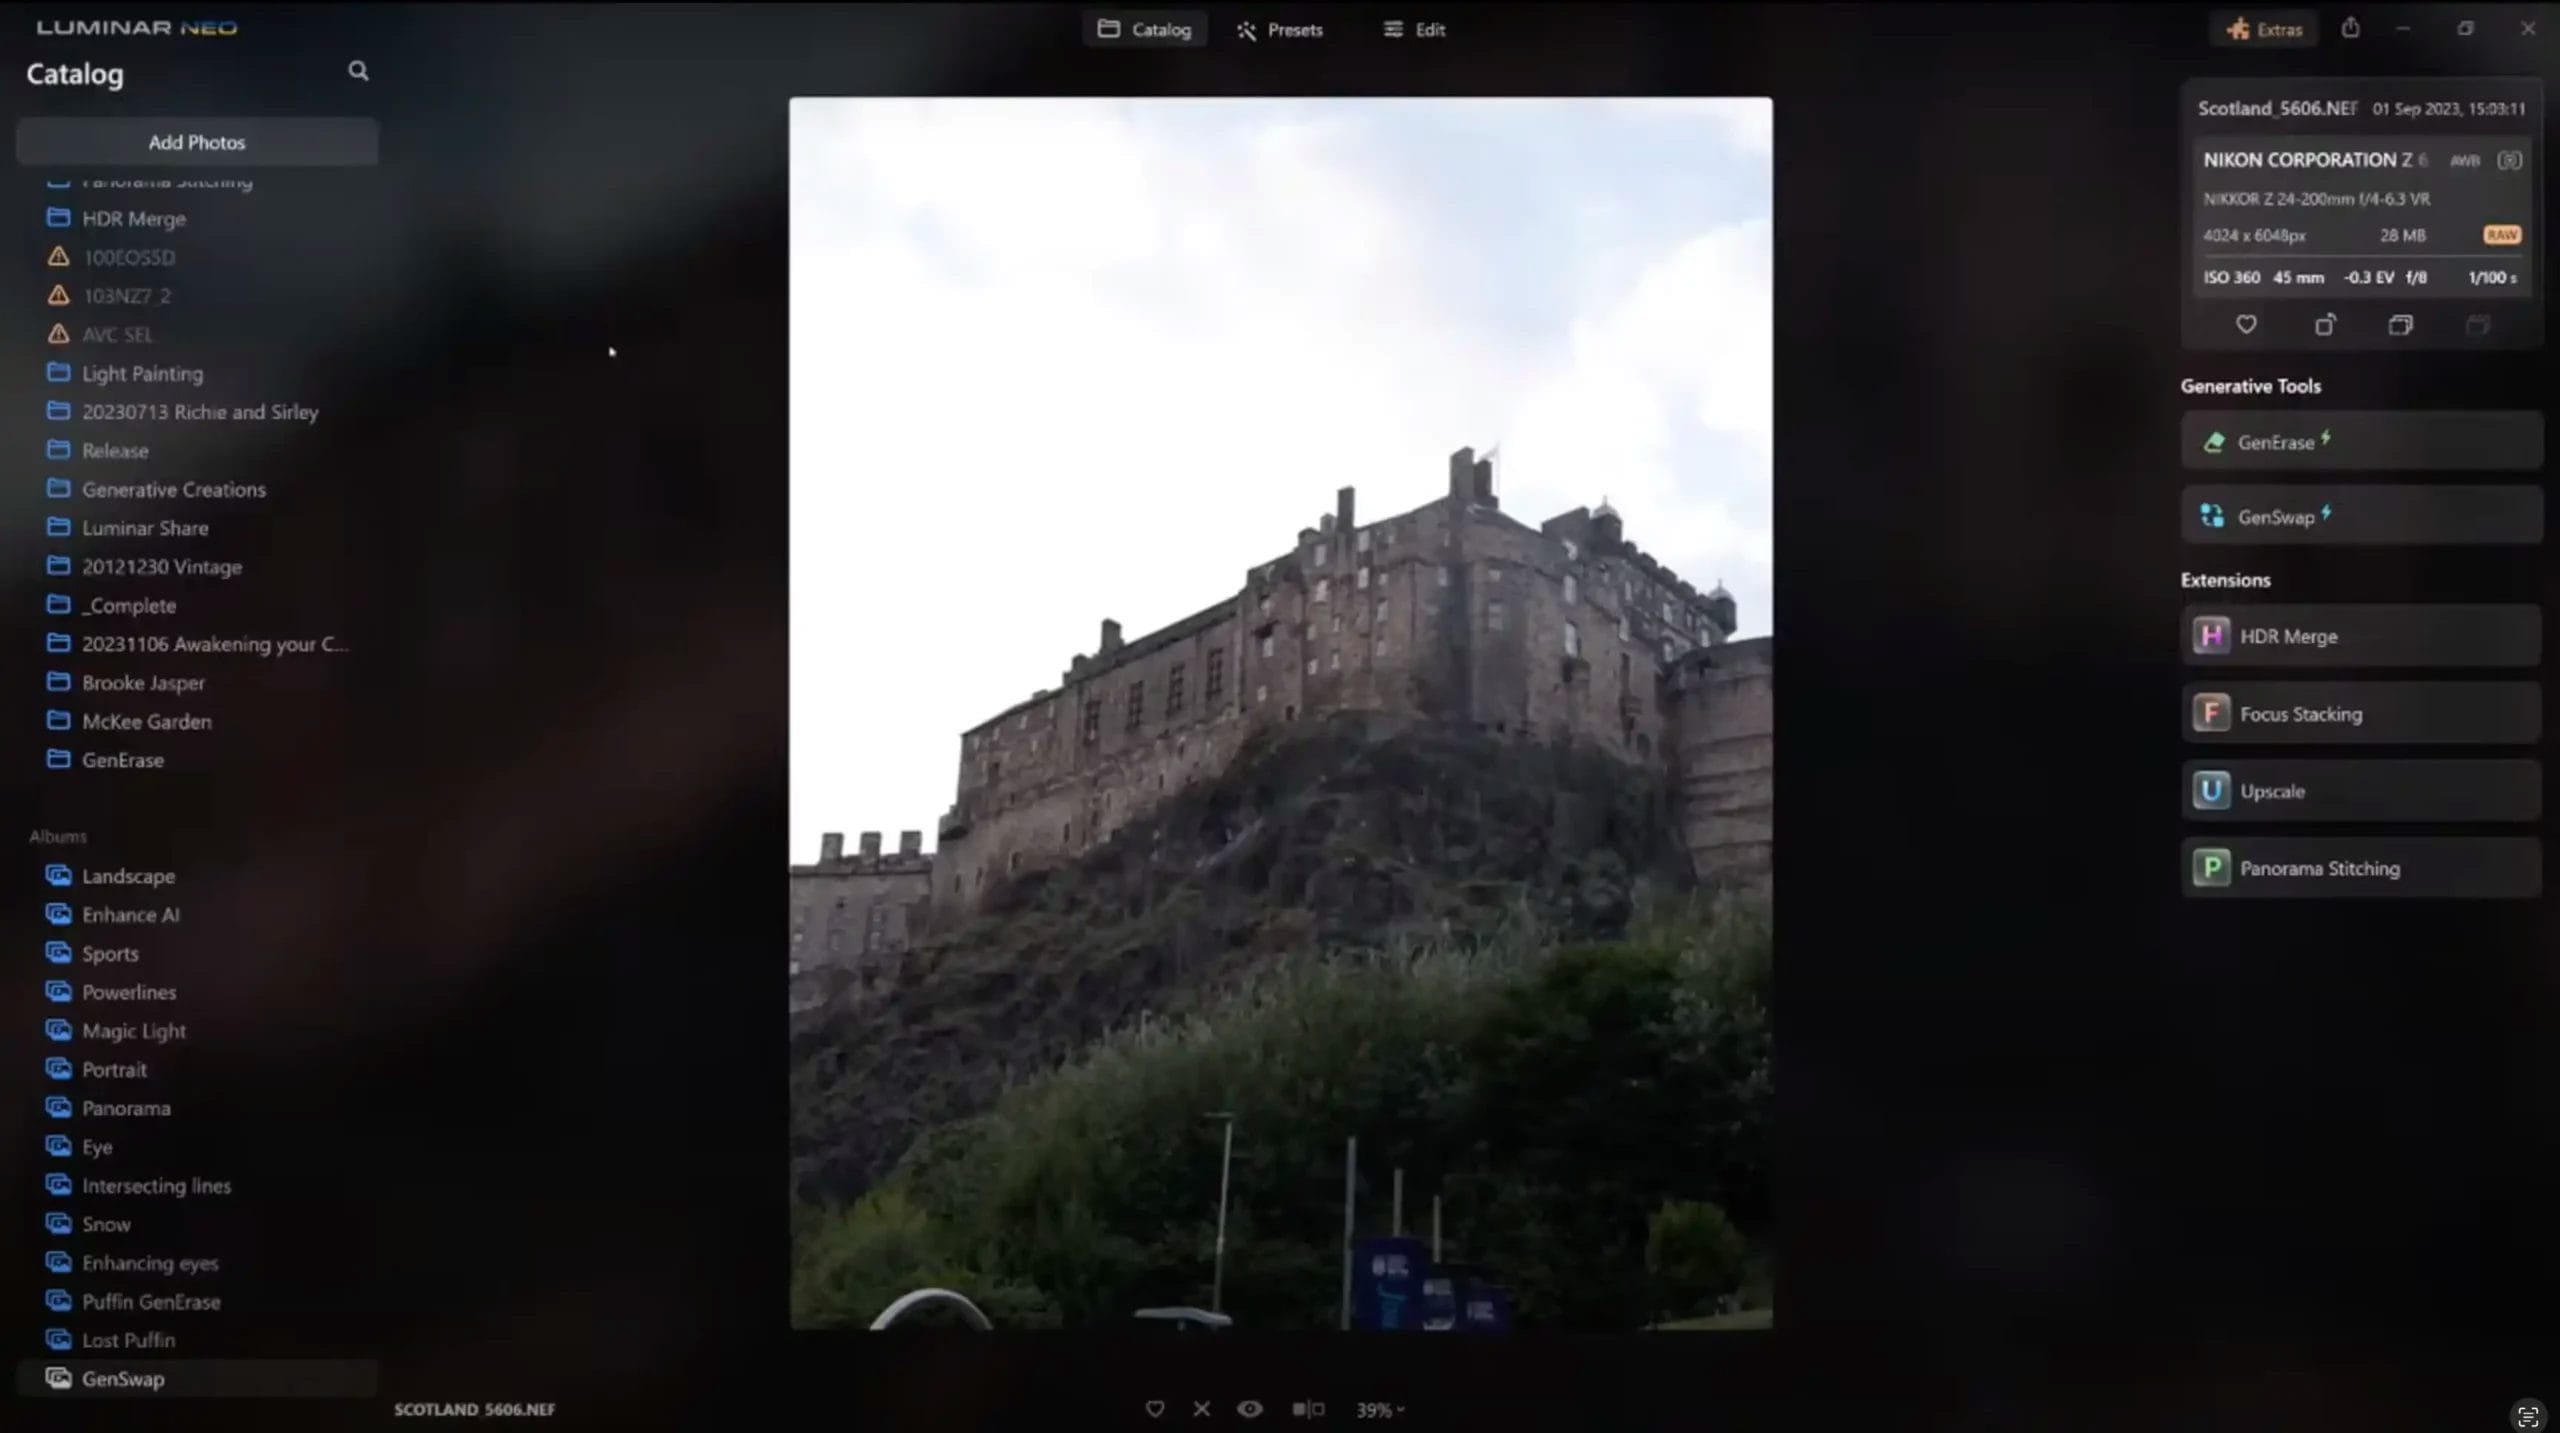
Begin within the “Catalog” view and select an image you want to transform with GenSwap.
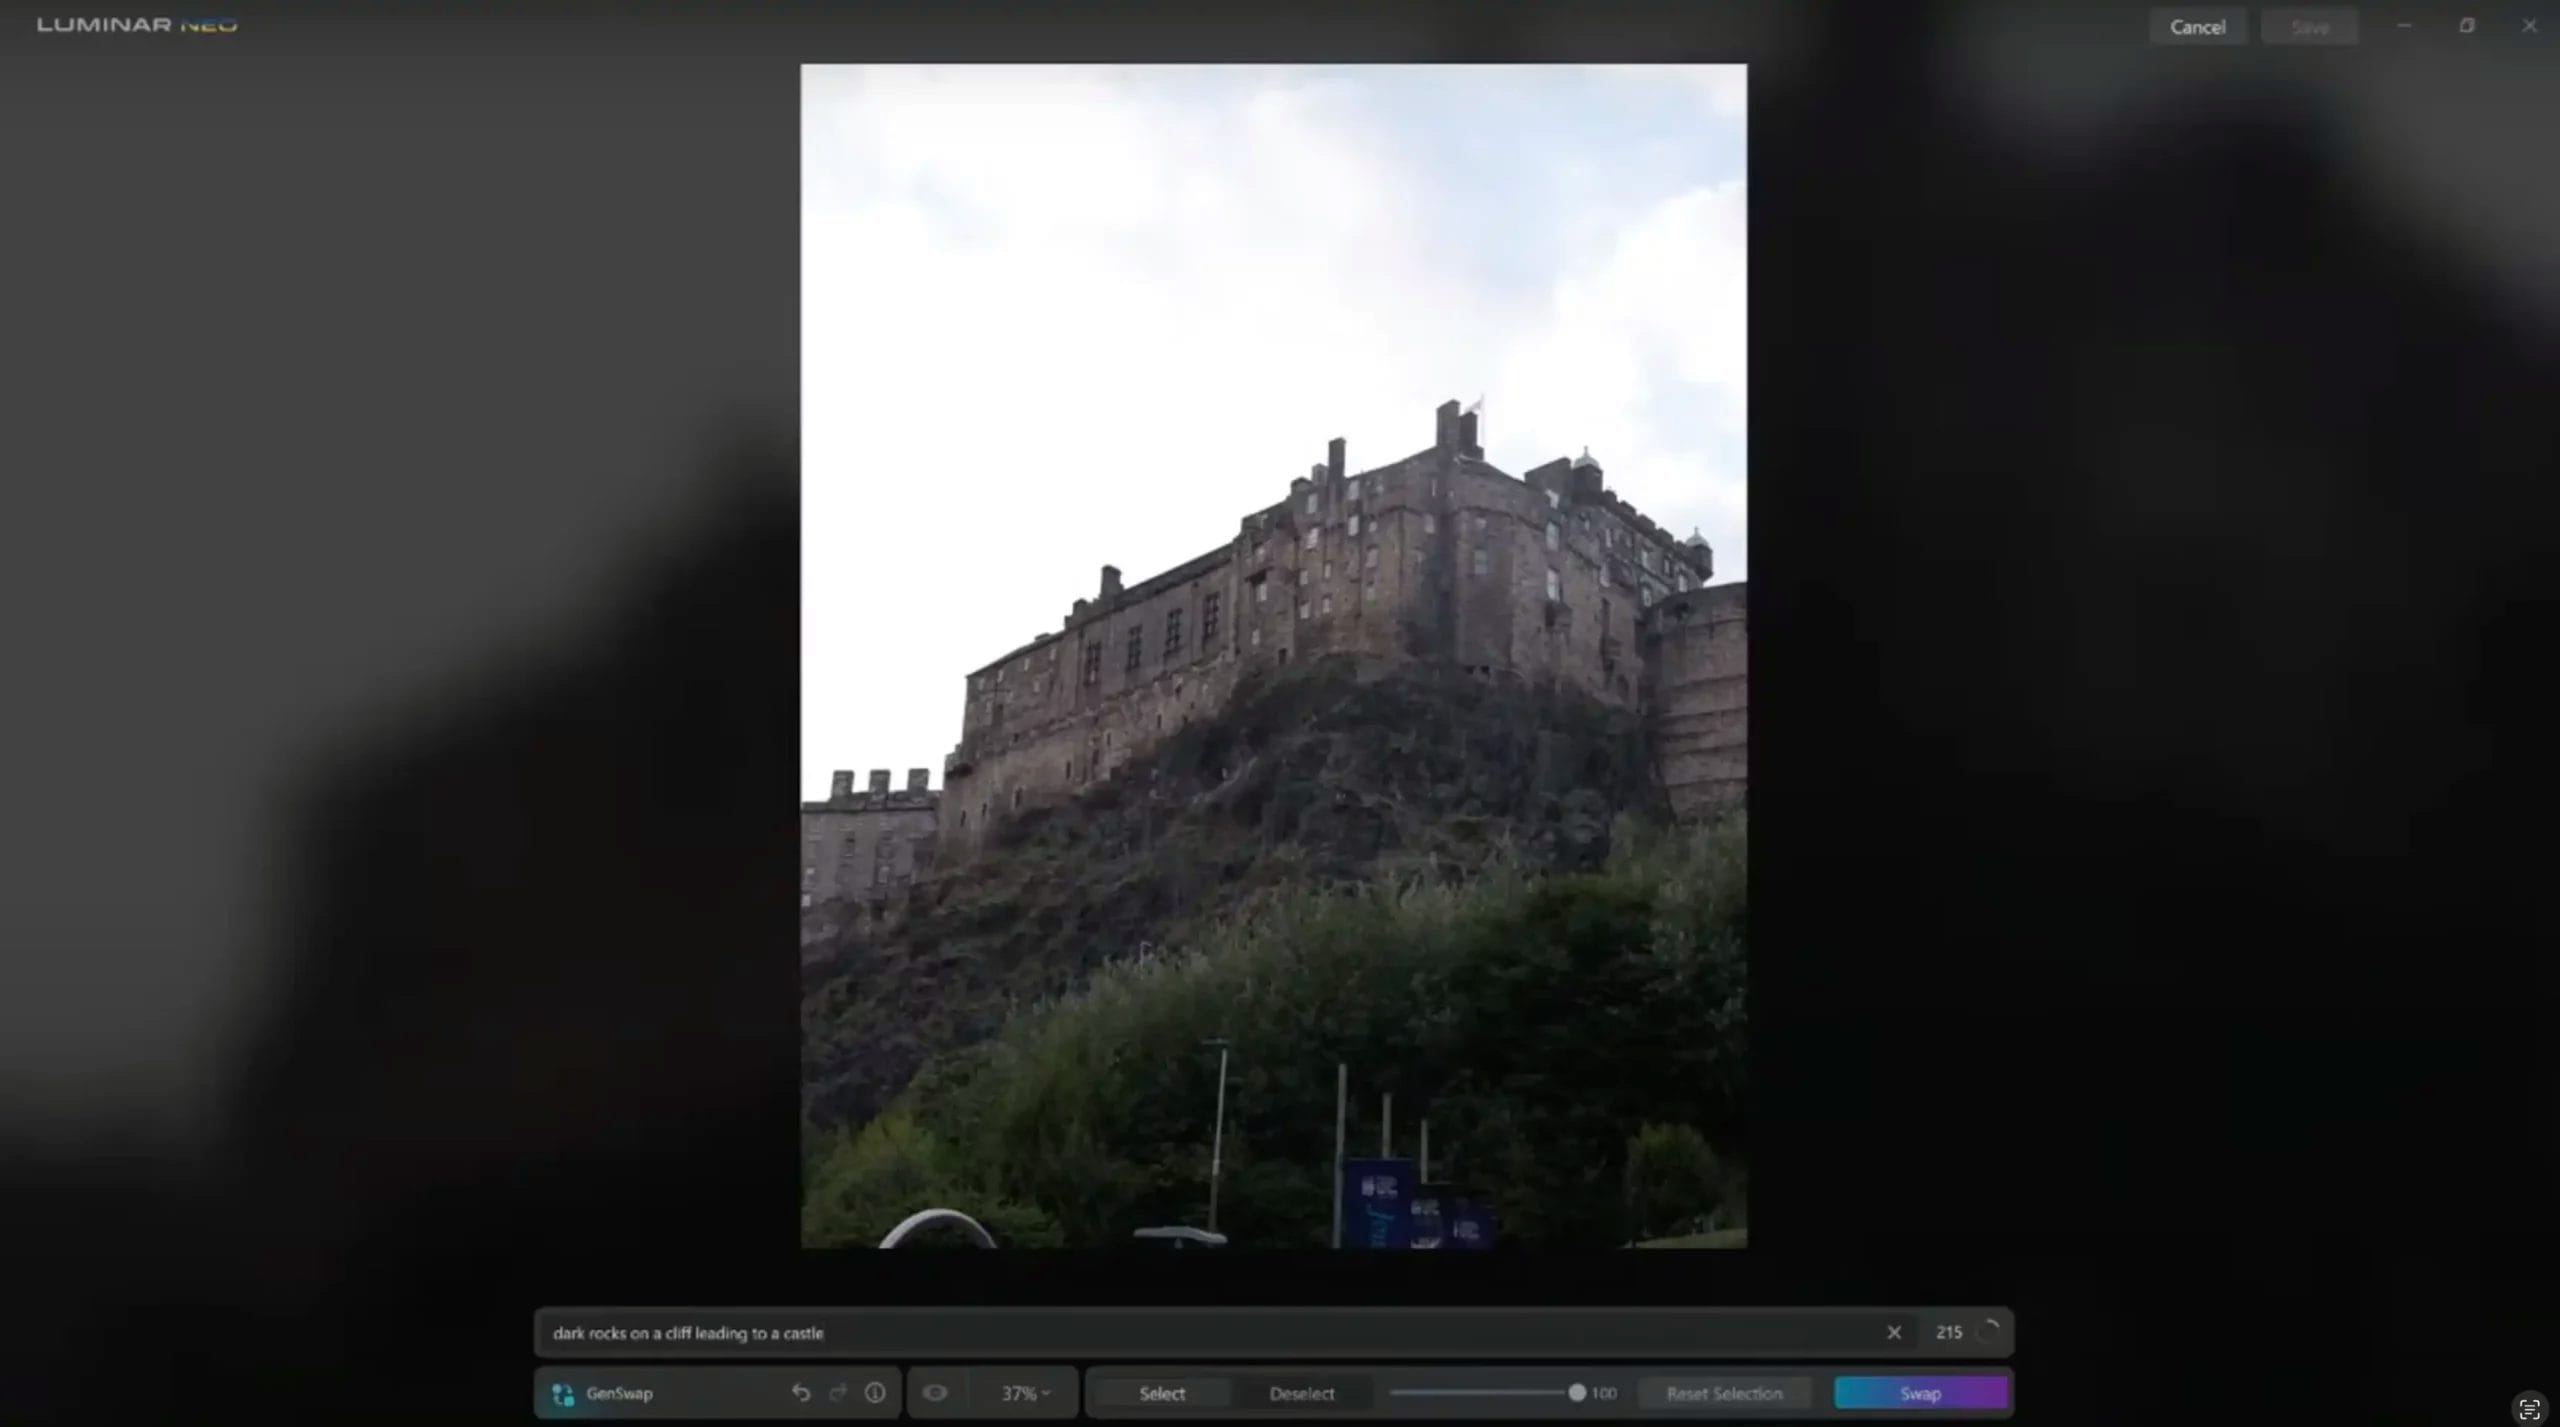
Adjust the brush size and generously select the object for substitution. Ensure shadows, reflections, and all pertinent details are included in your selection. This aids in achieving a flawless replacement. Precision isn’t necessary; the tool thrives on broader selections, so feel free to highlight the area outside the object Deselect as needed.
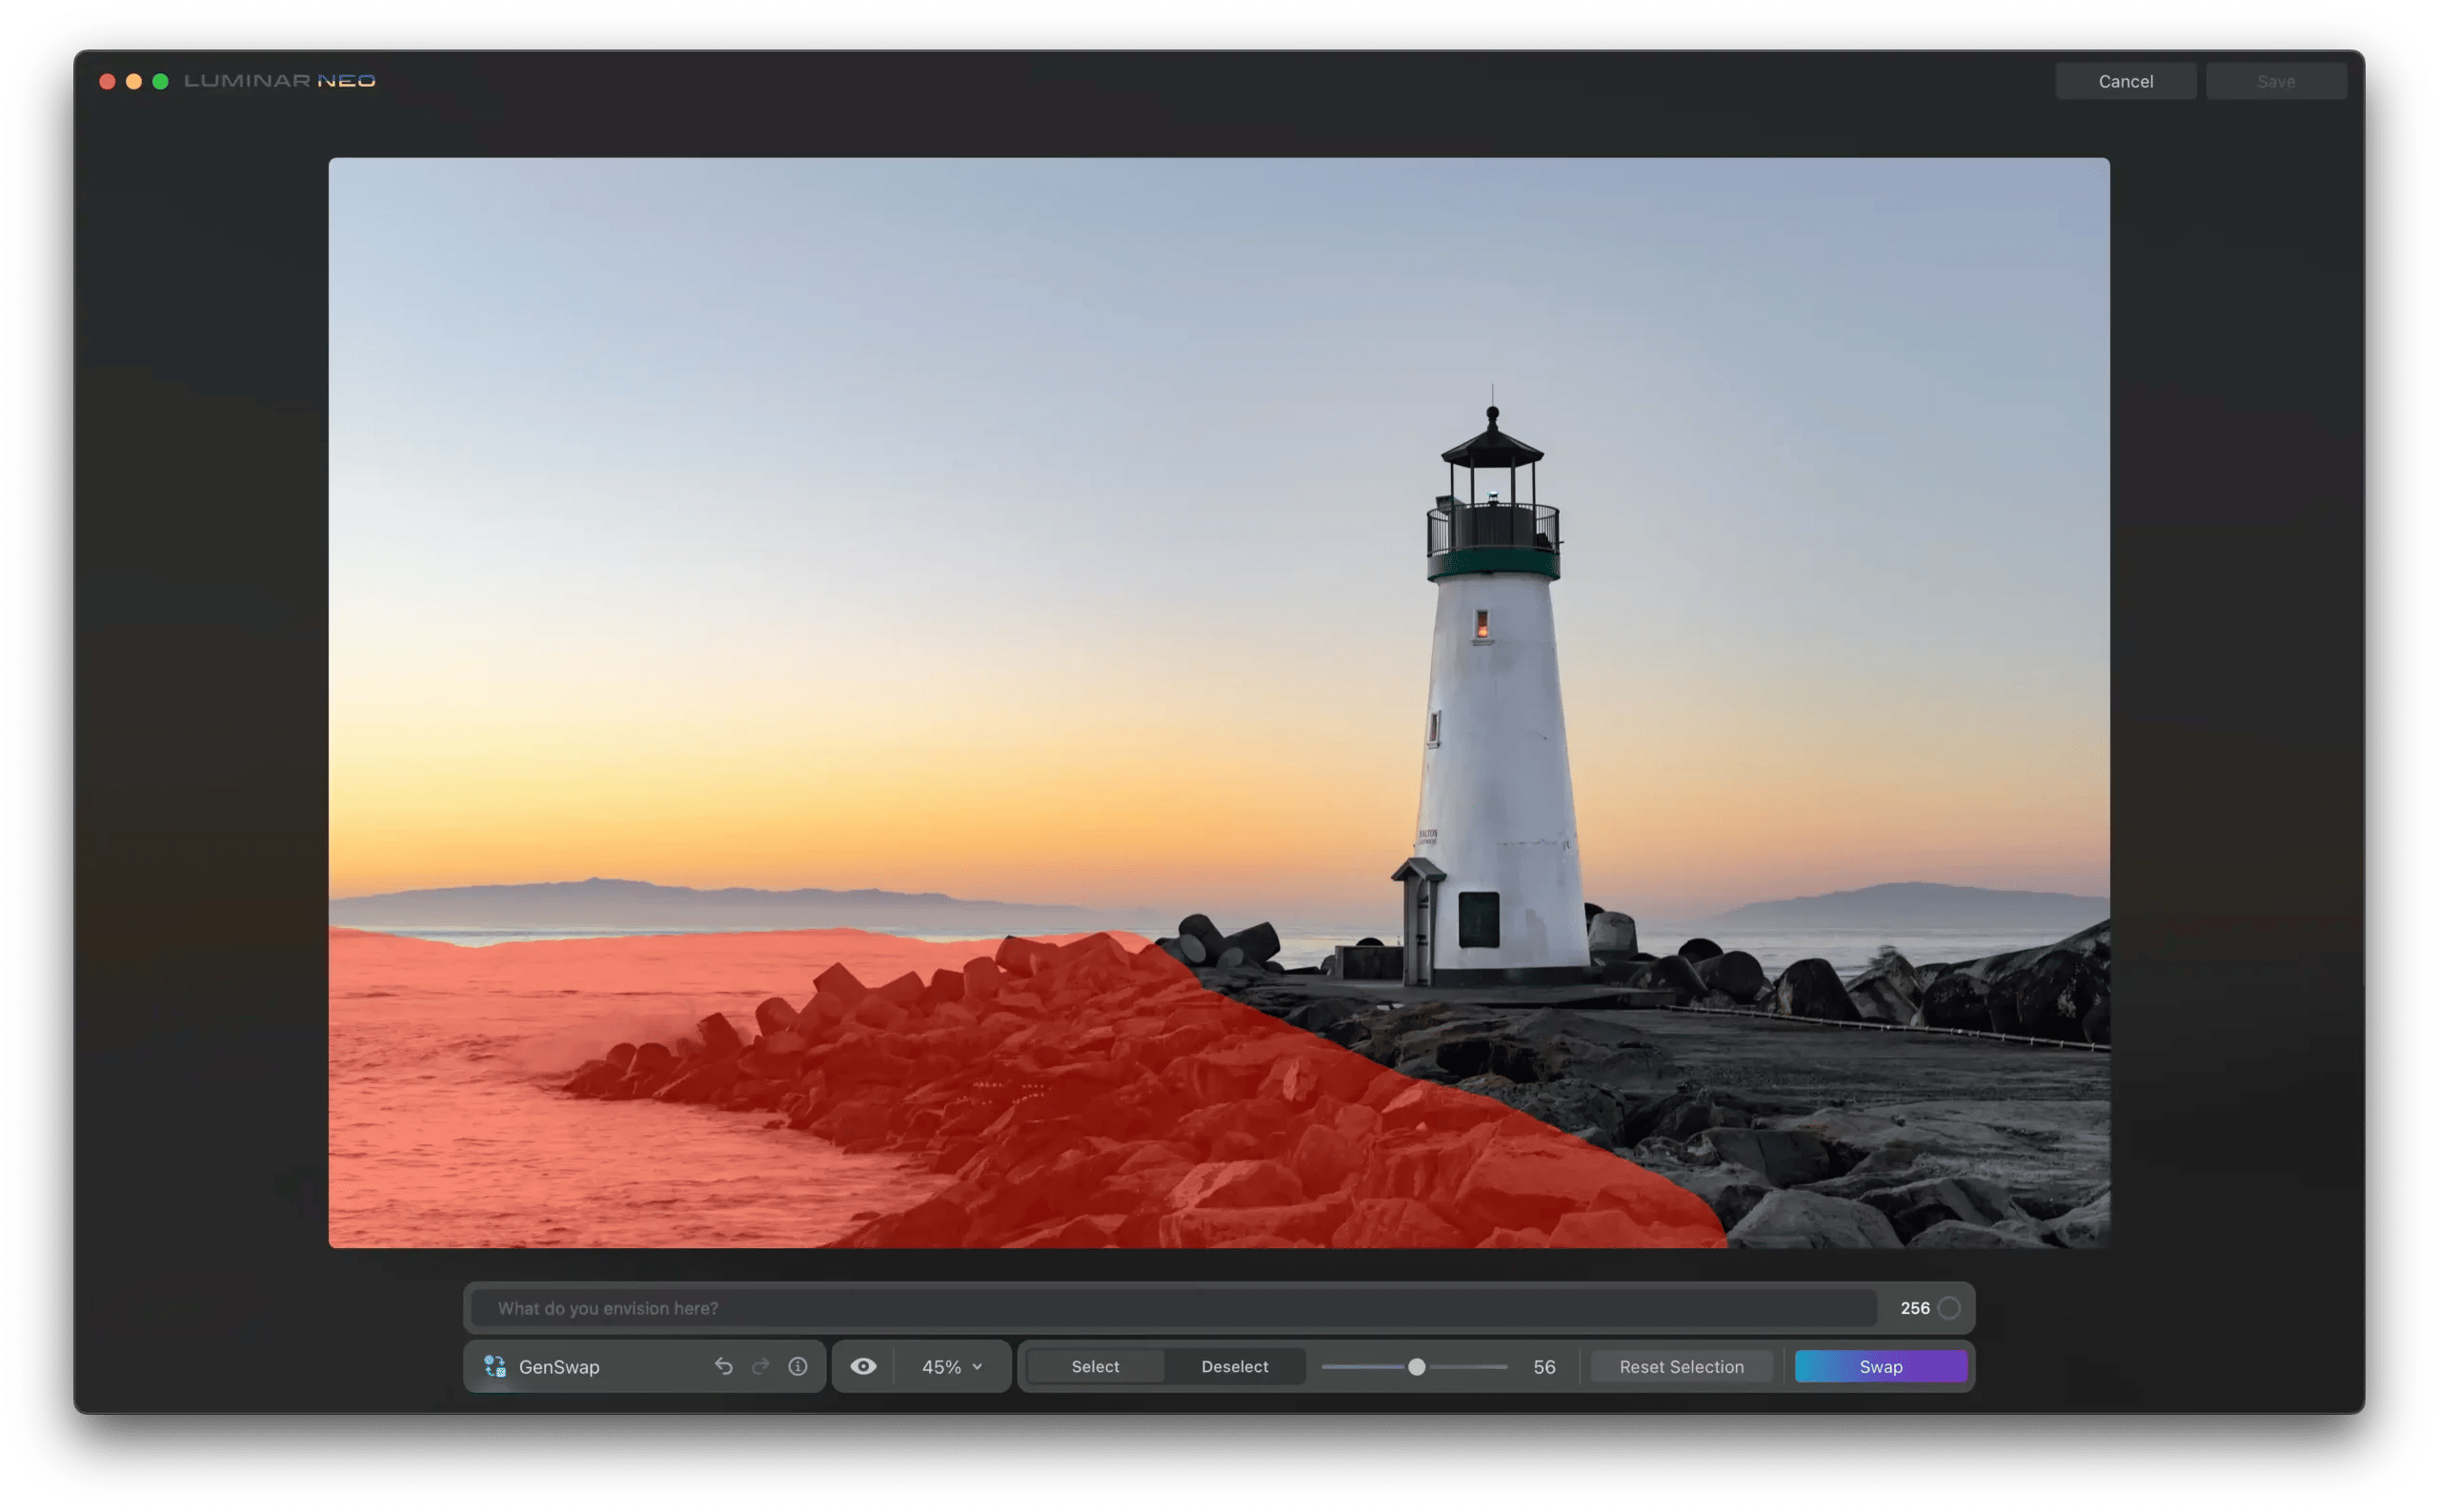
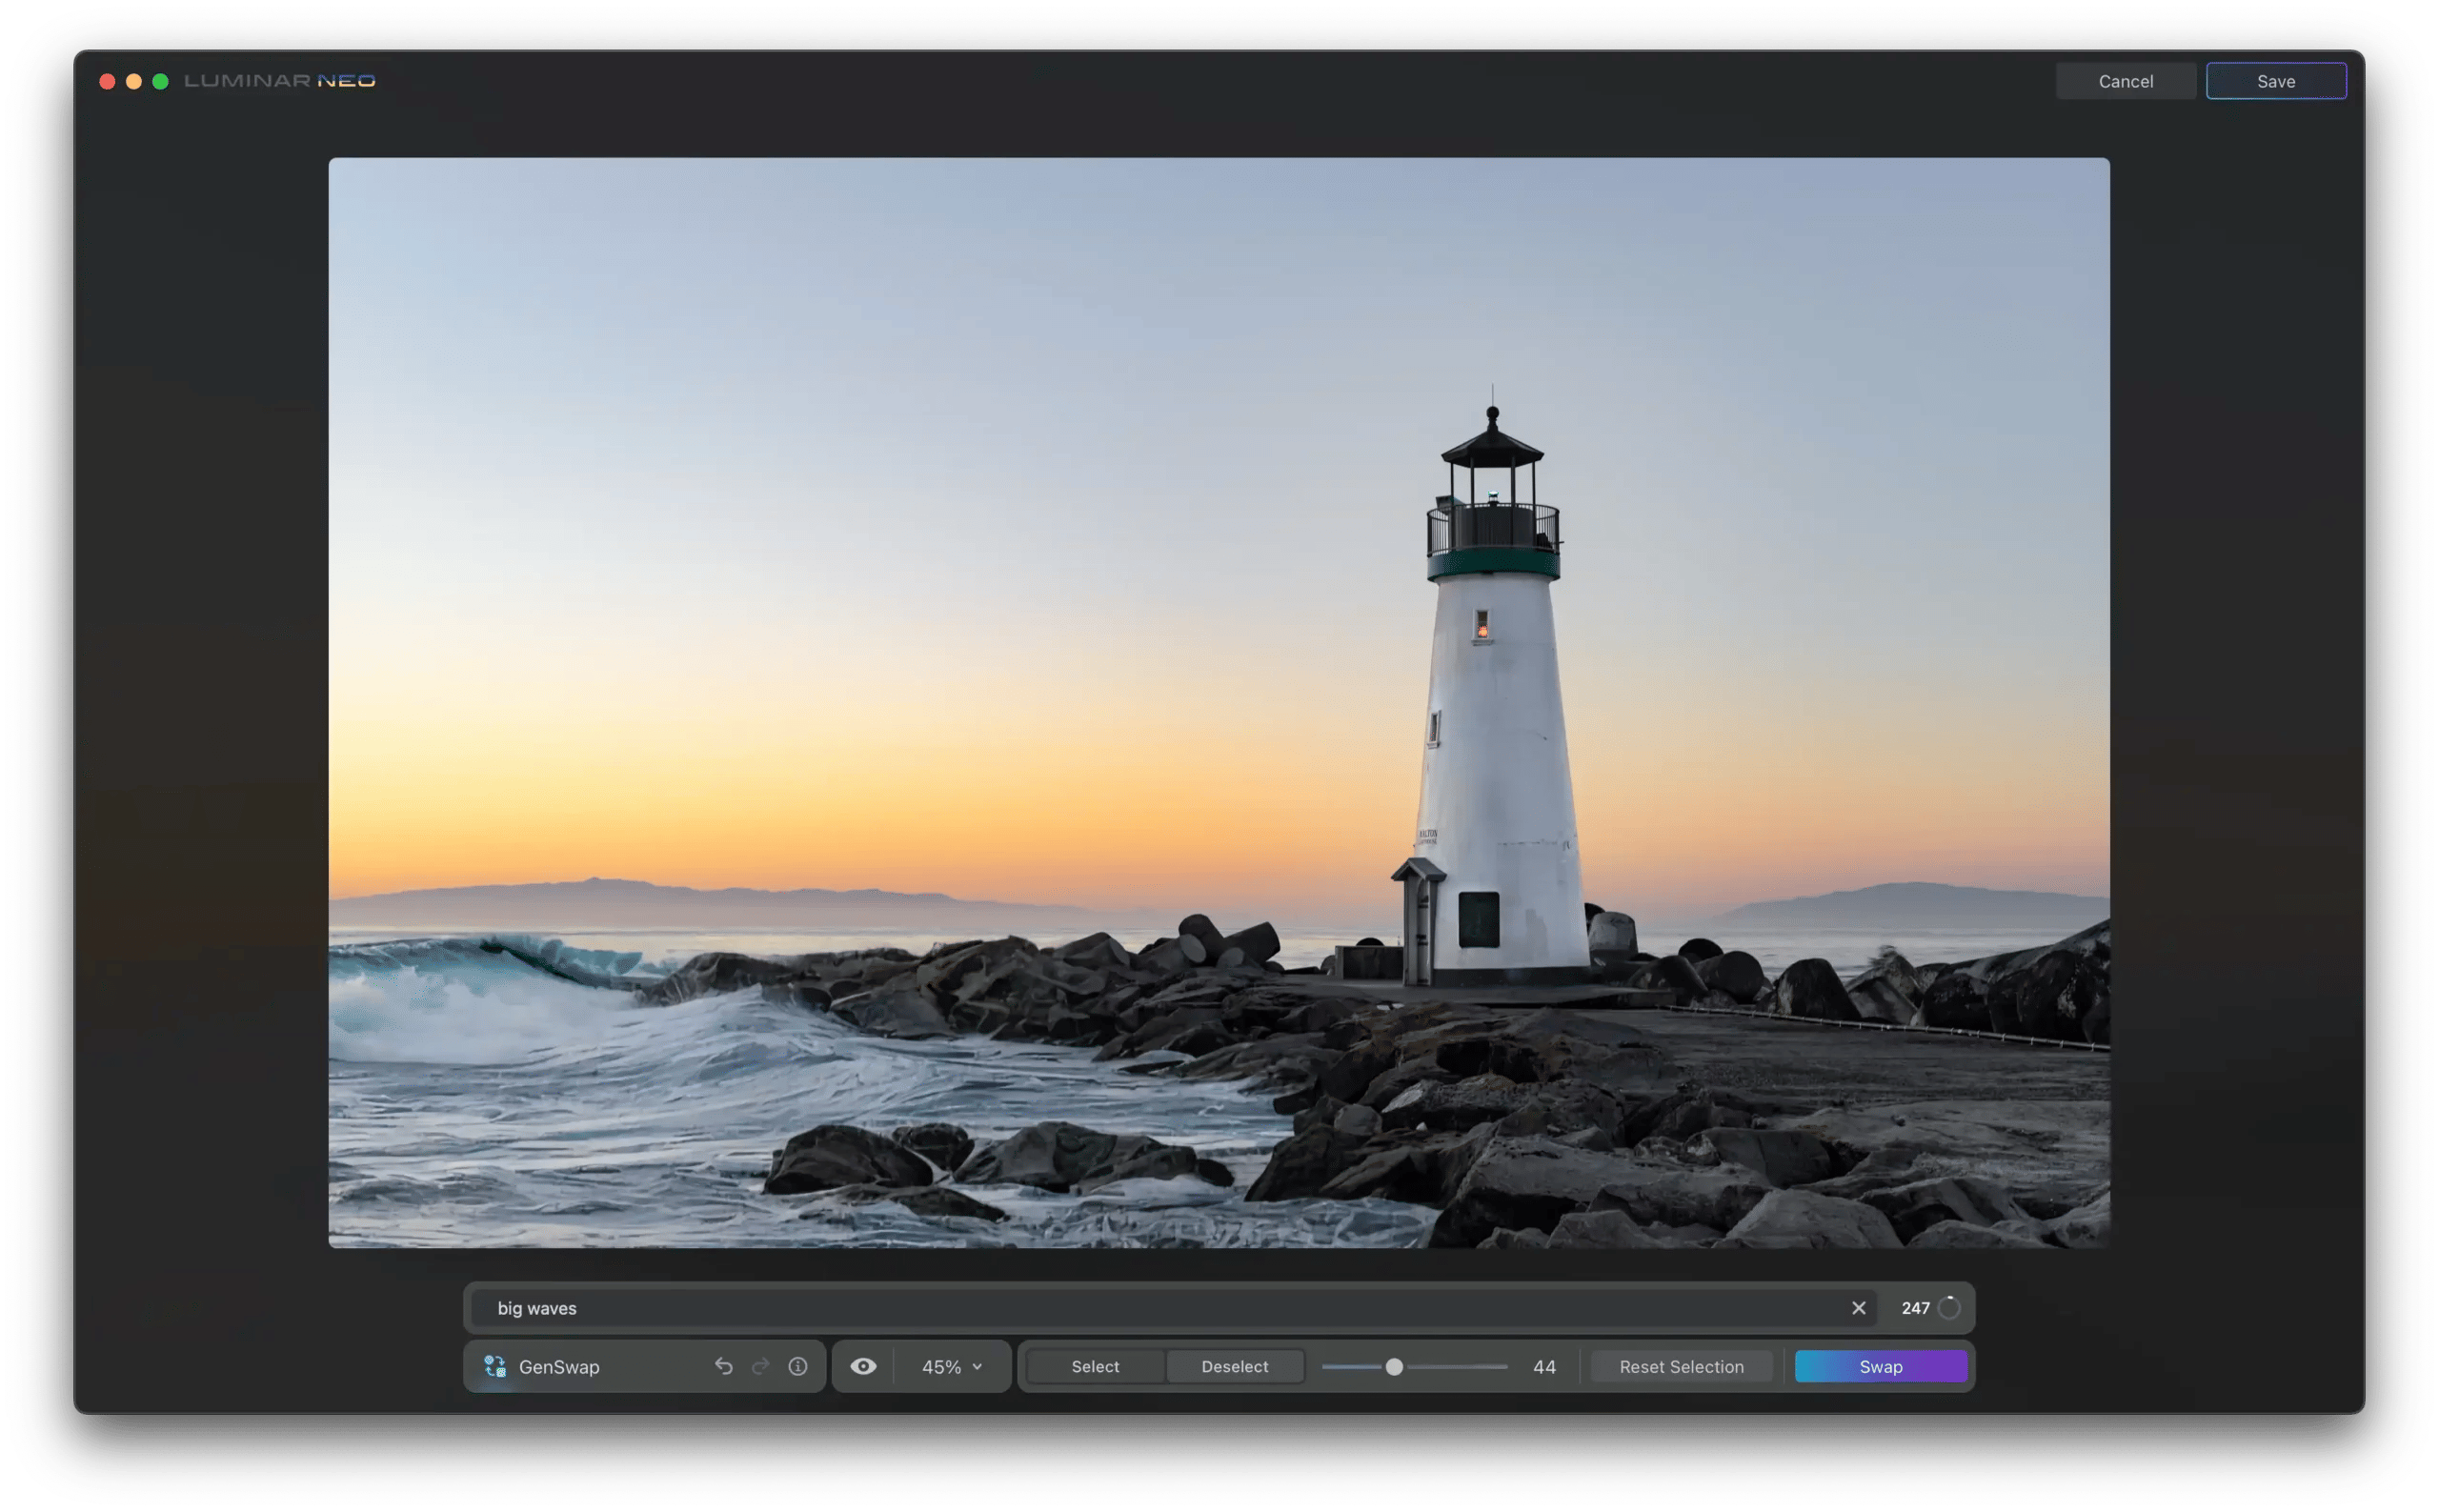
In the prompt text box, describe the object you’d like to see substituted using nouns and adjectives. Be aware of the 256-character limit, as an excess of text might prompt unnecessary imagery generation.
Avoid verbs like “change,” “add,” “erase,” or “remove,” as these could inadvertently prompt the generation of text into the image. Focus solely on describing the object for substitution in the selected area.


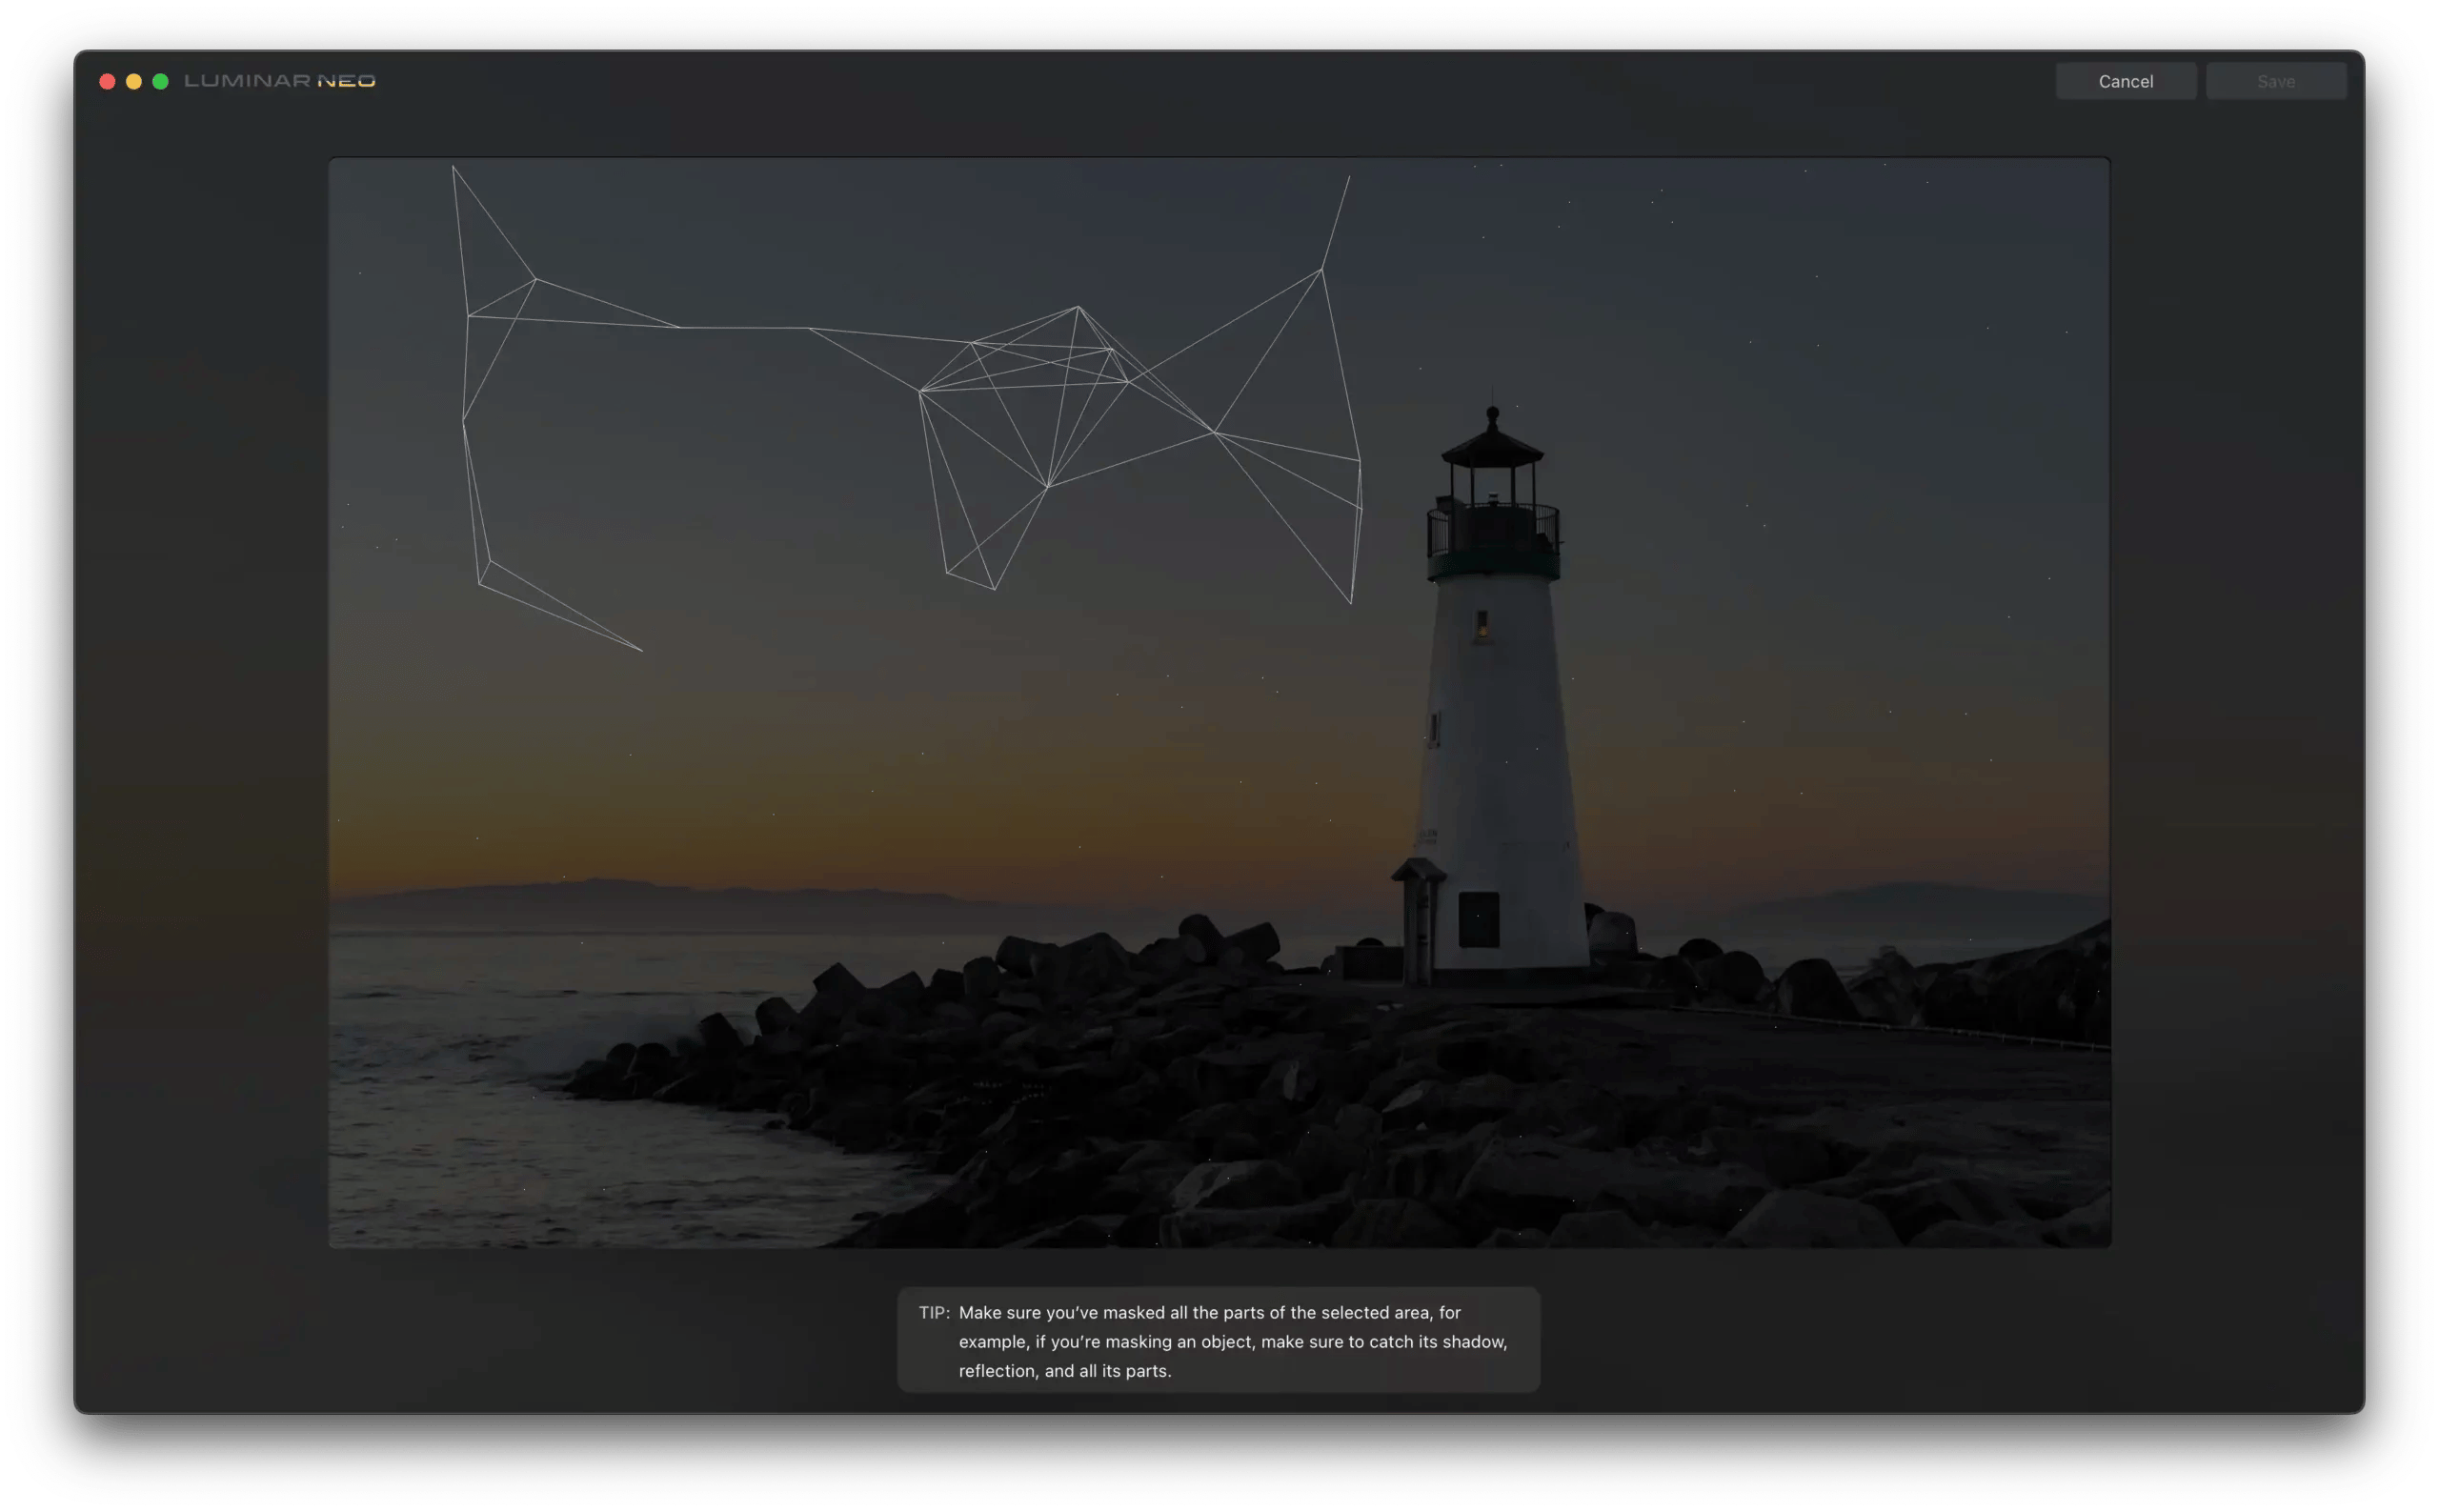
Click the “Swap” button to kickstart the object replacement. Transforming your photo might take multiple attempts at altering prompts and adjusting selections to fine-tune the results. You can cycle through different outcomes by repeatedly selecting the “Swap” button until you achieve the desired result. Luminar Neo’s AI is analyzing the image to seamlessly remove and replace selected objects, so generating results may take time.
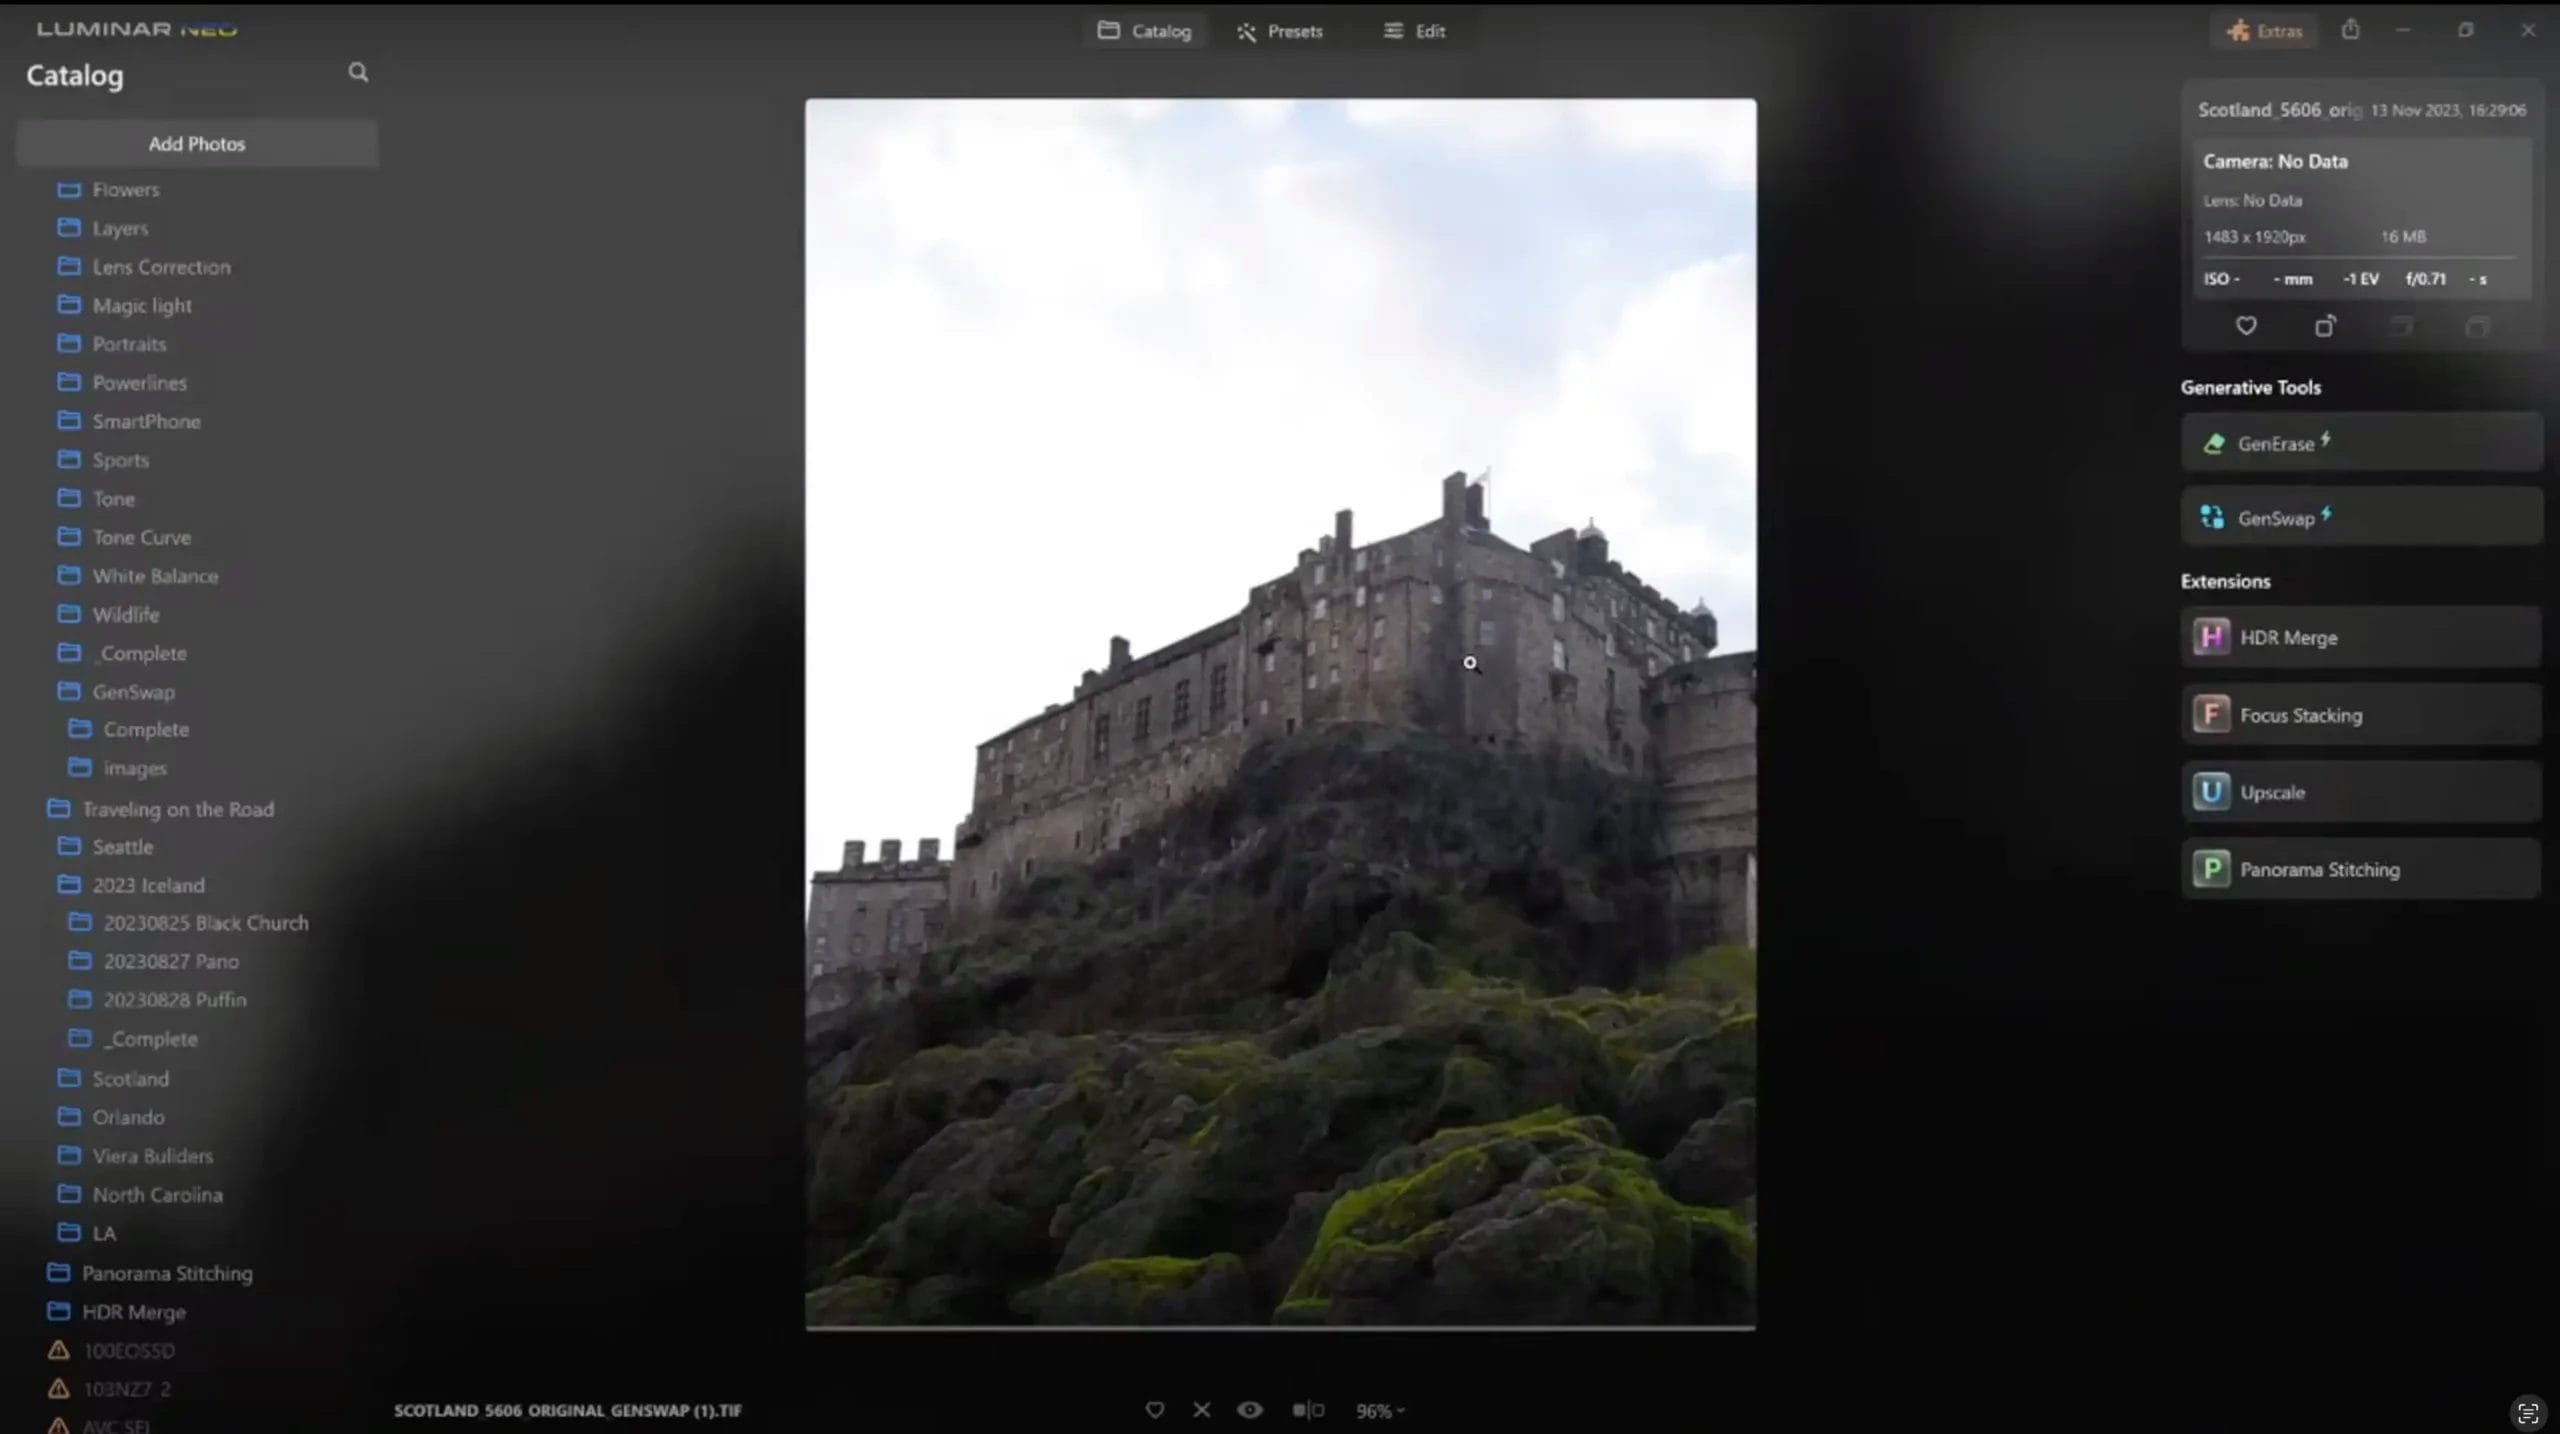
View the before and after results using the preview icon. Once you’re satisfied with the alterations, confirm by clicking the “Save” button.
Occasionally, when crafting prompts for GenSwap, you may encounter an “Inappropriate Content” error message. This alert indicates that the prompt’s content might be outside the algorithm’s permissible boundaries, resulting in inappropriate or unforeseen visual outcomes.
If you are certain that your prompt does not violate our terms and conditions, consider refining it by using different terms and avoid ones that might be considered inappropriate. This will help guide the AI to a more suitable outcome. Also, consider the area you are selecting for replacement. For example, replacing clothing on people can trigger content alerts depending upon which parts of the body they are covering.
The modified image will be renamed with “GenSwap” included in the filename and saved in the Genitive Creations folder.
Let’s explore a specific example from a video tutorial with Skylum’s Director of Education and Luminar Neo expert, Vanelli, on how to leverage GenSwap to transform an image.
The goal is to replace unwanted elements and introduce new ones. In this example, we begin with a photo of a majestic Scottish medieval castle and aim to enhance the overall composition for a captivating visual story.
Begin by identifying elements you wish to replace or enhance.
Start to experiment with descriptive prompts to guide the AI. Start with a broad prompt like “dark rocks on a cliff leading to a castle” and iteratively refine it to align with your envisioned outcome.
This iterative process allows for adjustments to coax the AI into generating the desired transformation.
Feel free to make multiple attempts, subtle prompt adjustments, and precise selections to refine the output. Because of GenSwsap’s flexibility, you can fine-tune the AI output in alignment with your creative vision.
Each iteration brings you closer to achieving the desired transformation, so continue to experiment until you’re happy with the final result.

Let’s look at another example of GenSwap in action, with landscape photographer and Luminar Neo expert, Jakob Bors.
To follow along with Jakub as he transforms his image with GenSwap, head to the video description and download the sample files provided. These will be our canvas for exploring GenSwap’s capabilities.
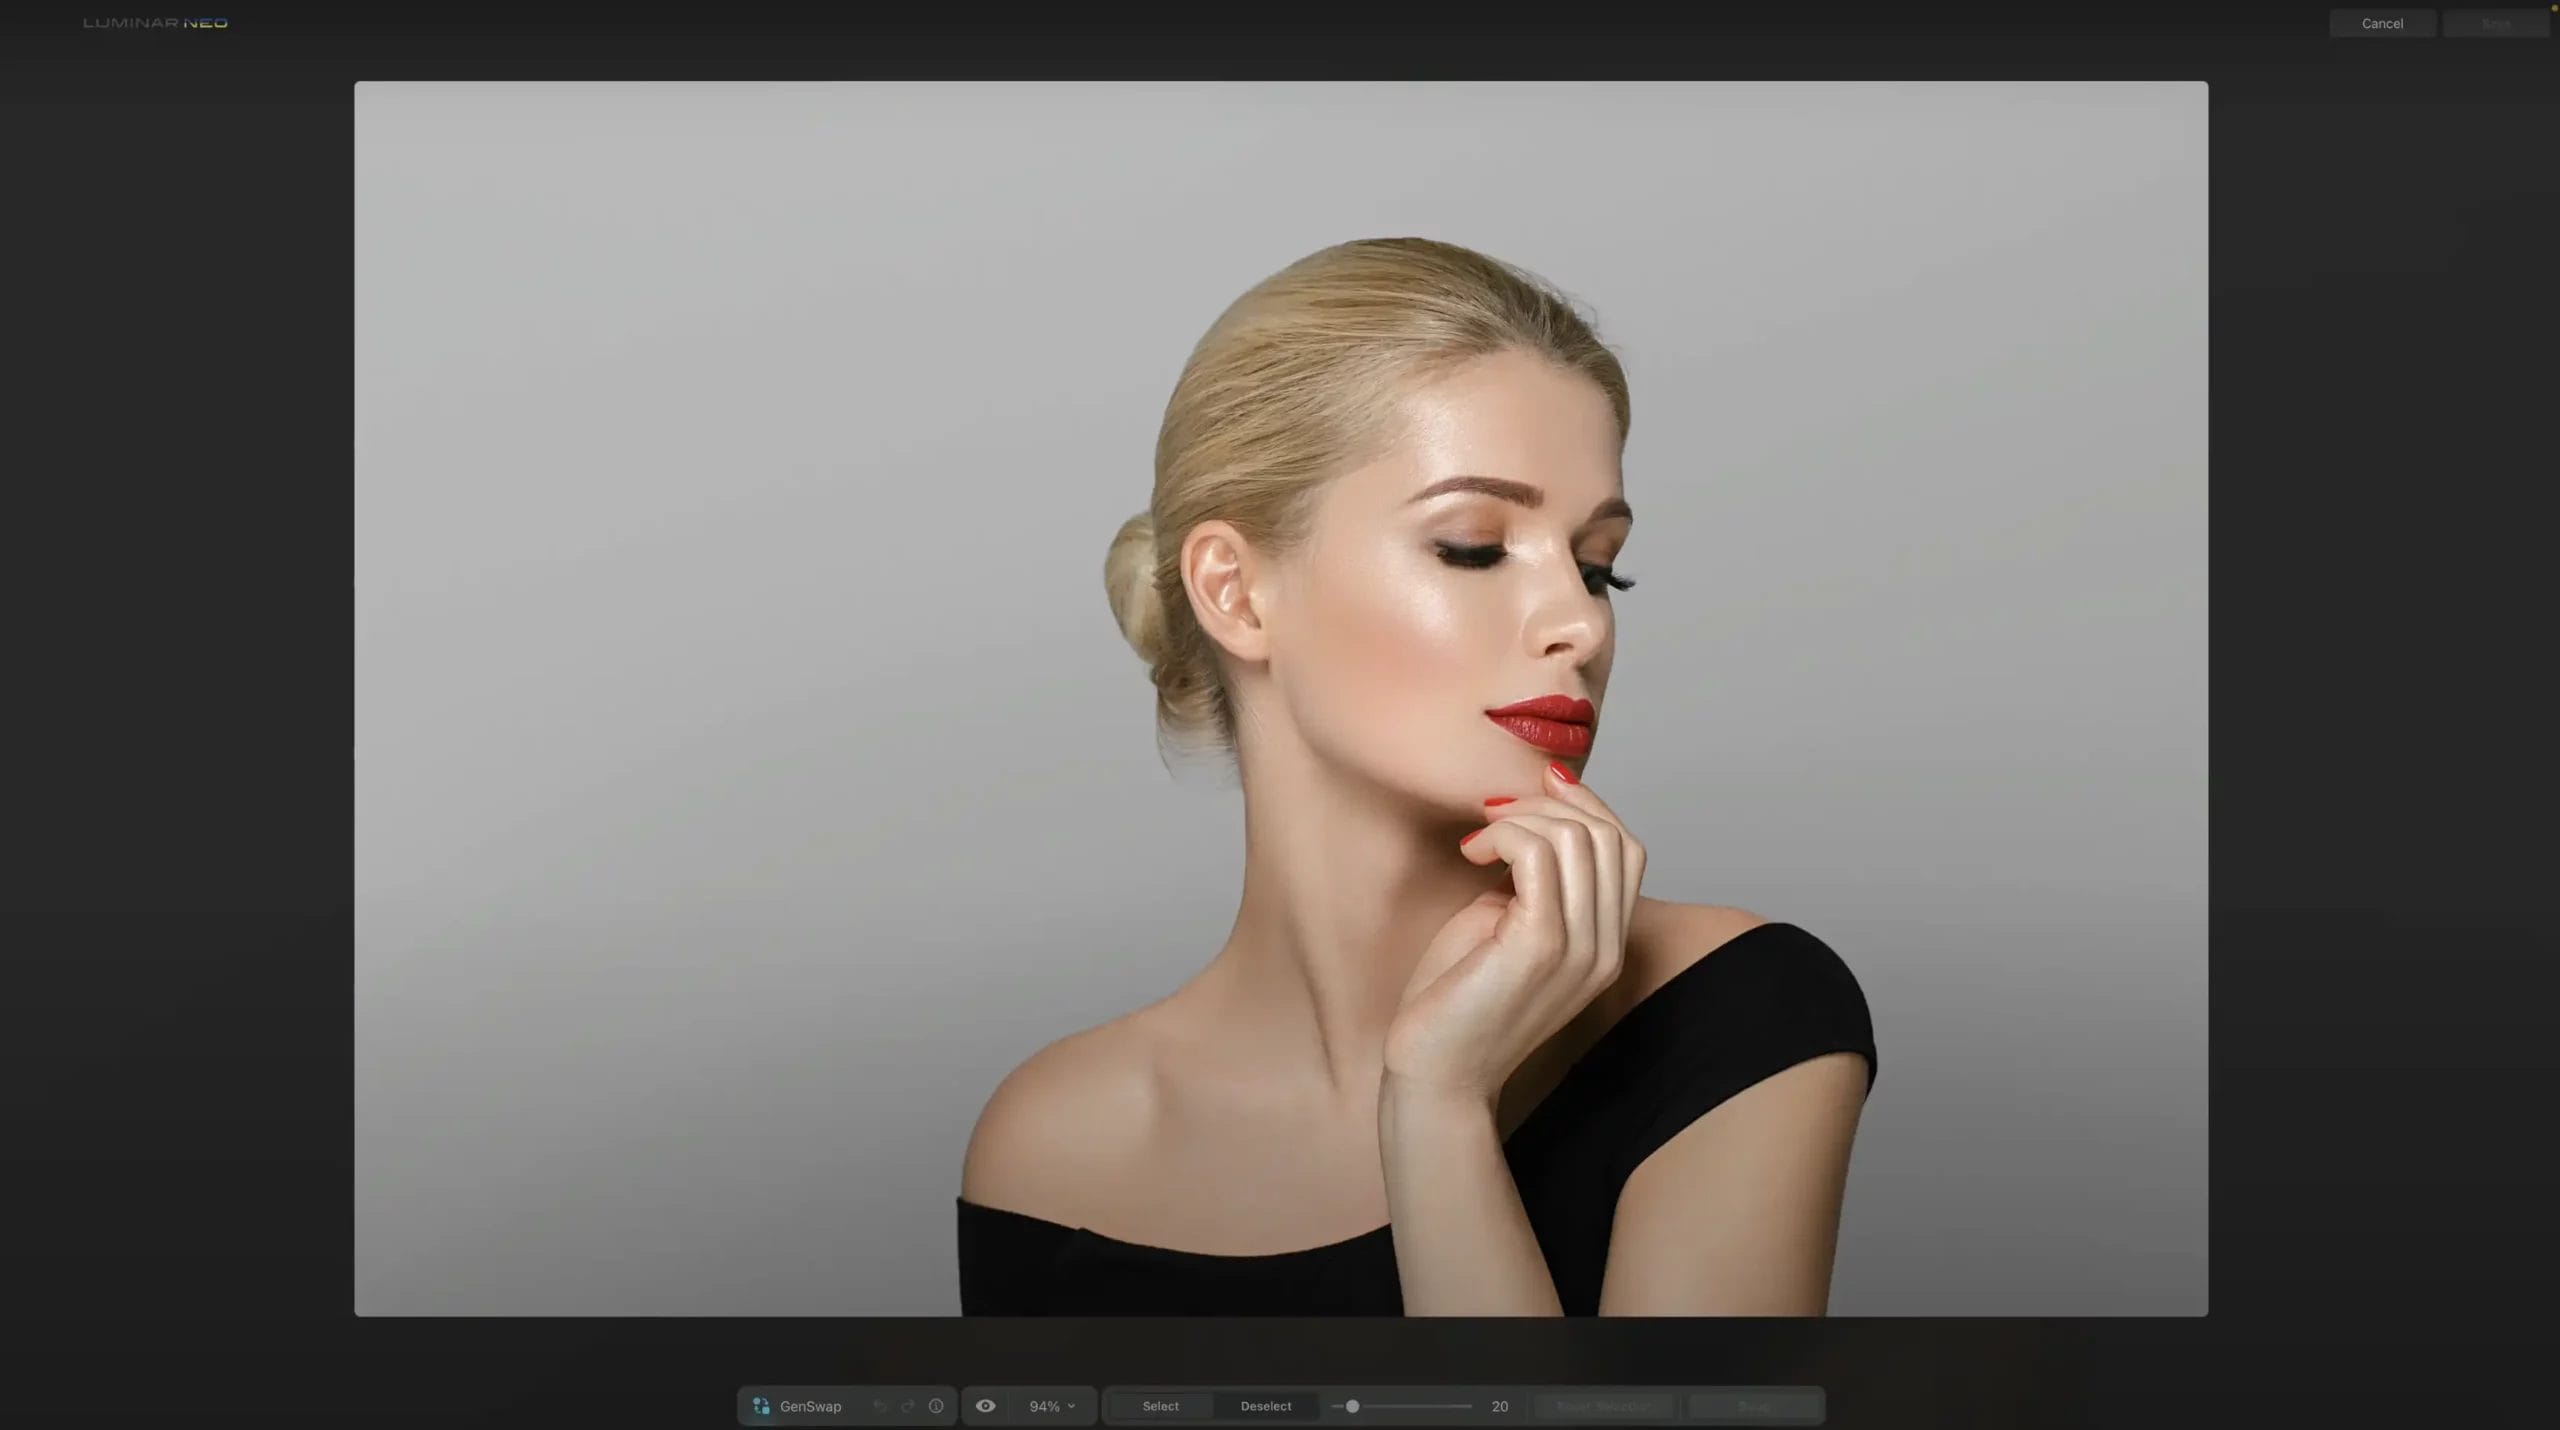
Step 1. To start, select an image within the Catalog. Jakub uses an image featuring a castle.

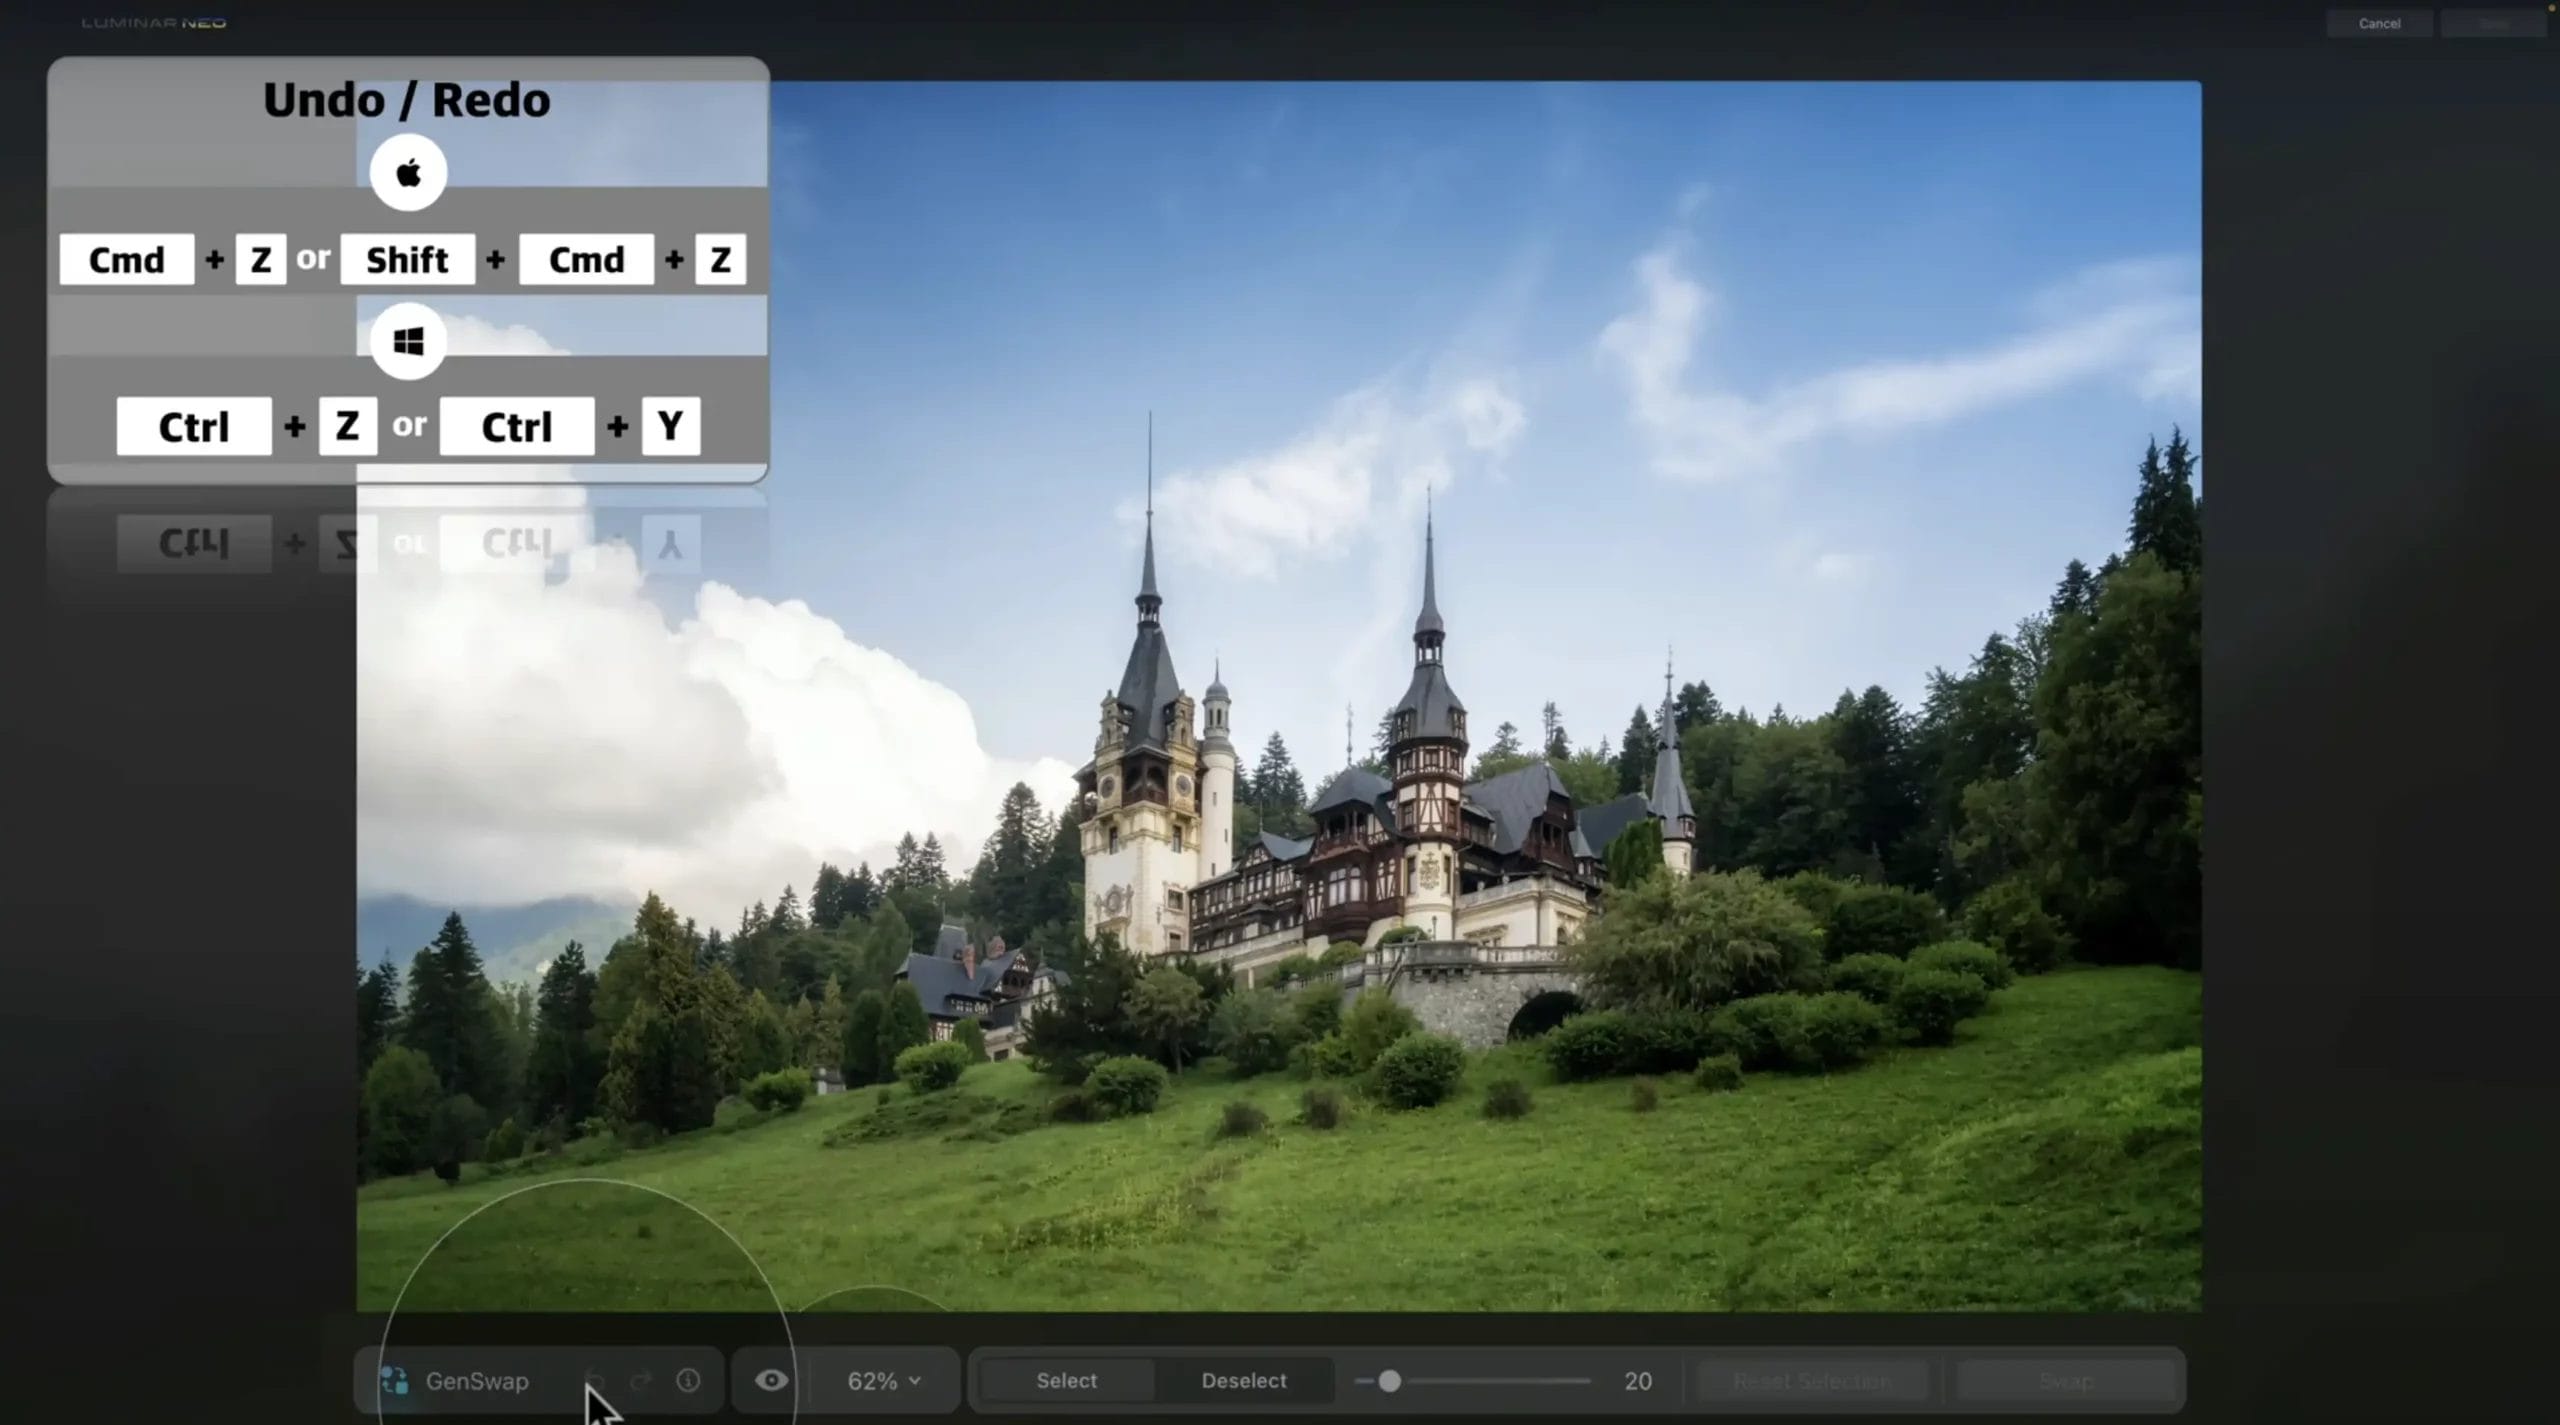
Step 2. Get familiar with the controls. You’ll notice options to undo/redo actions, an information icon for more details, before/after comparisons, zoom features, and brush controls for precise selection.
Step 3. Once you’re ready to start editing, simply select the area you’d like to modify, using the brush tool. You’ll encounter two options: select and deselect. The process is straightforward. By selecting, you’ll brush over the image.
If an error occurs, simply choose deselect, then re-brush the area. You can adjust the brush size and utilize ‘reset selection’ by pressing Alt. This reset feature removes any selected areas from the image.
Jakub selects the lower section of the image, then releases it to reveal the prompt field.
He then inputs “lake with green water and reflection” in the prompt field, clicks “Swap” and waits for the AI to process the request.
Once the result is revealed, review and refine the prompt if needed, ensuring that the level of detail given matches what you’re aiming to add.

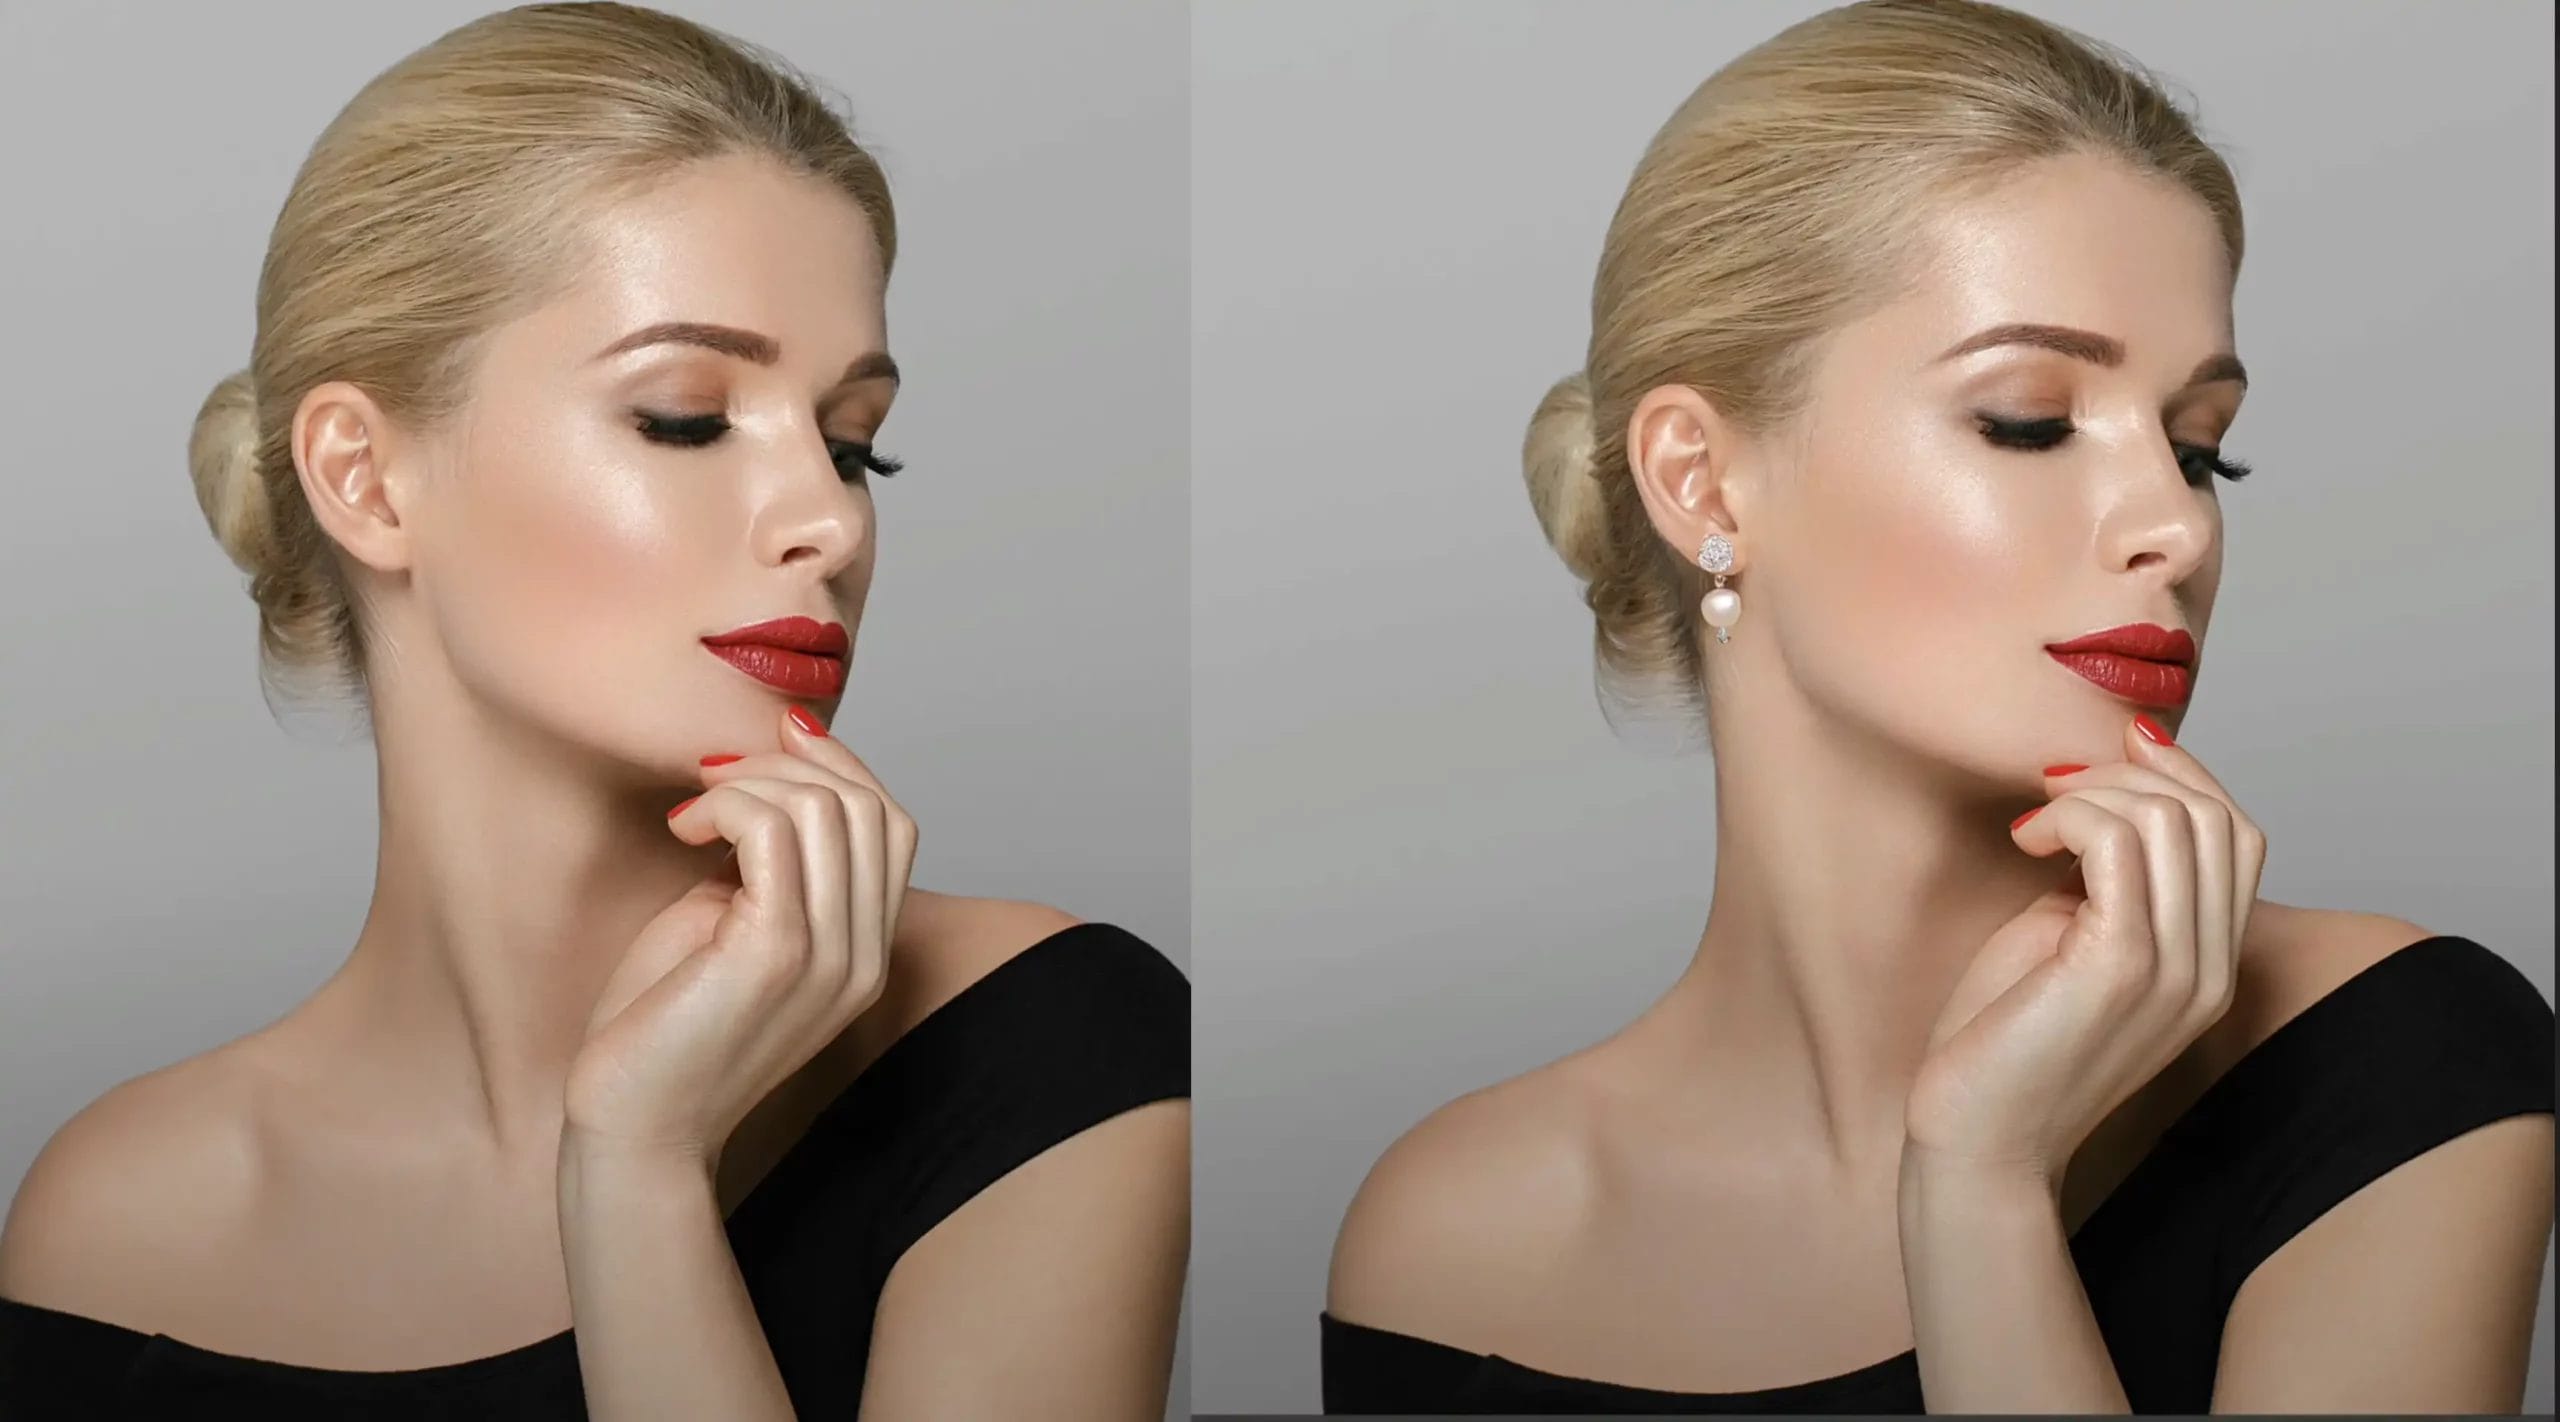
Transitioning to a portrait image, Jakub demonstrates adding a pearl earring, ensuring as always to adjust the brush size and refine the prompt.
In this round of editing, the focus is on a portrait of a lady in a black dress.
Here, Jakub starts by using a slightly larger brush, adjusting the size with the slider and delicately applying it to the ear and its surroundings.
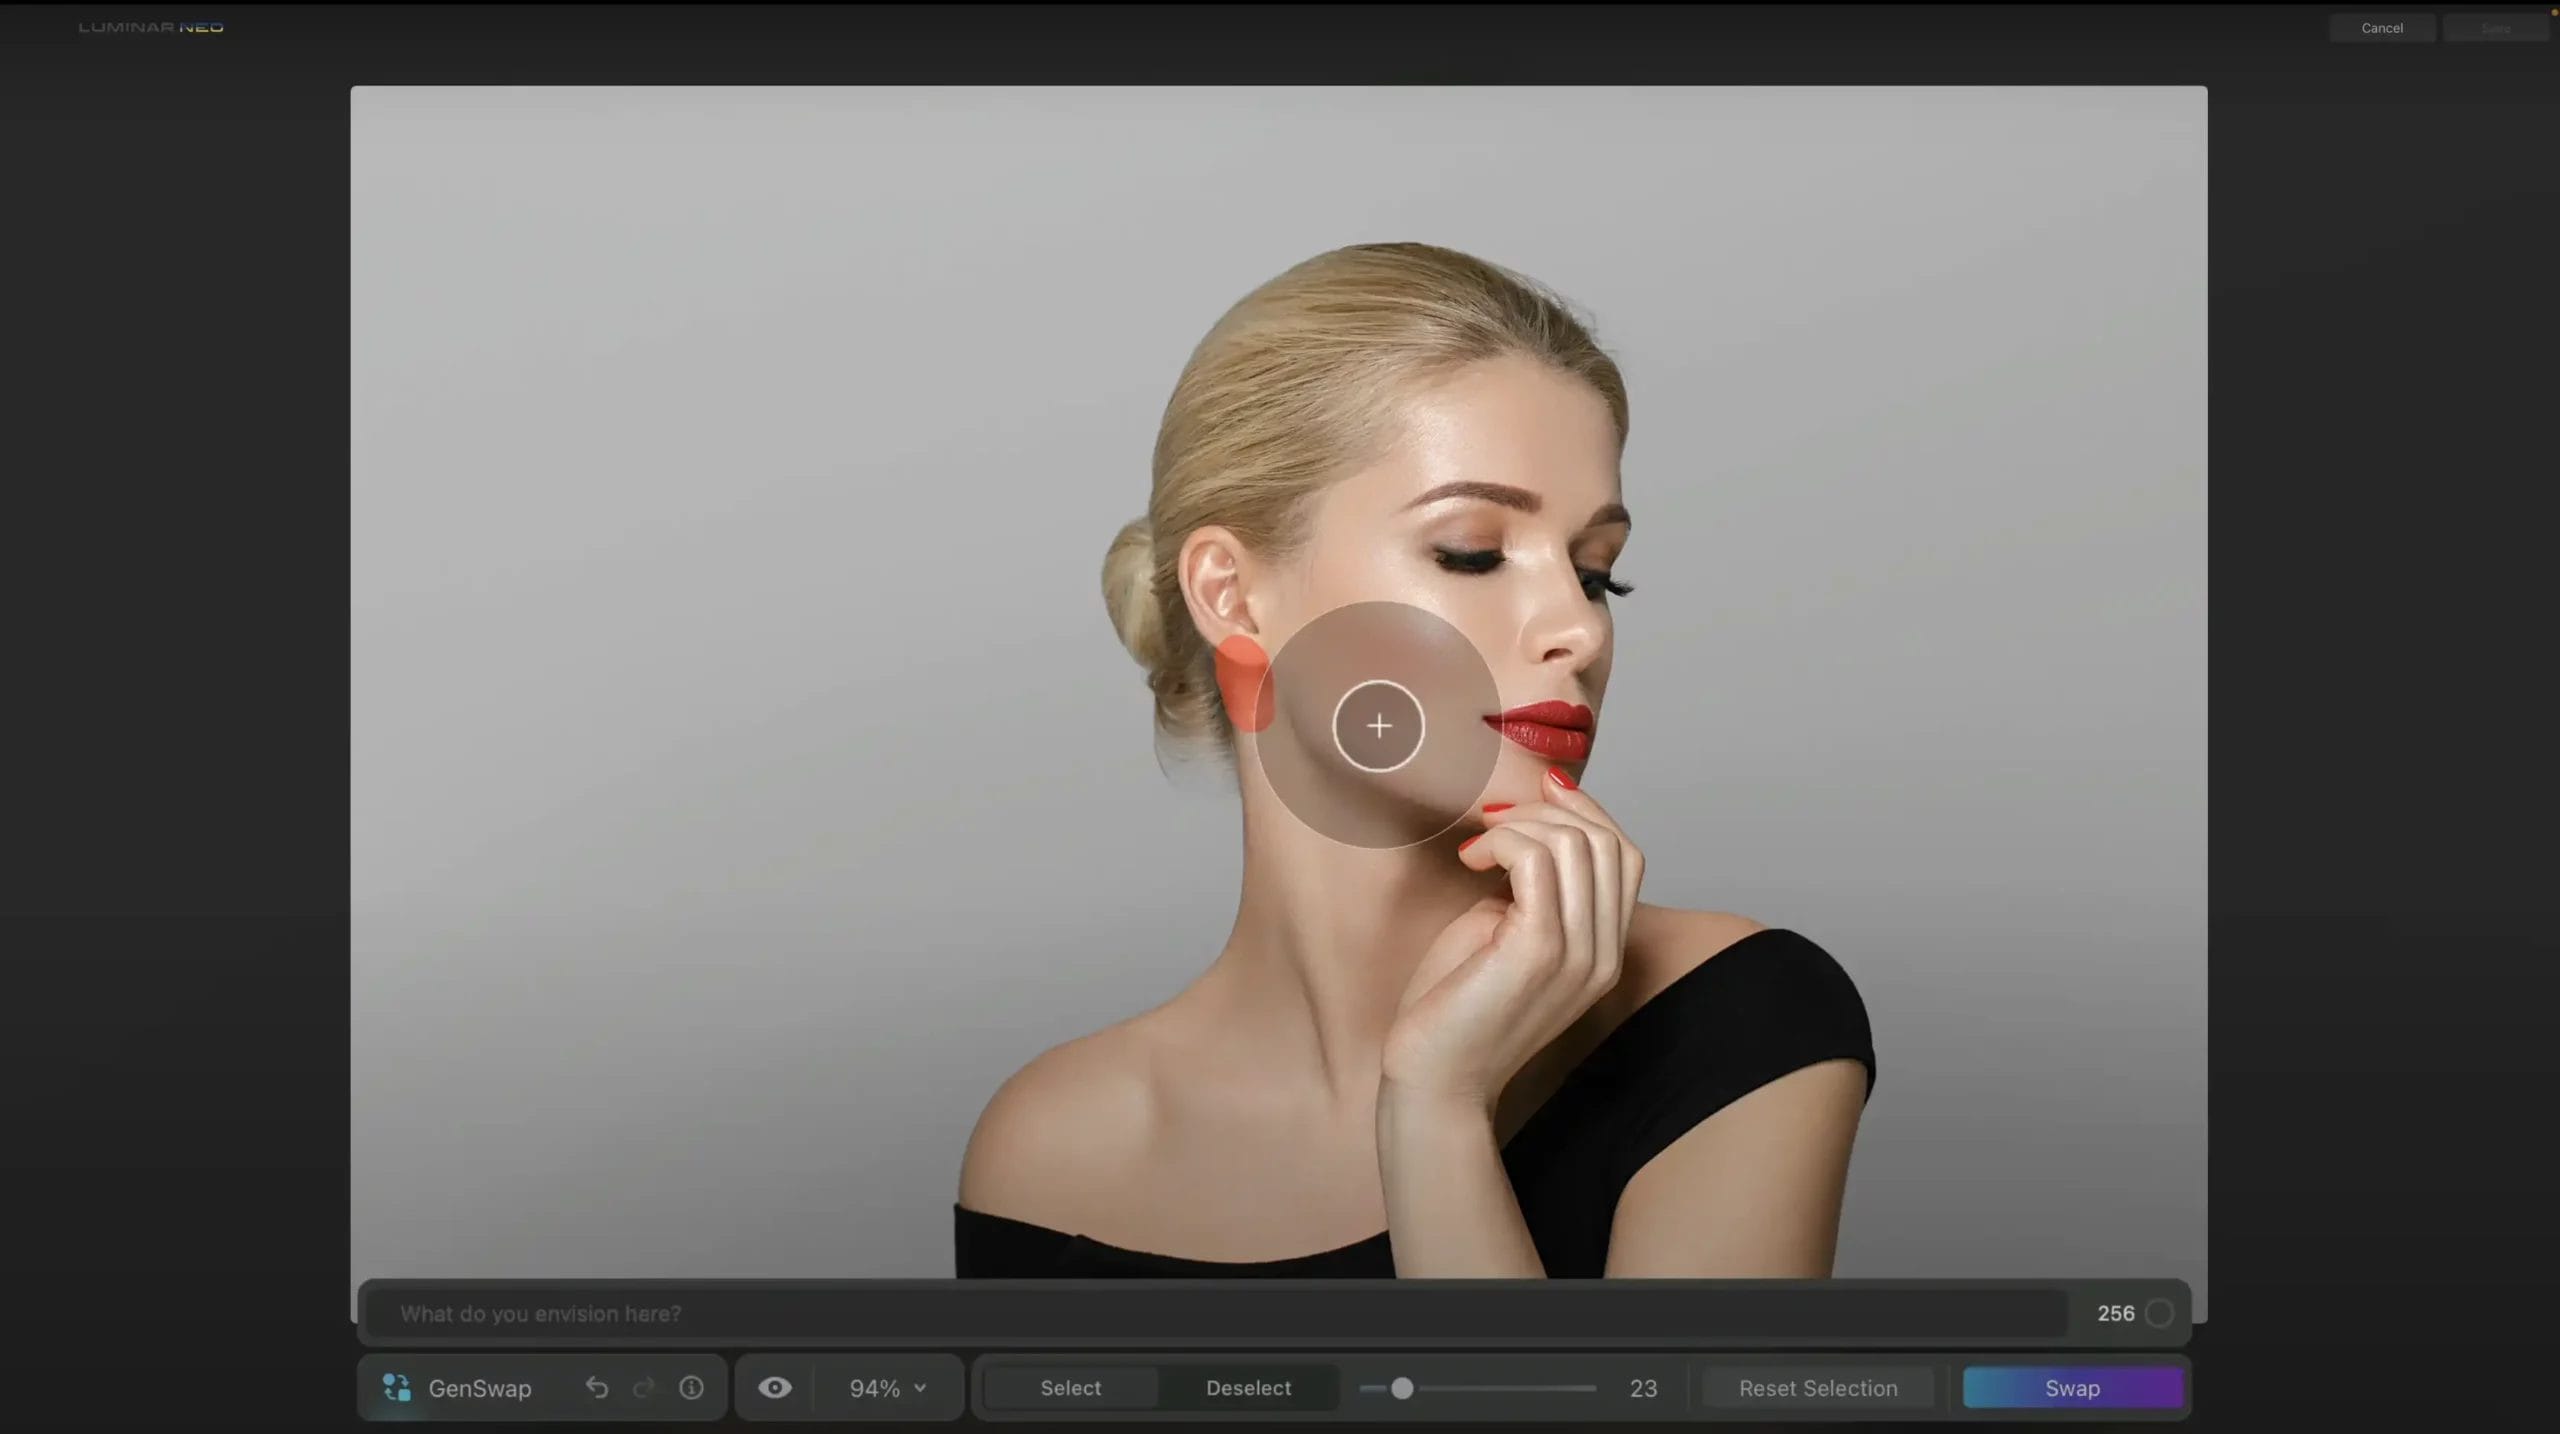
Once satisfied with the selection, he inputs ‘white pearl earring’ into the prompt field and clicks ‘Swap.’
The result shows how the AI blends the earring seamlessly into the image. If you prefer a different earring, simply click ‘Swap’ without changing the prompt.
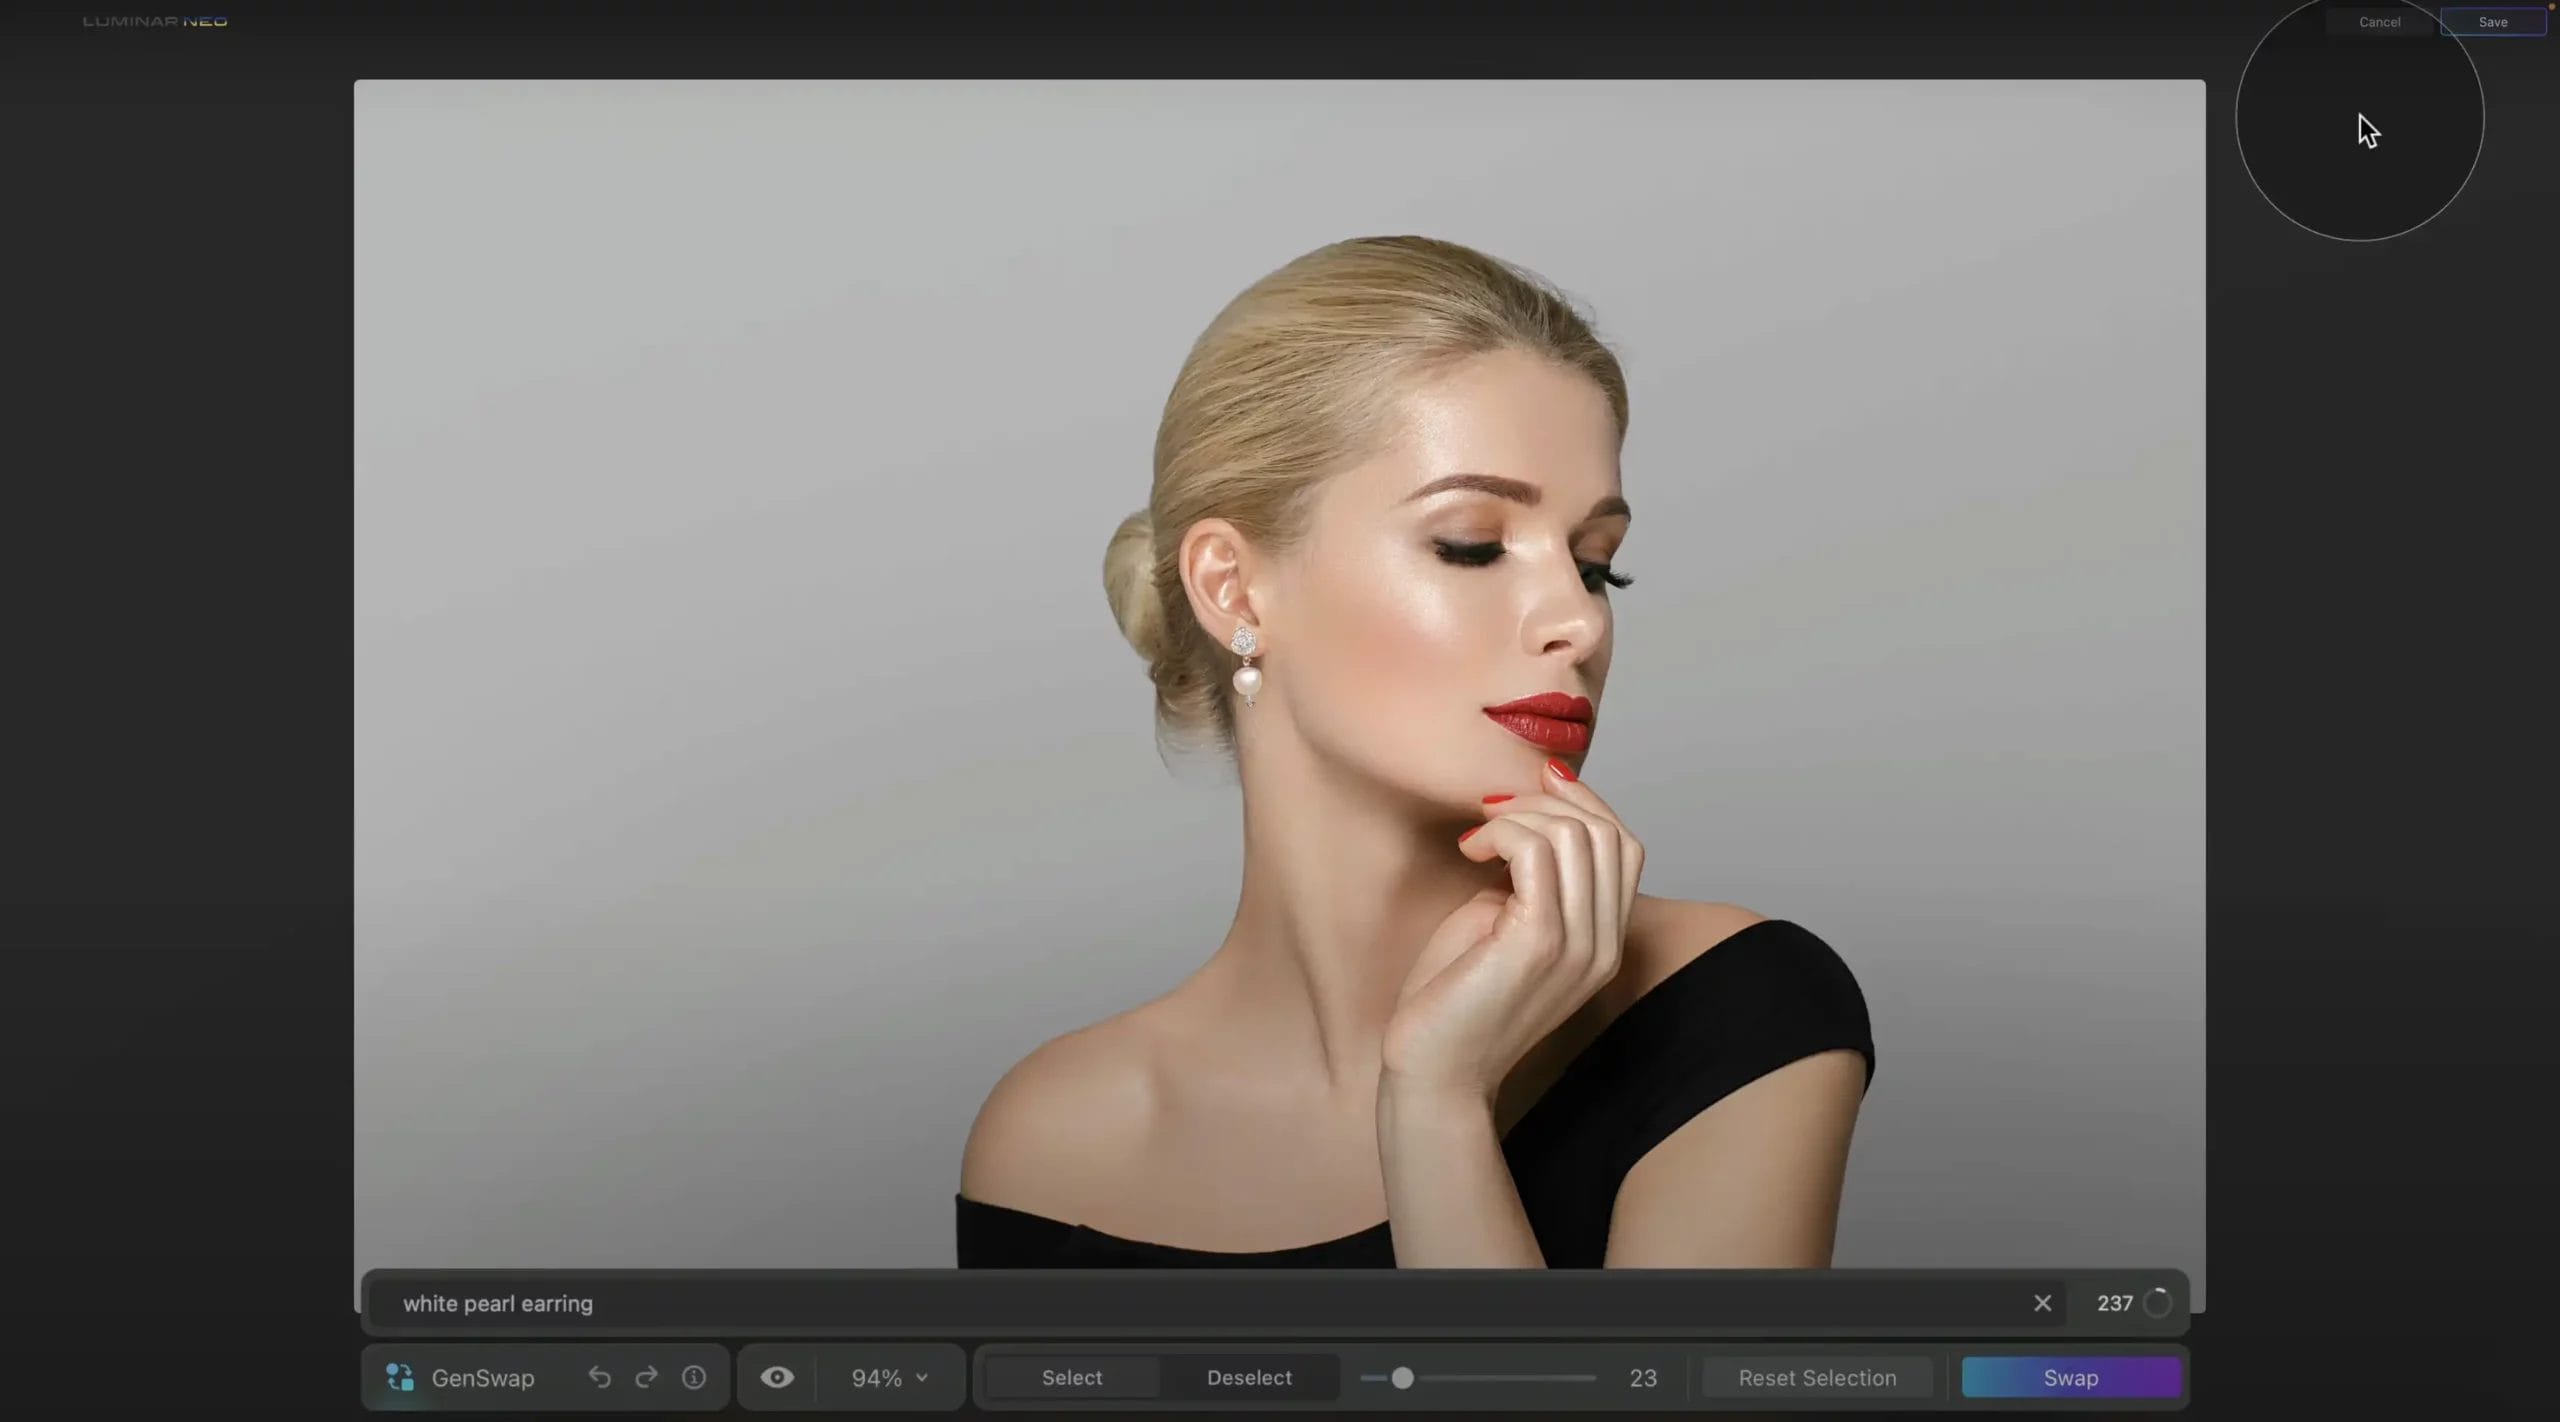
Once the result is provided, compare versions using ‘Undo’ and ‘Redo’ to choose the version you prefer.
Confirm your choice, then save by clicking the top right corner. The new image will appear in the generative creations folder.
(iPhotography may make small commissions from links in this article.)

Discover TOP features in the Lightroom CC mobile app with this guide for enhancing your photo editing skills. For desktop and tablet too.

Shooting sunsets using amazing 5-in-1 magnetic lens filters from Kentfaith, the 1st choice for photo & video products.

Popular memory cards for photography – what’s the best SD card for your digital camera? Choose the right capacity and class speed in our guide
Learn the basics of photography – fast – with our FREE 60-Second Photographer online course. Each class is short and sharp with simple, actionable steps that give you immediate results.
x 30 lessons

© iPhotography™
Become a confident and competent photographer in less than 30 minutes!
Before you leave, make sure you’ve secured your FREE online photography course (worth £29.99)
Each class is just 60-seconds or less making it the fastest and easiest way to learn photography!