 Rachel Sinclair
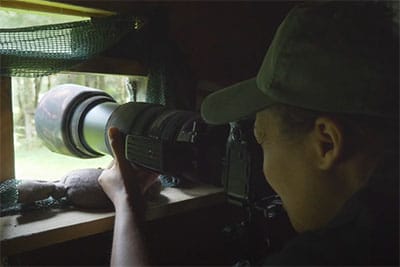
Taking photos of birds isn’t just limited to your back garden. Discovering where your local bird hides are is a great way of putting yourself in the hub of rarer seen birds.
Scroll down for 7 bird hide photography tips. These helpful and practical suggestions have been shared with us by professional wildlife photographer and conservationist Rachel Sinclair.
You can use these tips whether you’re photographing from a bird hide, out in the wild or even in the garden.
Before whipping off your lens cap and instantly start snapping – take a moment. Just stay still and observe the bird from the hide. Watch its movements and pattens.
If you can roughly predict where the bird will land, if it’s grazing for food, then you’ll have a better success rate.
Try not to move around a bird hide too much. Pick a position and stick to it for a while – why? Well 2 reasons;
1. It requires patience to get the right shot. You maybe have the best angle and lighting, don’t sacrifice that for your inability to wait.
2. Birds will be very sensitive to movement nearby. A creaky floorboard, a rustling of kit can spook them enough to retreat
Combine a fast shutter speed with a decent size aperture (around F/8) to give you a crisp finish within a comfortable depth of field. Your shutter speed may need to be above 1/1000th depending upon the distance and movement of the bird.
This is all relative though. If the bird is far away it won’t appear as fast as if it were a few feet away from you. The camera needs to consider this too.
Therefore, when shooting large flocks of birds far away your shutter speed could be slower than 1/1000th. But if the bird is close (and moving at a similar pace) then raise your shutter speed to over 1/1000th and check the sharpness on the screen afterwards.
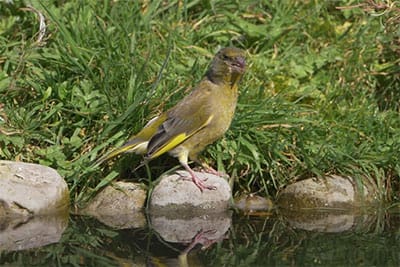
To give your bird hide photography the framing they deserve remember to mix up the orientation of the camera. Shoot in portrait as well as landscape. Adding in reflections of birds drinking water and sitting on vertical branches may require a break from the classic landscape orientations.
The problem of shooting in bird hides, and outside in general, is the light. The ever-changing natural conditions, if you’re hidden behind trees, will require you to check (and double check) your exposure.
Use your histogram to make sure the highlights aren’t clipping, and those wonderful feathers are still in acceptable range.
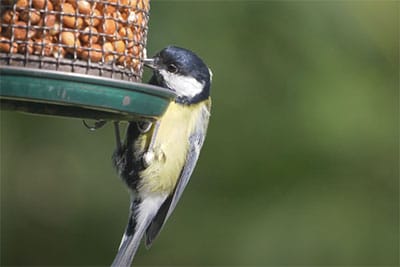
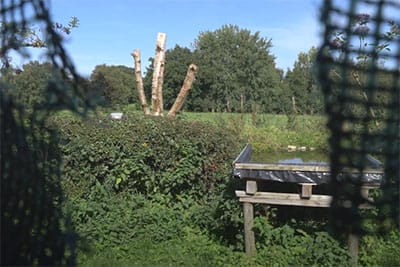
It’s great to capture a bird standing still for a moment but making that moment look natural in context, is even better. Watch out for birds landing on fences, branches, tree trunks and on the water.
Look for objects and structures that birds would have in the wild. Rather than bird feeders, fountains, barbed wire and cars. Cutting out the man-made elements complements the wild subject.
If you love taking photos of birds and want more photography advice, then we’ve got a perfect course for you. Our wildlife photography course not only has lots of tips, techniques and tutorials about taking photos of birds but a whole lot more.
This online wildlife photography course covers how to photograph garden insects, birds, pets, zoo animals and wildlife. You’ll learn how to prepare your camera kit, all the essential camera settings and how to edit your photos.
This course is also environmentally minded too. Course instructor Rachel Sinclair shows you ways to plan your wildlife and bird photography to improve conservation for the wildlife you love to photograph.
Click here to find out more about this online wildlife photography course for beginners.

Discover TOP features in the Lightroom CC mobile app with this guide for enhancing your photo editing skills. For desktop and tablet too.

Shooting sunsets using amazing 5-in-1 magnetic lens filters from Kentfaith, the 1st choice for photo & video products.

Popular memory cards for photography – what’s the best SD card for your digital camera? Choose the right capacity and class speed in our guide
Learn the basics of photography – fast – with our FREE 60-Second Photographer online course. Each class is short and sharp with simple, actionable steps that give you immediate results.
x 30 lessons

© iPhotography™
Become a confident and competent photographer in less than 30 minutes!
Before you leave, make sure you’ve secured your FREE online photography course (worth £29.99)
Each class is just 60-seconds or less making it the fastest and easiest way to learn photography!