In an ever-growing world of digital uploads, it’s hard to protect your digital art from misuse. But making a logo in Photoshop for your photography helps your work.
It can create a protective shield from those individuals who intend to infringement intellectual content.
I am going to show you how to create a watermark logo in Photoshop. This will help you add that extra level of protection to all your photography and creative edits.
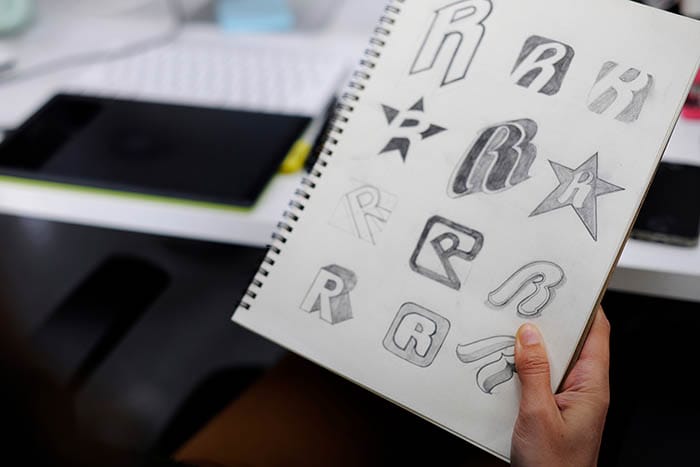
From Van Gogh to Damien Hirst most artists have some type of logo, watermark or signature on their work to protect it from copyright breaches and also to add authenticity, so you know who the creator was.
Logos on the artwork may have started off as a simple signature years ago. This is when paintings were the main medium of visual art but as popularity grows, individuals have transformed themselves. They’ve changed into brands and bigger networks, so the simple signature has been modernised into logos.
To create a logo in Photoshop is actually simpler than you may think. There are a few different ways to do this depending upon what you want your logo to look like.
Now that parts up to you, but we think a good way to start, if you want a signature style is to actually doodle some signatures on paper first. Handwritten signatures can look personal, original and homelier.
Try scribbling down a few different ideas (on plain paper) but use a good pen, because if you draw one you like then you could transform that exact signature to be your final logo in Photoshop. Let’s see how to do that;
1. Start off by scanning the paper and uploading it to your computer. If you don’t have a scanner then just take a picture of it, but make sure your shot is sharp otherwise your logo will be blurry!
2. Now open the file in Photoshop and use the marquee tool (CTRL+M / CMD+M) to select the signature you want. Now go up the top toolbar and select IMAGE > CROP and the file will crop down to just your selection.
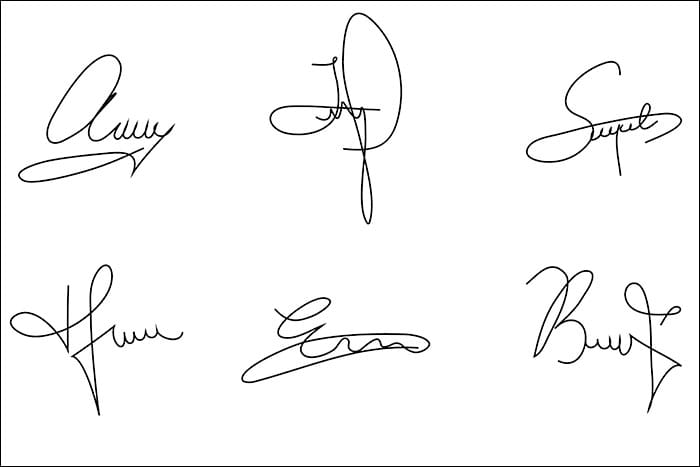
3. Check that all parts of your signature look just how you want it, you can use the eraser tool to remove any smudges.
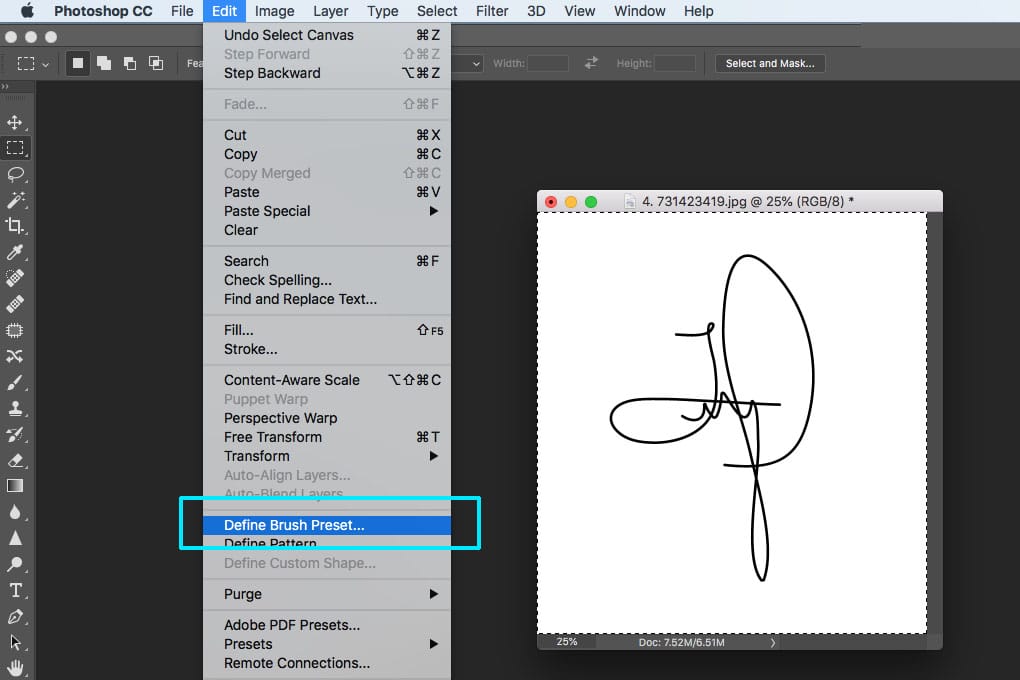
4. Make sure your marquee line is still around the edge of the signature and then select EDIT > DEFINE BRUSH PRESET. This is going to help us to transform your signature to become a stamp on every image you create.
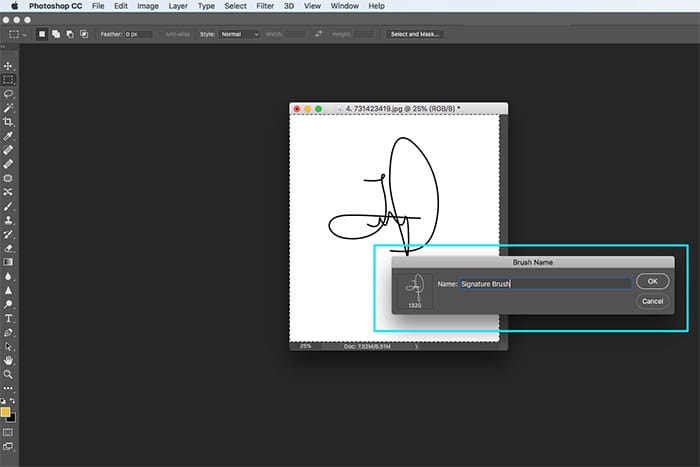
5. Photoshop will then ask you to name your signature, so you can find it again in the brush panel. Make it a simple phrase, one that you’ll remember.
6. Now you can close the file with all your scribbles on without saving (unless you want to).
7. To test out your new signature logo, then open up a piece of work that you’d like to brand and then go to your brush tool on the left-hand side vertical tool bar. Go up to the top toolbar and select your custom-made logo brush.
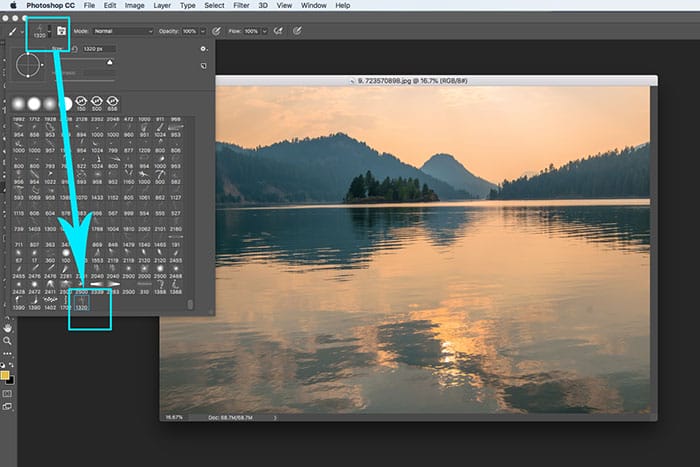
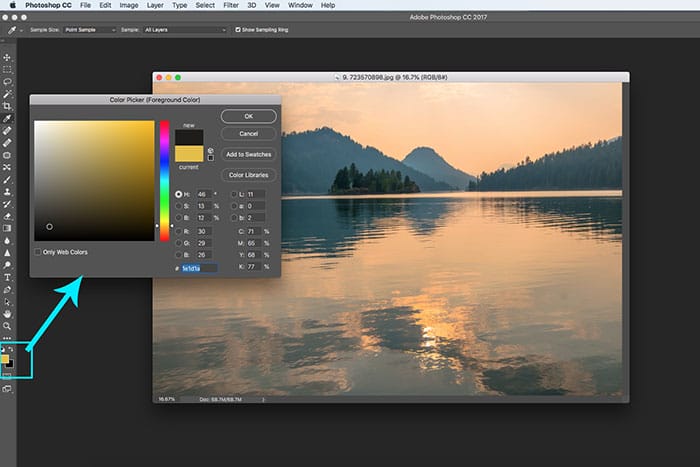
8. Now you change the colour of the brush using the colour palette at the bottom of the vertical toolbar and the size of it by right-clicking over your artwork whilst the brush tool is selected.
9. Make sure the hardness is set to 100% and click once on your artwork exactly where you want the logo to appear, and now your work is forever branded! If you make a mistake, then just press CTRL+Z / CMD+Z to undo an action.
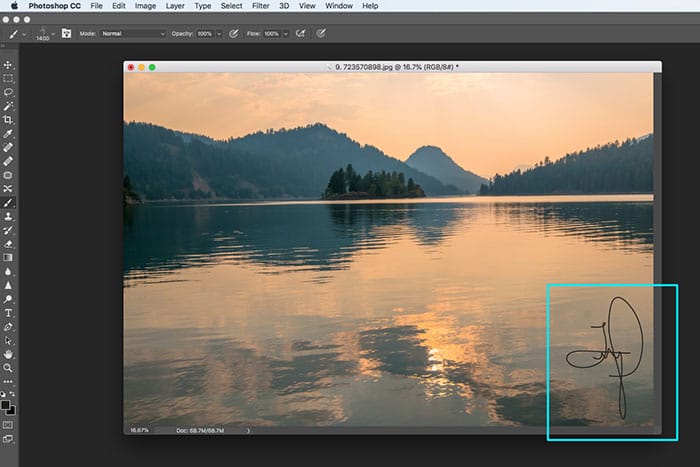
It’s truly that easy to convert a scribble on a page to a fully functioning logo in Photoshop that can be reused infinite times making your work consistent and identifiable. You can apply this method to other hand-drawn ideas such as brand logos, patterns, shapes or symbols if you’re quite the illustrator, so give that a try too.
If you prefer you can watch the sequence in video format.
But not all of us are that talented with a pen and paper and that’s fine because there are other ways to create text signatures and logos from scratch in Photoshop.
You can easily get carried away when creating a logo for your artwork but at the end of the day it should be simple and recognisable. It’s not going to be big so heavily detailed designs are pointless, a logo should reflect something about you as an artist.
Bold fonts suggest a strong masculine feeling, italicised typefaces describe creative individuals (but they are often overused and can look boring), whereas slim fonts can be modern and appealing.
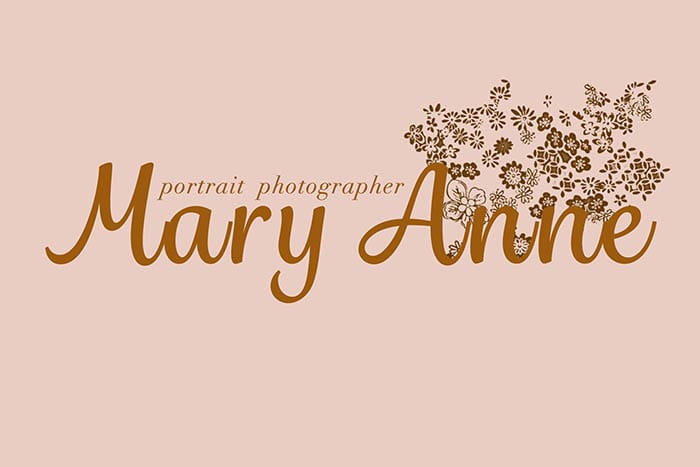
1. Open a new document and select your text tool from the left tool bar, draw out a box to put your text in.
Once you have written your name/brand then choose EDIT > SELECT ALL to highlight all the text and then scroll through the font options on the top toolbar to see what styles are available.
You can find different fonts online if you don’t like the default Photoshop ones, websites such as DaFont, 1001FreeFonts and FontSpace offer thousands of downloadable fonts for free.
(As a quick side note, if you do use these sites then once you have downloaded your font(s) then find the .TTF file and copy it into your computer’s font folder for Photoshop to utilise it. You may have to restart Photoshop before you see the new font in the options.)
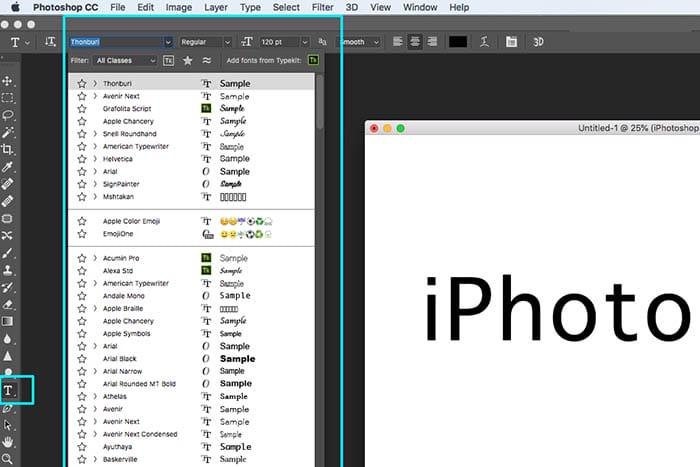
2. Now you can simply stop here once you’ve written and styled your logo. If you want to add a bit of colour then you can do that using the colour box on the top toolbar when the text is selected.
You can transform your creation into a custom brush as we did earlier, but you will have to add the colour back in every time you use it as brushes are only saved in black and white.
3. Otherwise press the padlock icon on the background layer and unlock it so you can delete it. This will allow you to save your new logo as a PNG (Portable Network Graphic) file which has a transparent background.
This time when you want to put your logo on your artwork you will have to open up the PNG file (save it to a memorable place on your computer) and then copy and paste then logo on to the artwork.
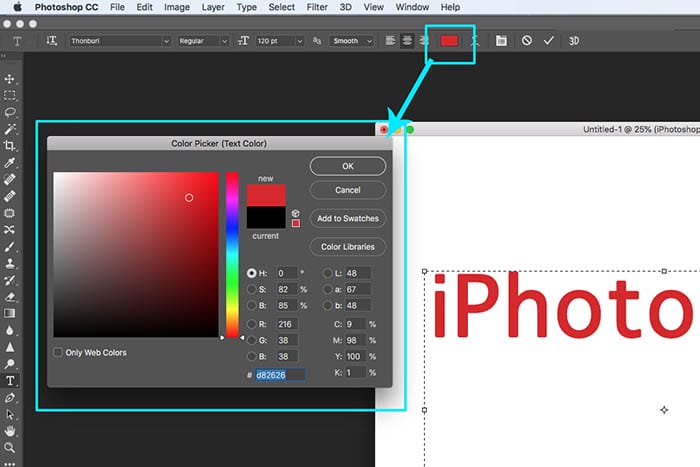
4. But if you want to add a texture to the logo to it make it unique then you will need to rasterise the text on the Layers panel to the right-hand side (if it’s not there just go to WINDOW > LAYERS for it to appear), right-click on the text layer and select ‘Rasterize Type’, which means you can’t alter the style, font or size of the text anymore (so make sure you’re happy with it!)
5. Select the magic wand tool from the vertical toolbar on the left and select all the areas of your logo that you want to add some texture too. To select multiple areas hold down the Shift key as you select.
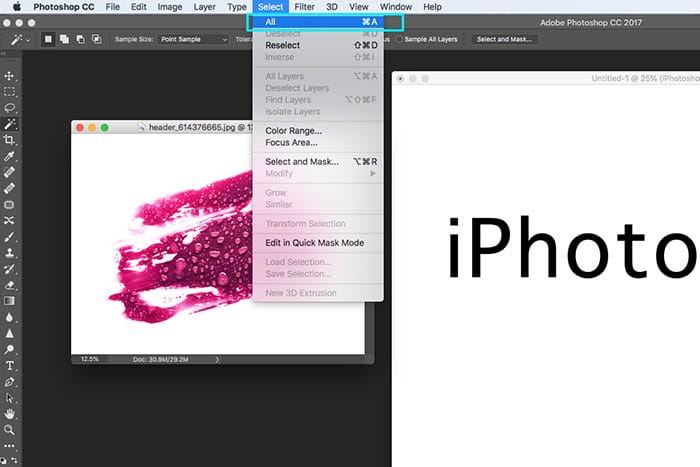
6. You can add any type of texture or image file you want to your logo. Either way, open it up and follow this sequence;
SELECT > ALL
EDIT > COPY
FILE > CLOSE (no need to save)
EDIT > PASTE SPECIAL > PASTE INTO
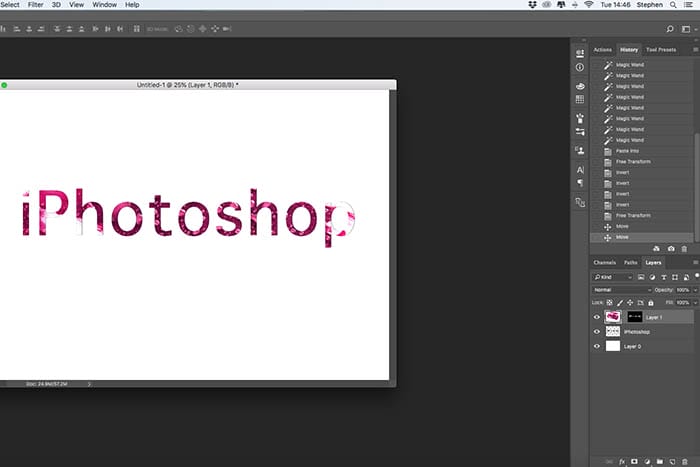
7. You will see your texture has filled the areas in the logo that you selected. Move it around with the Move Tool to get its position perfect.
Once you’re happy either remove the background and save it as a PNG as before (if you want to keep the colour, or flatten all the layers (LAYER > FLATTEN IMAGE) and then create a custom brush as before.
This tutorial is all about choices and because there are so many ways to design a logo we could go on forever, but the simplest ways we find our best, but give it a try and see what you think.
If you’ve downloaded specialised brushes from the internet then try adding those in to your logos to make it more unique. It may be flowers, handprints, mountains – it just depends on what represents your personality and style of work.
Once you’ve created your logo you can reuse it forever on all your uploads to stop your work from being misused.
If you’re an iPhotography member I’d love to see some of your work uploaded to the gallery featuring your new logos to see how you’ve all got on.


Popular memory cards for photography – what’s the best SD card for your digital camera? Choose the right capacity and class speed in our guide
Discover the BEST way on how to clean a camera sensor using swaps, rocket blowers and pencil brushes to give your shots a dust-free finish!
Capture the magic of the night with our beginner’s guide to night photography. Learn tips and techniques for stunning results.
Learn the basics of photography – fast – with our FREE 60-Second Photographer online course. Each class is short and sharp with simple, actionable steps that give you immediate results.
x 30 lessons
© iPhotography™
Become a confident and competent photographer in less than 30 minutes!
Before you leave, make sure you’ve secured your FREE online photography course (worth £29.99)
Each class is just 60-seconds or less making it the fastest and easiest way to learn photography!