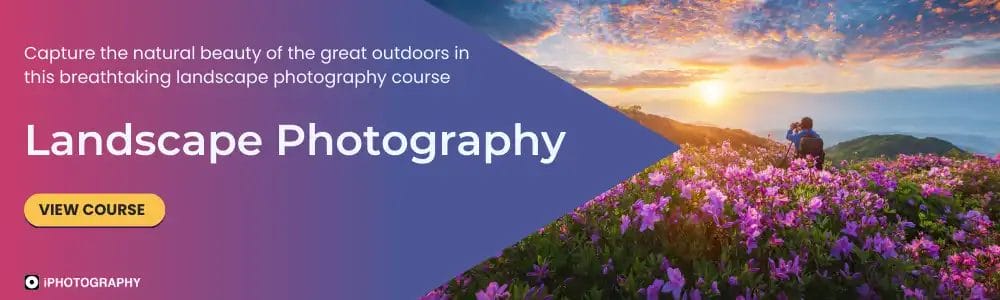
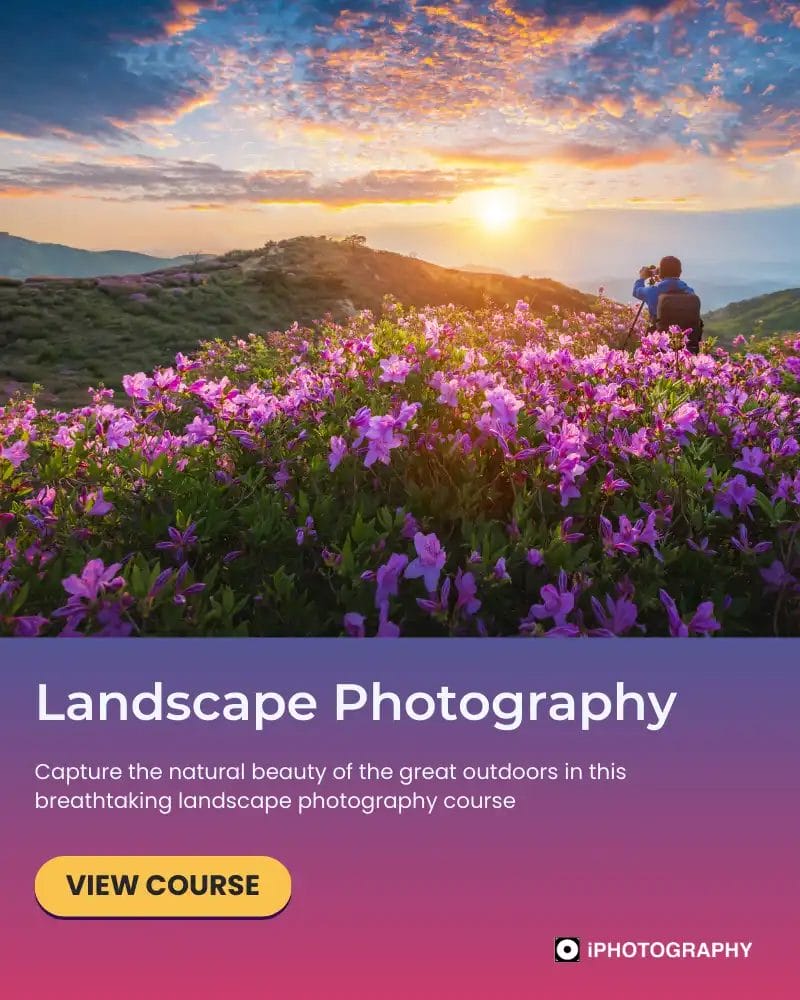
Whether you’re a beginner in need of advice, or an experienced hand looking for a refresher then, this COMPLETE guide for landscape photography will be your bible to the outdoor world.
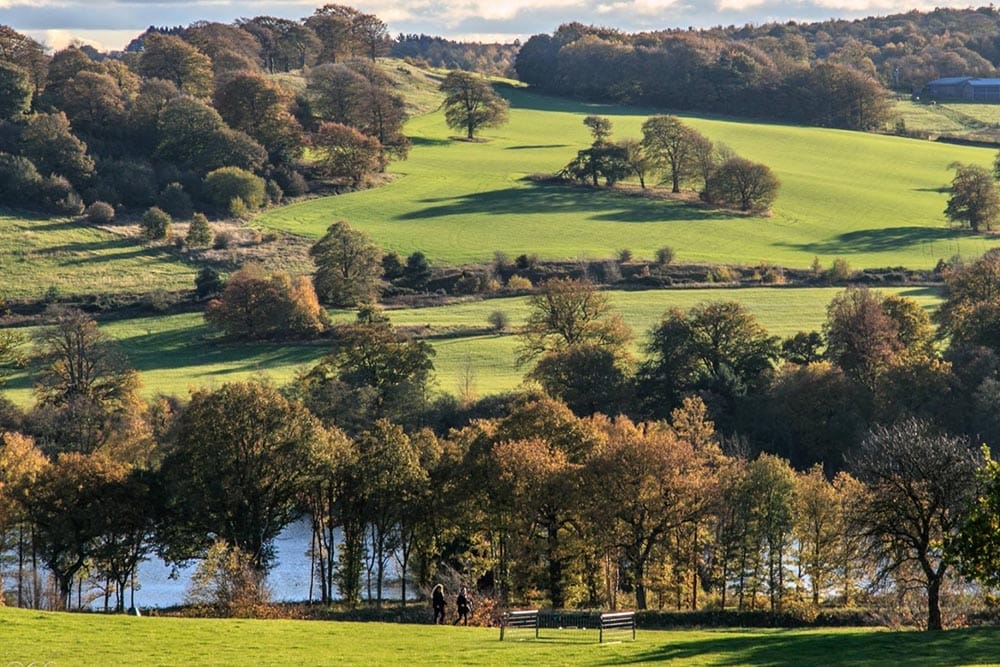
Landscapes are accessible, inspiring, energising and constantly changing – every visit presents a new opportunity.
Getting your preparation wrong will limit your chances of getting the perfect shot, skip this part if you’re ok with screwing up, if not, listen up. Firstly, your kit bag needs to be rugged and waterproof. If you only intend to go outside on days when it’s blistering sunshine then ignore us, but otherwise, be wise and get something sturdy.
Look out for these features:
• Padded shoulder straps
• Cross body straps or hip belt
• Rubber base
• Side pockets
• Water bottle holder
• Shoulder strap loops
• Reinforced seams
• Ripstop nylon material
When choosing a bag don’t get lost in the amount of compartments and how many pockets it’s got. Instead choose it based on its comfort, size (relative to you) and budget. It’s unlikely in these early days of being a landscape photographer that you’ve got tonnes of equipment to fill it with anyway.
Rather than stressing that you don’t have a good enough camera and you need more megapixels, let us tell you this one universal truth about photographers – we always want something we don’t have, especially when we don’t need it. We are worst type of coveters.
Simply, work with the camera that you’ve got, and we’ll show you that using it correctly makes up for any missing megapixels.
Invest in a strong neck and sling strap. You’ll need your hands free if hiking, don’t rely on hand straps solely.
Just make sure you’ve cleaned your sensor before venturing out and don’t pre-populate your battery compartment until you get to your location.
I’ve done this before and accidentally knocked the camera on when packing and wound up with a dead battery just as I began shooting.

Same goes for lenses as it did for cameras, don’t, in these early days, splash out on a top-level landscape lens. The camera settings, which we’ll come to shortly, are more vital to get right than a lens.
In truth, all you need to get yourself is a lens with short focal length for wide landscapes. Around 18-25mm would be wide enough. Therefore most 18-55mm kit lens that come with many digital cameras will suffice for a beginner.
Again, clean the lens, front and back, with a microfibre lint-free cloth to remove any smudges off the glass. Clean in a circular motion to avoid leaving any lines.
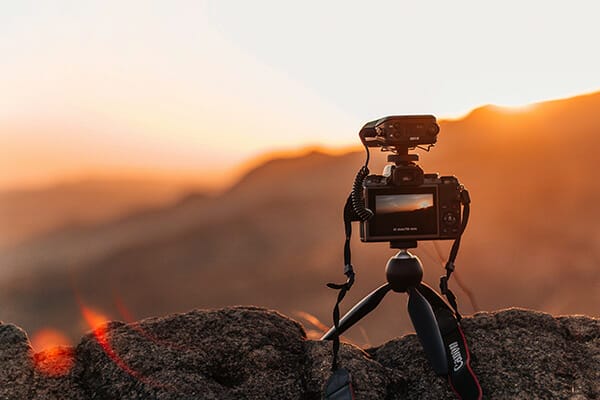
If you even attempt to leave the house without a tripod, just don’t bother with landscape photography. The biggest crime beginners commit is not getting their horizons straight, which we’ll tackle later on.
A ball headed tripod will give you the most flexibility in terms of angles, very useful for uneven surfaces. Carbon fibre tripods will be the lightest material and it’s worth screwing the baseplate in the camera beforehand, so all you need to do is clip it on when you’re out.
Make sure your camera batteries are fully charged and stored separately from your camera when you head out. In the same vein, when you’ve finished shooting remove the battery from the camera.
Batteries can lose up to 50% of their native power in extremely cold conditions. If you’re shooting in the depths of winter, taking two batteries will feel more like one.
Another battery-related incident I’ve heard before is when the battery was left in the camera for several years (extreme example I know) and it corroded, leaked and ruined the camera. Like I said, its extreme, but it can happen.
Don’t be cocky and pile all your shots on to one monster 128gb memory card. If it fails, then there’s no going back, unless you’re very lucky with recovery software.
Instead, invest in a few small sized cards (16/32gb) and swap them out after an hour or two of shooting. That way, if a card corrupts, then you’ll still have something to show for your day.
Technology is like unprotected sex; there’s no such thing as a small mistake.
Get yourself a class 10 card to ensure the write and reading times are as fast as possible.
Firstly, it’s not an essential part of landscape photography for beginners, but there is no harm in picking up a couple of lens filters to help balance exposures and give you richer contrasts in the camera. There are several different filter types.
Let’s take you through the 5 most common ones;
Neutral Density filters are a way of reducing the light entering the lens when you don’t want to change your aperture, or you’ve maxed out (i.e. it’s as small as it can go). They are graded in stops (like f/stops). You’ll see 1 stop through to 10 stops. Therefore, shooting at F/8 with a 6-stop filter will be more like F/64.
As you can imagine though, you’d probably need to be shooting on the sun to require an F/64 aperture. It’s more like you’ll use it for a long exposure – which we’ll cover later.
Grad filters are the same as normal ND filters, but the filtration is graduated so you can just filter the sky and not the rest of the shot. Useful for stopping your bright highlights from being blown out.
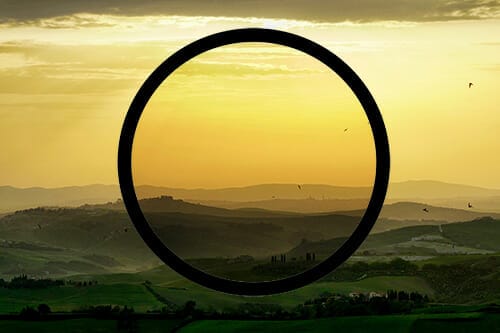
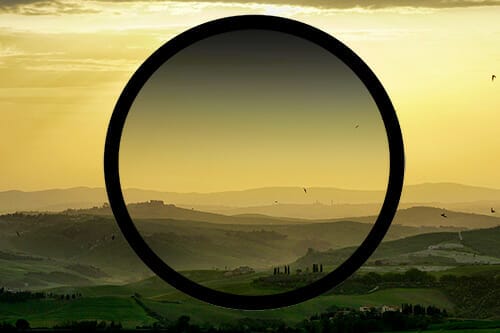
You can use circular polariser filters to stop reflections of the sky in shallow water, making it appear transparent. Really helpful for landscape photographers who shoot a lot of coastal scenes. They also reduce specular highlights (glare/reflections) from wet surfaces, glass and snow.
Used to warm up colours in your landscape, a useful little addition to your kit bag, but not something you couldn’t do through white balance changes or in editing if you prefer.
You can pick up these filters in either rectangular or circular format. The circular ones will only fit certain thread sizes of the lens but are less susceptible to light leaks. Whereas the rectangular filters will cover most lenses when used with a filter holder.
Your landscape photography requires a bit of planning in terms of when to go. Weather will have a massive impact on your location, access and light conditions. But when is the right time to go? Well let’s find out.
It’s a term you may have heard in relation to photography before but if it still leaves you in the dark then let us explain.
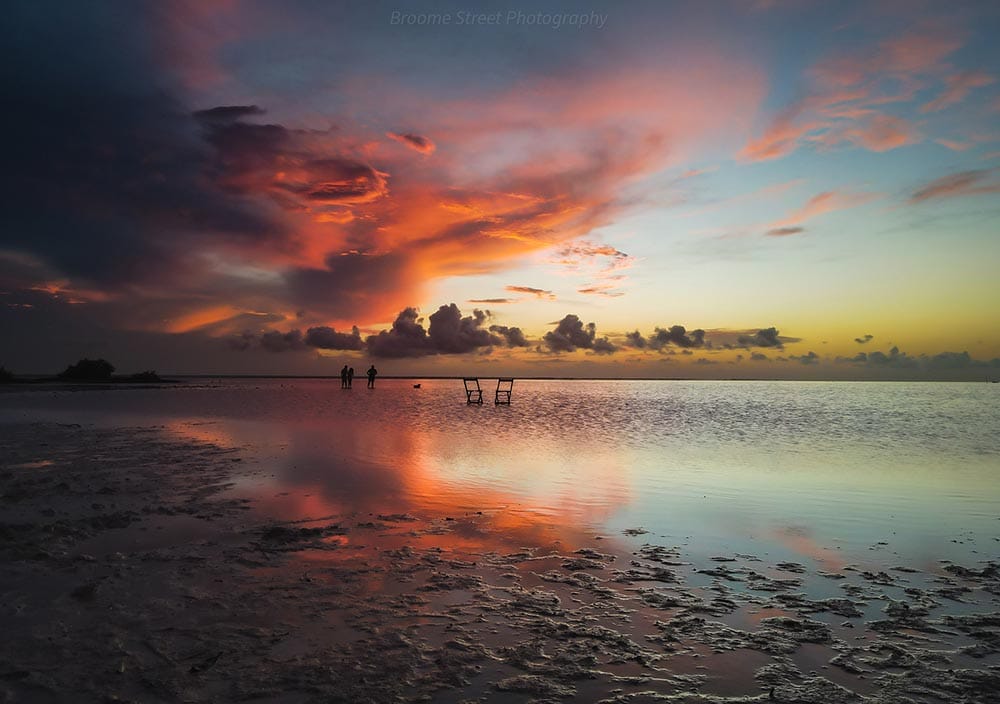
The golden hour is generally accepted as the hour after sunrise and before sunset. Depending on location and weather, this golden ‘hour’ may not be a 60-minute window, nor may it be a daily occurrence.
In fact, you may go a long time without the right quality of light that’s normally associated with this time of day. Despite that, it’s still important to take your chances when the light is right.
When the conditions are right the golden hour produces long wavelengths of red, orange and yellow light. They cast golden warm tones across a landscape and look amazing as they peak through trees, over mountains or across an open plain.
The number of stories I’ve heard from photographers turning up during the golden hour and missing their shot is countless. Remember to turn up before this time, so you’re ready for the light as may not last for 60 minutes.
When the sun is considerably below the horizon, indirect sunlight takes on a blue tone, which differs from the visible light we see during a sunny day. It’s referred to, by photographers, as the blue hour.
The blue hour tends to occur just before sunrise and after sunset, opposite to the golden hour. Its lifespan is normally closer to 30 minutes, but blue hour we guess just reads better.
It’s still affected by all other weather factors just like the golden hour so check the forecast ahead of time. When the conditions are right through, the sky should be an uninterrupted blanket of rich blue tones. It’ll be a seamless backdrop to your landscape with maybe a few stars twinkling through.
Previously I’ve used an app called ‘The Photographer’s Ephemeris’ perfect for landscape photographers looking to predict the days light conditions and directions. You’ll be able to pinpoint the perfect spot at your location ahead of time, knowing where best light will be.
Furthering our preparations, you need to also sort yourself out before venturing out. This is where we need to discuss your personal items.
If your location involves a bit of a hike, then don your best walking boots (don’t break in a new pair with a 10-mile hike).
Wrap yourself up warm with multiple thin layers – big bulky jumpers and coats can limit your movement and flexibility. And we all know how photographers love to get into science-defying stances when we’re taking pictures!
If you’ve got the budget, make yourself two wardrobes for warm and cooler weather. Softshell jackets and lightweight trousers for summer and waterproof outers and thin base layers underneath for the colder months.
Opt for bright colours that would stand out on a landscape – yellows, oranges, reds – you won’t believe the amount of times a luminous jacket has saved a stranded adventurer!
Fingerless gloves are a top tip to be able to change those settings on touch screen cameras.
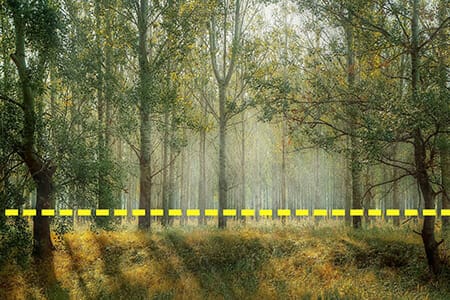
Eventually we are out in the great outdoors! How do we pick the right spot? What makes a good location or the right angle? When there’s too many options how do we know which is the right one?
Well it all starts in your heart…
Breathe in that fresh air and take a moment to appreciate where you are. Any good photograph should make you feel something, as a photographer you need to translate that feeling through your camera. It all starts with taking stock of those feels.
• Do you feel inspired?
• Comforted and peaceful?
• Nervous and intimidated?
Pinpointing what is causing those feelings is important to guide you to a POI (point of interest).
The POI is the main subject of your landscape photograph. POIs could be your background or even your foreground. It’s important not to overlook what is right in front of you, or at your feet.
Either way, you need to make the POI clear when you compose the shot, don’t cram in everything else around it just because. Choose a subject and stick to it.
Its typical that you choose your spot but find a giant eyesore that you can’t crop out or work around. So, what do you do?
Pick another spot possibly, without compromising on your shot. Moving a couple of feet left or right may remove the offending article from your eyes.
Alternatively, if you’re an ace on Photoshop then assess whether you can edit that distracting element away in post-production.
But if neither of those is options then get creative with your camera and opt to use a depth of field that helps blur out that road sign or ugly bin.
Remember that depth of field is controlled by distance as well as F/stop so you may need to get closer to your distractions to make them disappear.


We know what you’re thinking, I’m over 2,000 words in and we’ve not even turned on the camera! Any good landscape photographer will tell you good things come to those who wait – and your time has arrived.
The biggest question we get asked is ‘what settings do I need for landscape photography?’.
This is the most impossible question to answer. We’d have more success giving you next week’s lottery numbers! Honestly, it is a completely individual experience.
We made the point earlier that the biggest crime beginners make in landscape photography was messing up the horizon, so let’s get it right. This is where your tripod or camera’s built-in leveller come in handy.
Some tripods have a little spirit level beneath the base plate to show you when the horizontal is level, it’s ridiculously easy to use, which makes you wonder how some new starters still end up with wonky landscapes. In truth, the problem arises from choosing what is the horizon.
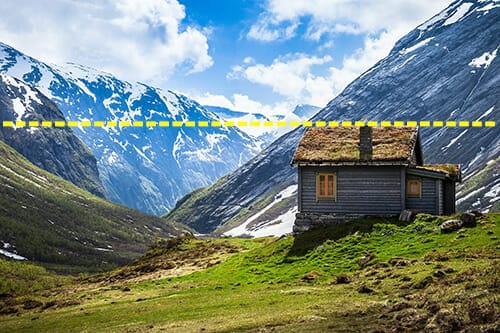
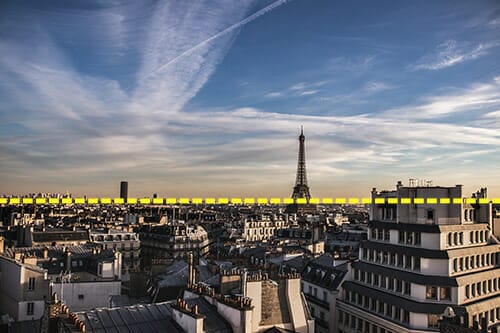
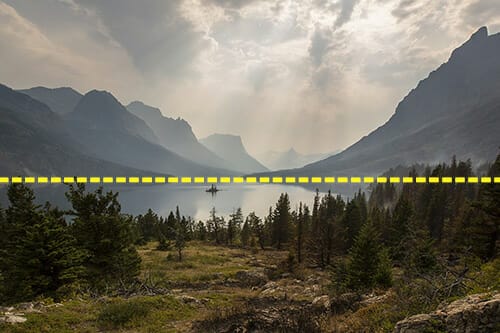
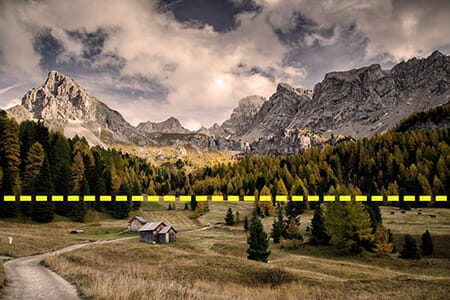
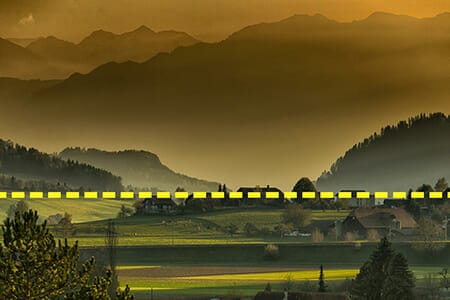
When we say ‘horizon’ most of us think of the sea with the sun setting and that line where they meet is the horizon. But what if we’re not shooting that scene and there’s no water and no sun? Instead, we must look for other horizontal lines crossing our frame.
The horizon may not always be obvious, you have to be creative with your composition to work in the horizon line.
• It may be the baseline of a mountain range
• Where the land meets the sky
• Where the foreground and background meet
• An invisible line drawn across at the vanishing point
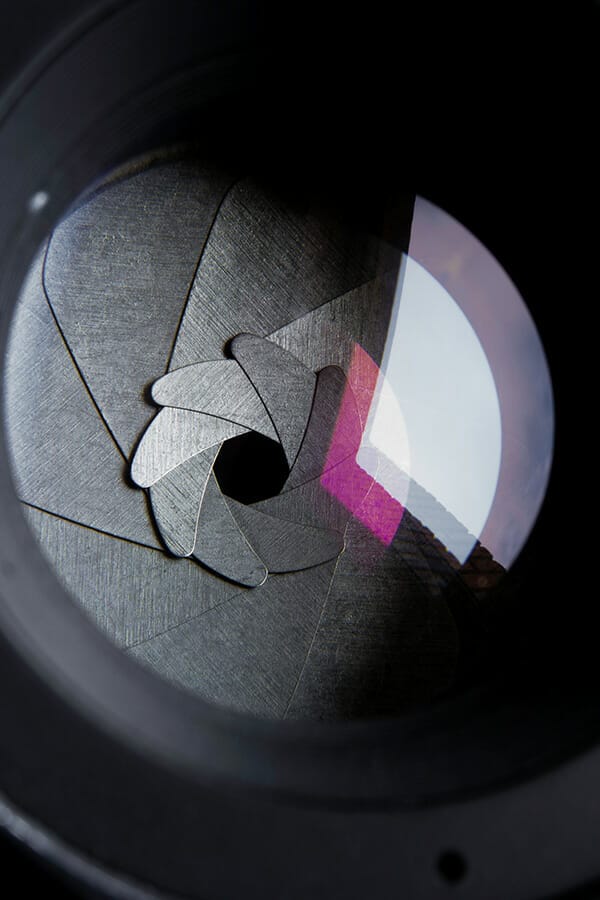
Continuing our understanding that there is no magical aperture setting that you need to use on every landscape. All you need is the understanding that landscape photographs should be rich in detail and texture.
Apertures such as F/16 and higher are typically associated with landscape photography, but it may not always be the case for you. You may even want to lose detail for a certain effect, so this rule isn’t exclusive.
Yet if you are just starting out and want a yard stick to shoot with then set your aperture to F/11 or smaller.
These aperture sizes will reduce the amount of light entering your lens, but the light waves are more compacted and focussed resulting in a sharper image. And an increase in sharpness is followed along by greater detail and texture.
It’s possible to set your camera to A/Av mode (aperture priority) so you can keep your aperture small and let the camera sort out your shutter rate.
The only problem is that, depending upon light, your camera may push your shutter speed slower than recommended for hand-held shots (1/60th or slower), hence why we keep banging on about a tripod.
A tripod will keep your shot stable when the shutter runs to slower rates.
But if the light is good and you want to shoot handheld, providing there are no rapidly moving parts of your landscape, then a shutter speed of 1/250th or faster will be suitable.
Allow for wind movement to small plants, trees branches or reeds around water. Shutter speeds slower than 1/250th may pick up little blurs of motion when you really zoom in.
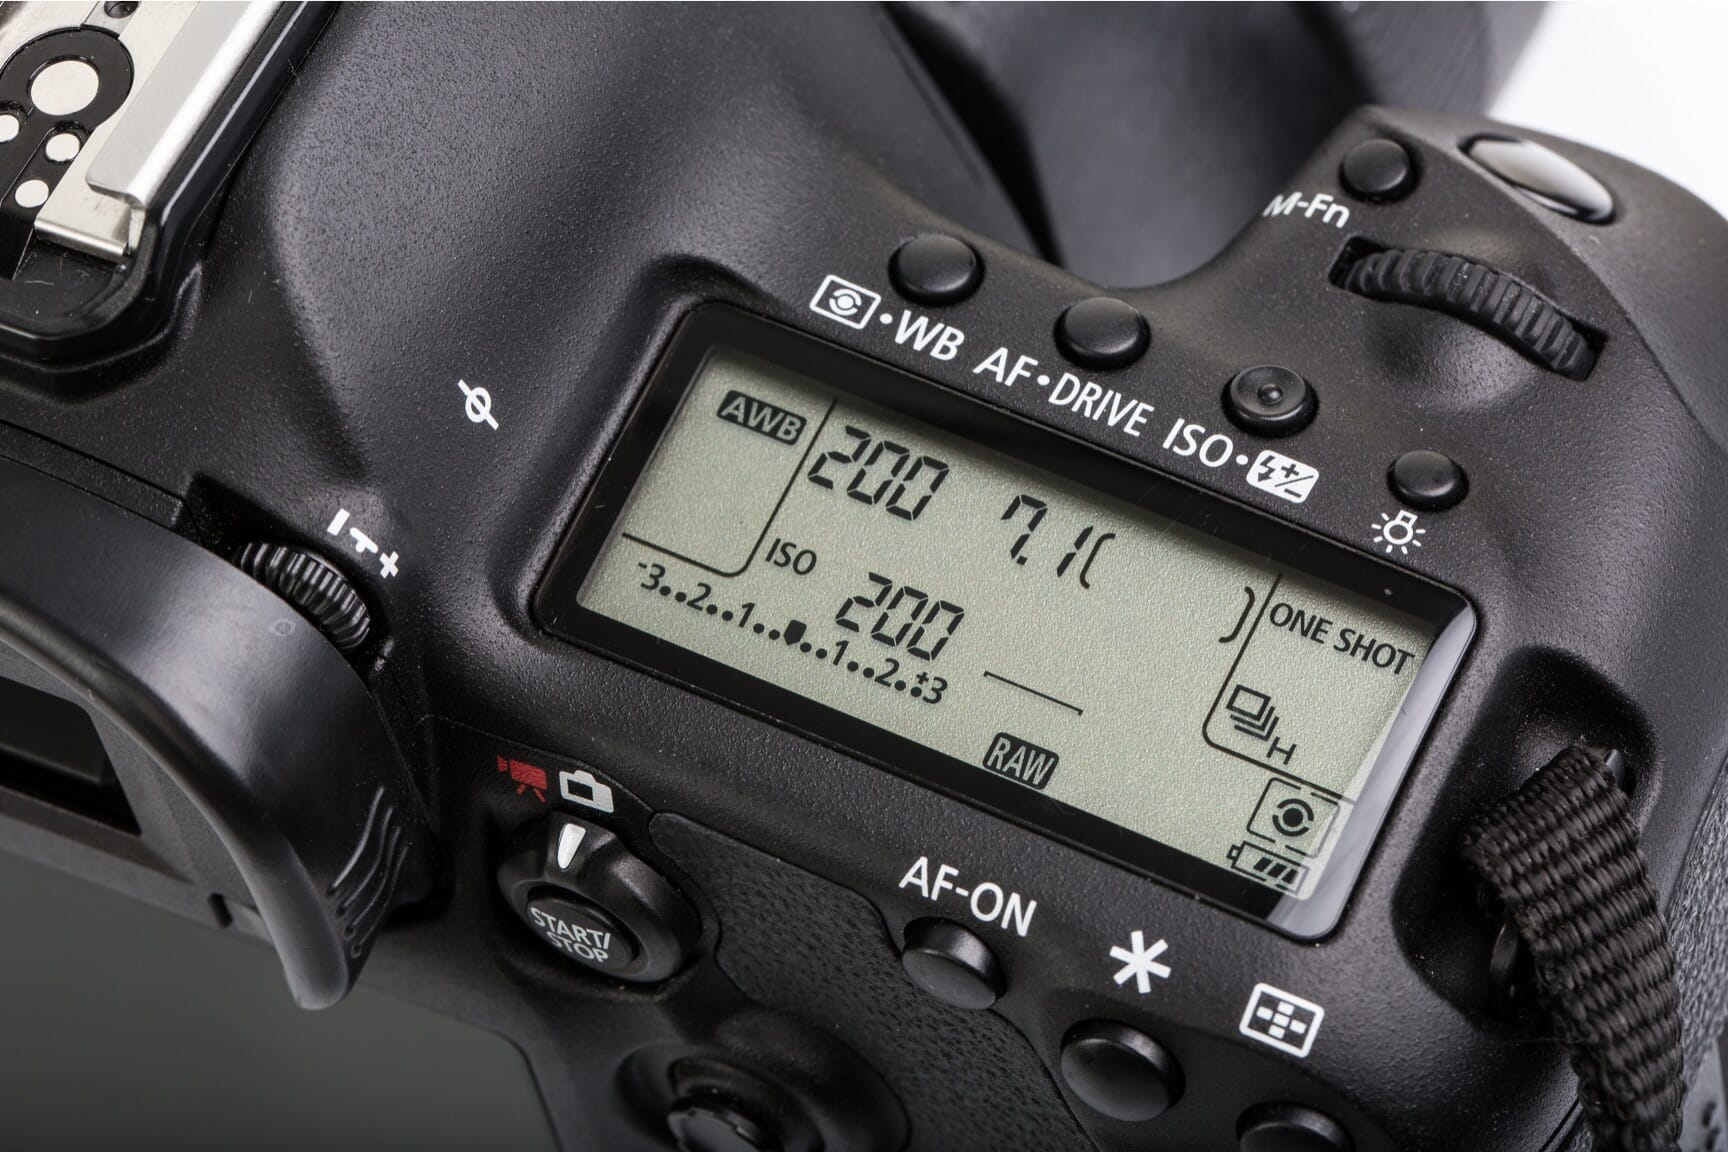
ISO governs your sensor’s sensitivity to light. The aperture dictates how much light enters the camera, but the ISO decides how much of the light is converted. Low ISO’s result in richer colour, stronger contrast and better overall clarity.
Depending upon what camera dial mode that you are shooting in for your landscapes, apart from M (manual) then the camera will decide the ISO setting for you. Given the quality of modern digital sensors you can push your ISO rate up to 400 without much quality loss. Keep an eye on it though and don’t go about 800.
In summary, keep you ISO as low as possible 50-100 would be ideal, 200-400 isn’t a major problem that you couldn’t fix with a little bit of work in Lightroom.

Getting your metering system correct is a stylistic choice based on your composition. There are two types of metering for a camera, one for the exposure another for the focussing. Whichever you choose, make sure you are exposing for the brightest part of your shot.
We could go through all the modes and describe the finer points of each, but who’s got time for that right now? You need landscape tips and quick – so here…
Evaluative Metering – gives an average overall exposure based on all visible light. Useful for low contrast scenes where you don’t want overly dark shadows and highlights. A good starting point for new landscape photographers as it will stop your skies from becoming overexposed.
Centre-Weighted Metering – more specific to a region of your frame. The exposure will be based upon light readings from a set area. Better for shooting larger subjects like a mountain range.
Spot Metering – Unless you’re shooting a flower in the foreground and want the landscape totally out of focus for example, stay away from spot metering.
Let’s do the same cut-throat analysis on focusing modes…
AF / One Shot /Single-Servo – Half pressing the shutter or holding the back focus button (if your camera has one) in AF-one shot mode will focus the camera on the scene, but if you move or let go focus is lost and you’ll need to reset for each shot. Useful if your confident of your composition and don’t want to overshoot.
AF-C/AI Servo/Continuous-Servo – Continuous focussing modes will track any changes in camera position and readjusts the focus point with tiny movements. If you’re shooting handheld be aware movements, you make could change the focus point at the last second. Best to use for beginners to take one less stress away.
After choosing your focussing mode, you may get face with focus zones i.e. where and how much of the frame do you want the camera to focus on? You’ll see wide, centre or spot.
Similar to exposure metering, wide means the whole frame (good for landscapes), centre is a region (good for large subjects) and spot (best used for small objects or a person in a landscape).
Let’s face it, we all just stick it on auto hey! Modern digital cameras are so good at reading light levels and temperatures that auto is probably the best bet in many situations.
You can tweak white balance if you enjoy post-production editing, but otherwise we’d recommend either cloudy or sunny settings depending upon the weather.
Don’t bother with customising a colour temperature to your landscape. By the time you’ve set it, chances are the light will have changed.
If you use a particular white balance setting outside of auto you may find it trickier to revert back if you don’t like it afterwards. I’ve deleted many landscapes after trying to be overconfident thinking I’ve got the shot perfect when looking on an LCD back-lit 3-inch screen. When I’ve got it home and seen it on a colour-balanced screen I’ve hated it.
You may have the light balanced and focus set but is the actual scene looking as amazing as possible?
I’m going to take some time now to investigate how to maximise the landscape in front of you and see what camera tricks we can use to make it truly breath-taking.
There are several traditional compositional rules in photography that are worth adhering to, as well as breaking. But when it comes new photographers, it’s best to learn the basics before you go ripping up the rule book.
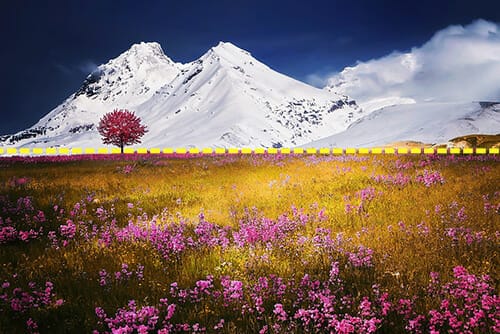
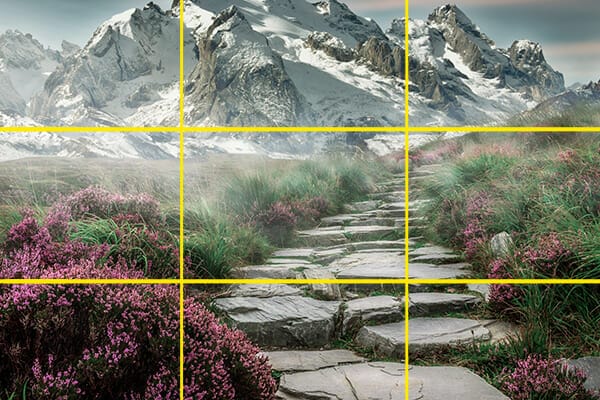
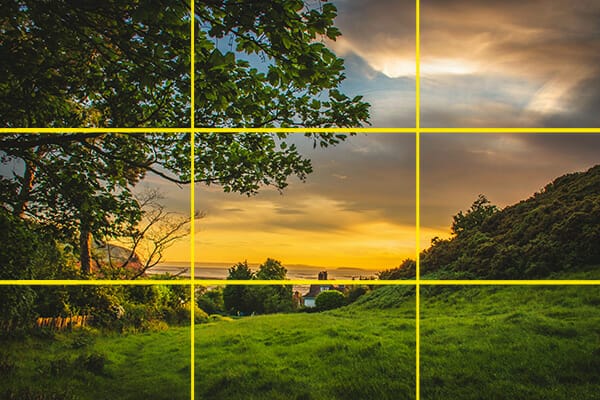
The rule of thirds was constructed off the back of landscape photography, so this rule is just for us. Divide your screen into a grid of 9 rectangles, look at it as 3 horizontal rows of 3 boxes.
With a landscape compose it accordingly;
• Sky in the upper third
• Subject in the middle
• Foreground in the lower third
Of course, this is easier said than done, not every landscape will fit perfectly for you, but if you at least aim to construct your frame like this you won’t go far wrong. Have a look at alternative ways that you can apply the rules of thirds to differing types of locations.
Continuing with the rule of thirds, where the lines intersect are our power points. These are compositional markers on which you should position any subjects of interest.
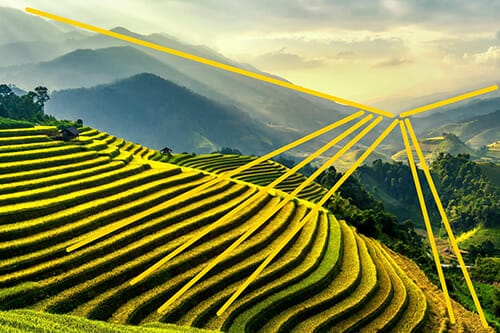
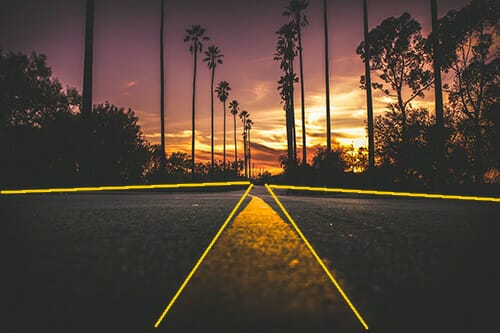
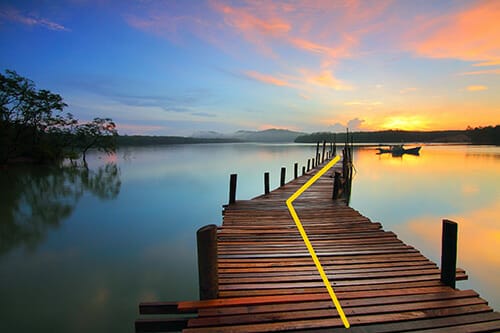
Constructing a narrative or super-objective in your composition can also be very powerful. Leading lines are designed to draw your audience into the shot and through it following a particular path.
For a landscape photographer, rivers, converging valleys, mountain sides, tree lines and roads are all great continuing lines to work with. Lines can be straight or curved.
If you’re looking for a symmetrical shot, then place your line in the middle of the shot or balanced lines on the edges leading to the middle. Otherwise get your line to start in one corner of the frame and let it trail into the main subject or across the entire frame.

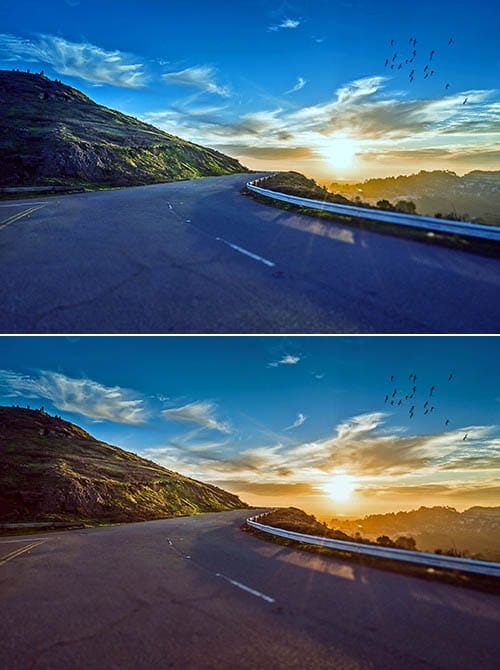
We mentioned a while back when you use A (aperture priority) mode your shutter speed may go too slow for handheld shots. But there is an opportunity there to exploit for some more creative landscapes. Have a look how you can create silky-smooth waterscapes.
If you’ve decided to use a ND filter and your shot is still looking underexposed, despite changing the aperture, then playing with a slow shutter speed is a fun combination.
To give you more control of the shutter rates, instead of using aperture priority, flick over to shutter priority mode (S/Tv) and turn your shutter rate down to 1/30th to begin with. Go slower if you’re feeling confident.
Remember that if you’re not using a tripod whilst doing this, don’t expect anything good to come from this.
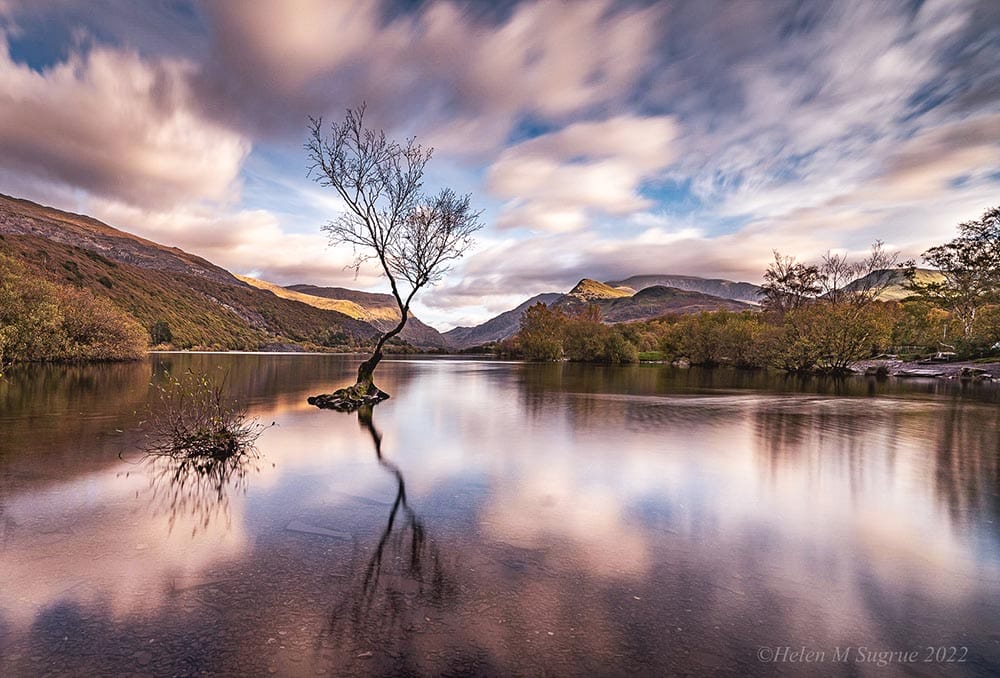
Subjects such as crashing waves, babbling brooks and powerful waterfalls can all be transformed into mirror-like surfaces. They will reflect light sources more clearly and turn a dramatic moment into something calmer and peaceful.
It will also have a similar effect on moody skies though you may have to drag the shutter speed out a little longer, somewhere around 30 seconds, depending upon the cloud movement. Fluffy nimbus clouds can be stretched to look placid and low key like the water below.
Long exposures don’t have much effect otherwise on stationary objects. Keep an eye out for dangling branches and wavy plants that could shuffle in the wind, they may only be small but if you’re printing your photos out, you’ll notice unwanted motion blur.

Finally, you’ve taken your shots and its time to pack up and go home.
Yet since we are opportunists at iPhotography we’d never recommend turning your camera off until you get back to your car, you never know what you may see on the way down.
Remove any batteries and memory cards before the drive home. If the weather has been particularly cold and frosty then heed this warning…
…instead, leave the bag to warm back up to room temperature before opening. The reason for this is condensation. Rapidly changing temperatures to already cold equipment can cause microscopic sized water droplets to form on the camera body and if that gets into your electronics you’re finished!
Put your batteries back on charge as soon as possible. Get in this habit every time and you’ll never be scrabbling around last minute for power.
You’re back home, cosy, warm and with the finest flat white coffee in hand sat in front of your computer. What are you going to do with those lovely landscape photographs?
There are a million things you edit on your photo, but they may not be relevant every time and some are just too overwhelming for beginners in this field. Instead here’s a list of basic ideas that you can apply to your landscape editing.
High Dynamic Range is really geared to get the best out of textures and details in landscapes. A lot of popular software has automated HDR processes or clarity sliders to increase this effect.
It’s possible to shoot for HDR in-camera by taking 3 shots of the same scene. 1 underexposed by 1 stop, one over by the same measure and one bang on. Photoshop will take these three files and compile the best rendition.
The beauty of wide-angled lenses is the field of view they give. Yet the wider they go the more barrel distortion that will happen on the edges, making your straight horizon look rounded at the sides. Lightroom, for example, can counter for that with its lens correction function. Simply tell it when the camera brand you were using, and it’ll do the maths from there to correct the distortion.
Remember earlier we said just stick it in auto? Well this is a chance to start on a level playing field and add a bit of warmth to your landscape, or even temper the golden sunlight by making the colours cooler. Ultimately the final effect should look as your mind remembered it, so tweak it how you want.

Sticking with a Lightroom function, chromatic aberration is the scourge of digital cameras. The aberration appears along the edge of some objects when a lens struggles to focus all colours to the same point. Sometimes called ‘fringing’ or ‘purple fringing’ due to its colour.
Either way, tick the option to remove any aberration if you’re keeping your picture in colour at least.
This is just a standard rule to follow whenever you begin editing. It doesn’t have to be a lot but adding a little contrast and hyping up the saturation levels 5-10% will make your image pop off the page a little more.
In Photoshop you can access the contrast panel using CTRL/CMD+M or IMAGE>ADJUSTMENTS>CURVES. To get the saturation tool hit CTRL/CMD+U or IMAGE>ADJUSTMENTS>HUE & SATURATION.
Similarly, another tool in Photoshop will help your remove features that you couldn’t at your location. Content-Aware uses AI to assess your selection and will replace it with decent accuracy. Make your selection as precise as possible to help the AI out.
Don’t try to make it do all the work though and start removing mountains out of your shot.
Furthermore, if you crop your shot in editing, just make sure you’re still keeping true to your original composition. Ideally, you should be cropping in-camera, but if you need a different ratio for a print or Instagram perhaps then try to keep your leading lines and rule of thirds in mind so you don’t compromise your intentions.
On Photoshop and Lightroom as you use the crop tools a fluid grid will appear to help you follow along to.
In summary, landscape photography can be as easy or as complicated as you want it to be.
But this guide should serve as the entry-level bible on how to get started and enjoy taking breathtaking vistas of the world around you. Don’t always assume a landscape needs a mountain, green grass, lakes and trees.
Think about urban landscapes too. Use all the methods and approaches we’ve outlined and apply them to shooting in your hometown or the big city and you won’t go far wrong.
• Have you learnt something new from this guide?
• Are there some tips you’ve discovered to encourage and inspire your next adventure?
• Do you have any other tips to contribute?

Discover TOP features in the Lightroom CC mobile app with this guide for enhancing your photo editing skills. For desktop and tablet too.

Shooting sunsets using amazing 5-in-1 magnetic lens filters from Kentfaith, the 1st choice for photo & video products.

Popular memory cards for photography – what’s the best SD card for your digital camera? Choose the right capacity and class speed in our guide
Learn the basics of photography – fast – with our FREE 60-Second Photographer online course. Each class is short and sharp with simple, actionable steps that give you immediate results.
x 30 lessons

© iPhotography™
Become a confident and competent photographer in less than 30 minutes!
Before you leave, make sure you’ve secured your FREE online photography course (worth £29.99)
Each class is just 60-seconds or less making it the fastest and easiest way to learn photography!
