 Stephen Walton
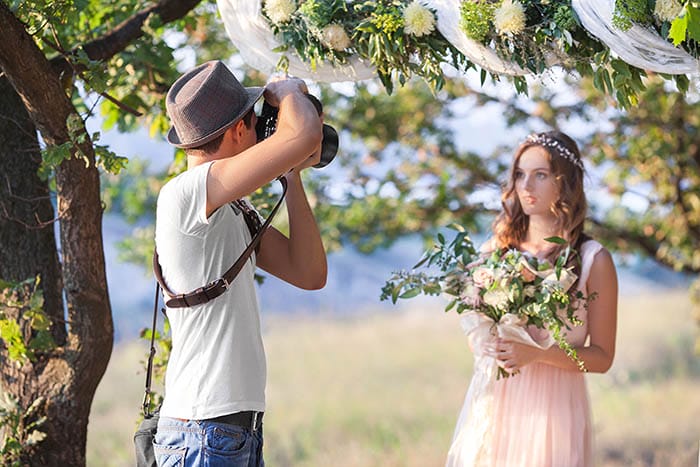
Have ever wanted to learn how to photograph a wedding like a pro? Or to learn the best tips & tricks from a professional wedding photographer to capture those precious moments & memories for newlyweds?
Well then, you need to check out our iPhotography wedding photography guide. It’s full of ideas on how to take stunning wedding photos & avoid common mistakes that every new photographer makes.
We’ve shot tonnes of weddings and engagement photoshoots between them and now we want to share our best wedding photography techniques with you.
Photographing weddings is one of the most popular areas of photography if you want to start turning your hobby in to a career. It’s an idea place to make money from your photography and a fantastic opportunity to get noticed in the local community.
But all too often amateurs and semi-pros overlook the essentials when either preparing their photography equipment, planning their poses or composing their shots resulting in poor wedding photographs – and you only get one chance for each special day!
So, we are here to help you overcome that pressure and turn every wedding photograph you take in to a magical memory for the bride and groom to cherish forever.
Now we understand that everyone has a different approach to photography, and weddings are no different. Whether you prefer formal wedding poses or the reportage side then we think this guide will help you regardless as we look at the best techniques, ideal lighting and the hidden tricks that professional photographers us when directing the Bride, Groom and even the whole wedding party!
But before we get into that, let’s talk about how to prepare yourself for the big day!

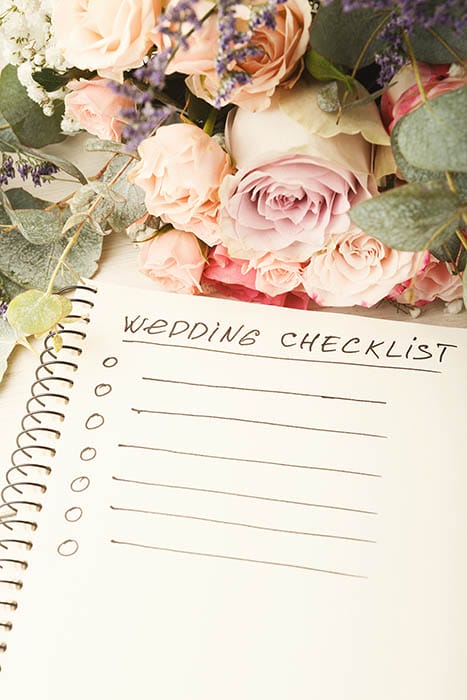
This is essential. Without a wedding photography checklist, you will inevitably miss something out of your shoot, and this could be fatal to the start of a promising wedding photography career.
A Bride and Groom won’t be pleased to know you forgot to take pictures of them cutting the cake or the Mother of the Bride’s decadent hat.
Take time to meet up with the happy couple who have chosen you to capture the special memories of their happy day.
Visit them a few weeks before and find out as much as you can about their wedding and their expectations of you.
• Do they want lots of posed formal wedding photographs?
• Or do they prefer a natural and candid approach?
• What parts of the day do they want you to cover? Bridal preparation, Ceremony, Meal, Speeches, Cake cutting, Party/Disco etc.,
• What’s the starting time for these parts? (expect there to be delays – you’ll find no wedding runs on time!)
• Is there any special activities or surprises that will happen that guests don’t know about?
• How many guests will be present?
• Is there anyone who they don’t want photographs with?!
• Do they want a big group shot of everyone together?
• What time will the wedding finish?
These are going to be important questions to ask to help your Wedding Photography checklist as it’ll help you form the basis of your approach.
If you’re being asked to photograph from start to finish, you’ll know you’ll need some lights (as the daylight fades) and some extra accessories for example. But if you’re only needed for the actual ceremony, you can travel lighter.
Its vitally important to know what the couple want to do with the final photographs too.
Some newlyweds just want digital copies on a CD/USB drive to share on social media, others may request you to make an album for them or a big canvas of their happy day.

One very important not to forget is to ask the couple; ‘Do you have any ideas of your own?’
Ultimately, it’s their day and there’s nothing more professional than involving the Bride and Groom (to-be) in the creative process.
There are brilliant websites such as Pinterest, Behance, Flickr and 500px which are ideal resources to gain inspiration for different styles of wedding photography. Ask the happy couple to have a look and send you some of their favourite ideas.
It’s a good idea for you to make your own ‘inspirational mood board’ to show the Bride and Groom the type of photographs that you’d like to take, especially if this is your first wedding.
Write down all the possible combinations of portrait shots you could capture such as;
• Bride and Groom – obviously!
• Bride and Maid of Honour
• Bride and Bridesmaids
• Page Boys and Flower Girls
• Groom and Best Man
• Groom and Groomsman
• Bride, Groom and Parents
• Bride, Groom, Best Man and Maid of Honour
• Bride, Groom, Page Boys and Flower Girls
• Bride and Bridal Family
• Groom and Family
• Best Man and Maid of Honour
• Mothers of the Bride and Groom
• Fathers of the Bride and Groom
Cross them off as you go, so don’t forget a pen! It makes it much easier to know you’ve captured all the shots your newlyweds asked for. You’ll start to look like a professional wedding photographer already.
A clever trick we used, to use was to write down all the combinations and put them a sticker behind the camera’s flip out screen. Concealed and neat!
Don’t forget a shot of all the whole wedding congregation (you’ll definitely need a wide lens for this, anything between 15mm-25mm should be fine)
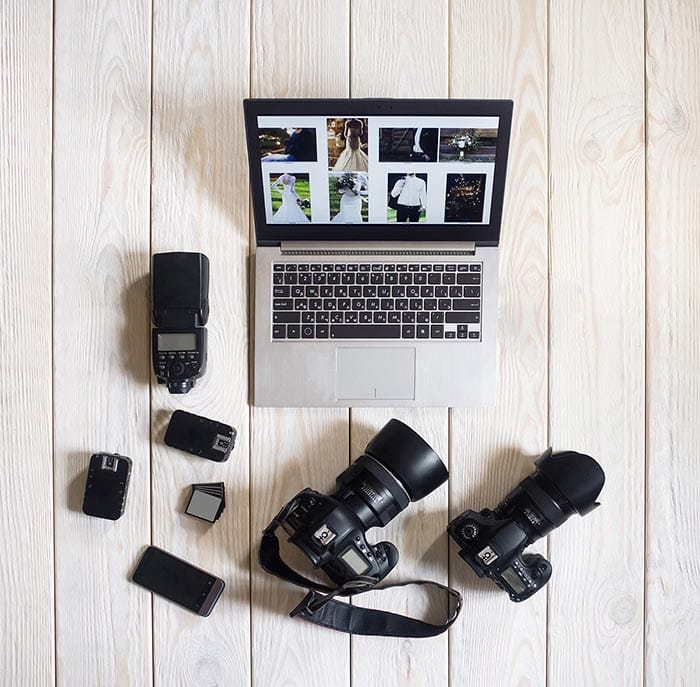
Basically, as little as possible, but enough to cover all eventualities! Confused? I know. But don’t worry, what we mean is travel as light as possible. You’re going to be on your feet for hours, so you don’t want heavy bags, check out the weather beforehand so you’ll know if you need to take provisions.
Try to borrow or rent a backup camera (something you’re familiar with) in case the worst should happen during the wedding – it’s rare, but not implausible.
Compact cameras are in truth, useless for weddings, they will not operate fast enough to capture all the fleeting moments of the day. If you are a beginner in wedding photography (with a view to becoming) more serious then you need to consider investing in a reliable mirrorless or DSLR camera. Fast shooting cameras are really important if you want to make the most of the day.
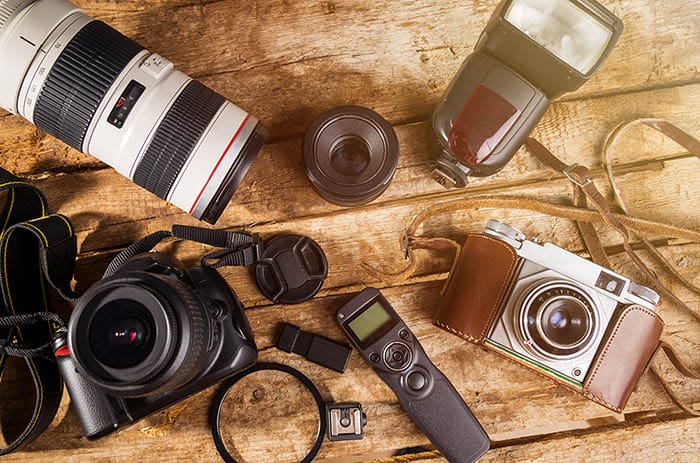
Here’s a few other wedding essentials all photographers should have in their bag on the big day;
• Extra camera batteries (make sure they’re fully charged the night before)
• Neck or hand strap (we’ve known sweaty palms be the cause of many a broken camera)
• A zoom lens (unless you have dedicated wide and telephoto lenses already)
• Tripod
• Reflector (a small fold up one will be ideal)
• UV filter
• Extra memory cards (the faster writing speed the better, you’ll be taking lots of shots you won’t want your camera to slow you down)
• Off-Camera Flash (this depends on the location and the time of day as to whether you’ll need extra light at any point – this ones up to you. But if you do, take many spare batteries and a wireless trigger if you have one.)
• Energy snack (Oh you’ll thank us for this one!)
Use a camera bag that allows you to strap your tripod to it to keep your hands free. Go for a backpack style over a shoulder bag as it’ll help you keep balanced and won’t strain one side of your body.
It’s not uncommon for professional wedding photographers to suffer from permanent bad backs and RSIs from years of miscarrying their equipment.
Again, it’s your call but if they’re small and easy to use, then why not? Little glass balls and balloons can make your shots quite unique and help you start to develop a certain style of wedding photographs.
An ornate photo frame can make for quirky shots as all the guests can have a play. The Bride and Groom may already have some cute props arranged so it’s best to check first.

Typically, but not exclusively, most wedding photographs begin with the Bridal parties’ preparation. Expect to be graced by room strewn with clothes, champagne and make up – therefore you’ll have to be clever to work in small spaces so make use of mirrors and Dutch tilts.
A make-up artist will be vying for your attention of the Bride during the preparations as they beautify the lady of the day. It’s a good opportunity to turn your attention to other party members like the Father of the Bride rehearsing his big speech.
Or the Mother of the Bride wiping away her tears of happiness, these candid moments add to the story of the wedding.
The lengthy nature of preparing the Bride should not be forgotten, you generally only wear a wedding dress once in your life so make sure you’re capturing all the small details of the day too like the amazing hair styles, the delicately painted nails, the luscious wedding flowers, those killer heels and above all THE dress.
Wedding dresses are their own fashion, no two are the same and reminding the blushing Bride of her fabulous outfit through your photographs will never be forgotten.
The last-minute pep talks between Father and Daughter are special as they share a final moment before she steps into the awaiting cars and heads to meet her one true love. If you don’t want to intrude, stand back and use a longer lens to capture the intimacy of the moment.
As she’s whisked away into the fancy wedding car grab those poignant shots of the Bride leaving her family home to start a new chapter in her life.
Knowing that you’re not Superman and you can’t be in two places at once, don’t put pressure on yourself to photograph the Groom’s preparations as well, unless they are only a few doors away. If we can speak from experience, the Groom’s preparations take a lot less time, so your opportunities may be fleeting. You’ll know where to divide your time if you speak to the couple in advance.


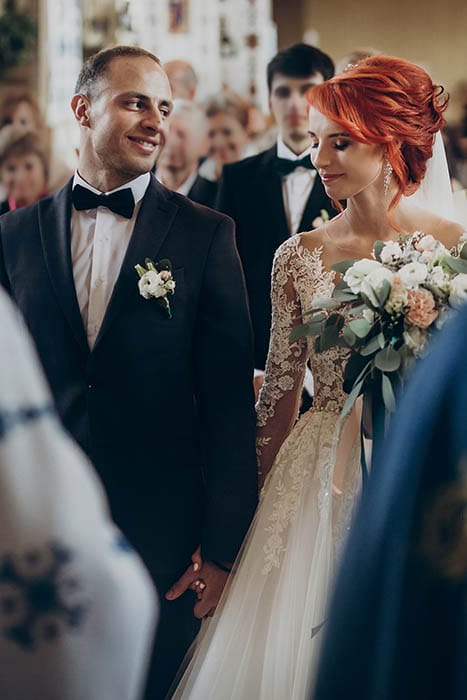
With your camera poised you are going to be like the Bride’s shadow for the next few minutes as she leaves the car and walks down the aisle. But don’t forget there are other important figures to feature, so standing near the Groom and looking down the aisle will help you capture that iconic moment as the doors open and the ceremony begins.
Tears will be running amongst the congregation, but it’s the Groom’s reaction to seeing his Bride that will memorable and instant, to see natural emotions makes your images powerful.
Use a zoom lens and track the Bride as she and her Father commence their glide towards the front. Check beforehand with the ceremony officials that you are allowed to use a flash at this point as a lot of venues can be dark and dimly lit.
You may have to compete with the flashes of excited guests, so you’ll have to be fast. There’s no harm in shooting in burst mode to capture the famous entrance.
Ceremonies, depending upon the religion of the happy couple may last between 15-30 minutes, it’s a quick event in the scheme of the whole day, so move around.
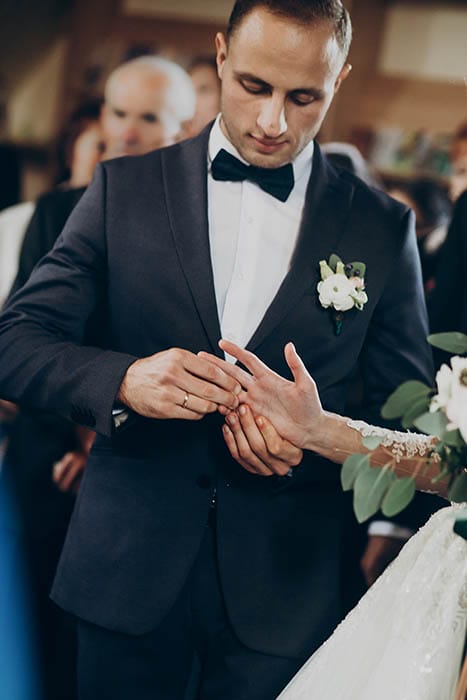
Try not to distract anyone and take your opportunities to capture the presentation of the wedding rings, the crying parents, the fidgety flower girls and the sleepy uncles! That zoom lens will help you capture all the truths of the day which the Bride and Groom will not otherwise see.
Get back down to the bottom of the aisle when all their first kiss is in the bag and be ready for the walk out.
Ask the newlyweds just to pause as they reach the exit to take some memorable shots of them emerging as the new Mr & Mrs. They won’t be able to hide their emotions so let them be as cuddly and kissy as they want.
There’ll be a lot of milling about after the ceremony for all the guests to congratulate the newlyweds as well, so look sharp and photograph all those important reactions and interactions.
These shots will be perfect in black and white if you decide to edit your images afterwards, the emotion of the wedding is ideally translated through simpler tones such as black and white, whereas colour adds the energy and a more general description of the location.
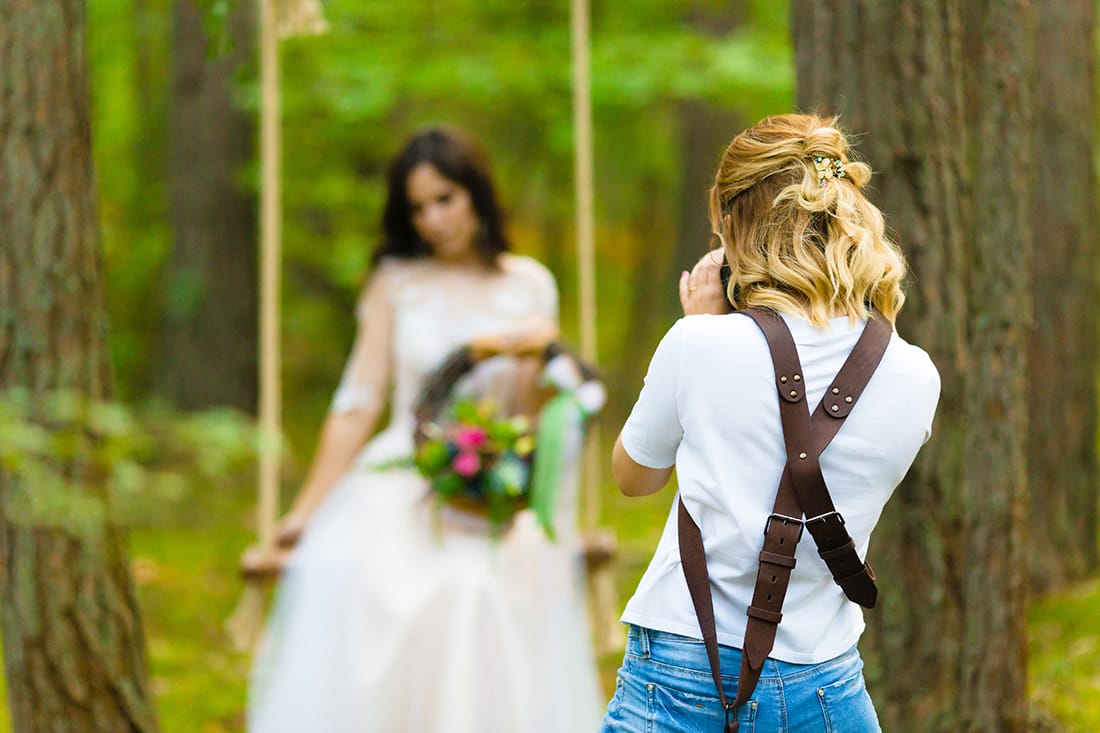
Once you get your beautiful newlyweds away from the crowds, like Hollywood starlets at a premiere, then you’ll have a bit of peace and quiet to take those all-important shots. Remember to take a moment to breathe and relax for a moment, this is the only calm moment of the day, so enjoy it.
There’s no harm in having your mood board and inspiring shots printed out in your back pocket to reference, and it helps the couple understand how you want to pose them. They’ll still be quite giggly and intimate so make us of those natural reactions and ask them to gaze into each other’s eyes lovingly – it shouldn’t be too hard to do!
Here’s a list of 7 poses you could try out and what makes each of them different;
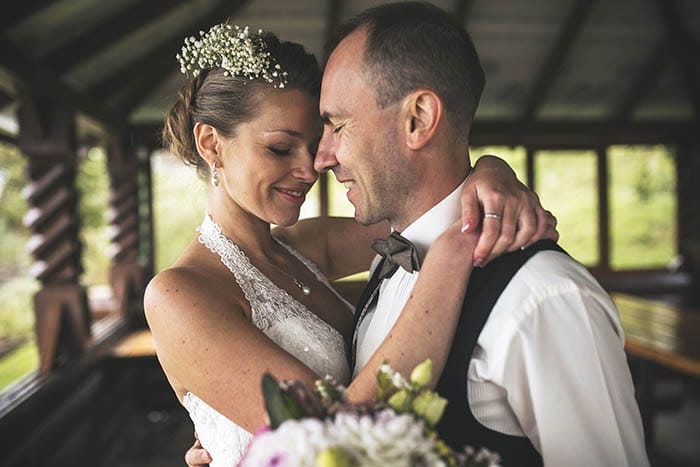
1. Front Facing– Front facing shots deliver intimacy and show a unified pairing.
2. Full Length – Full length compositions give a sense of scale and location to the frame, which can be useful if you want to incorporate the venue into the background.
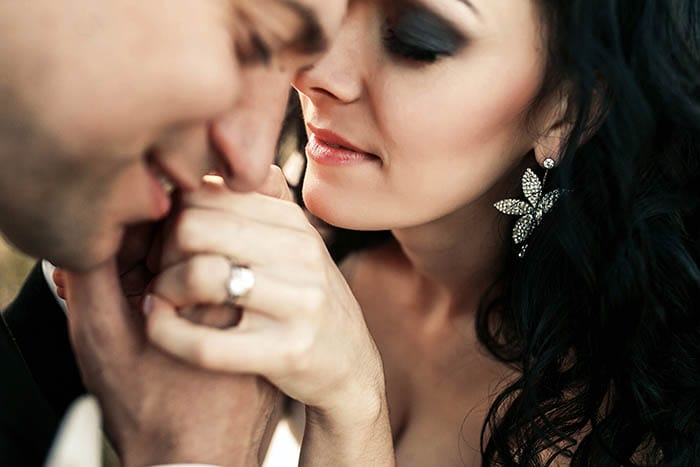
3. Close Up – Close up portraits are extremely romantic and personal, cutting out everything around and only focusing upon the loving emotions.
4. Walking Away – Walking away shots allow a more voyeuristic perspective, creating the connotation of the newlyweds walking off into the sunset to start their new life together.
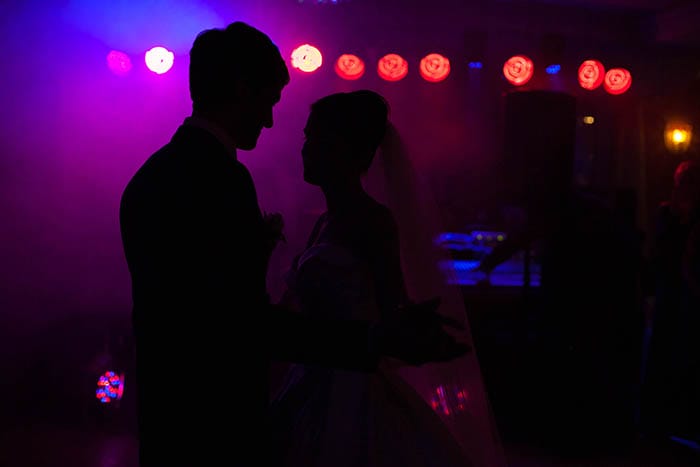
5. Silhouettes – Silhouetted portraits demonstrate the shape of the wedding dress as is a nice alternative twist.
6. Flash – Using daylight or a flash to backlight your shots can add to that romantic dreamy haze your couple are in, but whip out your reflector to make sure you still see the detail in their faces.
7. Stylised – Stylised shots are more creations from the photographer’s mind, they can look dramatic like a film poster, funny or totally off the wall – either way, it’s going to say something about the photographer when other people look at them, so make sure you’re happy with it.
The last tradition of the day is usually the first dance of the newly married couple. It generally is the first dance of anyone that day, but watch out for some rouge Flower Girls and Page Boys strutting their stuff as they get in to the party mood.
A Master of Ceremonies may announce this moment to everyone to give you forewarning to take up the best spot and you’ll need to prepare your flash for this moment as the room lights dim and the vivid disco lights take over.
If you’ve got an off-camera flash with wireless triggers then now could be a good time to use them, as you could physically hold the flash in your left hand to get the angle you want whilst you click away with the right.
It takes a bit of time and skill to master this technique but allows you to achieve the best lighting at any angle. Keep your flash high up to avoid unflattering shadows.
The Bride and Groom’s heads may be locked closely together as they slowly glide across the dancefloor so remember to get in close to be able to see facial features and intimate expressions. Looking out for their hands is another great way to incorporate those dazzling wedding rings one more time.
If those distracting disco lights are still lighting up the dancefloor then make a feature of them by selecting a slow shutter speed and once your flash has fired, then drag the camera around to make crazy light trails wrapping the newlyweds in a blaze of colour! Or you can even zoom out whilst the shutter is open to creating a very abstract zoom burst.
Now depending on your preferred style, how to edit wedding photographs is a very personal experience and will only be perfected with time. But there are a couple of tips though that we can offer based on simple mistakes a lot of beginners in wedding photography make when it comes to editing.
1. Don’t lose the highlights – Keep your bright and white areas away from being pure white. If you use Photoshop or Lightroom, use the curves tool or highlights slider to reduce the white areas to a dulled white preserving the details.
2. Don’t crush the shadows – In the same way as preserving the highlights the shadows shouldn’t be pushed to true black either, it allows for subtle details to be seen on closer inspection drawing more attention from the viewer. It would never be realistic to have true black shadows in real life anyway.
3. Don’t crop in too close – It’s easy to look at a shot and crop 50% of it out to make a better composition, but you’ve then deleted half of your detail and pixels, which means the maximum size you can then print that photograph is dramatically reduced. You have two outcomes if this happens – 1. Learn to get in closer next time 2. You’ll have to delete the shot if it’s going to be small in print.
4. When to use Black and White – We mentioned it earlier but let’s quickly repeat; monochrome evokes emotion and intimacy in a wedding photograph, whereas colour adds energy, vibrancy and life to a scene – your photographs will dictate what type of colour treatment they need based on these rules.
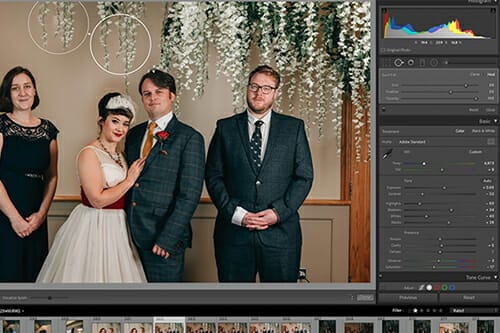
5. Don’t over sharpen – In the early days it’s natural to overuse the sharpening tool in Photoshop or Lightroom to cover up a bit of camera shake or blur, but don’t become reliant on it saving your shots. Sharpening should be reserved for well taken (sharp) shots to look even crisper against a soft background. If you find you’re using it a lot, it’s time to reassess your focusing method on your camera.
6. Be selective – The Bride and Groom don’t want to see 30 photographs of them cutting the cake. It’s a cake – 4 or 5 is more than enough. You don’t want to overwhelm them; you should only be showing them wedding photographs that you are proud of and you’d be happy to put in your portfolio. If you don’t like it, delete it. Be your own critic first.
7. Don’t overlook the silliness – You’ll meet a range of personalities at a wedding and it’s those silly and humorous moments that may not be flattering but are meaningful and personal to the newlyweds, so don’t throw them away. Think of them like out-takes from a movie.
8. Add a watermark – If you are starting out then its great way to get your name out into the open. 70% of wedding photographer’s find their next clients whilst at a current wedding, so if you have a small watermark on your pictures when the other guests see them, they’ll remember your name. Keep it small and neat and in the bottom right of every photograph.
Now let’s try and boil down all that information in a bit of a summary of those helpful hints and tips to help you get the best from your wedding photography.
1. Visit the Bride and Groom before the wedding to find out what they want from their photographer. Make a list of important questions that you may want to ask them.
2. Make a shot list of all the groupings you want to capture on the day. Keep it handy.
3. Pack extra batteries and memory cards and keep them in a pocket for quick access.
4. Research some different poses and compositions from wedding magazines and online to give you some inspiration.
5. Pack lightly and don’t take equipment like extra lights if you are shooting outdoors during the height of summer.
6. In small spaces, look for quirky angles to make dramatic and interesting compositions.
7. Use burst mode in instances where you know you’ll only get one opportunity, like throwing the Bridal bouquet.
8. Raise your ISO setting if you are shooting in dimly light venues but try not to exceed 800 ISO.
9. Edit only what you need – don’t spend time retouching all your photographs to then narrow them down to a handful of favourites. Pick your favourites first.
10. Be loud and clear with your directions when shooting large groups of people. They’re there for the celebrations, so you need to work quickly and efficiently. If you speak with confidence, people will listen to you.

Popular memory cards for photography – what’s the best SD card for your digital camera? Choose the right capacity and class speed in our guide

Discover the BEST way on how to clean a camera sensor using swaps, rocket blowers and pencil brushes to give your shots a dust-free finish!

Capture the magic of the night with our beginner’s guide to night photography. Learn tips and techniques for stunning results.
Learn the basics of photography – fast – with our FREE 60-Second Photographer online course. Each class is short and sharp with simple, actionable steps that give you immediate results.
x 30 lessons

© iPhotography™
Become a confident and competent photographer in less than 30 minutes!
Before you leave, make sure you’ve secured your FREE online photography course (worth £29.99)
Each class is just 60-seconds or less making it the fastest and easiest way to learn photography!