 Stephen Walton
One of the rarer terms mentioned in photography circles but this tilt-shift photography tutorial will explain how it can be used for amazing creative effects that transform perspectives.
Tilt-shift photography requires a specific lens to move on the horizontal or vertical axis in relation to where the focus point is.
While it’s not the most popular area of photography you will see/hear photographers shooting architecture using a tilt-shift lens whenever they’re taking a picture of a building from floor level.
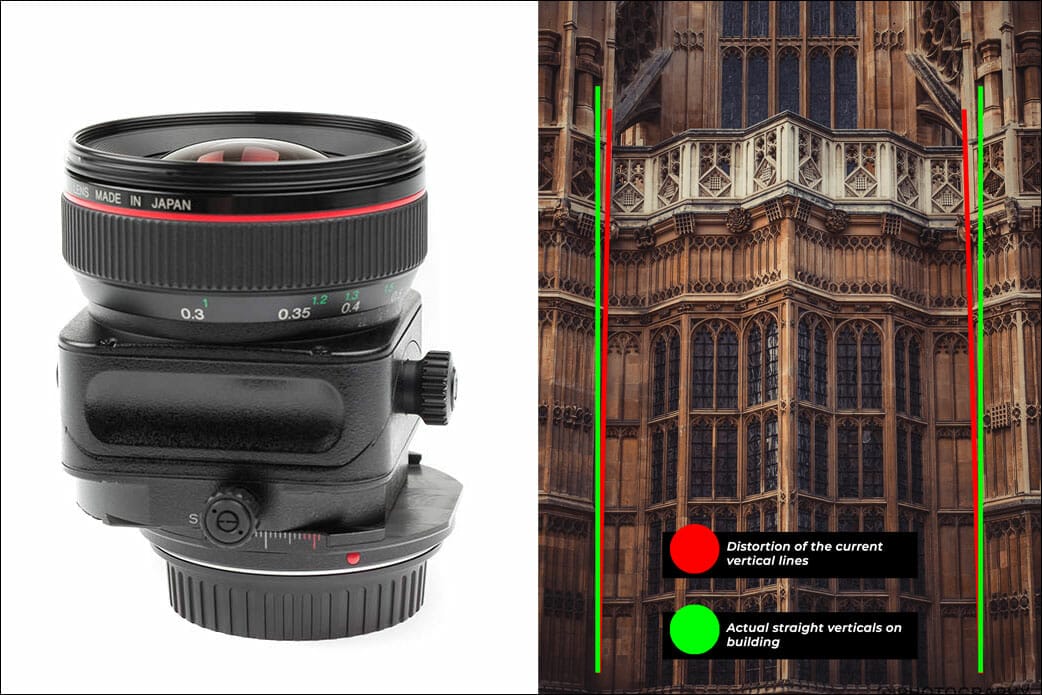
Normally when you shoot upwards to capture a tall building the top of the building looks like it’s leaning away from the camera and the vertical lines converge making it look like it’s all leading to one point.
Using a tilt-shift lens you can control this perspective distortion to keep everything in shot and make the verticals appear straight. You may also hear tilt-shift being referred to as a perspective control lens.
While this guide will cover tilt-shift photography using a lens you can also ‘fake’ the effect using apps on your phone if you want to try it out for fun.
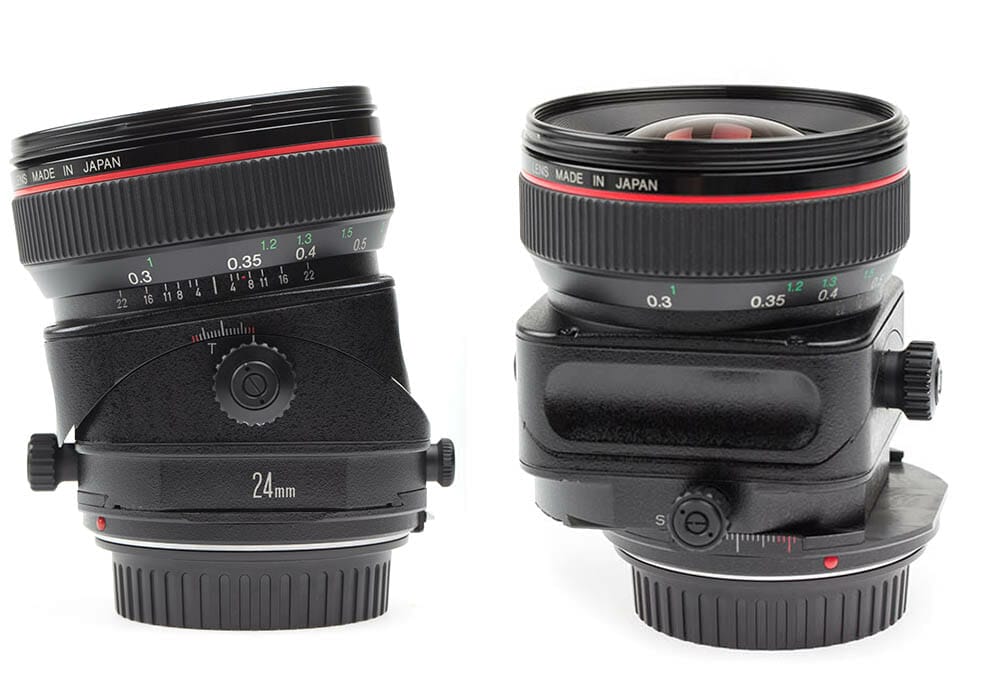
Without this becoming a science lesson a tilt-shift lens allows two different types of movement.
There are two little dials on the side of a tilt-shift lens. One controls the tilt and the other controls the shift. You can use just one, or both to create the desired effect. It’s vital to look through your viewfinder as you make the adjustments.
There is no autofocus option on a tilt-shift lens, it is entirely manual and requires the photographer to dial in the required settings.
There are no presets or markers on these dials to tell you when to stop – you have to make that judgement for yourself.
Traditionally a camera lens can provide focus on a single plane. The camera’s sensor and focus point all line up on the same axis meaning any objects that are in focus will all be the same distance away from you.
But with the tilting aspect of this lens, it changes.
Instead, the lens plane becomes tilted to the relative position of the image plane (the sensor) and the focus point. This results in objects at different distances can now fall into focus.
Hopefully, your mind hasn’t exploded yet as we explain how the shifting aspect works!
Again, in traditional lenses, a subject is straight onto the camera sensor’s direction then all lines leading in between remain parallel. But, as we mentioned before with buildings, if we point the camera upwards, for example, lines stop being parallel as the sensor isn’t on the same plane as the subject.
The shifting part of the tilt-shift lens is a displacement of the lens parallel to the sensor that means the subject can move in the frame without changing the camera angle.
The shift can be used to keep the sensor and focus point parallel to the subject; this is the part of the lens that can make those vertical lines look straight and not converge on tall buildings.

Because of the unique way you can select a focus area, this means you can use a tilt-shift lens to direct attention to a small part of the image while de-emphasising other areas through the blur.
When you’re using the tilting feature, the depth of field (DoF) starts to look more wedge-shaped when used in conjunction with a wide aperture (small F/Stop number).
You’ll need to still adjust your aperture size to control the size of the depth field if you want more things to be in focus rather than just one.
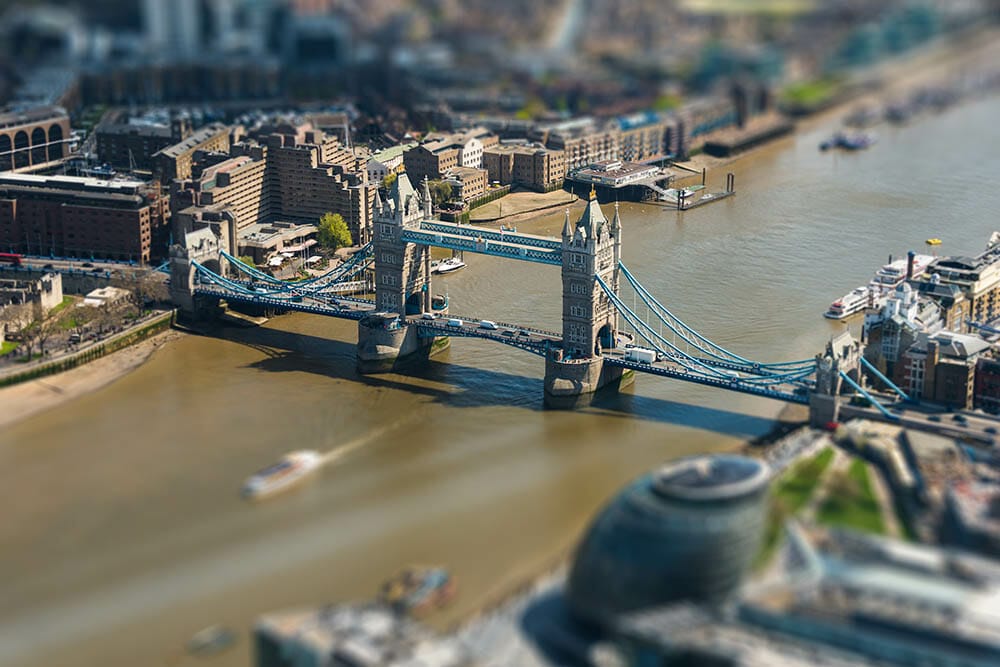
The effect of the tilt-shift lens on a photo is to create a miniaturised look with an area of blur at the top and bottom of the frame and a corridor of focus in the middle.
This can also make images look dreamy, vintage and stylised so they may not be suitable for everyday use. In fact, it’s very rare for a photographer to only use a tilt-shift lens and nothing else – unless you’re a hardcore fan.


Given the speciality of a tilt-shift lens, there is a hefty price tag that comes along with it. Therefore, it’s not an area of photography that is open to everyone currently.
With that in mind, it’s good to look at how you can recreate the tilt-shift photography effect using apps and even websites that automate the process for you.
You’ll still need to feed these machines the right type of image. So here are 3 tips to what type of photos look good with a tilt-shift effect.
1. Photos are taken from a higher angle/elevation looking down on a view work well. You don’t want drone type shots that look straight down, it’s important to have some angle.
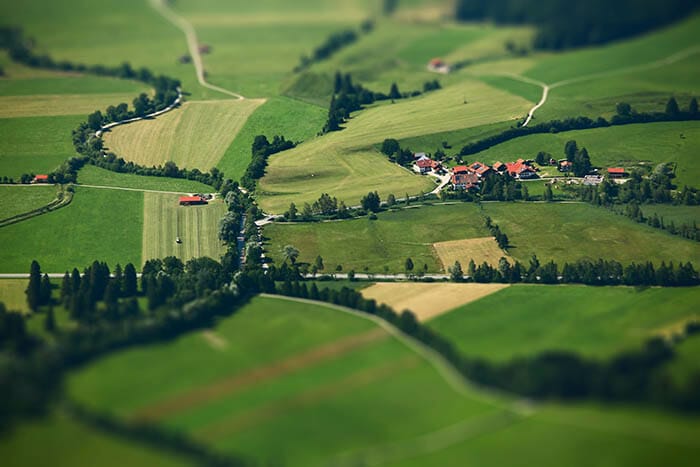
2. Pick the right type of scene. Cities and landscapes look great as it can condense a large spread view and focus on one small element in that space.
3. Given the amount of blur that is incurred with a tilt-shift lens you need to pick a photo that is sharp to begin with. If your image is soft before you add the effect, you won’t get the best results.

Well, let’s tick architecture off the list as we know tilt-shift lenses work well for straightening outlines. But there are also other areas where you could apply the effect.
As well as architecture we’ve already mentioned that landscapes look great under the tilt-shift effect. Look for an interesting area to keep in the new focal plane. Maybe a row of trees, a woodland path, a river – whatever it may be make it different to the surrounding elements.
You could also use a tilt-shift to create a panorama. Simply take a shot, then shift the dial upward, then take the next shot. Once you’ve covered the whole view, stitch them all together in editing.
When you are shooting products for a commercial project consider getting creative with tilt-shift photography. Essentially you can blur everything but your product, with a dreamy effect. It’s something that’s also used when shooting food photography.
Imagine having a group of people to photograph but you just want the focus on one or a couple. A tilt-shift lens will allow you to do that by shifting the focal point to someone’s position. This could be useful in wedding photography but due to the time, it takes to adjust the tilt and the shift dials it may not be time-efficient.

Tilt-shift photography is not a beginner-friendly lens unless you want a steep learning curve and a big challenge. Instead, you’ll find tilt-shift an experience for more seasoned photographers who are looking to push the envelope with their creativity.
You need to prepare yourself mentally too. Tilt-shift lenses are designed to play on altering perspectives which our minds aren’t used to. This can get very confusing as to how the effect is working and how to control it to get exactly what you want.
Because of this when you first start using one don’t set out with expectations of getting great shots. Think that it’s a chance to practise moving the dials around and what it does. You don’t even need to take a shot, just watch through the viewfinder.

Popular memory cards for photography – what’s the best SD card for your digital camera? Choose the right capacity and class speed in our guide

Discover the BEST way on how to clean a camera sensor using swaps, rocket blowers and pencil brushes to give your shots a dust-free finish!

Capture the magic of the night with our beginner’s guide to night photography. Learn tips and techniques for stunning results.
Popular memory cards for photography – what’s the best SD card for your digital camera? Choose the right capacity and class speed in our guide
Discover the BEST way on how to clean a camera sensor using swaps, rocket blowers and pencil brushes to give your shots a dust-free finish!
Capture the magic of the night with our beginner’s guide to night photography. Learn tips and techniques for stunning results.
Learn the basics of photography – fast – with our FREE 60-Second Photographer online course. Each class is short and sharp with simple, actionable steps that give you immediate results.
x 30 lessons

© iPhotography™
Become a confident and competent photographer in less than 30 minutes!
Before you leave, make sure you’ve secured your FREE online photography course (worth £29.99)
Each class is just 60-seconds or less making it the fastest and easiest way to learn photography!