 Stephen Walton
If you fancy yourself at pushing your photo editing skills, then this is a brilliant (and easy) tutorial to start off with. To demonstrate how straightforward creating a stretched photo effect is, we aren’t even using Photoshop.
Instead, I am going to demonstrate this photo editing trick using Pixlr X – an online photo editor.
If you’re familiar with Photoshop already, you may find some of the tools similar but even if it’s your first time editing then you’re in safe hands with us. I’ve made this tutorial in to 6 easy steps to create a stretched photo effect.
Firstly, find yourself a suitable picture to stretch. Action portraits are really good to use, if you don’t have any then search some free stock sites such as Unsplash, Pexels or Pixabay to get yourself a good starting point. Look for shots with a clear background and outstretched limbs.
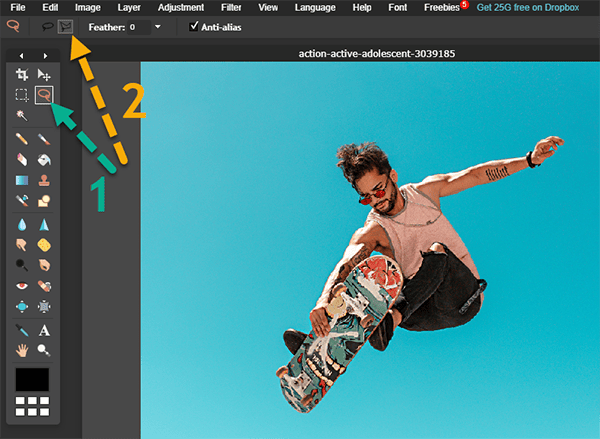
Next, with your image chosen then we need to cut the subject out from the background. In Pixlr, select the lasso tool from the vertical toolbar and then choose the Polygonal lasso option from the horizontal toolbar above. It’ll make your selection more accurate.
Zoom in close and begin by setting an anchor point along the body and move your cursor to set the next and just keep doing this to create an outline of the person. It may take a while, but the more accurate outlines make better results.
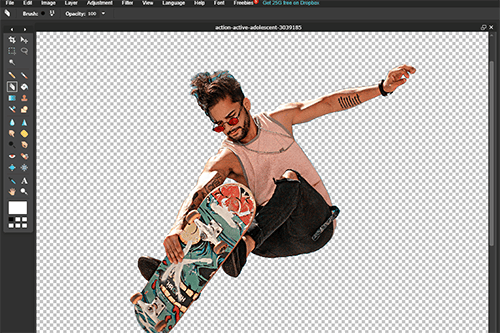
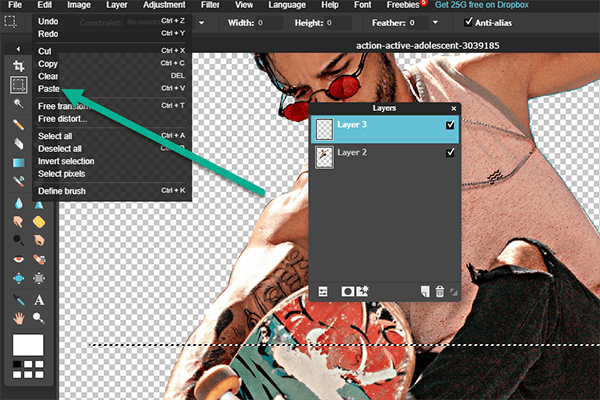
Moving on from our selection, it’s time to separate them from their background. First off, using the menu bar at the top, choose EDIT>COPY, then LAYER>NEW LAYER so we have a space to put our cut out on.
With your new layer active on the layers panel, return to EDIT and this time select PASTE, so our selection ends up on its own layer. You can delete or hide the original photo if you want, we won’t need it anymore.
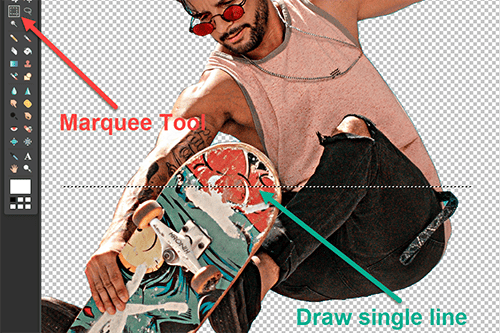
Instead of manufacturing the stretch effect using shapes etc, we are going to use our subject to provide all the colours. Make a single line marquee selection across the middle of your subject. Try to make the selection as narrow as possible, but above all aim to include as many colours in the picture as possible. Similarly, to how we transferred our subject onto a new layer, we need to do the same with this single line selection. Follow these steps again;
• EDIT>COPY
• LAYER> NEW LAYER
• (with the single line selection active) EDIT> PASTE
Next, we need to expand the single line selection to start the appearance of the stretch effect. Activate the layer with the single line on and go EDIT>FREE TRANSFORM. You’ll get some little blue dots on the edges of your selection, hove your cursor next to one and push it around so the horizontal line becomes vertical.
Now pull the anchor points apart and you’ll have a colourful selection of stripes. All the colours were pulled from the original subject, so, therefore, making the best single line selection is important.
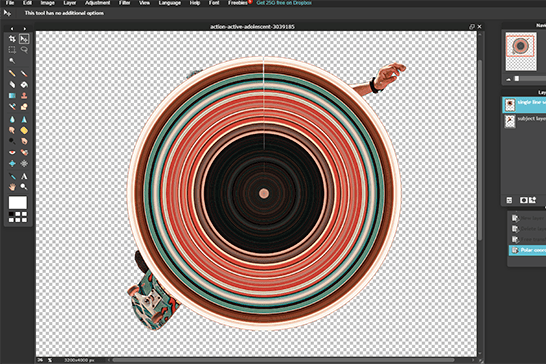
Now comes a magic trick. With the stripey selection active hop to FILTER>POLAR COORDINATES and stick with the first option of ‘rect to polar’. Your bank of stripey colours has now become a colourful circle. Yippee!
If you’ve got some straight edges on your layer, select them using the magic wand tool and erase them to make the circle more, well…circular!
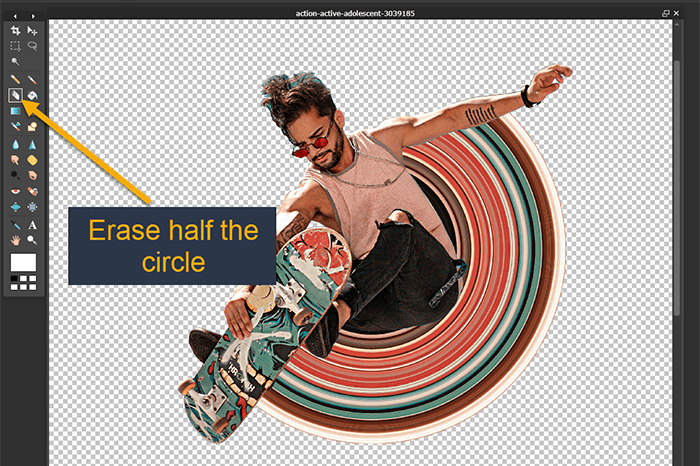
Carrying on, position the circle over your subject and swap their layer positions, so your subject is on top.
And finally, we’re at our last step. It’s just a case of erasing areas that cross in between some of your subject’s actions. This is why outstretched limbs are a good feature for this type of edit as they can mark out start and end points to your effect.
Set your erase to 100% hardness and brush away parts of the circle to make it look like arms and legs have created this stretched trail of colour!
Don’t forget to merge all the layers together when you’re done so you can save it as a JPEG or PNG.
How easy was that?! It cost you 10 minutes of time, but nothing more than that. It just goes to show you how fun, quick and straightforward photo editing can be.
Above all, we want to see your attempts at this stretch effect, don’t be shy now! You can’t spend time trying it out and not showing off your newfound skills. Get those bad boys uploaded to the gallery and our teaching staff will be keeping a keen eye out to give you feedback.
If you’ve seen some killer artwork you want to try out, but are not sure how to send us a link or screenshot and we’ll get on it!

Shooting sunsets using amazing 5-in-1 magnetic lens filters from Kentfaith, the 1st choice for photo & video products.

Popular memory cards for photography – what’s the best SD card for your digital camera? Choose the right capacity and class speed in our guide

Discover the BEST way on how to clean a camera sensor using swaps, rocket blowers and pencil brushes to give your shots a dust-free finish!
Learn the basics of photography – fast – with our FREE 60-Second Photographer online course. Each class is short and sharp with simple, actionable steps that give you immediate results.
x 30 lessons

© iPhotography™
Become a confident and competent photographer in less than 30 minutes!
Before you leave, make sure you’ve secured your FREE online photography course (worth £29.99)
Each class is just 60-seconds or less making it the fastest and easiest way to learn photography!