 Emily Lowrey
Star trails photography is a fun area of astrophotography. Usually, in astrophotography, our goal is to keep the stars pin-sharp, but with star trails, we let them streak across the sky and use this effect to our advantage!
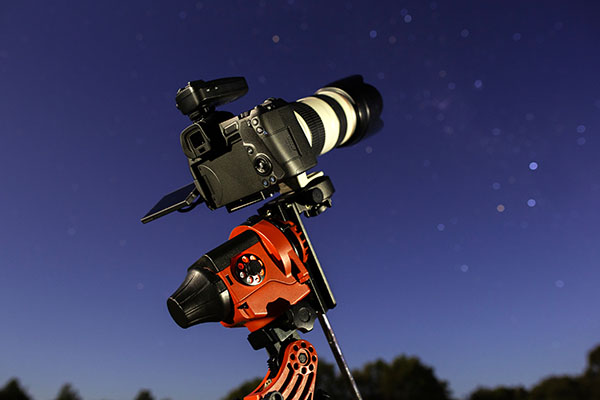
You don’t need an expensive camera in order to shoot star trails, but you will need a camera that has full manual settings. We will be shooting with manual camera settings, and also using manual focus for this style of photography. You can use any lens choice, but a wider-angle lens is usually best.
If you’ve read the astrophotography for beginners article, you’ll notice that there are a lot of similarities. If you’re interested in shooting the stars, definitely read that article next!
For star trails photography, you’ll need:
• A camera with manual settings
• Tripod
• Torch/light (bonus points for a red light!)
• A way to find Polaris (the north star)
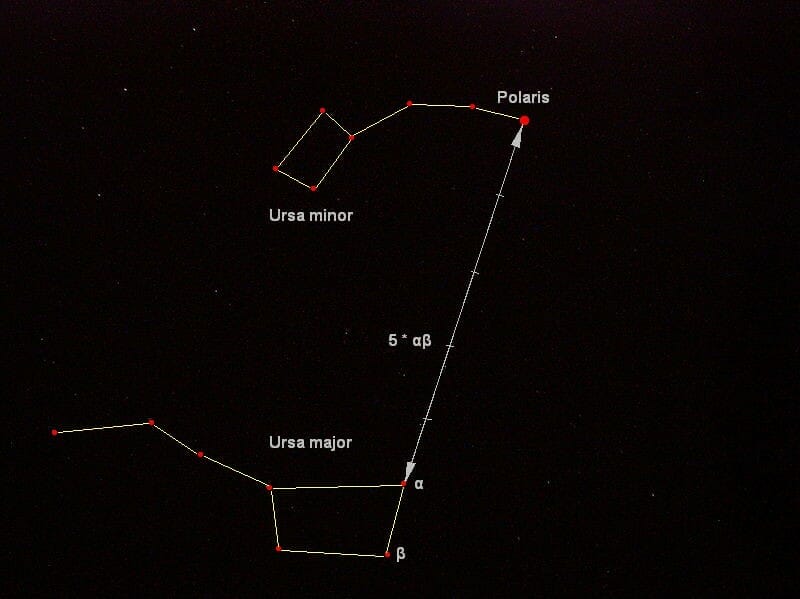
There are two ways to find Polaris, the North Star. The reason we need to find Polaris is because all the other stars appear to spin around it, creating the circular effect. We need to know where it is in our frame in order to predict our end results.
If you’re just experimenting with star trails, you can still get great effects by pointing your camera anywhere in the sky. All the stars will streak, but knowing where Polaris is will just give us better control over the image.
If you know your stars, you can find Polaris by finding the Big Dipper (Ursa Major) and heading up to the Little Dipper (Ursa Minor). Polaris is the bottom star in the Little Dipper, as you can see in the image below.
Sometimes it is much quicker and easier to find Polaris by using an Augmented Reality app on your smartphone. There will be dozens of apps available for free on either Android or iPhone.
With these apps, you can point your camera phone at the sky and see in real-time what you’re looking at. Polaris should be very easy to find this way.
Just remember that we are in the dark and staring at a bright screen can ruin your night-vision. Remember to turn your phone’s brightness down to the lowest setting.
Another helpful tool is using red light. Some apps will have a red mode, which will help preserve your night-vision.
If you have a red headlamp or torch, then this is the absolute best light to use for astrophotography! You’ll be able to see what’s going on but you won’t lose your night-vision. Just remember to use a white light if you are going to light paint your subject (we’ll cover this later.)
In terms of settings for star trails, we want as much light coming into your camera as possible, so keep your aperture on its widest setting (or as close as you can) and bump your ISO to maybe 800 or so. Test shots will really help you dial in the best settings for your particular shot.
You can use a 2-second timer on your camera to set the shot going and eliminate any camera shake.
Aim to take more shots than you need. A minimum of ten would probably be best, but the more you take, the more pronounced the star trails will be.
Take the shots in very quick succession. The spinning effect will be broken if you leave too much time between your shots.
So, you have found an interesting foreground, and also decided if you’d like to feature Polaris in your composition or not. Your camera is ready on your tripod, and you have a full battery. What now?
Now you need to set focus. There are a few methods, just remember to put your lens into manual focus mode because autofocus won’t work in the dark.
You can use a light (from your phone or a torch) to illuminate your subject and focus on that. Just remember to fire off some test shots and double-check the stars are coming out how you want them to.
You can also utilise the magnification function that is available on most cameras. While keeping your focal length the same, you can magnify 4 or even 8 times into a spot on your screen. If you focus on a single star, making sure it is pin-sharp and small on your viewscreen, you can set focus this way.
Once your image is in focus (test shots are your friend! Always double-check!) we are ready to go.
You need to take very long exposures in order for the stars to streak. This could be 30 or even 60 seconds. But take care not to shoot for any longer than that. This is because you can risk over-exposing your stars if you leave the shutter open for too long.
It’s good practice to take a few test shots at different exposure times to make sure the stars are streaking and bright, but not over-exposed. Start at 30 seconds and see how you get on.
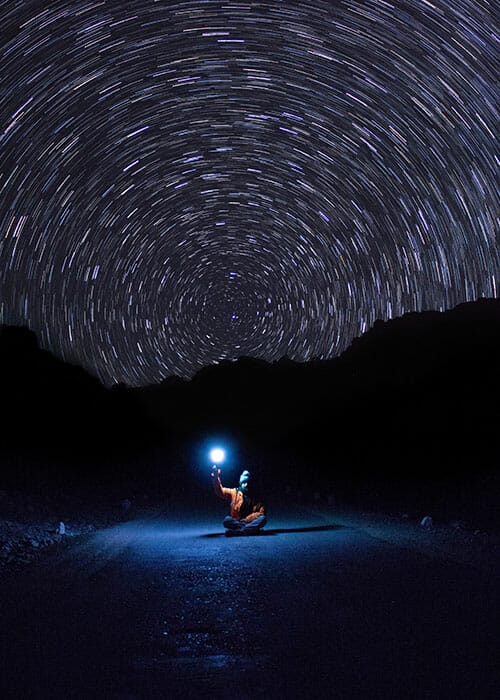
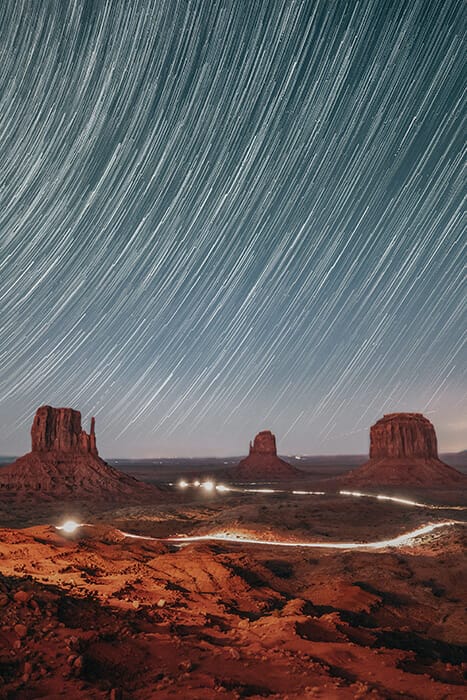
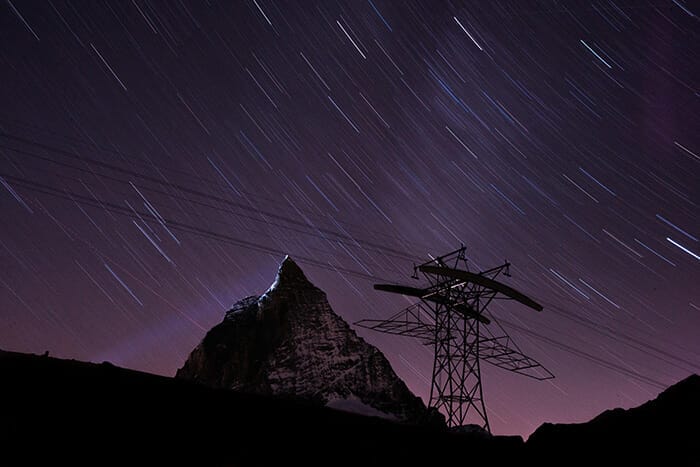
You can make your star trails spin around the North Star. This is the most popular technique, as you can see above left.
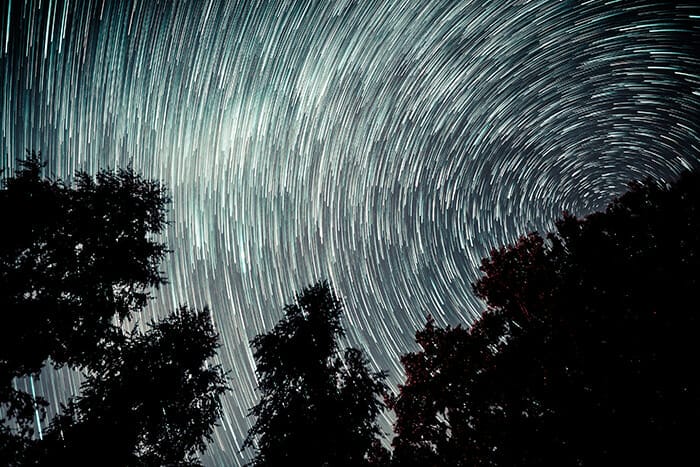
However, you can also zoom into parts of the sky and use a smaller section of light trails for effect, like the photo above right.
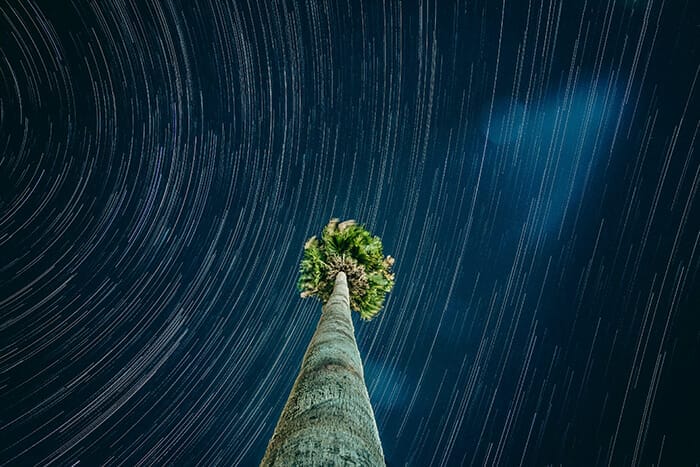
Most effective star trails images have an interesting foreground or subject to add context to the image, but there is nothing wrong with just focussing on the sky to really show off the spinning effect.
We’re going to want a clear night. Sometimes you can get away with light cloud, but the clearer the better.
As you can see in the photo above right, light pollution is less of an issue with star trails photography. For more astrophotography, you’re going to want to choose a remote location with no man-made light.
This is also probably the optimum condition for star trails, but because your shutter is going to be open for longer, light pollution is less of an issue. You can even experiment in your own back yard!
We’re also going to want a New Moon. The moon is a huge light source, and if it’s in your shot it will become over-exposed. The moon’s light also hides the stars.
Definitely not ideal for star trails! You can check a calendar, or look online, to plan the best nights in the month. A small crescent moon might be OK in a pinch, so long as you shoot a part of the sky where the moon isn’t in it.
You can light paint your subject to make them brighter if the foreground is coming out dark on your screen. You’ll only need to do this on one or two of the images. The light on your phone will work fine unless your subject is very far away.
We are aiming to stack several images together, so every image must stay in the exact same place. No moving your tripod halfway through!
Watch the video below to see how you edit your star trail images together using Photoshop.
Once you’ve got the effect you want, you can save your image as a .JPG and you’re ready to share it!

Popular memory cards for photography – what’s the best SD card for your digital camera? Choose the right capacity and class speed in our guide

Discover the BEST way on how to clean a camera sensor using swaps, rocket blowers and pencil brushes to give your shots a dust-free finish!

Capture the magic of the night with our beginner’s guide to night photography. Learn tips and techniques for stunning results.
Learn the basics of photography – fast – with our FREE 60-Second Photographer online course. Each class is short and sharp with simple, actionable steps that give you immediate results.
x 30 lessons

© iPhotography™
Become a confident and competent photographer in less than 30 minutes!
Before you leave, make sure you’ve secured your FREE online photography course (worth £29.99)
Each class is just 60-seconds or less making it the fastest and easiest way to learn photography!