Sponsored by Lume Cube
Throwing a small light into your camera bag can prove to be one of the best investments you ever make as a photographer. We’ve teamed up with our friends at Lume Cube to show you 10 ways to use a small light in your photography and how it can dramatically improve your creativity.
Getting well exposed shots in low light is a battle new photographers face without relying on ISO. But who wants all that suffocating noise hiding in the shadows? Instead using a small light such as the Lume Cube 2.0 will help exposure foreground subjects evenly.
Maybe you’re at a party and your camera’s struggling to focus in the dark? A small, portable light will make it easy to lock on to everyone’s faces and get that crisp, sharp shot every time.
Don’t resort to using the hard, direct pop-up flash which doesn’t do anyone any favours. Instead use a small light, at an elevated angle out of everyone’s eyes, and get shots everyone is going to want copies of!

Another night-time benefit of a small light in your kit bag means at a moment’s notice you can capture some beautiful light trails. Light trails are the result of using a moving light in combination with a slow shutter speed.
To try it out, pop your camera on a tripod and set your camera to S/Tv (shutter priority) mode on your camera dial. This will only let the camera sort the f-stop out so make sure your ISO is as low as possible.
Reduce your shutter speed to 5 seconds to begin with and as soon as the shutter opens get in front of the camera and start drawing shapes, letters etc with your small light. Listen out for the second clunk of the camera to know when your exposure has stopped.
If you’ve got a Wi-Fi /Bluetooth function on your camera, pair up your smartphone so you can be ready and waiting with your small light before the shutter opens. A shutter release cable will also help you do the same thing.
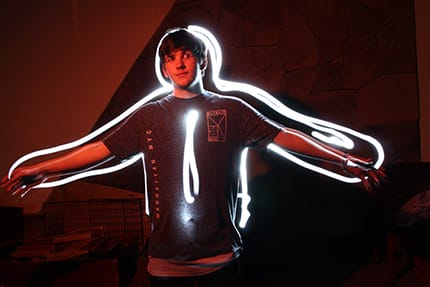
Continuing our night-time adventure, you can also try out light tracing using the same settings as light trails.
Firstly, pick an object with clean lines and a distinct shape, maybe a car, bike or person. Secondly, set your shutter speed to around 10-15 seconds to give you more time to draw. Thirdly, use the small light to trace around your subject, keeping true and close to its outline.
The final shot will be a ghostly figure of what once was there. The more intricate your subject the more time you’ll need on your exposure. Start simple and build up.
Using the Lume Cube 2.0 as our small light we found that its lack of hotspots meant that we could create seamless outlines around several objects. Other small lights may have a narrow spread of light meaning your tracing lines could vary in thickness during your movement.
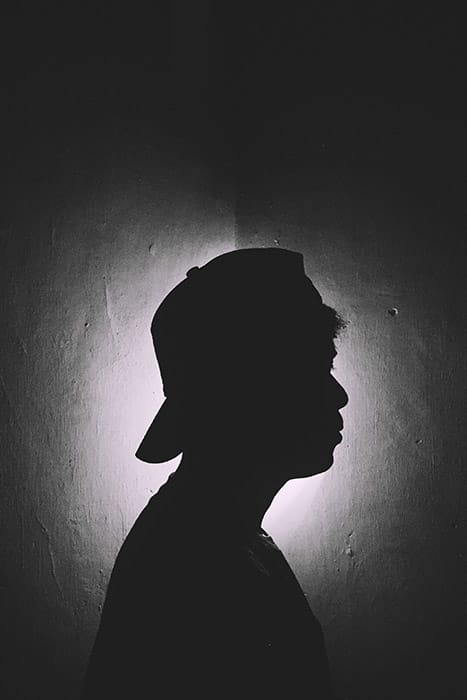
Fortunately silhouettes only need one light – and that’s all we’ve got! Push your subject close to a background surface and position a small light in the gap between pointing upwards.
The trapped light will create an outline of your subject, but it’ll also be recognisable with a plain backdrop behind it.
Silhouettes are great mood-makers, they can transform a portrait to look more ominous or something quite banal to be much more interesting. All this with just one small light. Goes to show that creativity doesn’t take time.
Angle your small light towards the background or subject for varying effects. Try placing a sheet of colour plastic film over the light for bolder finish.
No matter how much we may resist, we all take selfies time-to-time, so why not take ones you’re always happy with? Using the Lume Cube 2.0 we found that the 80-degree wide beam angle meant that our selfies are always well exposed and flattering.
If you’re a good multi-tasker then hold your small light in one hand and your camera in another. If you’ve got an articulating LCD screen, flip it around to check you’re in-frame. Raise your light up for a more flattering angle and make sure there’s a catchlight at the top of your eyes.
Use this method every time to get picture-perfect selfies that everyone will get jealous of!
For the strobists amongst us then you’ll love the functionality of the Lume Cube 2.0 as it also has a built-in flash. But how is it different from your camera’s own pop-up flash? Well, there is a degree of flexibility with it’s positioning on your camera’s hot shoe.
You’re not limited to pointing it directly at your subject, like your pop-up flash. Instead, you can angle and bounce the flash off a reflector or a surface to soften the light.
This small light also can work as a slave flash too giving your more choice with every shot. There aren’t many small lights on the market that work in continuous and flash mode. This one will save you space, money and more importantly time.
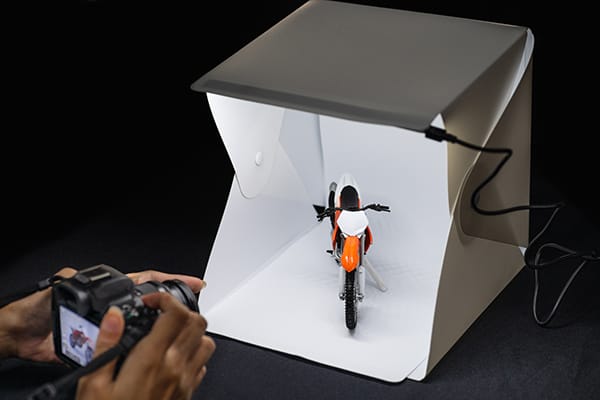
Big lights are useless for photographing small objects. We’ve made use of our iPhotography Light Tent and in combination with our small light we’ve been taking some really striking product shots.
Our Home Projects course members will know all about using light tents but if you’re new to it then it’s a fantastic way into product photography and making some money out your camera. Our iPhotography Light Tent has a roof space for holding a small light through to give us a different effect on our shots.
A small light is manageable enough to be held at different angles so you can get the exact effect you’re looking for.
Try placing your small light underneath your product to give it that dramatic and atmospheric feel.
If you’ve passed our iPhotography course modules about basic light, then you’ll know that small light sources produce hard light when faced with a relatively large subject. But if you can get your hands on a diffuser to soften it out, there’ll be so many more benefits – especially in your portraits.
Beautify your subjects by placing a thin white sheet in front of your light to soften it out. You could use a bed sheet or a white plastic bag. The wider spread of light will stop harsh shadows falling on your subject making them look more shaped.
The Lume Cube light we’ve been using has its own diffuser panel that simply snaps over the light and instantly gives us a softer beam. Having a filter like this makes it so much quicker and cleaner to eliminate harsh shadows with a small light.
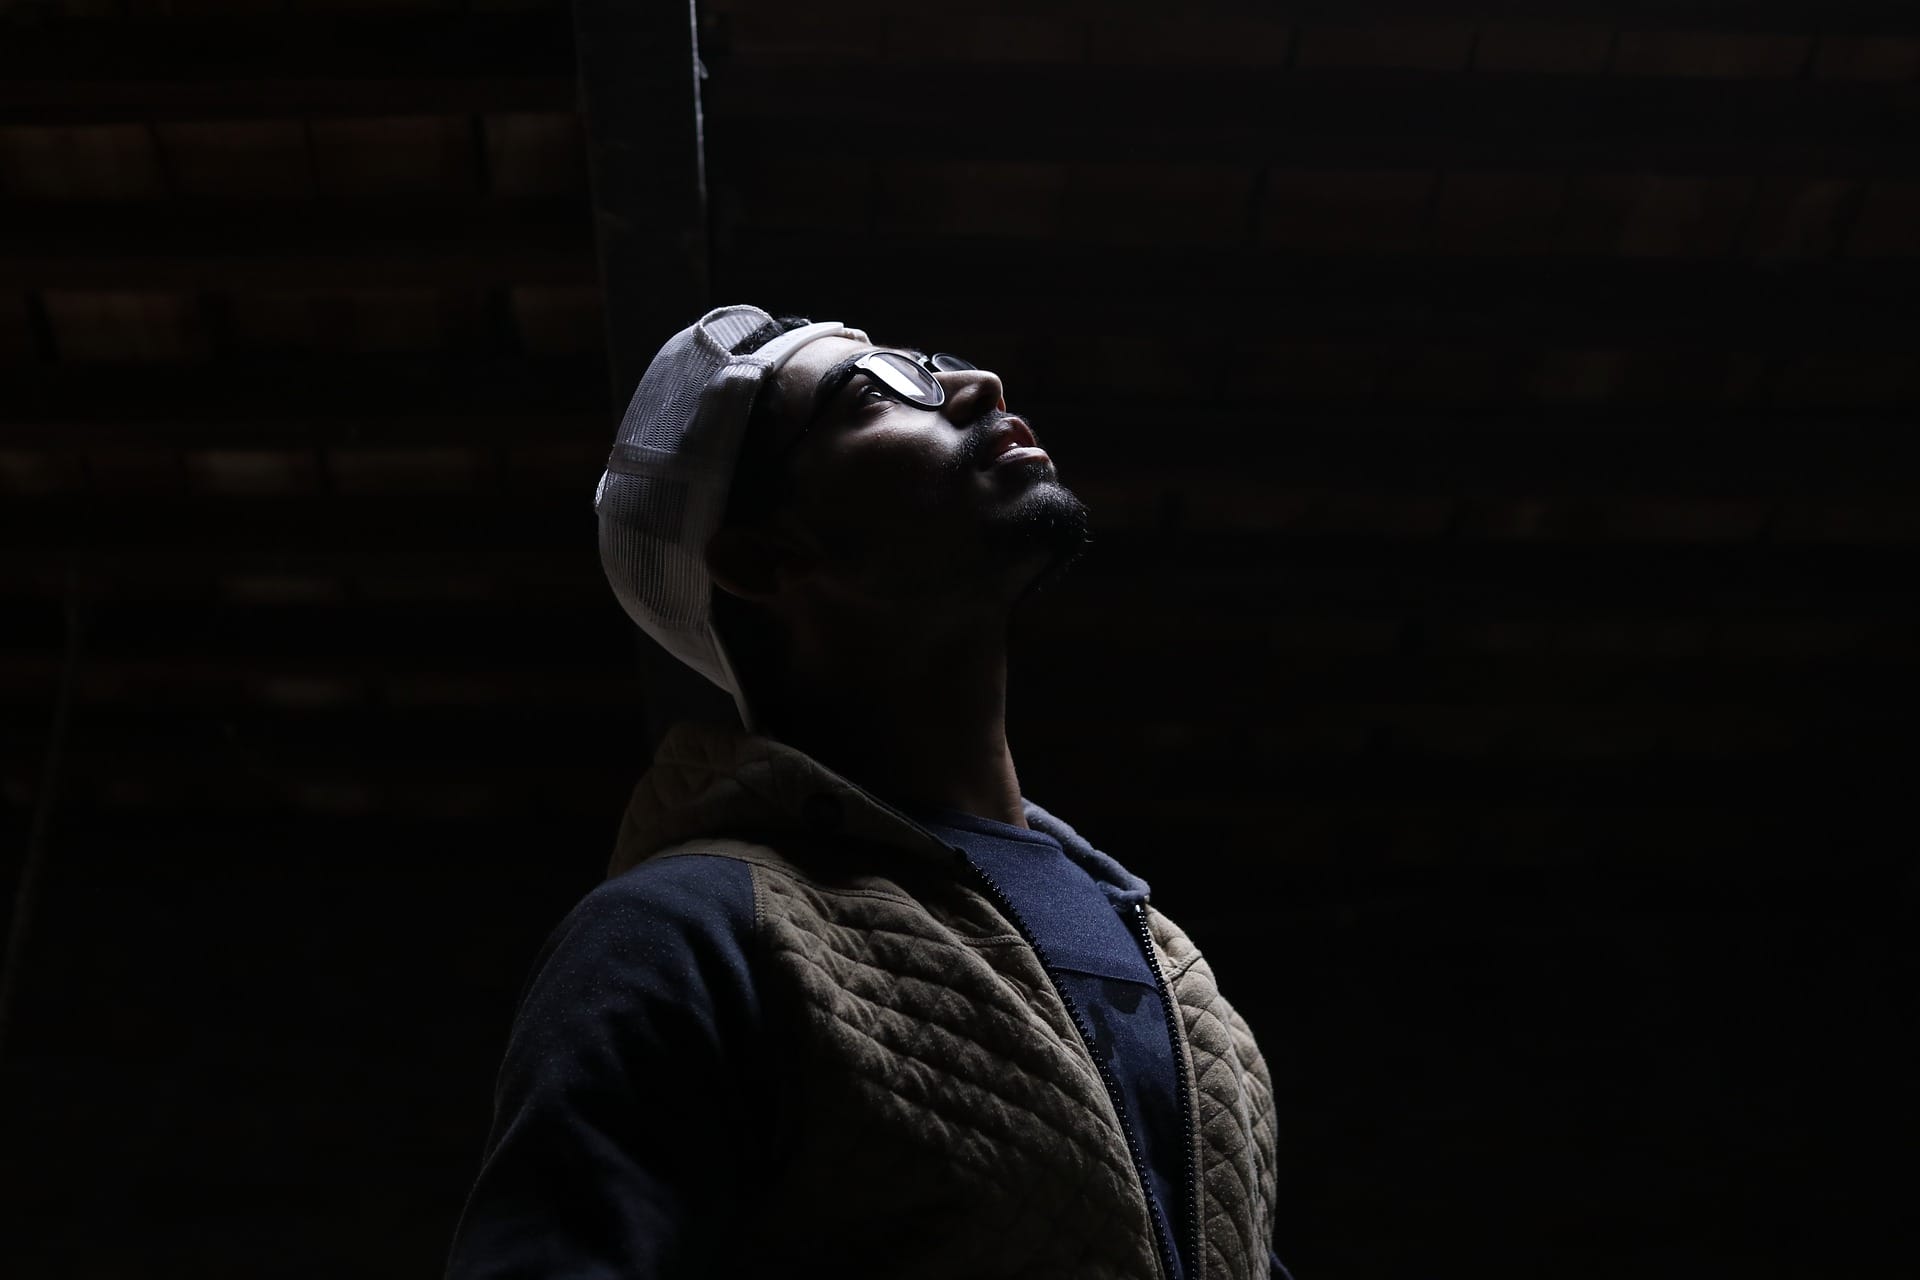
The fun of only using one small light (in the dark) is that you can see exactly where your light falls. It means you can adjust it live to make lots of moody lighting. Again, if you’ve mastered low key photography then you’ll know the power of a small light in the darkness.
High angles and rim lighting positions can turn a picture from innocent to suspicious in the turn of a light. Have a go with moving your light around your object. Try shining it through a small gap in a doorway or holding it high above your subject to only reveal a few features.
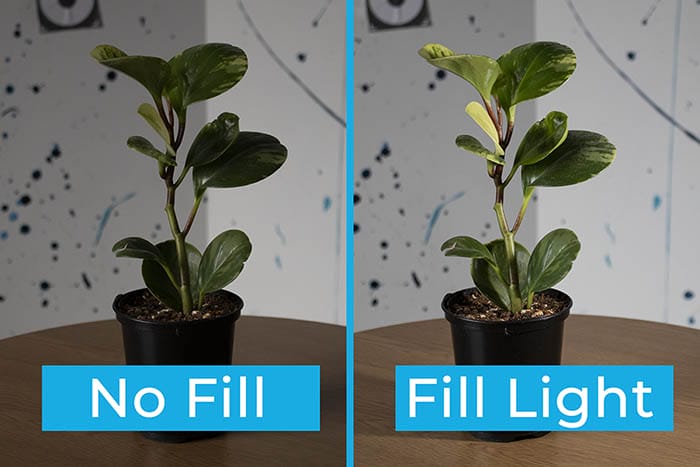
If you like to travel light and find that fill-in reflectors only get in your way, then having a small light to hand could be a good alternative. Fill lights should be positioned on the opposite side of your subject facing back towards your main light.
A small light will help fill in the shadow area, especially combined with a diffuser, and make your exposure more even across the subject. This is a simple little trick to try out if you’ve only got a small light and the sun.
Move your light closer or further away depending upon on the intensity you’re looking for from your fill light.
I want to take a moment to say thank you to our friends at Lume Cube for sending us their fantastic Lume Cube 2.0 small light for us to try out on this article. They’ve got a huge range of perfect accessories that all photographers need to check out.
Can you think of anything else that we’ve missed off our list? If you find more creative uses for a small light in your photography, then let us know.
Popular memory cards for photography – what’s the best SD card for your digital camera? Choose the right capacity and class speed in our guide
Discover the BEST way on how to clean a camera sensor using swaps, rocket blowers and pencil brushes to give your shots a dust-free finish!
Capture the magic of the night with our beginner’s guide to night photography. Learn tips and techniques for stunning results.
Learn the basics of photography – fast – with our FREE 60-Second Photographer online course. Each class is short and sharp with simple, actionable steps that give you immediate results.
x 30 lessons

© iPhotography™
Become a confident and competent photographer in less than 30 minutes!
Before you leave, make sure you’ve secured your FREE online photography course (worth £29.99)
Each class is just 60-seconds or less making it the fastest and easiest way to learn photography!