 Stephen Walton
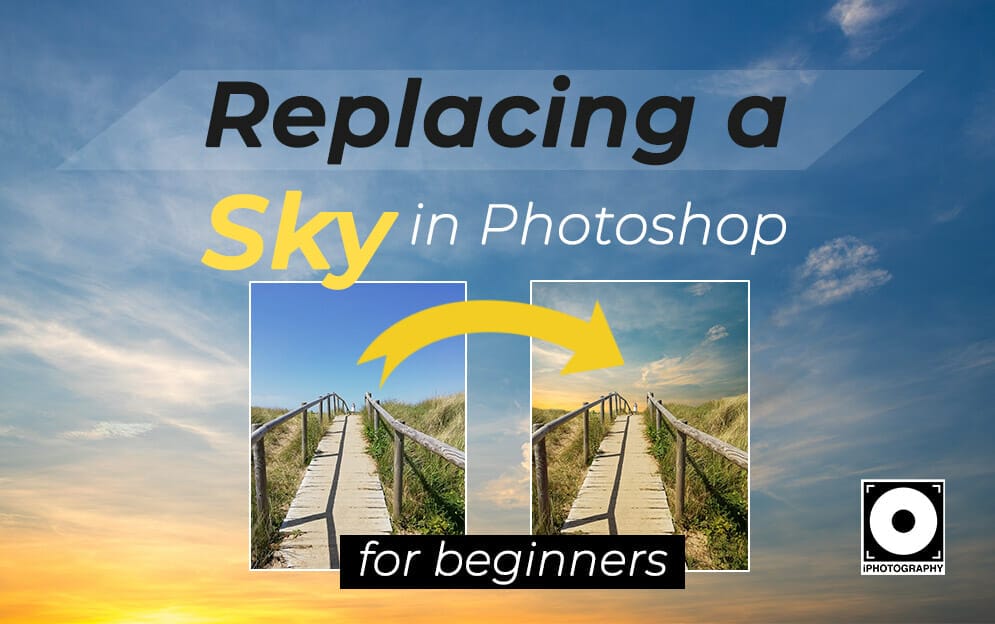
Knowing how to do a sky replacement in Photoshop is a powerful transformation for any landscape photographer. It’s an inevitable struggle to balance foreground and background exposures in some cases. And not every camera has built-in bracketing functions.
Instead, we’ve got this great tutorial about how to replace a sky in your photographs if you don’t want to use Photoshop or Luminar Neo’s automated sky replacement tools.
Fingers crossed this isn’t a guide you’ll need to refer to all the time and you can get the exposure perfect in camera, but that’s not always the case. While replacing skies shouldn’t be a reliant technique it can help you out of tight spots when you’ve had to overexpose the sky to bring out detail in otherwise low light.
Secondly, it could also be the case that your skyline is just rubbish. Some skies are boring, flat, uninteresting and bleh. And soon you’ll know how to make it WOW!
Thirdly I said not every camera carries bracketing or HDR functions to solve that dullness in camera so providing you’ve got access to Photoshop or Affinity Photo then whatever camera you use you’ll be able to follow this mini tutorial.


Firstly, you need to figure out what the new sky is going to look like. A lot of passionate landscape photographers spend time outdoors just shooting beautiful skies simply for this situation. They don’t include any land elements just 100% sky. If you haven’t got the time or the weather to do this then you need to turn to the power of the internet.
Open up Google and search for any of these FREE stock sites:
Or if you want to splash the cash check out Shutterstock. Search their libraries for the perfect replacement.
When looking for a sky replacement file consider the composition and angle of your current image and try to find a new sky that looks similar in terms of direction and angle it was photographed at. This will help the blend between old and new look seamless and less of a composite.


Let’s move on to actually swapping these skies. Open up both images in Photoshop and follow these steps:
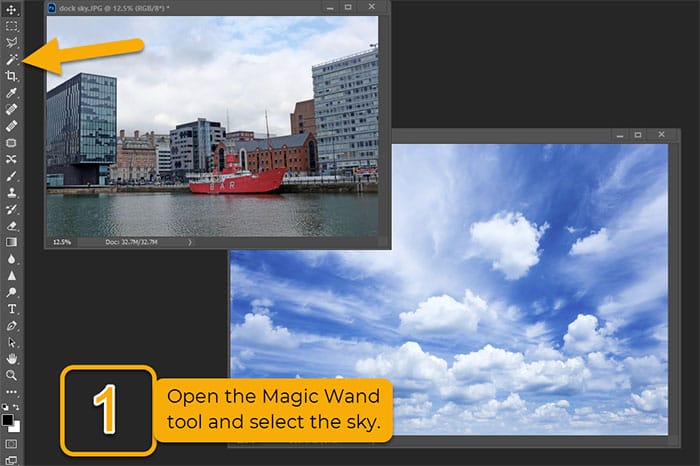
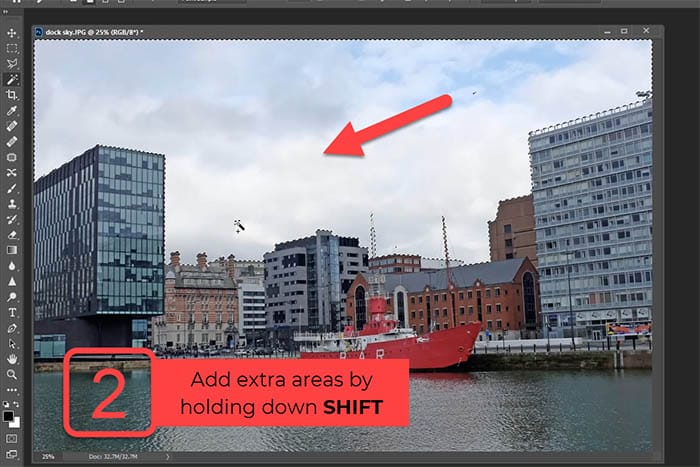
1. Use the Magic Wand tool or Quick Selection brush and select the full area of the sky in your original image. Make sure you capture all the sky areas. The more precise this selection the better the final result. Hold down SHIFT to add more selections when using the Magic Wand tool.
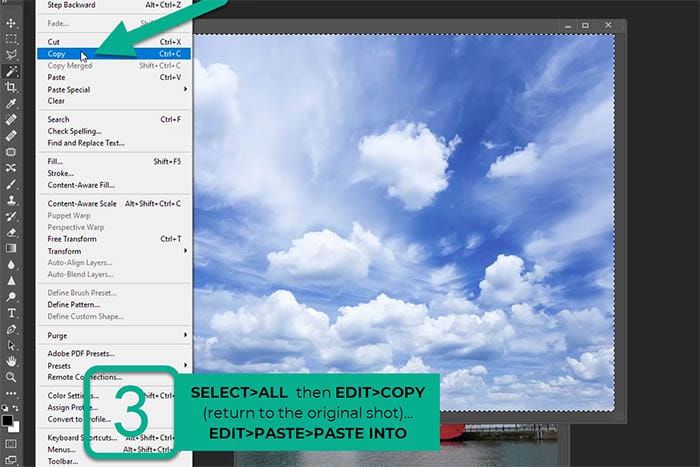
2. Move over to your new sky shot and hit SELECT>ALL>EDIT>COPY.
3. Switch back to the original shot with the sky area selected and choose EDIT>PASTE SPECIAL>PASTE INTO.
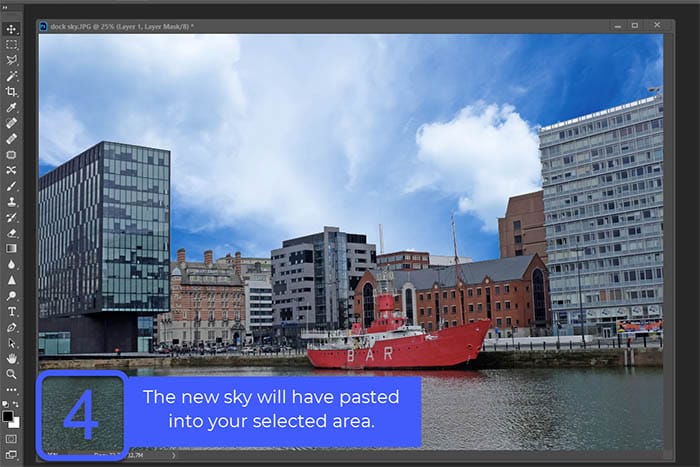
4. This will drop your new sky into the area you selected. You’ll see on the layers panel Photoshop has made a mask. This will be really helpful if you need to cover the new sky over other areas you missed when making the initial selection.
The replacement sky is on your original image probably won’t be looking perfect just yet. You’ll have to tweak the perspective and scale possibly to get them to match up better. If you’ve chosen well from the stock site, then it shouldn’t take too long to adjust.
Use the Free Transform tool in Photoshop (with your sky replacement layer chosen) press EDIT>FREE TRANSFORM and change the scale using the anchor points whilst holding down the ALT key to keep the proportions even.
If you need to adjust the perspective then switch to holding the SHIFT key and your corner anchors will turn white (instead of black) and you can bend the perspective to match your original image if needed. Too much distortion will be obvious. If you’re transforming the replacement sky a lot then you may have chosen the wrong image in the first place.
The aim is to end up with a sky that fits the composition, angle and direction of the original shot (but with a lot more detail and interest).


With the perspective sort it’s time to turn your attention to the colours. Two different photographs are rarely going to have the same exact lighting and toning. Therefore to complete your masterpiece you will need to tweak the colours to make both parts look harmonised.
You’ll even have to do this if you’re making it all B&W – there isn’t just one way to do B&W, but it is easier.
It’s up to you to decide which image you are going to match up to – the new sky or the original. Either way uses the Colour Balance panel found in IMAGE > ADJUSTMENTS > COLOUR BALANCE (or use a Colour Balance adjustment layer) and start pushing the sliders around to get the right part to start looking like the other. This will take time so be patient.
Notice what colours you need more and less to match up. Watch out for reflections of colour in the original image and ensure they are also toned to match your new sky and vis versa.


In conclusion, it’s that straight forward! Such a quick and simple tutorial to do a sky replacement in Photoshop and get you out of those tight spots. As always we really hope this guide will give a new lease of life to images, you’d stored away because of those blown out highlights.
Gone are the days of bland skylines! Now get sharing those images and send us what you made.
But if you’ve got the latest version of Photoshop CC and looking for a quick way to replace skies in Photoshop check out the video below to see how their AI Sky Replacement tool works.

Discover the BEST way on how to clean a camera sensor using swaps, rocket blowers and pencil brushes to give your shots a dust-free finish!

Capture the magic of the night with our beginner’s guide to night photography. Learn tips and techniques for stunning results.

Master the art of solar eclipse photography with expert tips on equipment, settings, and precautions for stunning celestial images.
Learn the basics of photography – fast – with our FREE 60-Second Photographer online course. Each class is short and sharp with simple, actionable steps that give you immediate results.
x 30 lessons

© iPhotography™
Become a confident and competent photographer in less than 30 minutes!
Before you leave, make sure you’ve secured your FREE online photography course (worth £29.99)
Each class is just 60-seconds or less making it the fastest and easiest way to learn photography!