 Stephen Walton
Macro photography has always been an elusive, yet intriguing area of photography for some many newcomers. Getting the focus sharp, choosing the right type of lens, and picking the best camera settings are the important building blocks to create amazing close-up photos.
In this guide I’ll give you the best tips on all those principles and more!

Macro photography is probably the most detailed form of photography. The definition of macro photography is that the subject you’re shooting is photographed at a 1:1 magnification— basically, how big it looks in the photo is how big it is in real life.
With that said, it’s common place for photographers to use macro as meaning any type of close-up photo.
Regardless of what camera you pick up nowadays (even your phone) you’ll no doubt have a built-in macro mode. It’s normally depicted by a flower symbol on your camera dial or menu.
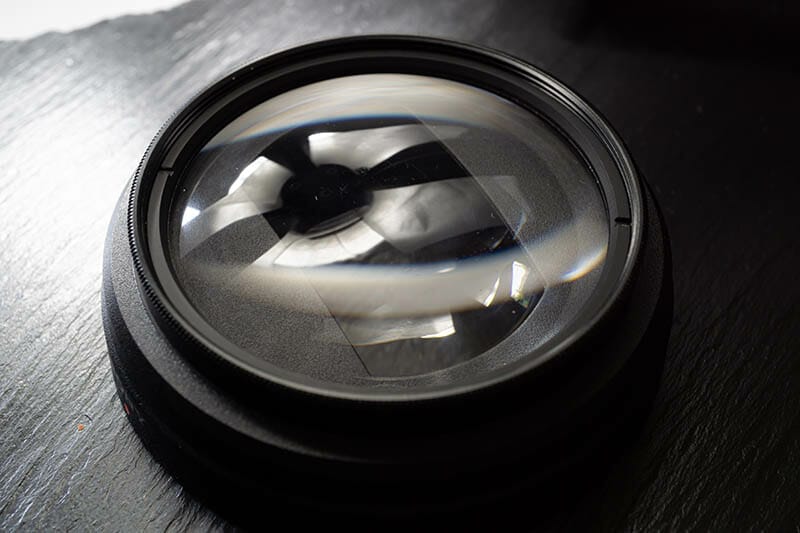
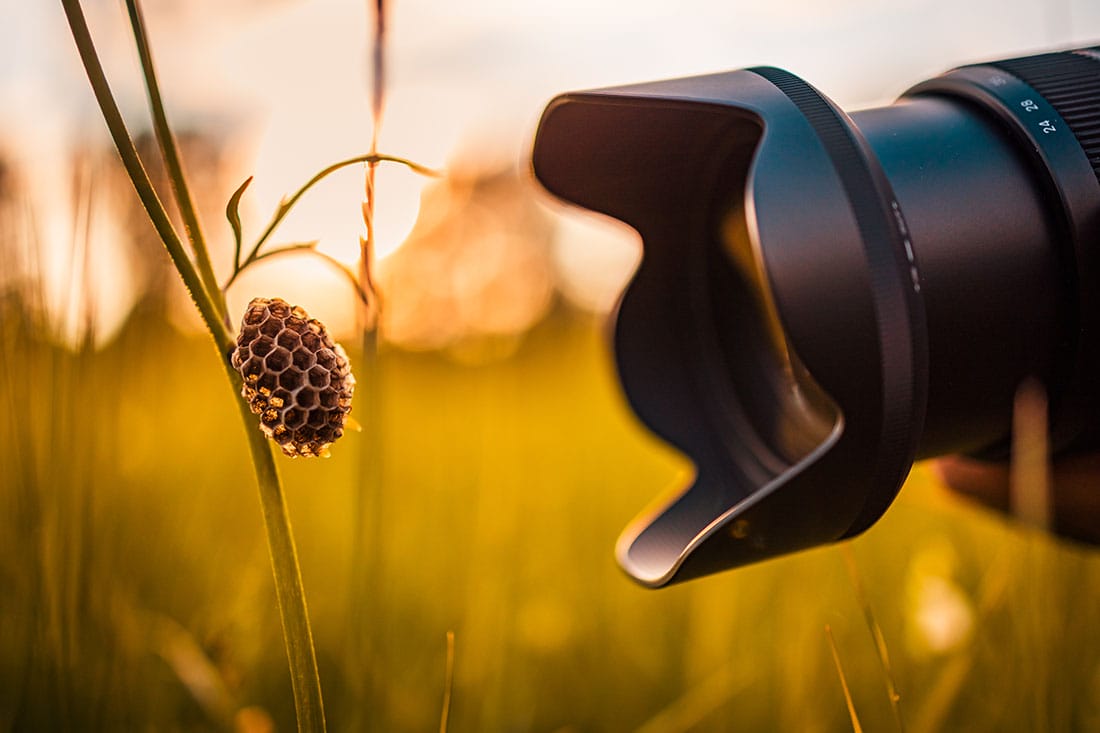
When using this mode, the camera adjusts the glass elements in the lens and moves them closer to the sensor to create magnification. While it is possible to use extension tubs and macro filters as an alternative, nothing will give as good quality as a dedicated macro lens.
Macro lenses come in different focal lengths anywhere from 30mm up to 200mm.
Due to the shorter focal lengths with these type of macro lenses, it means you need to get physically closer to your subject, which startle a bird or insect. But with that said they tend to be the cheapest types of macro lenses and therefore are a good introduction to macro photography for most beginners.
This is a slightly more suitable length for macro photography enthusiasts. The longer length may require you to crack out the tripod as they tend to be a little heavier to otherwise hold.
While producing the best quality image, long focal macros come with a hefty price tag. If you really want to get the best possible quality and make macro photography, you’re thing then really consider in investing in the best type of lens.


A macro lens with a 1:1 magnification (where a 1-inch object is also projected at 1-inch on the camera sensor) is the best type of lens to look for. You may also come across macros that are a 1:2 magnification, meaning a 1-inch insect, for example, would take up just a half inch on the sensor.
Don’t believe that you can just crop in closer to a photo to make it look like a macro. This will immediately reduce image quality and defeat the purpose of upholding detail and quality.
If you’re shooting with a cropped sensor (APS-C/APS-H/Micro 4/3rds) camera then you’ll need to consider crop factor. Using a 100mm macro lens on a camera with a 1.5x crop factor means you’ll be actually shooting at 150mm – which can be a bonus.
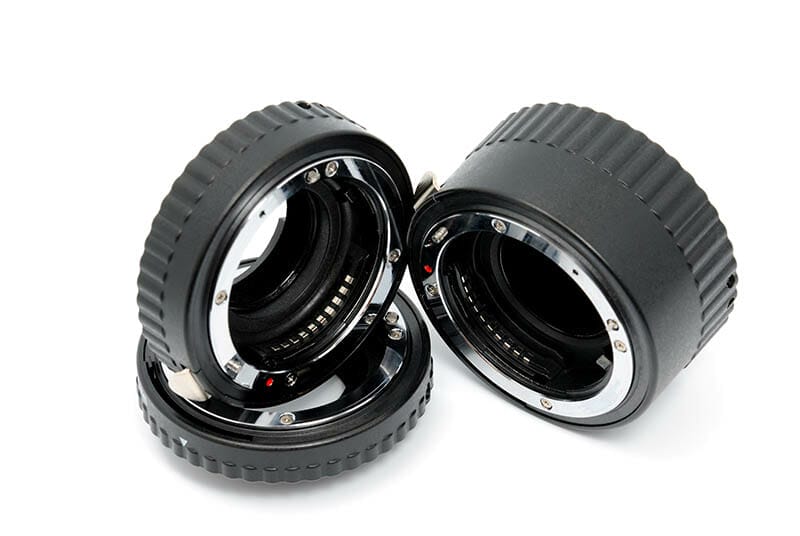
Earlier on I mentioned that extension tubes are an alternative if the price of a macro lens isn’t in your budget. Even though they aren’t the ideal scenario, it doesn’t mean we should immediately discount them.
They are basically hollow tubes that you attach to you any lens in order to extend its focal length. You can normally pick up a couple of tubes in the same set to give you flexibility and aren’t overly expensive.
Look out for extension tubes that has electrical connections to the lens mount as this allows better control over aperture and focus.
But like I said they aren’t the best option for macro photography.
So, what are the drawbacks?
Well because there is a greater distance between the sensor and lens when they’re attached the amount of light hitting the sensor is reduced. Therefore you’ll need to compensate by opening the aperture more or slowing down your shutter speed.
Macro filters are another, cheaper, alternative if a dedicated macro lens is not in the stars right now. They work like all lens filters by screwing on to the front of your lens to act like a magnifying glass.
Because of the low grade quality in the glass that’s used to make them, they don’t result in the best possible quality. But with that said they’ll certainly help you get closer to your subject compared to not using them.
Macro lens filters come in a range of magnification levels from +1 to +10. Make sure you purchase the right ones to match your chosen lens’s thread size. You can stack multiple filters on top of each other for great magnification too.
Aperture and depth of field is what you need to concentrate on most with macro photography. Most of the time you’ll need to open your aperture as wide as possible, especially with insects. This is because if they are nestled into shaded areas, you’ll need lots of light entering the lens to get a good exposure.
The resulting effect of a wide aperture is a shallow depth of field. At F/1.8 or wider the depth of field will be super narrow – meaning micro adjustments and changes can throw out focus easily.
To be in control of your aperture setting then it’s best to shoot your macros in Aperture Priority (A/Av) or Manual mode (M). If you don’t have these options on your camera dial, trying looking for your dedicated Macro mode on your camera to help.

Given that the depth of field is really small in macro photography you’ll want to limit any touching of the camera – enter the shutter release remote (or a countdown timer).
Attaching a wired, or wireless shutter release means you can take the photo without touching the camera and causing micro vibrations in the camera.
If your camera doesn’t support this option, then set a 2-5 second countdown timer to start the shot. Be aware if you’re photographing insects using a countdown timer may mean you could miss the shot if they move before the timer reaches zero.
We would rarely consider macro photography without a tripod. The ability it gives you to stabilise the shot and keep it sharp is vital.
Hand holding your camera, while allowing yourself flexibility in changing the composition quickly can make you lose that perfect focus if you’re not concentrating. Basically, keep your camera as still as possible.
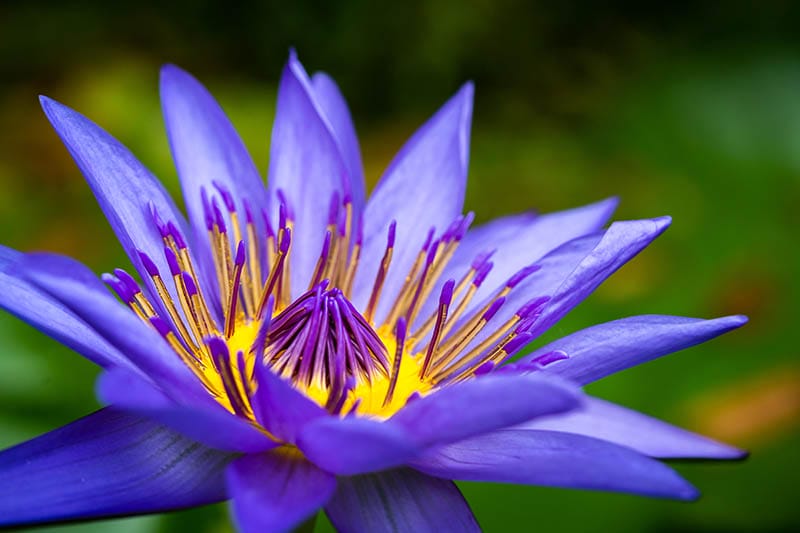
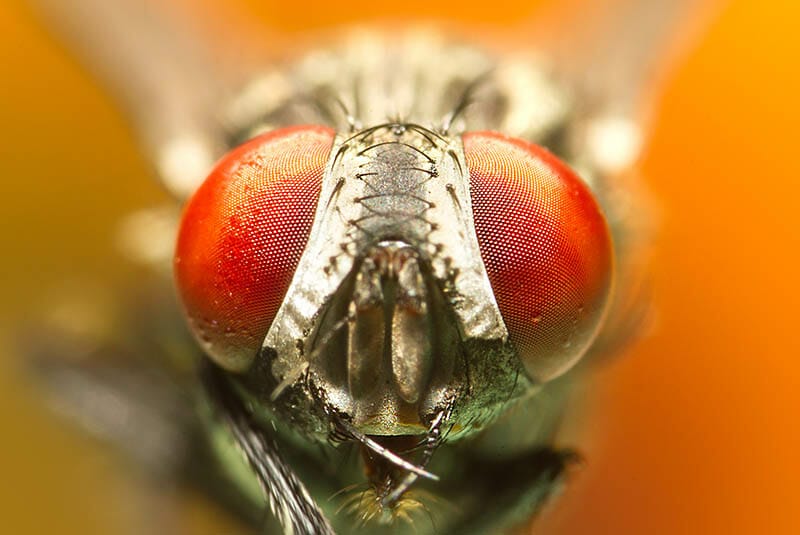
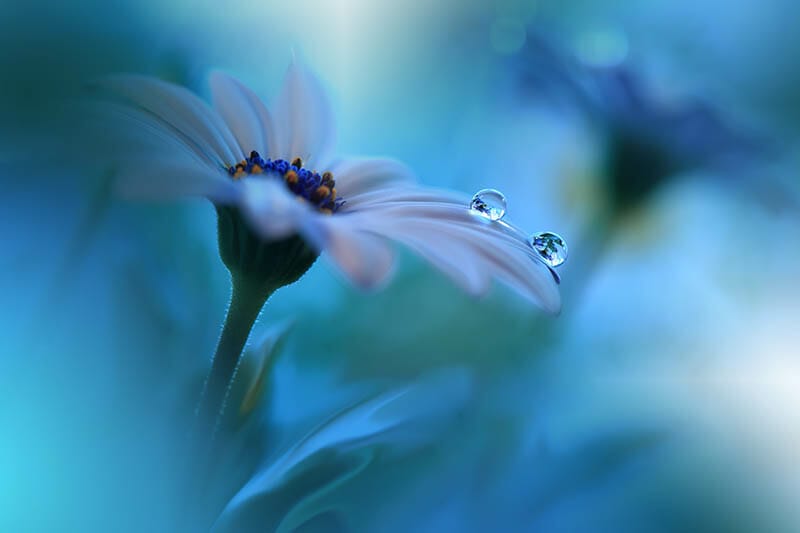
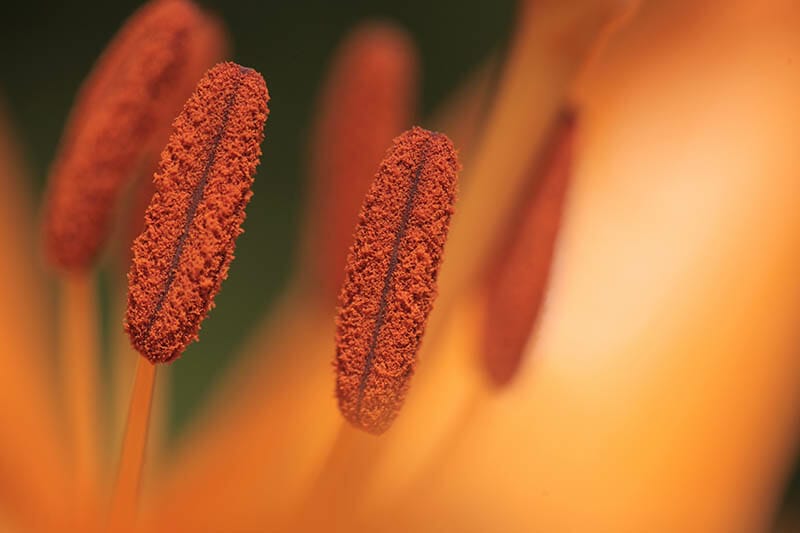
Insects and florals tend to be the most common type of subjects for macro photography – but they aren’t the only ones. Think about subjects that are inherently small, or just photographing parts of a larger object to show interesting detail that would be otherwise overlooked.
• Flower petals & Grasses
• Insects (bees, butterflies, ladybirds, worms, wasps)
• Waterdrops (raindrops or condensation on a window/bottle)
• Jewellery & Watches
• Fruit & Vegetables
• Leaves & Plants
• Eyes
Why not start indoors with some little home photography projects to get comfortable with the settings before venturing outdoors to shoot macros in the wild?
Understanding which focus mode to use and where to place it in your macro photos is the most crucial story-telling element to get right.
Normally small apertures (i.e F/11 upwards) create a greater depth of field making it easier to focus, but this may not give you the exposure you need. But with macro photography, we commonly use larger apertures to bring in more light.
Because of the effect of macro lens magnification, the effective aperture you’re shooting at may not give you the exposure you expect. If you’re shooting at F/2.8 for example, given the effect of magnification it may look more like an exposure taken at F/5.6 and therefore darker. Most camera brands compensate for this and display the correct working aperture on screen, but it’s reported that some Canon cameras don’t.
You may want to adjust your aperture and focus approach if you’re wanting to make all your subject fill the frame and be sharp (yet be close up). This means you’ll need to change to using a smaller aperture (F/11 and upwards) to create a wider depth of field and getting more of the subject sharper.
Don’t be scared of using manual focus – it’s not just for professional photographers!
Many pros who shoot macros tend to use it as it can offer a greater level of sharpness over normal AF (autofocus). Macro lenses are known to have weaker AF capabilities when shooting at high magnifications.
With your camera in MF (manual focus) twist the focus ring on the front of the lens. Turn on focus peaking or focus magnification modes in your camera to see on screen when you’ve got the right area sharp. Peaking modes flash up areas in a red or blue that area sharp based on the twist of the focus ring.
While MF would be the better choice, not every camera and lens have that option. Therefore, let’s look at what’s the best setting to use if you are limited to AF.
Firstly, AF locks focus based on the distance to your subject. As long as your subject stays at that distance, your photo will be sharp. In some instances, your camera may not take the photo if your subject is moving.
The benefit is that AF allows you to recompose whilst retaining focus. Imagine that you focus on the middle of a frame, but your main subject looks better further to the left or right.
When using the AF mode, all you need to do is keep your shutter button half-pressed to firstly lock focus on your subject and then (whilst still half-pressing the shutter button) shift your composition to suit.
Set your AF Mode to Single Shot Servo. As long as you don’t change the distance between camera and subject then your shot should still be sharp.
If your camera has a touch screen option then, using a single AF point, place your focus on the area you want your audience draw towards. This may be the body of an insect, the centre of a flower, the tip of the diamond or the corner or a bottle. Many cameras work on an AF contrast-detection meaning it uses different colours to help find edges of objects and locking focus on that contrast.
If you’re photographing a small insect you may need to switch to AF-Continuous mode to help the AF track any movement of the insect during the taking the shot.
Because the movement can be unpredictable and sometimes hard to track in low light don’t rely on it solely. Put your camera into a high burst mode and take lots of shots in one go.
Macro photography requires the photographer to be patient and dedicated. You can’t just quickly snap a highly detailed and pin-sharp macro on the move. Invest in the best tools within your budget and remember to practise.
If you’ve got other tips to share about macro photography, then get in touch – I’d love to hear them!

Shooting sunsets using amazing 5-in-1 magnetic lens filters from Kentfaith, the 1st choice for photo & video products.

Popular memory cards for photography – what’s the best SD card for your digital camera? Choose the right capacity and class speed in our guide

Discover the BEST way on how to clean a camera sensor using swaps, rocket blowers and pencil brushes to give your shots a dust-free finish!
Learn the basics of photography – fast – with our FREE 60-Second Photographer online course. Each class is short and sharp with simple, actionable steps that give you immediate results.
x 30 lessons

© iPhotography™
Become a confident and competent photographer in less than 30 minutes!
Before you leave, make sure you’ve secured your FREE online photography course (worth £29.99)
Each class is just 60-seconds or less making it the fastest and easiest way to learn photography!