 Stephen Walton
Digital cameras are getting so much better these days that you don’t need to worry as much when shooting in low light. Our 8 low light photography tips will give you creative ideas for shooting still life, urban landscapes and even low key portraits.
We’ll show you how to set up your camera to minimise noise effectively. Later on there’s details about reducing noise in editing too. And if you want some creative low light photography ideas we’ve got you covered there too!
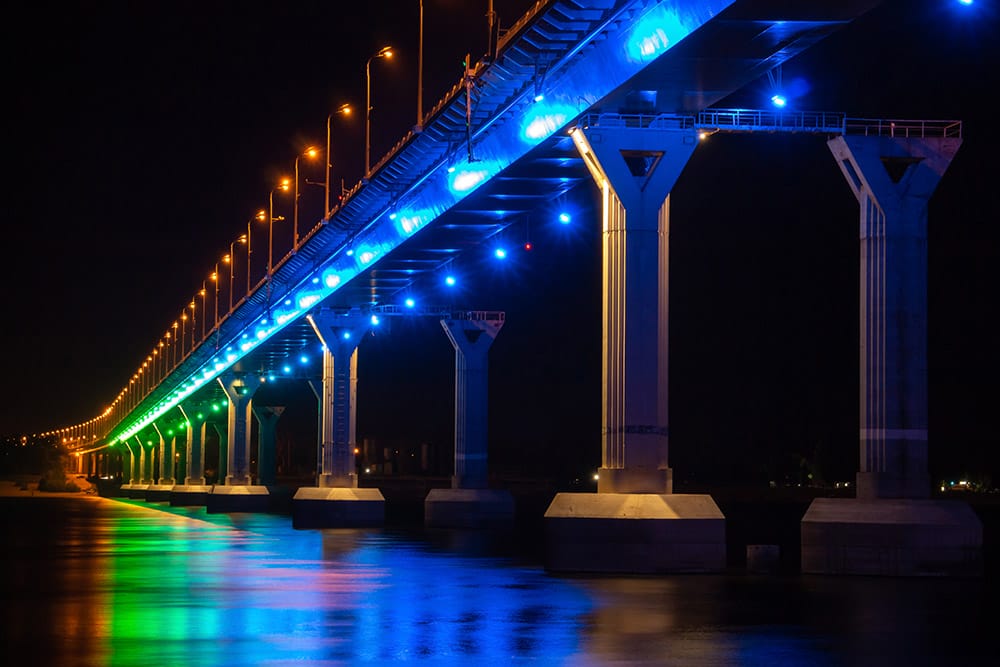
Shooting in low light is something all beginner photographers can do. Dark pictures can add a sense of atmosphere while providing a technical challenge to the photographer.
If you are nervous about shooting in the dark and how your camera will handle it – do a test. To know your own low light photography settings firstly make the room dark. Secondly, turn on a dim light and pick out an object to shoot.
Start your ISO level at 100 by shooting in Program or Manual mode. Keep the low light aperture fixed as well as the shutter speed. Take a shot at increasingly higher ISO levels.
It’s hard to judge the best ISO setting for low light photography based on your camera’s LCD so upload them to a larger screen first.
Zoom in 200% to each image and scan around the shadows and dark areas. Look at what ISO level that noise starts to become apparent and make a mental log of this.
You’ll know going forward what your camera’s optimum ISO range is so you won’t worry any more with whatever low light situation you’re in.
Digital cameras are benefitted for taking low light photos if you’ve got IBIS technology. IBIS (In Body Image Stabilisation) is available in cameras and lenses. It’s a technology that compensates for camera shake when using slower shutter speeds.
You can get IBIS upto 5 stops. This means you can slow your shutter speed by 5 stops and still expect a similar image quality (providing the image is correctly focused to begin with).
This is an amazing advantage if you never shoot on a tripod and you love shooting low light photography.


While autofocus (AF) is generally pretty accurate if you are shooting the dark then consider switching to manual focus (MF).
While our other low light photography tips can be applied to most cameras you’ll need a manually focusing lens for this. iPhone’s won’t cut it here.
Many photographers find a great accuracy of sharpness with MF over AF. Don’t overtask yourself with shooting traffic at night on MF. Still life subjects give you more time to get the focus dialled in.
Zoom in to the back of the camera screen to double check your focus correctly. If you have focus peaking options on your camera screen use it to show where the sharp points are.
AF can really struggle in low light photography. If there’s not much contrast between light and dark then you may find your camera goes ‘focus hunting’ and doesn’t lock on quick enough. This can be very frustrating for a beginner photographer.
The histogram is one of the most vital screens to check over when you’re low light shooting. Making sure your histogram hasn’t bulked to the extreme left side is important.
While shooting in low light means the predominance of the histogram will be weighted to the left it shouldn’t be contained to the edge. Having peaks in the shadow zones is great as it means you’ll have some level of detail to bring out in editing later on.
The more information that is hidden in the black zone will make it harder to pull out later. While it’s OK to have completely black pixels just make sure they’re meant to black and not hide information you’ll want to brighten up later.
You can always make areas darker in editing, but you can’t retrieve details from total black pixels.
Firstly pay attention to the shadows if you decide to shoot in low light. Look at where they fall and whether that obstructs the enjoyment of the subject for an audience.
Hard light can result in heavy shadows so pay attention to how dark the shadows are and whether you are losing detail in those areas.
Secondly, shadows can play a great role in creating a moody atmosphere, especially for portraits so don’t try to actively avoid them all the time. Use shadows to conceal aspects naturally. This may be a side of someone’s face in a portrait to make them look sinister or mysterious.
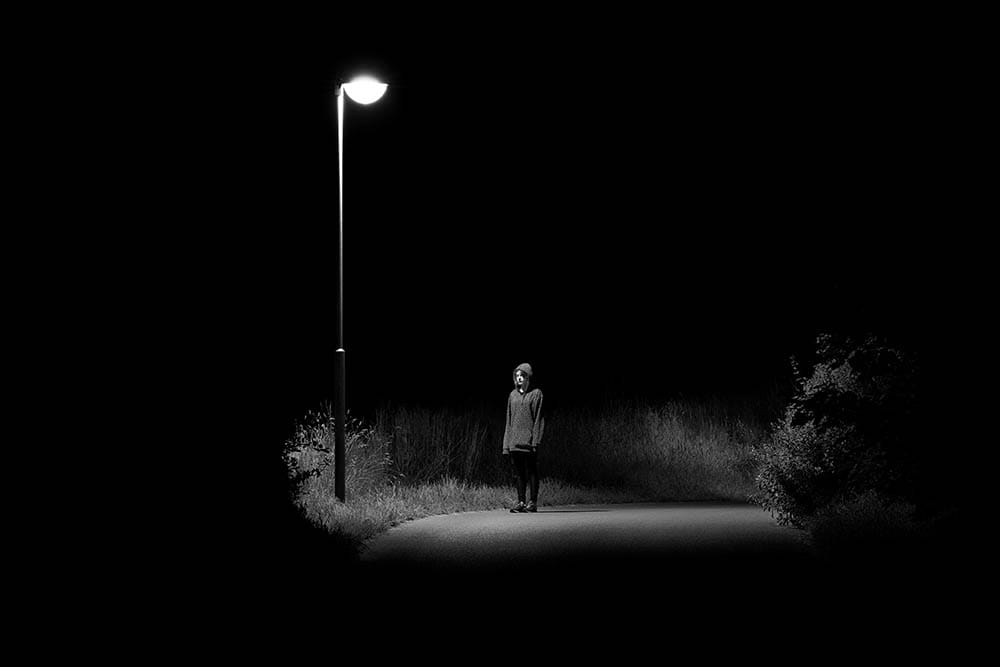
When you are shooting low light photos should you make sure the overall lighting is as even as possible? No. Expose your shot for the main subject and the light falling on to that subject. The main point of the story should always be well exposed and clear.
The rest of the shot can quite happily appear darker or underexposed as it’s not the point of the story. This type of thinking means the shadows will conceal areas that aren’t vital to the narrative of the image.
When it comes to picking a light metering mode for low light photography we’d recommend using one that fits the size of the subject you’re shooting.
Use spot metering for small objects in the frame and matrix/zonal metering for larger subjects.
Try not to leave it on the same metering mode all the time with different sized subjects as your camera will try to balance the exposure meaning your shot will look flatter in contrast and darker on your main subject.

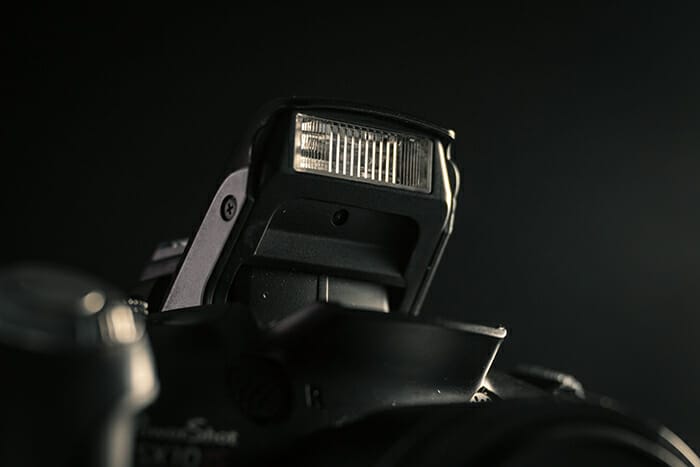
For low light photography without flash then remember to consider the colour temperature of the light source.
Old street lights tend to emit at lower Kelvin temperatures so you’ll need to adjust to using an incandescent white balance.
But if you are shooting low light photography with flash you won’t need to worry about colour temperature and just leave the white balance in auto.
Remember that with low light flash photography you’ll be using a hard light on your subject which can leave heavy shadows. If you don’t want that bounce your light instead.
If it’s a pop-up flash get yourself a diffuser cap or bounce card to reflect the light off a ceiling. This will spread the light and soften it in turn. The same goes with an off-camera flash unit too.
We’ve got more low light photography ideas when it comes to the editing suite too!
If you have Camera RAW through Photoshop or Lightroom then it’s a good idea to zoom your image to 100% to see the actual details of the noise in the image.
Using similar options in both pieces of software we’ll outline a few steps that you can use to reduce those noise levels in your photos.
Lightroom has dedicated noise reduction tools under the ‘Develop’ module and in Camera RAW (for Photoshop users) you’ll find it in the ‘Detail’ tab.
● Luminance Detail noise threshold. This is good for shots with lots of noise. Moving the slider to the right preserves detail, but can produce noisier results. Whereas sliding to the left reduces detail but gives cleaner results in terms of noise.
● Pushing the Luminance Contrast slider to the left can give smoother results but can also have less contrast.
")
")
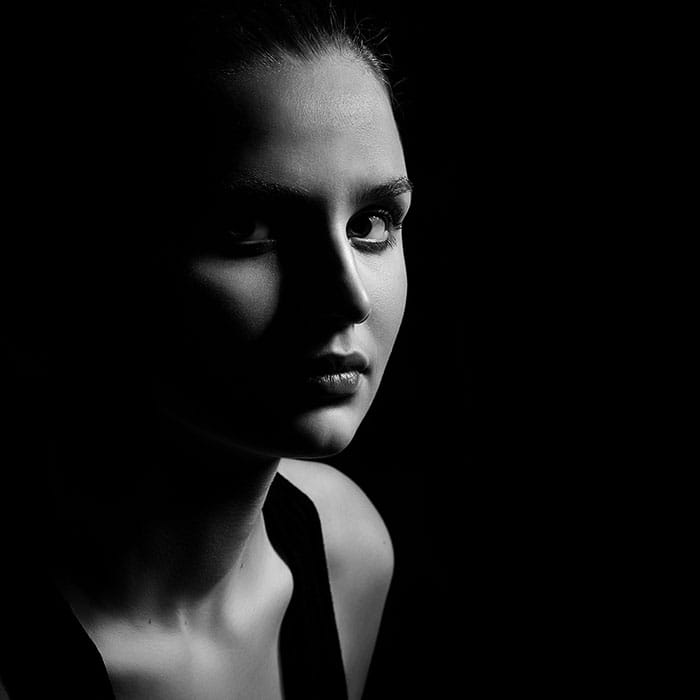
If you really enjoy photographing people and want to try something with a challenge then how about low light portraits? We’ve got a few tips for getting the best camera settings for low light portraits.
However dark you want your shots don’t forget to include a catchlight in the subject’s eyes. Even in a moody shot a catchlight makes a portrait more engaging and gives an ‘energy’ to the subject.
Catchlights should fall between the 10 and 2 o’clock position in the eye, if you treated it as a clock face.
Read more about catchlights here
What is the best ISO for portraits? It’s a tricky question to answer depending upon how you want the shot to look.
Generally, we say start out at 100 ISO and judge the exposure from there. If you need to go higher then do so. Most modern digital cameras will be able to cope with ISO levels of at least 1600 before throwing up digital noise issues.
If you think you are going to exceed that level with your low light portrait then bring your light(s) closer to your subject. The same thinking goes when choosing the best ISO for indoor photography too.
If you want a little more inspiration for your low light portraits then we’ve got a small collection of further ideas for you to check out. Have a look online for low light photography and look for available EXIF / Metadata to see what the original photographer used.
While you won’t always get the exact same results yourself (unless your lighting and kit are exactly the same) its a good springboard to know where you should aim for.
We mentioned earlier the advantage of IBIS technology in cameras – and you can get lenses too.
If you want to know how to take low light photos and you’re just starting out then look for lenses with IS or VR (Image Stabilisation or Vibration Reduction). This is similar technology to IBIS for lenses.
If you team up a camera with IBIS and a lens with IS/VR then you’ll get the best possible combination for shooting in low light if you need to slow down your shutter speed.
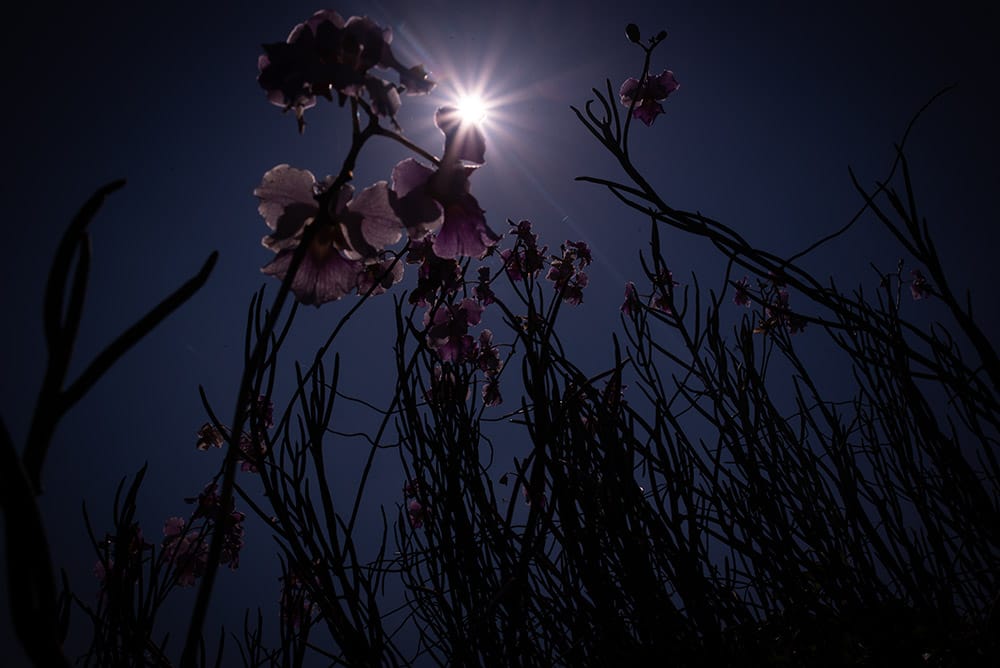
It’s all about the quality of light, not so much the amount of it when shooting a low light indoor photograph.
Hard light, from the sun for example, casts heavy deep, dark shadows which can make any objects that fall in their path underexposed.
Good low light photographers pay attention to things like this. They already know what they want their shot to look like and so wait for the best time of day (if using natural light). Or you can black out a room and use adjustable LED light panels to set up your own low key shots.
If you are photographing lit bulbs or candles in a dark room it can be tricky. The best approach is to expose for the brightest part of the light. Pay attention to the histogram and make sure the highlights aren’t clipped at the right side.
If the dynamic range of your shot is too wide for one shot then consider shooting a few pictures at different exposures and blend them all together.
When taking photos in low light you need to have good control of all your camera settings. Leaving the camera in auto is only going to give you problems.
Cameras don’t care if your ISO is too high. Auto modes will use anything at their disposal to get as close to the balanced exposure as possible – but this may not be the best way to do it.
Shooting in manual mode (M) is the smartest move and something beginner photographers shooting in low light should be afraid of. Set your aperture based on the depth of field you want and then adjust the shutter speed to brighten up the shot. If it goes slower than 1/60th then get the camera on a tripod to go slower.
Going slower than 1/60th means any fast motion in your shot will be slightly blurred. If you don’t want this then start raising your ISO level instead to get the exposure scale to 0.
There isn’t one ultimate low light camera to rule them all! Photography would be alot easier if there was though!
You’ve probably realised when we’ve looked at the best camera settings for night photography that most DSLR and Mirrorless cameras have features such as manual controls. If you’ve got an M mode you’ll be fine. A tripod would be helpful too sometimes.
Further technologies such as IS/VR and IBIS are also really helpful but not mandatory to get started in low light photography.

Popular memory cards for photography – what’s the best SD card for your digital camera? Choose the right capacity and class speed in our guide

Discover the BEST way on how to clean a camera sensor using swaps, rocket blowers and pencil brushes to give your shots a dust-free finish!

Capture the magic of the night with our beginner’s guide to night photography. Learn tips and techniques for stunning results.
Learn the basics of photography – fast – with our FREE 60-Second Photographer online course. Each class is short and sharp with simple, actionable steps that give you immediate results.
x 30 lessons

© iPhotography™
Become a confident and competent photographer in less than 30 minutes!
Before you leave, make sure you’ve secured your FREE online photography course (worth £29.99)
Each class is just 60-seconds or less making it the fastest and easiest way to learn photography!