 Stephen Walton

As the A.I. technology of photo editing software advances, how and what you edit in your photos comes with more choices. You can either approach your photo with a global edit, or a local one, or a bit of both.
But what does global and local editing mean? Which should you use and when? I’ll share all that information in this article.
Before A.I. technology became permanent fixture in photo editing most photographers would treat their photo with a global edit. A global edit means that any change you make affects the whole image.
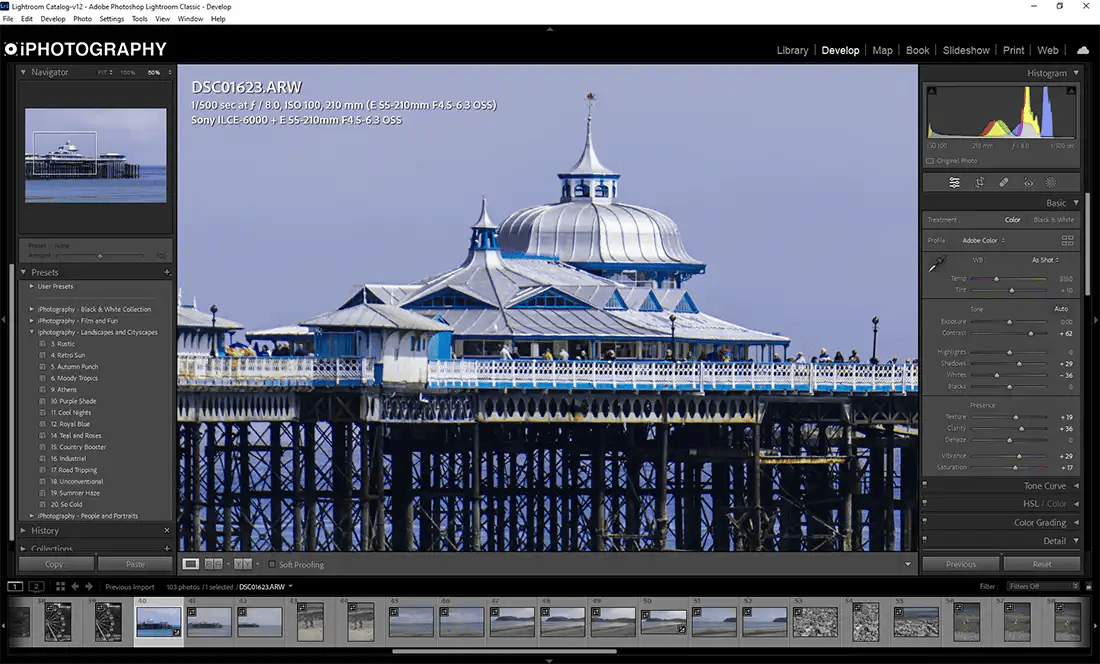
For example, changing a photo from colour to black and white is a global edit. This change affects the whole photo, therefore it is a ‘global edit’.
If you edit photos using an app on your phone or tablet most of the options will only offer global edits. Whether it changes texture, contrast, brightness etc as long as it affects the whole photo it’s still classed as global.
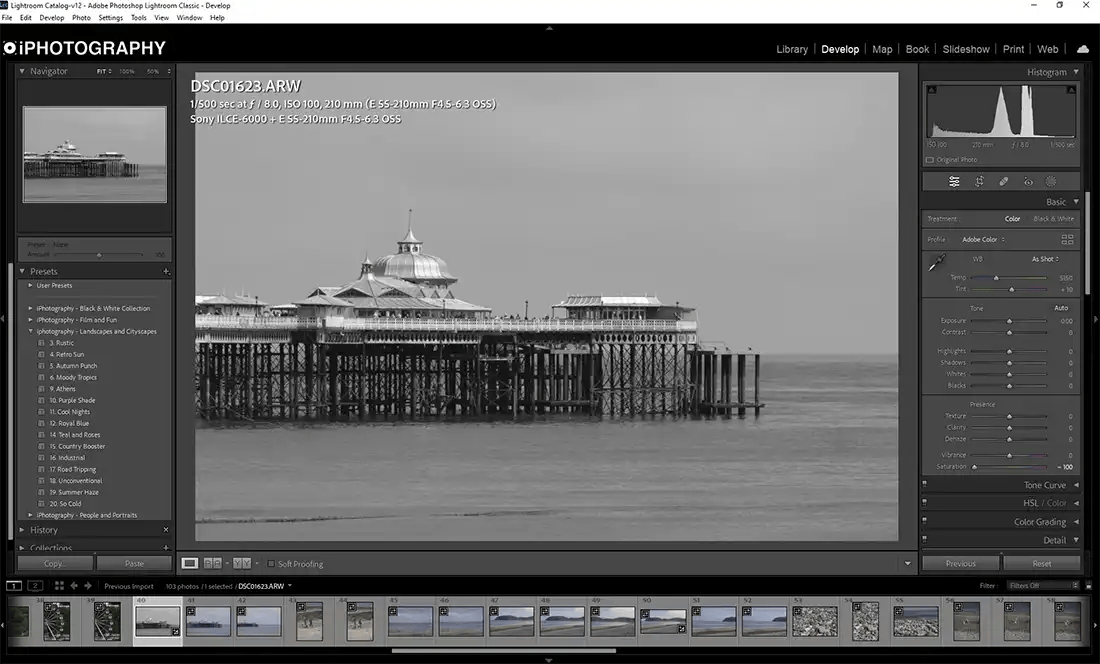
Image: Desaturating a photo into black and white, as shown, is considered a global edit as it affects the whole image.
A local photo edit focuses on a smaller, specific area of a picture to edit further. For example picking out one flower in a bunch of many and editing it separately from the others.
It’s become much easier to do local edits with the rise of A.I. options. Lightroom and ON1 Pro RAW for example have effective and precise tools to automatically select and mask subjects, skies and the background of any photo with the click of a single button.
The benefit of local photo editing means that you can adjust images to match the how you visualised the initial shot. Sometimes bracketing a shot may not be possible and you need to brighten the foreground, you can do it with a local edit without affecting the rest of the shot.
It may be a case that you want to saturate one particular colour more than another for a certain reason and you can do this through local editing.
You can isolate objects, backgrounds, particular colours and even a specified tonal range to mask and edit further.
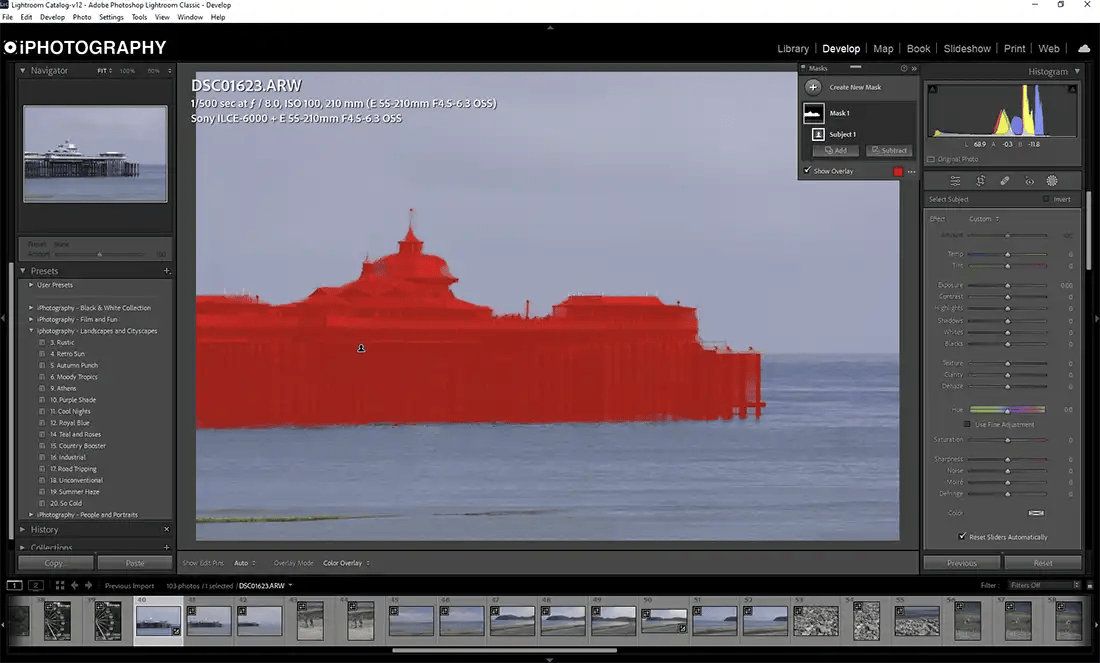
Image: Local edits allow you to select specific areas/objects in a photo to edit individually without affecting the surroundings.
Everyone will approach photo editing differently and each image needs its own consideration.
Personally, I find using both global and local editing every time suitable for most of my photos. Most of the time global editing is a good approach to get your image up to a base standard. I adjust the overall exposure, contrast, texture, blacks and shadows to get my image to a platform to then take further.
If you like to use presets on your photo for a certain look, apply that first and then make further global edits before going in closer for selective tweaks.
Having the tools to make local editing feature in nearly all modern photo editing software. Camera RAW, Lightroom Classic and CC, Affinity Photo, Luminar, ON1 Pro Raw and more software all have options to make selecting individual elements easier for local editing.
This gives you more control when you want to highlight a particular object in a photo which can enhance your visual storytelling.
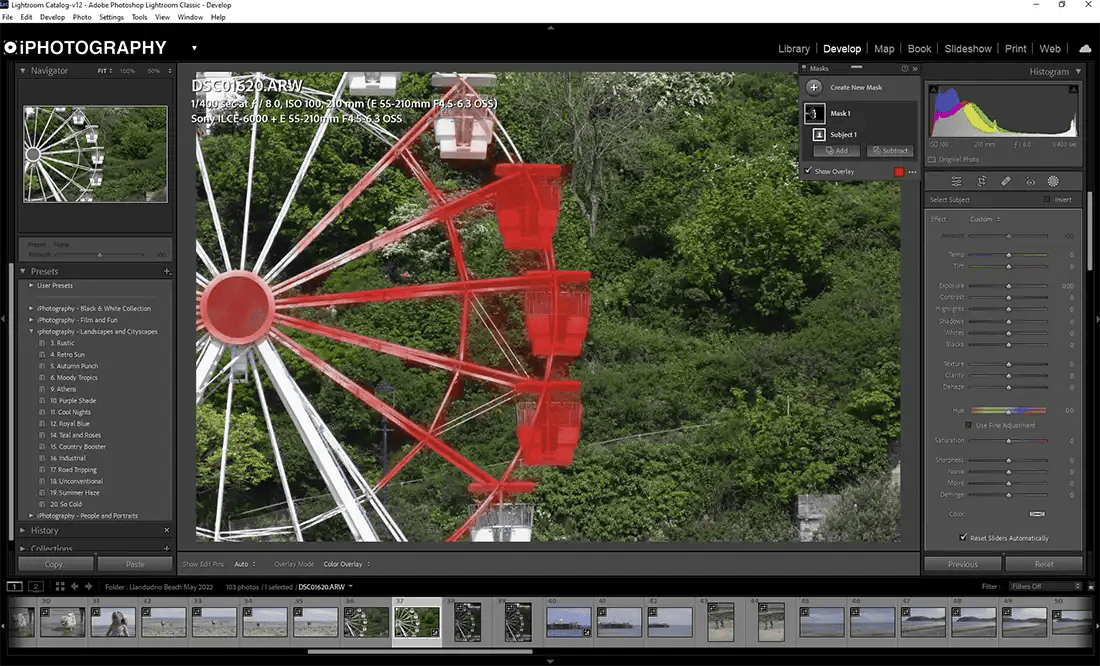
Image: Beware that A.I. tools for masking aren’t always 100% accurate and may require further addition or subtraction to make local editing more efficient.
The reason why some photographers stick to global edits is that it’s quicker to get a picture to a particular standard – and if that’s you, that’s fine! BUT there is a world of creativity opportunities and finite adjustments that you are missing out on by not doing local edits.
The standard of photography rises year on year and audiences expect the best quality work to engage with. Take the time to play around with selective edits and make your photos the best possible version of what you captured.
If you’ve enjoyed this guide check out our other articles below.

Discover the BEST way on how to clean a camera sensor using swaps, rocket blowers and pencil brushes to give your shots a dust-free finish!

Capture the magic of the night with our beginner’s guide to night photography. Learn tips and techniques for stunning results.

Master the art of solar eclipse photography with expert tips on equipment, settings, and precautions for stunning celestial images.
Learn the basics of photography – fast – with our FREE 60-Second Photographer online course. Each class is short and sharp with simple, actionable steps that give you immediate results.
x 30 lessons

© iPhotography™
Become a confident and competent photographer in less than 30 minutes!
Before you leave, make sure you’ve secured your FREE online photography course (worth £29.99)
Each class is just 60-seconds or less making it the fastest and easiest way to learn photography!