 Stephen Walton
Have you been wanting to get creative with flash photography? Do something other than point-and-shoot? Perhaps create dazzling images with beautiful motion blurs and crisp sharpness?
This slow sync flash for beginners article will explain all you need to get yourself started.
Slow sync flash is a function that a pop-up flash on a DSLR camera (and off-camera flash) may have allowing you to choose when your flash fires. This opens up a world of creative light tricks for you to try with your photography.
There are two different approaches to slow sync flash. This relates to when the flash is fired during the exposure cycle. They are called rear and front curtain flash sync.
Full flash photography tutorial here.

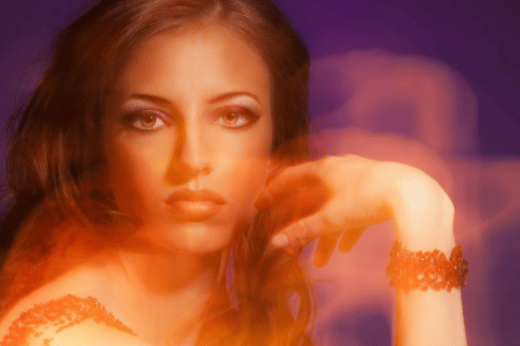
You can create interesting effects when a subject is in motion. Rear Curtain Sync creates an image with a sharp main subject, but also skewers the path of any ambient light creating whispy light trails.
The flash is fired at the end of the exposure cycle, just as the shutter is about to close. This then creates the effect that the main subject is frozen, while the background holds movement and ‘speed lines’ appear, created by the subject’s movement prior to the flash firing.
Use a slow shutter speed around 1-3 seconds to make the lines of movement appear. S/Tv Mode will enable your shutter priority mode to give you control over your shutter rate. Make sure you’re using a tripod with any of these techniques too!
In opposition, if you were to use a flash on a normal setting (called Front Curtain Sync) combined with a slow shutter speed, the subject would be frozen at the beginning of the exposure, with the ‘speed lines’ following in front of the subject as opposed to behind.
Regular flash settings also tend to create a darker background as it picks up less of the ambient light.
Most flashes tend to be set to Front Curtain Sync as a default. Look at your menu settings on your camera or off-camera flash to change the synchronisation.
Have a look at these examples to understand the two methods in practise.
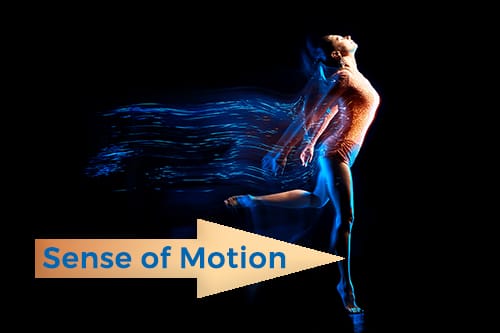
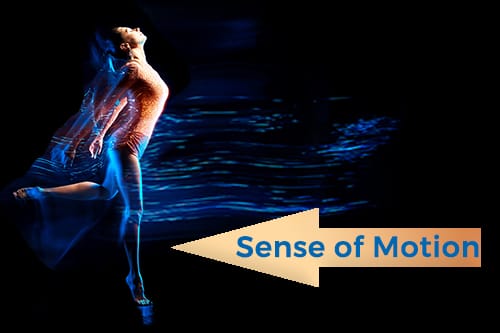
If you were photographing a dancer for instance, moving from the left to right of a stage with Front Curtain Sync, the dancer would be sharpest on the left-hand side of the stage with the motion blur moving across to the right.
If you are shooting with Rear Curtain Sync, then the movement trails would start on the left-hand side but freeze the dancer on the right-hand side of the stage. In this scenario, Rear Curtain Sync would be the best flash setting as it gives the impression of the speed that the dancer was moving across the stage.
With a Bridge, Mirrorless or DSLR camera you may be allowed to operate ‘slow sync’ flash manually. Yet on many compact cameras it will be an automatic set function known as night mode or party mode.
Using these presets will limit your control, but with a little experimentation, along with the skills that you have learnt on our iPhotography courses, you can still create some very interesting effects.
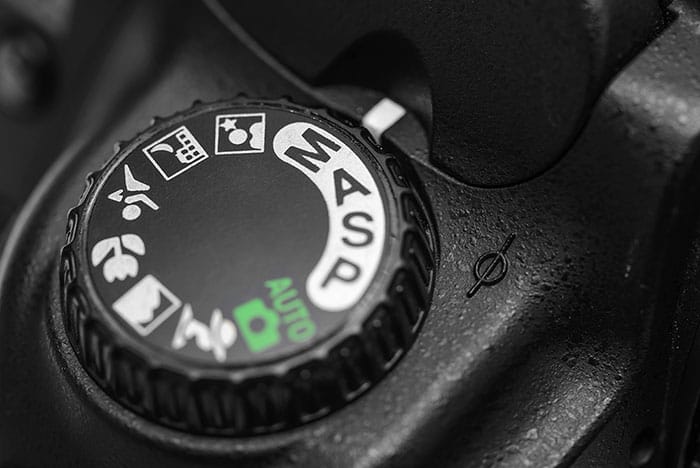
In manual mode (M on a camera dial), you can often change the power output of your off-camera flash and your shutter speed time on your camera. This will allow you to time your shots to perfection.
Otherwise, if you’re using a party or night mode, then the camera will automatically choose the strength of the flash and the length of time that the shutter is open for depending on its measured metering. You can use Shutter Priority (S/Tv on a camera dial) as well as Manual.
The effects of using different flash sync methods, draws an audience deeper within the image, adding a real sense of energy, power and movement.
You will need to have some ambient lighting present in order for these effects to work effectively, otherwise the movement trails won’t be visible and the technique will be lost.
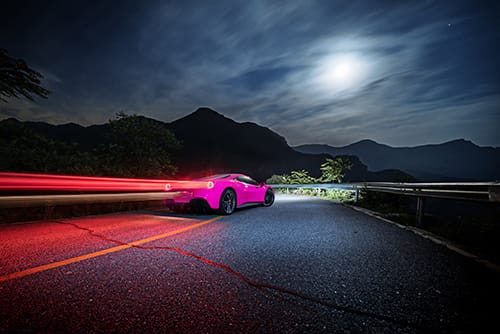
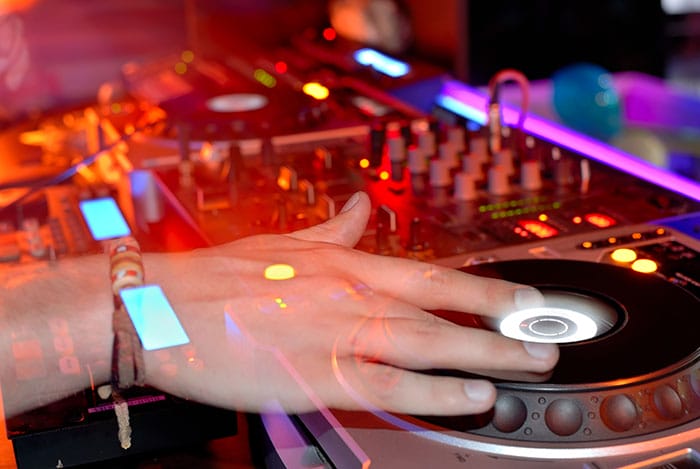
You could also try using slow sync flash at large concerts, fairgrounds with carousel rides, nightclubs with dancers, teenagers skateboarding (or performing tricks on their bikes) and sporting events for example.
Have you been trying out creative flash photography? If so, send us your shots! Post your photos in the iPhotography gallery and let us know how it went. Did you find any problems that we didn’t warn you about? Our iPhotography community is better prepared if we all share our experiences and learn from each other.
Did you enjoy this guide? Let us know. Drop us a comment on other helpful photography guides you want to read.
We may already have the answers you’re looking for too on our blogs page, don’t forget to check it out for other great sources of inspiration, motivation, tips and tricks to make your photography look incredible.

Discover the BEST way on how to clean a camera sensor using swaps, rocket blowers and pencil brushes to give your shots a dust-free finish!

Capture the magic of the night with our beginner’s guide to night photography. Learn tips and techniques for stunning results.

Master the art of solar eclipse photography with expert tips on equipment, settings, and precautions for stunning celestial images.
Learn the basics of photography – fast – with our FREE 60-Second Photographer online course. Each class is short and sharp with simple, actionable steps that give you immediate results.
x 30 lessons

© iPhotography™
Become a confident and competent photographer in less than 30 minutes!
Before you leave, make sure you’ve secured your FREE online photography course (worth £29.99)
Each class is just 60-seconds or less making it the fastest and easiest way to learn photography!