 Stephen Walton
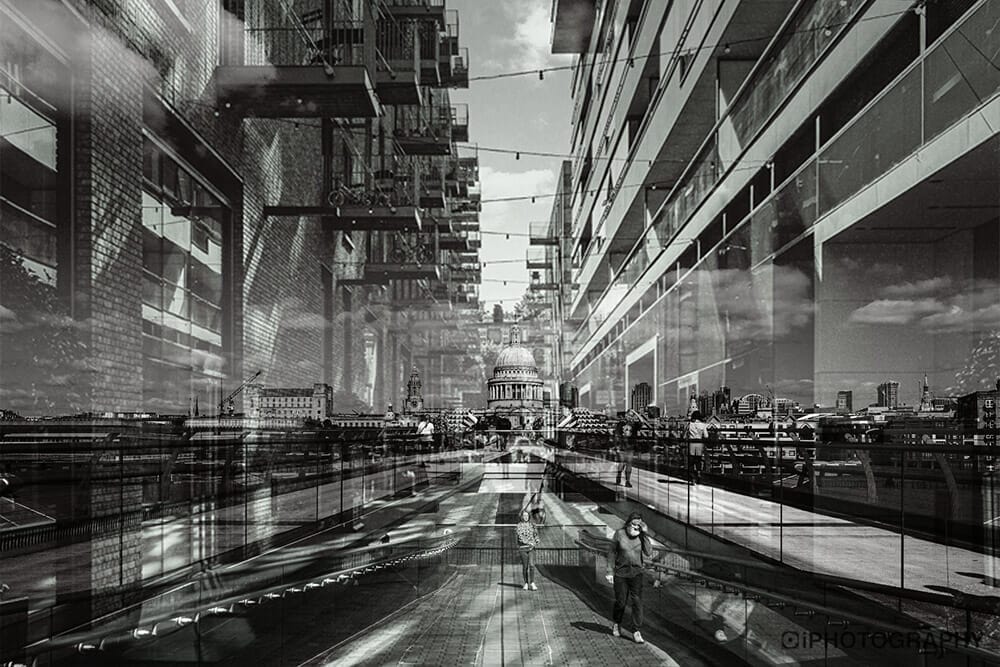
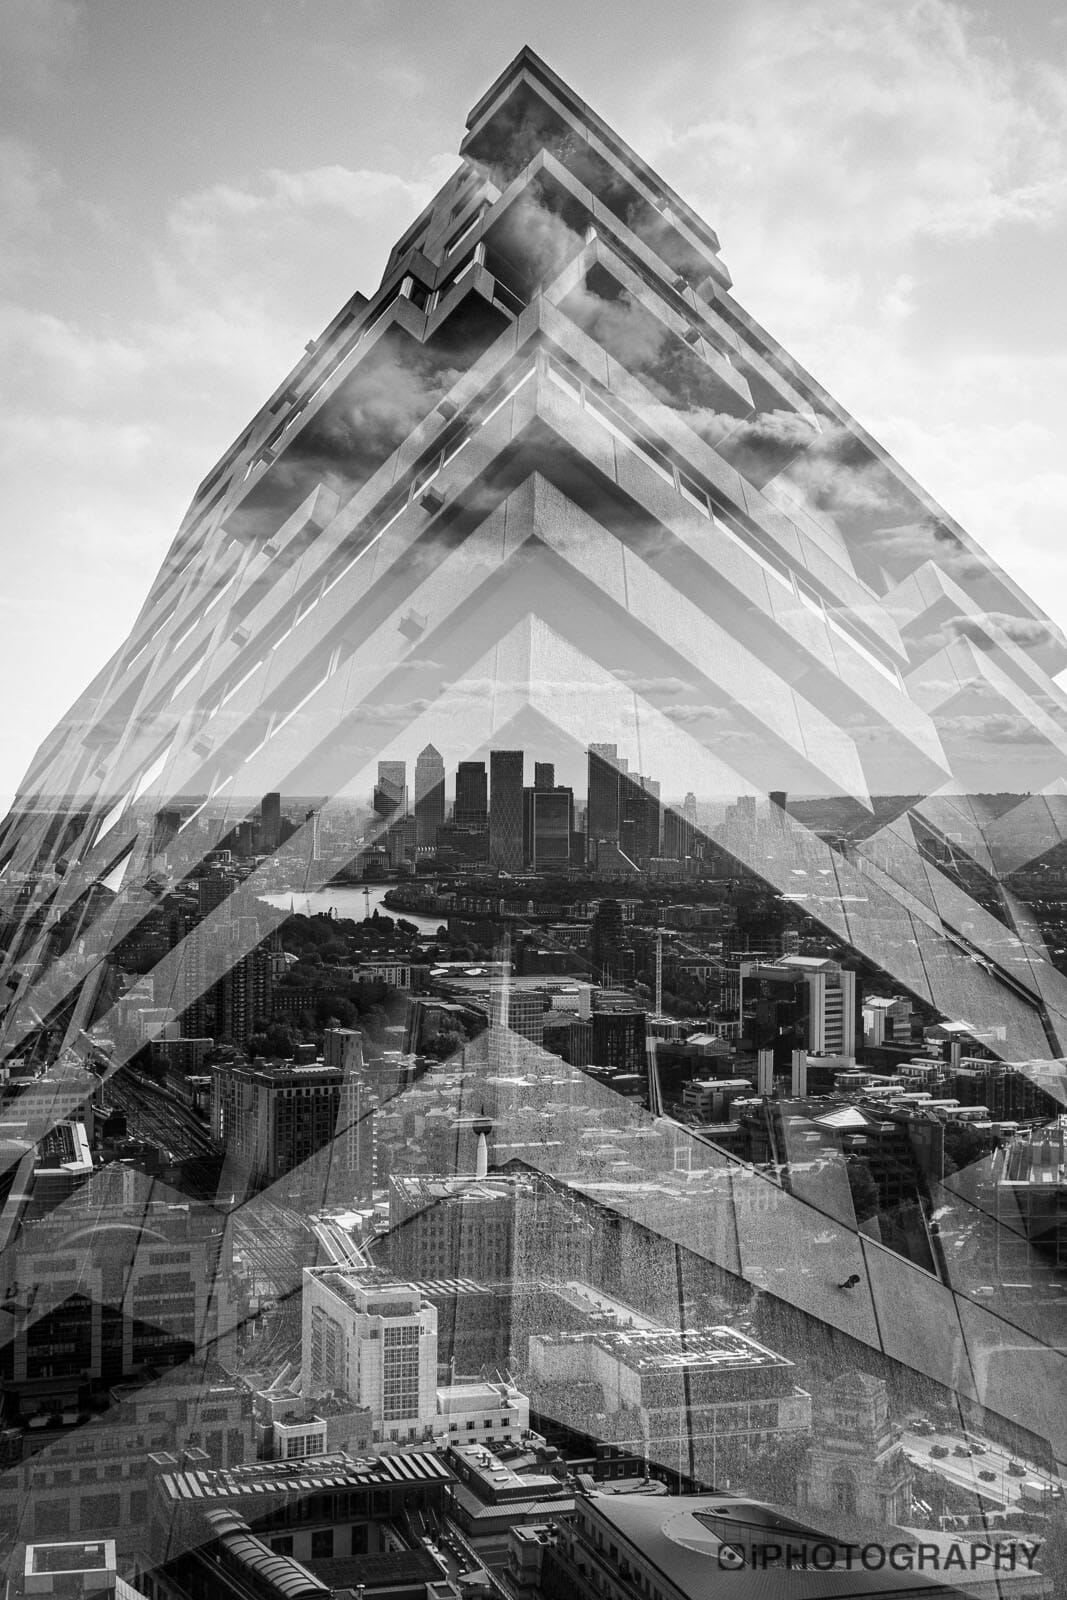
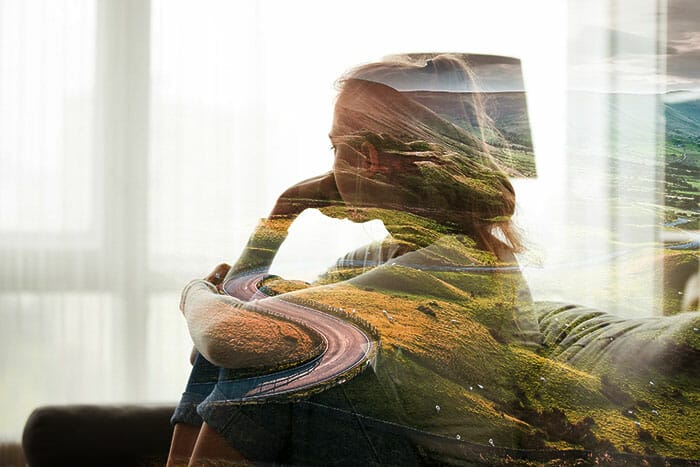
What’s better than taking one photo? Two – at the same time (almost)! In this complete guide for beginners, I’m going to give you a fully loaded double exposure photography tutorial.
It’s a sign of the times when 20 years ago, digital photography was still very much an infant, and 35mm film was the popular high-school kid. Taking 2 photographs accidentally on the same frame was deemed a schoolboy error.
Two decades on and we find ourselves purposely setting out to re-create those old mistakes using artistic vision, through the newly immerse trend of double exposure photography.
You’ll hear both double exposure and multiple exposure talked about; as long as it’s more than one image exposed onto the same frame, then you’re still working and thinking along the right lines.
This resurgence of trendy double exposure photography started back a few years ago, and it’s been slowly rising since.
So much so, that camera manufacturers like Canon, Nikon, Sony and Fuji have built in creative functions to let you capture double exposures live in-camera. It goes to show how much the urge for creativity affects the industry!
Double exposure photographs are very simple to create. You don’t have to have a specific camera with the function already built-in. Which is good news for all beginner photographers out there.
But if your camera doesn’t have a built-in double exposure function then don’t worry. You can still give it a go through editing.
You will need particular editing software such as Photoshop, Pixlr or GIMP. But don’t worry if you’re new to these software packages, you don’t need an awful lot of technical knowledge to create a double exposure photo if you can’t do it in camera.
First off, to start your double exposure photography you’ll need to choose the right type of subject for your base image.
It’s up to you what subject matter you choose, but people are often nicer to work with. What looks best are subjects with recognisable outlines. Your end results tend to be more poignant and personal. Flowers, bottles, buildings or cars could be good subjects.
However, you can start by practising with any object, as long as it has a nice sharp outline.
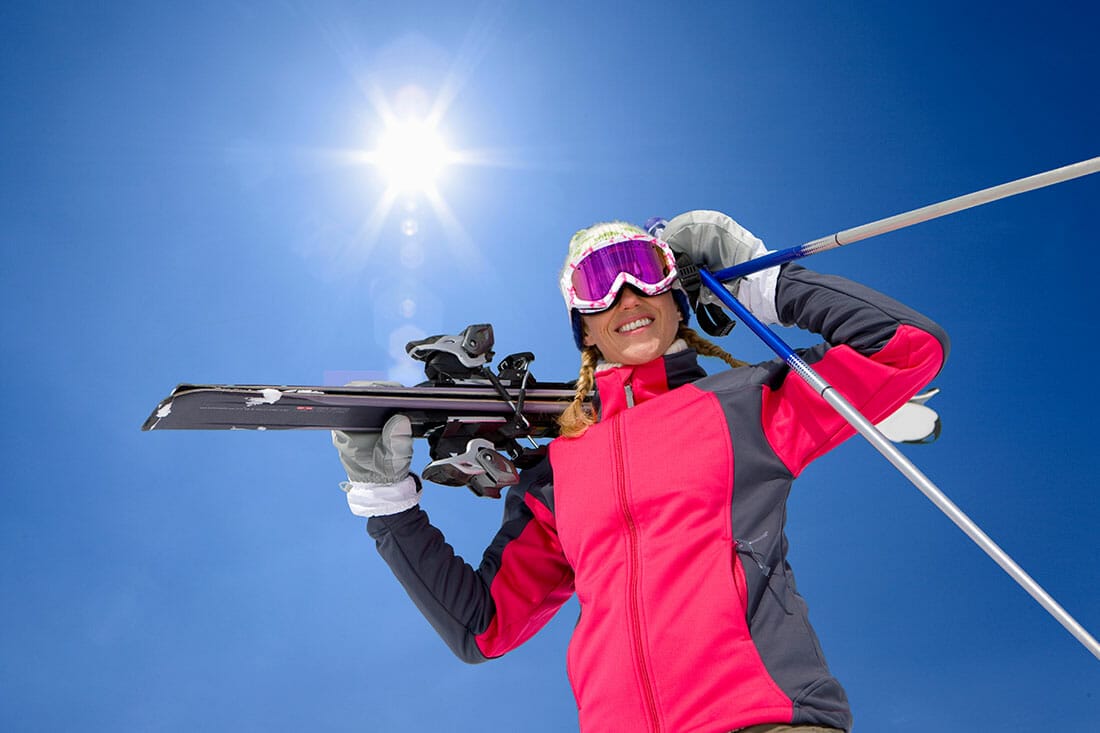
The second step requires you to make a silhouette out of your main subject. To do this position yourself directly in front of your subject. Then place your chosen light source behind them so you all line up.
If the object you’re shooting is small then use a torch, small LED panel or even the light on your phone to silhouette them.
If your camera can shoot double exposure photographs, then enable the mode.
You may be asked how many shots you want to take. Obviously for a double exposure you only need 2 but play around with multiple exposures when you feel ready.
There may also be options about how the two exposures are blended. Different blending modes such as subtractive, additive and average may appear on screen. Each of these will merge the two shots you take differently. Play around with them to see which works best – normally average is the most suitable for most types of double exposure photos.
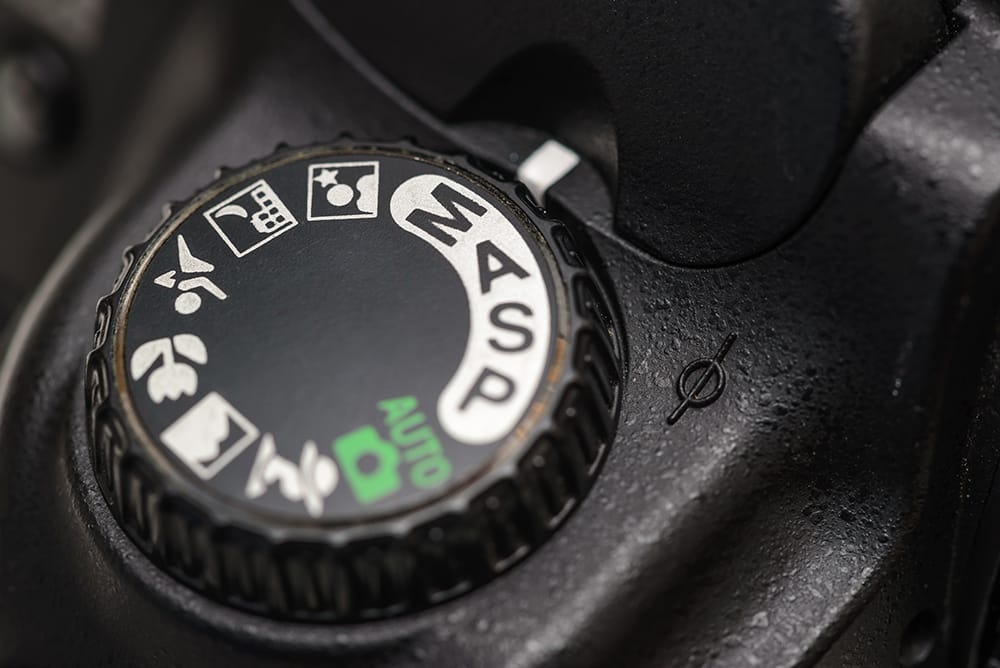
If you’re shooting without any automation then set your aperture to something small, around F/11 – F/16 depending upon how bright the backlight is.
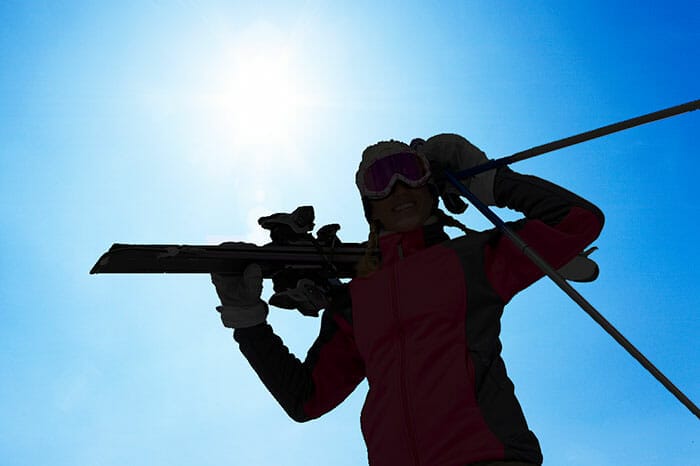
Next up, ensure that when you look through the viewfinder your subject is totally silhouetted. We don’t want any details present at this stage on our base image.
Once you have done that, quickly review your silhouette shot on your LCD. It’s important to check that the image doesn’t hold any distracting background elements.
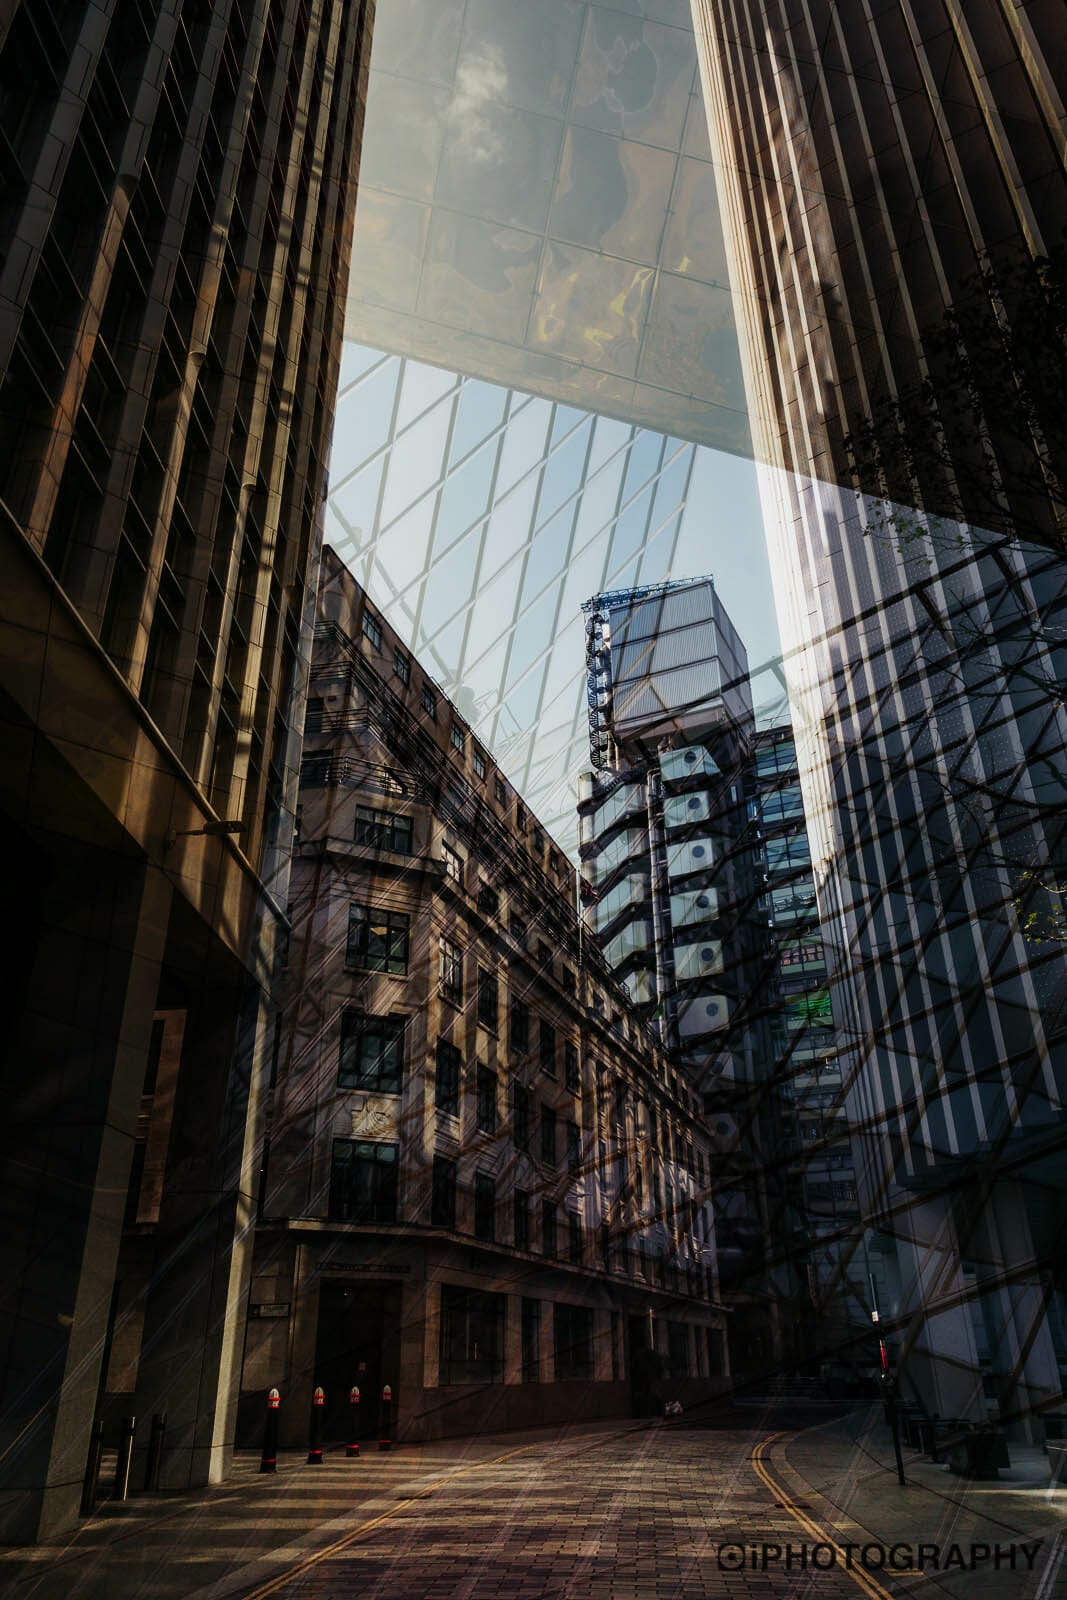
Your first shot in this double exposure photography tutorial should look similar to the image you see below.
We know it may sound unusual, but next, we want you to overexpose the background. Simple, plain, clear white backgrounds work best for double exposure photographs. Try to work from a low angle and use the sky as the background, especially if it’s an overcast day.
Try not to change your aperture to overexpose the shot. Simple by shooting in Aperture or Shutter Priority mode (or Program) you can increase the exposure compensation to +2 to brighten light areas.
Having a brighter background will make it easier for your silhouetted subject to stand out.
If your sky is perfectly blue, then don’t worry, we can always solve that in Photoshop. All you’ll need to do is desaturate all the blue tones using the Hue/Saturation slider. Alternatively, you can do the same using the HSL sliders in Lightroom.
When you’re happy with your silhouetted based image, you’re ready to move on to choosing the second shot for your double exposure photograph.
We believe the ‘texture shot’ (as some photographers call it) is actually the most important part of the double exposure process. It’s worth spending a little time thinking about what you hope to achieve.
The reason the texture shot is so important is that it brings the double exposure to life – it gives your image a reason and background story. It also introduces the tone and atmosphere.
Think of this exercise like a book: If the silhouette you shot was the title of the book, then the texture shot would be the first chapter.
It’s going to be what grips people, grabs their attention and helps them to make assumptions. Ultimately, it will lead to their decision of whether they like the image or not.
If the first shot in your double exposure photograph was a silhouette of a person, you would need to choose a texture that is relative and reflective of that particular individual.
Although your subject is pretty much hidden with disguised features, you want to take this opportunity to introduce your artistic vision. Consider your silhouetted subject’s personality, their character traits, their emotions or nuances…What relatable texture could you introduce to represent those things?

When you go to take the second shot, it’s important to remember that you keep your image well exposed. You don’t want your overlaying photograph to be dark.
The way the two images blend relies on the highlights and midtones of the second shot, overlaying into the shadow on the silhouette.
If your second shot is dark, the resulting effect won’t be clear. If your second shot is a single object like a flower, then aim to fill the whole frame with the flower.
Frame your composition with a nice tight crop. Look out for distracting background details. If needs be, zoom in or use a macro function to assist you.
Using the built-in double exposure function, you’ll be able to see a live view of how the second shot will look when mixed with your silhouette. This means you can adjust the composition to make sure it all lines up right.
If you are using a double exposure photography function in-camera then once you’ve taken your second shot you’re finished! The final version will appear on screen and be saved in a single JPG format file. Some cameras do allow you to save each image separately as well as the final mix.
Editing a double exposure effect in Photoshop, Pixlr or GIMP is really easy. We’ll walk you through the process using Photoshop but it’s possible to use the same actions to create a double exposure in the other software.
Here is a quickfire step-by-step process on how to make a double exposure photograph in Photoshop.
• Firstly, start by opening both of your images in your chosen software. While we’ve said Photoshop, Pixlr and GIMP are great choices you can do it on your phone too. Search your app store for double exposure photo editors to be able to create one from your iPhone or Android shots.
• Next, copy and paste your second shot over the silhouette, not the other way around! Make sure that your second shot covers the silhouetted area completely, don’t leave any black on show.
• Move to your layers panel on the right side of Photoshop and make sure you have 2 layers visible, one will be the silhouette, which may be called the ‘background’ and ‘layer 1’ will be your second shot.
• On the drop-down blending modes menu above, toggle down to the Screen blend mode.
• Use the move tool in Photoshop to drag that second shot around – experiment with this until you feel you have found the most effective and complementary position.
• Once you have that perfect position, make sure you flatten all layers (LAYERS>FLATTEN LAYERS) and then save as a JPG file (if you’re going to transfer it to your phone or put it on Instagram.

iPhotography has a great photography tutorial video looking at taking double exposure photos in camera.
Subscribe to our iPhotography YouTube channel and turn on your notifications to get updates of brand new editing and photography tutorial videos.
The double exposure technique is actually very straightforward – it’s having the artistic eye and vision to take the images and arrange them that makes each photographers’ work unique and special.
Combining imagery and artwork is a skill. If you hope to add heart-felt emotion to your portraits, landscapes or wildlife shots make them more poignant. Remember to choose the best overlaying shot to make the moment personal and iconic. The second shot should always define the original subject’s situation and feelings (if it’s a portrait).
We hope you’ve enjoyed this double exposure photography tutorial and it’s helped to give you the confidence to want to pick up your camera and try out this technique for yourself.
If you’re an iPhotography member, don’t forget to upload your images to the feedback gallery, so that you can show off your artistic photographic talents and receive feedback on your style.

Discover the BEST way on how to clean a camera sensor using swaps, rocket blowers and pencil brushes to give your shots a dust-free finish!

Capture the magic of the night with our beginner’s guide to night photography. Learn tips and techniques for stunning results.

Master the art of solar eclipse photography with expert tips on equipment, settings, and precautions for stunning celestial images.
Learn the basics of photography – fast – with our FREE 60-Second Photographer online course. Each class is short and sharp with simple, actionable steps that give you immediate results.
x 30 lessons

© iPhotography™
Become a confident and competent photographer in less than 30 minutes!
Before you leave, make sure you’ve secured your FREE online photography course (worth £29.99)
Each class is just 60-seconds or less making it the fastest and easiest way to learn photography!