 Stephen Walton
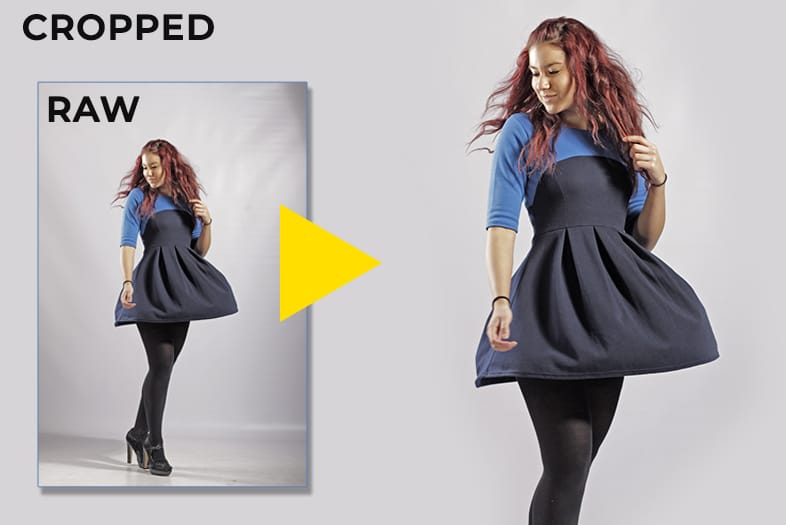
Creative crops can take a photo from a snapshot to a well thought out composition – even after the photo has been taken (though it’s better do it in-camera when possible).
Creative crops are done for stylistic and dramatic effect. They are a more advanced approach to framing a subject and telling a story. Creative crops can be applied to most genres of photography but there are specific areas – portraits, florals and still life – where we’ve seen them work best.
Creative crops make the framing of a subject more apparent. It isn’t simply a boundary of a RAW image, instead, it is an active choice to home in one particular area of the subject.
Here are two examples of a regular crop against a creative crop with the same subject. In this comparison, you can see how much more dramatic a creative crop can be. The aspect ratio may not be ‘industry-standard’ but instead the crop does the best for the story of the image first and foremost.
It is always better to frame your photo as best as you can in camera. Even if you know your final photo is going to be square (1:1 ratio) but you’re shooting in-camera as a rectangle (3:2) then aim to get the crop as close as possible.
The reason for this is resolution. The more you have to crop after you’ve taken the picture then the more pixels you’ll be cutting out. The more pixels you cut out the lower the resolution of the final shot (if it’s to be printed or displayed large). You should aim to keep as many pixels available – and composing your shot in-camera as closely as possible will do that.
Finally, the other useful tip to bear in mind with creative cropping is to always apply your crop when editing, first. Spending ages tweaking colours, removing blemishes etc on areas that you end up cropping out is just a waste of your time – so crop first.
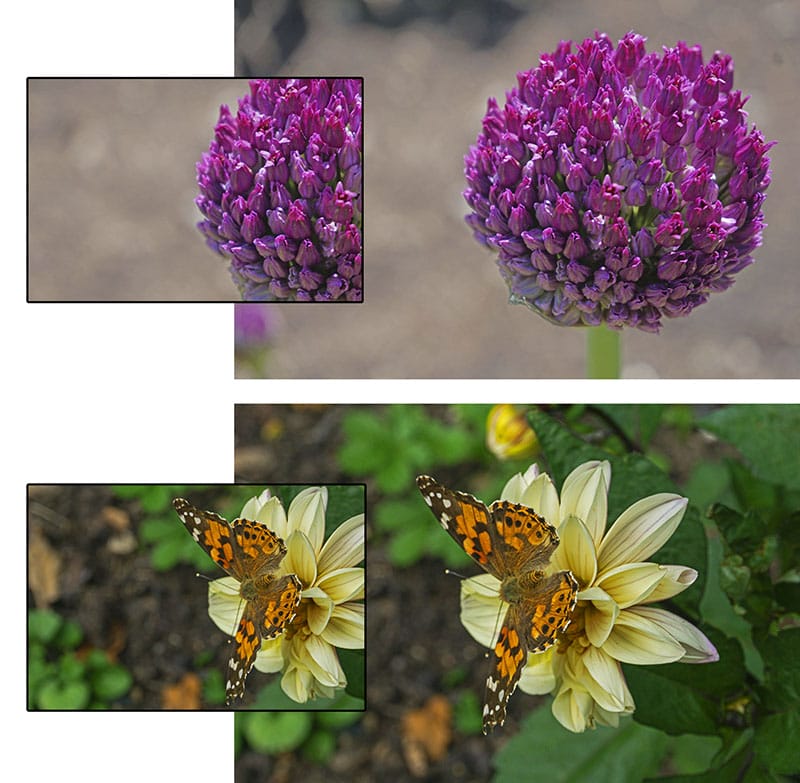
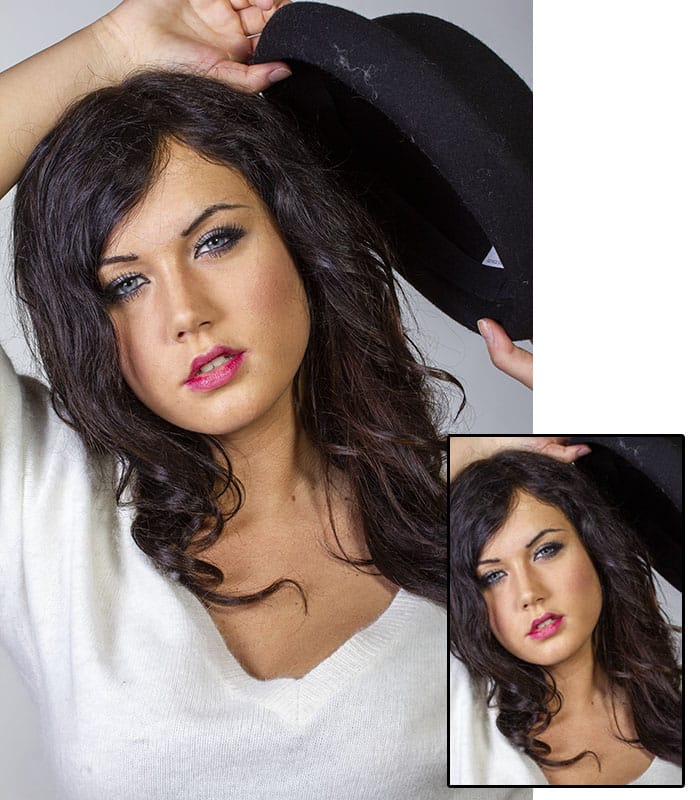
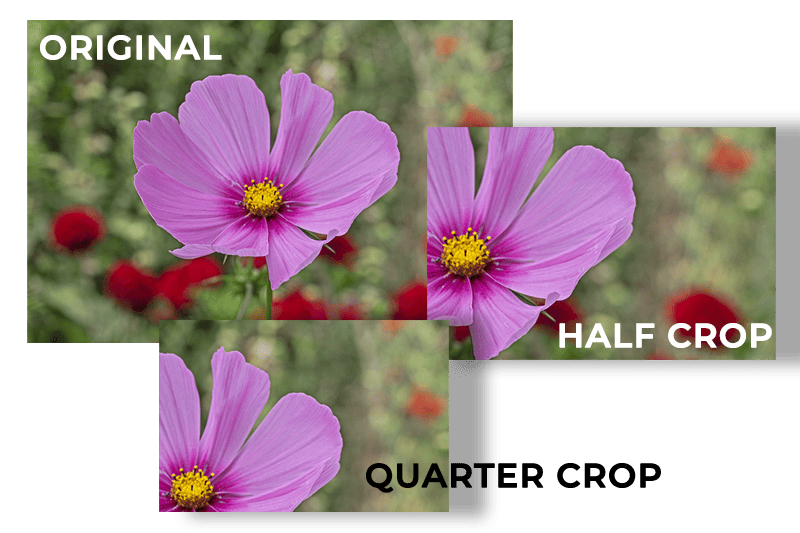
When it comes to portraits and floral photography half and quarter crops can look great. Imagine faces and flowers being a similar shape – round – use this construction to only feature one portion of the subject.
With flowers they are just a pattern so only featuring part of it still tells the story and gives context, but with portraits it’s different.
Half or quarter crops on a portrait has to be more considered on what you are featuring, and why. Maybe it’s a really interesting face tattoo, lip piercing, eye colour or birthmark – either way, make it interesting and personal where possible.
You’ve probably read lots about negative space if you’re a member of our iPhotography Course – and rightly so. It’s an important compositional factor to making subjects look dynamic. Minimalist crops take this to the extreme.
Compressing your subject or scene to the very corner of your photo makes it looks diminutive and overwhelmed, so consider beforehand if that’s the right story to tell in your situation. Use the sky as a vast space above to dwarf your subject matter. Imagine a lone tree in a barren landscape surrounded by a mammoth sky, or a lone figure stood on a bridge totally alone.
This minimalist approach requires empty backgrounds and very little colour. Subjects can be placed towards the bottom of the frame or in the bottom corners.

Have you ever considered looking past the regular idea of cropping, to balance a composition, and instead tried to tell a story through framing alone? Let us know if this guide has inspired you to try creative cropping we’d love to see what you can capture.

Popular memory cards for photography – what’s the best SD card for your digital camera? Choose the right capacity and class speed in our guide

Discover the BEST way on how to clean a camera sensor using swaps, rocket blowers and pencil brushes to give your shots a dust-free finish!

Capture the magic of the night with our beginner’s guide to night photography. Learn tips and techniques for stunning results.
Learn the basics of photography – fast – with our FREE 60-Second Photographer online course. Each class is short and sharp with simple, actionable steps that give you immediate results.
x 30 lessons

© iPhotography™
Become a confident and competent photographer in less than 30 minutes!
Before you leave, make sure you’ve secured your FREE online photography course (worth £29.99)
Each class is just 60-seconds or less making it the fastest and easiest way to learn photography!