If you feel your portraits aren’t engaging with your audience, this could be down to not having the eyes lit correctly. Perfecting the catchlight in a portrait is crucial to getting your subject looking strong, energised, dramatic and realistic.
A catchlight is that little reflection of a light source spotted in the eyes of portrait. It’s appearance, though small, is enough to light the colours in the eyes, which is one of the first places a viewer will look on a portrait.
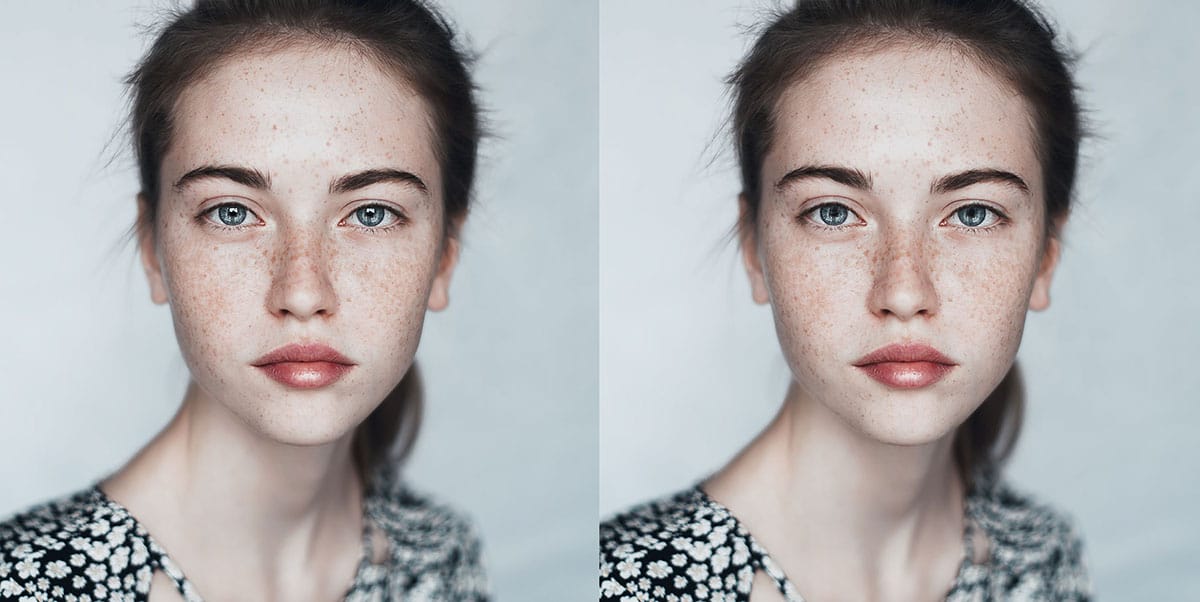
Without a catchlight, eyes can look dull, flat, colourless and uninspired. While some styles of portraits work well without a catchlight the majority are improved with having one.

About 90% of the time if you’re shooting portrait photography, catchlights are essential. They help add a sparkle to the eye of the subject that draws a viewer in. It can help audiences engage more when seeing that little eye sparkle.
Catchlights aren’t essential 100% of the time though. There may be instances where you want your portrait to look flat and without a catchlight.
Dark low key portraits with a sinister or mysterious atmosphere look better without a catchlight to make the subject stand out.
It’s all down to the vibe of the image you’re trying to create and what you want the story of the image to be.

Image: Notice how different the eyes look with (left) and without (right) catchlights.
You don’t need any fancy lighting equipment or dedicated tools to make a catchlight – all you need is a light source.
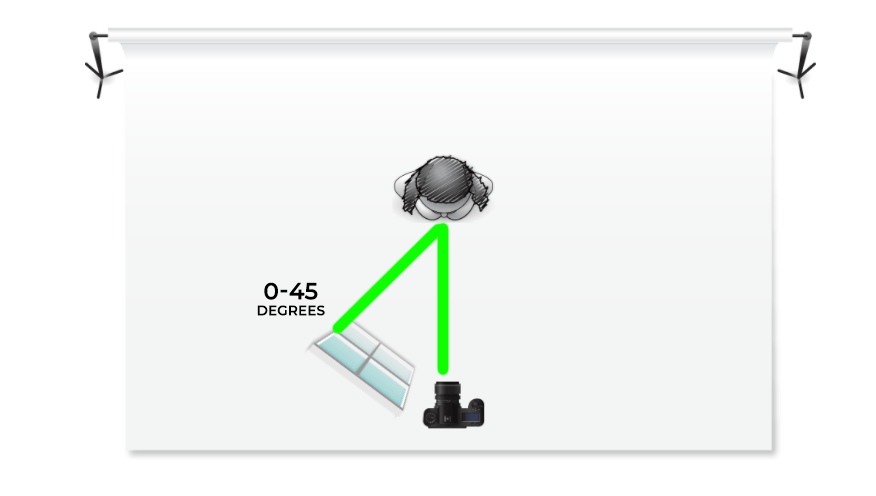
The position of your subject relative to the light source is how you create on. Position your light source between 0-45 degrees to your subject.
Raise the light position so it is always at a 30-45 degree position relative to the subject’s eyes.
Be careful if your subject is wearing glasses. Catchlights on glasses can be a distracting. You may need to raise of lower the camera angle to see past the catchlight on the glasses but still have it in their eyes.

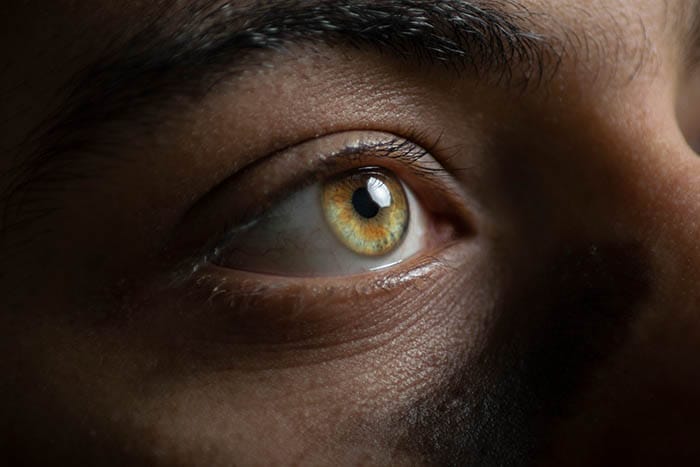
Portrait photographers referred to it as the ‘10 and 2 o’clock’ positions. If you divide up the shape of the eye like a clock face, then the catchlight should fall between the 10 and 2 positions at the top of the eyes.
While this is the rule 95% of the time, there are times that you can break this rule. If you’re trying to create a more horror-type look then you may want to place a light at your subject’s feet which would cause the catchlight to appear at the 6 o’clock position instead.

Image: Catchlights should be positioned between 10 and 2, if the eye was likened to a clockface.
Catchlights are simple to place, and they make a big difference to the overall finish of your portrait. Remember to watch out for glares and distracting reflections caused by glasses.
If you’re outdoors and shooting more candid portraits, catchlights can be that little less consistent. Try to make sure the light source is falling towards your subject’s face to give you the best chance of lighting those eyes.
Discover the BEST way on how to clean a camera sensor using swaps, rocket blowers and pencil brushes to give your shots a dust-free finish!
Capture the magic of the night with our beginner’s guide to night photography. Learn tips and techniques for stunning results.
Master the art of solar eclipse photography with expert tips on equipment, settings, and precautions for stunning celestial images.
Learn the basics of photography – fast – with our FREE 60-Second Photographer online course. Each class is short and sharp with simple, actionable steps that give you immediate results.
x 30 lessons

© iPhotography™
Become a confident and competent photographer in less than 30 minutes!
Before you leave, make sure you’ve secured your FREE online photography course (worth £29.99)
Each class is just 60-seconds or less making it the fastest and easiest way to learn photography!