 Stephen Walton
It’s a common fact that we as humans prefer straight levelled horizons and don’t respond well to things being off-balance.
This rule is the same when it comes to photography. Your horizon line should always be straight. It is amazing how much of a strong impact a straight horizon adds to a portrait or landscape, equally a crooked horizon can take away from an equivalently amazing photograph.
Think about how much effort we go to hang a frame in our homes. How much effort we go to make sure that the frame is perfectly straight; you measure put markings on the wall and dig out the good old spirit level to show that frame you mean business.
Equally think about how frustrating it is when the frame tips slightly to the right, it really bothers you doesn’t it? The concept is exactly the same for horizons in photographs.
If you’re sat there reading this thinking, “but does it really matter?” quite simply yes it does. The horizon line can really throw the focus of your whole shot.
It’s a learning process, once you start to pick up on the visual horizon guides in shots, you’ll get pickier with your own work.
For those that are new to photography or simply enjoy taking the odd snap here or there, you may not take notice of a crooked horizon.

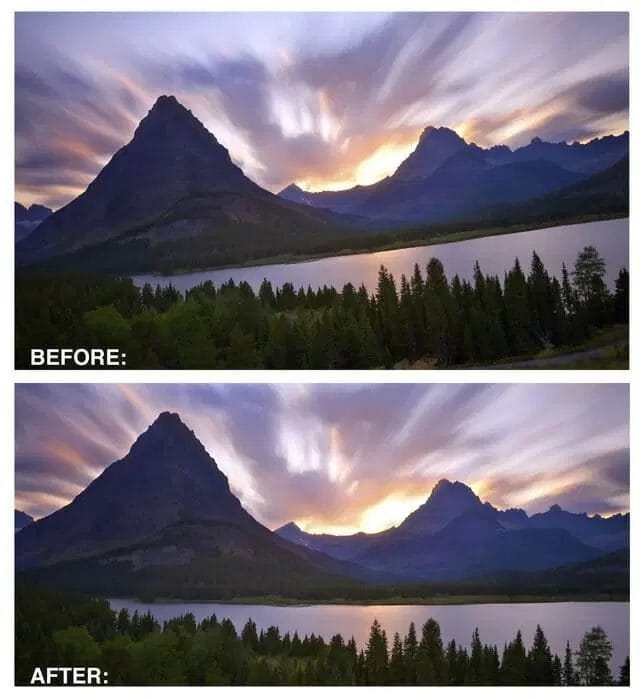
The image above has an obvious crooked horizon line. Instead of looking at the overall impact of the shot, the eye is drawn to how uneven the horizon line is, which causes a feeling of irritation to the viewer.
Another way to think about it is when you’re at the beach, looking at the sea meeting the sky; no matter where you are, the ‘meeting’ point and the horizon always looks straight. Unless you’ve had one too many cocktails that is!!
It’s all about maintaining balance, like a well-balanced diet it is important that elements in your photo are balanced. Whether it be where the sea meets the sky, the wall meets the ground or the wall meets the ceiling.
A mind is a powerful tool. Uneven horizon lines throw the subconscious perception off balance. It’s unnatural for us to see a wonky horizon line. It can trick the eye into thinking objects are “falling” or “leaning” when in fact they aren’t. The eye is always drawn to lines, therefore when taking your photograph you must keep in mind any lines that are in the composition.
Simply by creating that horizontal or vertical ‘straight-line it changes the impact and whole visual of the shot.

When the image is aligned it makes a huge difference as the visual impact is much more powerful.
Remember, the process and magic will always begin with you and your camera. Don’t just take hundreds of aimless shots and hope that one of them contains a reasonably straight horizon line. In the same way that you can’t rely 100% on post-processing.
Why?
Well, if you frame your shot tight, the alignment in post-production might not be possible. Therefore, you could lose key elements and objects within the shot.
Take time to really focus on the composition and plan your shot. Always pay attention to your framing, look for any objects or points of focus that you can use as a visual guide within the shot.
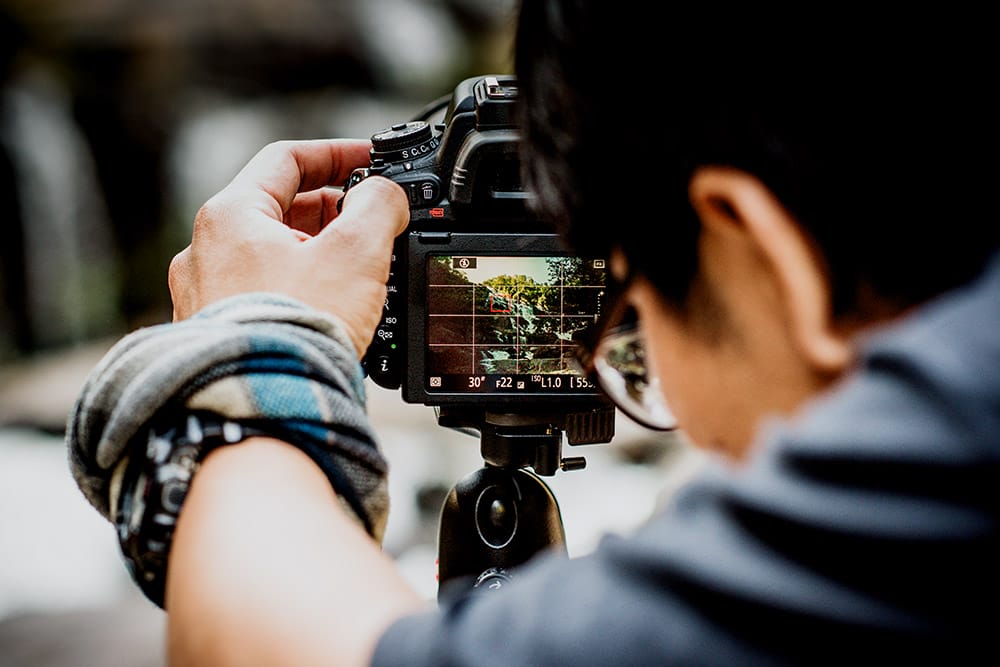
A great way to start is using your viewfinder grid display on your camera. Alternatively, if you have a digital camera, you can generally use grids.
You should then see a display similar to this:
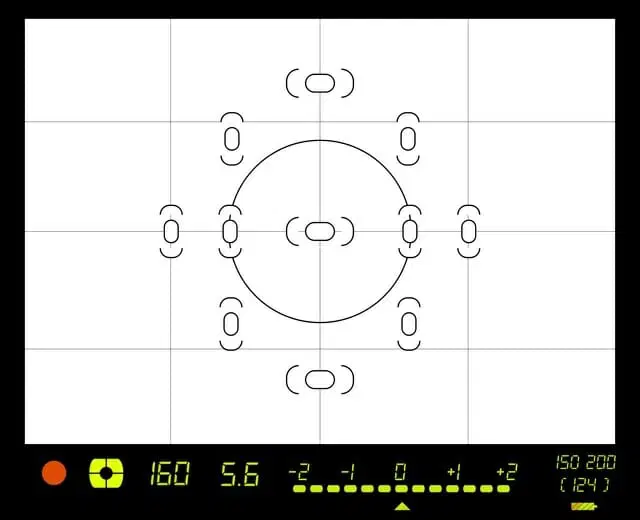
Each camera works differently, so always check the manual book provided. See if your camera offers something similar. If your camera has none of these options, you can always add a levelling aid, such as a spirit level. Of course, using a tripod will always make things much easier.
You can’t always rely on a shaky hand to get that perfectly straight line. Using a tripod will also give you time to really focus on the composition and make you more aware of those sneaky visual lines.
If this still isn’t working for you, or your horizon line isn’t quite there and at this point, you are pulling your hair out, you can always edit the alignment in post-production. Sometimes there’s nothing more you can do with the camera. Which can be down to the combination of the lens focal length and its distortion properties.
Adobe Lightroom offers a very simple, and more importantly quick (which is what we all need) way of fixing the horizon line. If you have access to Lightroom, then open it up and follow these simple steps:
Go to Develop Module, click on the Crop Overlay icon, then crop & straighten window will then expand. Next, click on the icon that looks like a ruler which is the angle icon and drag the angle tool along the horizon line in the image and Lightroom straightens and crops the image for you!
Alternatively, if you are more comfortable with Adobe Photoshop then here are a few easy steps you can follow to get on track. One of the most under-appreciated items in the world is the ruler. But what visual pencil case would be complete without one?
With your image open, and the Ruler Tool selected. Drag the ruler along the crooked horizon.
1. Go to the Image>Image Rotation menu.
2. Select Arbitrary and accept the default angle and hit OK.
3. The horizon line should be straight, and all you need to do is crop.

Well, in that case, you will have to search for a visual horizon and focus on that – the same techniques apply!
Once you find that point, use that to align your photograph and you can’t go wrong. Good luck, we hope we have helped to straighten that out for you.

Discover the BEST way on how to clean a camera sensor using swaps, rocket blowers and pencil brushes to give your shots a dust-free finish!

Capture the magic of the night with our beginner’s guide to night photography. Learn tips and techniques for stunning results.

Master the art of solar eclipse photography with expert tips on equipment, settings, and precautions for stunning celestial images.
Learn the basics of photography – fast – with our FREE 60-Second Photographer online course. Each class is short and sharp with simple, actionable steps that give you immediate results.
x 30 lessons

© iPhotography™
Become a confident and competent photographer in less than 30 minutes!
Before you leave, make sure you’ve secured your FREE online photography course (worth £29.99)
Each class is just 60-seconds or less making it the fastest and easiest way to learn photography!