 Stephen Walton
Bok-eh, bo-keh – how do you even say it? Apparently, it’s bo-keh (like a bouquet of flowers) – but it really doesn’t matter as long as you know how to capture it. Which is why in this guide we’re going to give a full bokeh photography tutorial.

Bokeh translates from Japanese as the ‘quality of blur’. Some beginner photographers’ mis-understand as bokeh only as the appearance of those magical glowing blurry ball effects in the background of photos. While that is a formation of bokeh it’s not solely found in background light. It is more about the overall quality of blur in the image.
Bokeh can be formed in the background AND/OR foreground of a photo and it doesn’t have to have light orbs in it.
Portrait photographers are big advocates of using bokeh in their shots as it has the ability to isolate a subject in a busy scene drawing attention to them.
Whereas landscape photographers tend not to employ bokeh that much as their discipline tends to rely on a wider depth of field (DoF).

You actually only need one thing to capture bokeh in the beginning – a camera! Yes camera, it’s that straightforward.
You may hear or read other photographers say you need a camera with a wide aperture (small F/stop number ie. F/3.5 or lower). This is only true to the extent of when you’re working in a confined space – as the depth of field (which controls bokeh) is also governed by distance.
If you’re shooting in a big open space where the background is far away then you’ll get automatic bokeh simply because the background is far from the focal point.
Alternatively, if you’re in a more space-restricted location then you will need a lens with a wider aperture to rely on instead. A lens that opens up to F/1.4 would be ideal.
You don’t need anything else though, no specific shutter speed or ISO.

I’ve somewhat already established that a shallow depth of field is crucial to show off that bokeh.
Firstly, compose your shot. Pretty bokeh effects don’t mean composition gets forgotten. Instead, look for colours in the background that complement or match your main subjects’ colours.
Through the blurring of bokeh, the background colours will be amplified and spread so by choosing the right background you can tie it all together to make a nice aesthetic and give the bokeh more purpose.
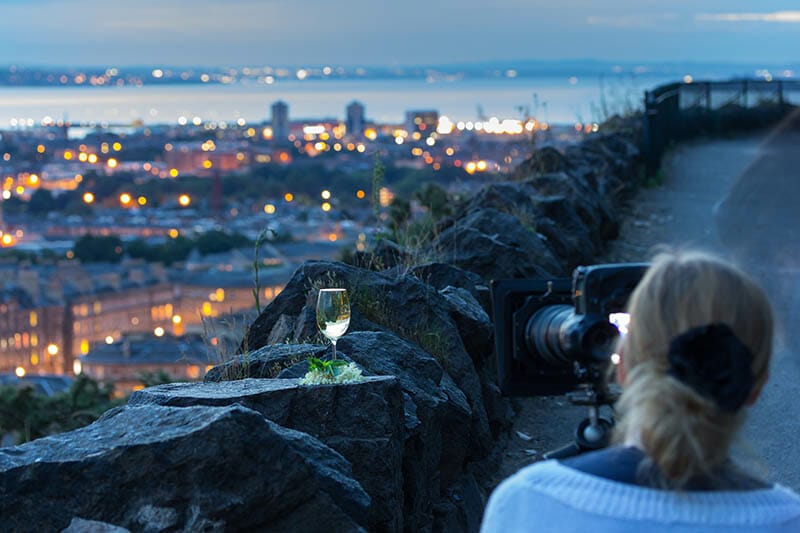
Secondly, while we said that pretty little light orbs aren’t the definition of bokeh they do look nice in the background. Shooting at night time in a city or in front of a Christmas tree you can capture those twinkling little lights that blur to look like magical orbs in the background.
Finally, once your frame is composed, open your aperture as wide as it can go and put your focus point on your main subject. If your subject is static, then use a One Shot AF-S mode and navigate the focus point to ensure the outline is sharp.
As you set the focus point you should be able to see the bokeh appear in the background as the DoF adjusts. If you’re happy with it – take the shot!
But if you’re not happy with the shots and the bokeh isn’t really popping you may need to make an adjustment.
As we said earlier bokeh photography is judged by the depth of field. So if your bokeh isn’t strong enough then you need to bring your subject and camera further away from the background.
If you can’t move your subject forwards, bring the camera closer to make the distance between the subject and background larger than the distance between the camera and subject.
Double-check that your aperture is as wide as it can go. Many zoom lenses give 2 widest apertures depending upon whether you’re zoomed in or out. The further out you are the wider the aperture available – but only do this if it doesn’t destroy your composition. Composition should be set first.
You can pretty much fake anything in digital imagery these days so of course you can create fake bokeh orbs in a photo. Here is a great video bokeh photography tutorial by iPhotography showing you how.
Taking photos with a lovely bokeh background isn’t hard. They can create some very dream-like enchanting images. Remember these 5 tips from this bokeh photography tutorial when you’re out shooting.
1. Make sure the distance between the camera and subject is shorter than the distance between the subject and background.
2. Compose your scene first and look for backgrounds that, when blurred, could complement the colours in your subject to give the background purpose.
3. Open your aperture as wide as you can. An aperture around F/1.4 would be ideal for bokeh photography.
4. If you are shooting in a wider space where the background is far away, you may not need an aperture as wide.
5. Use our bokeh photography tutorial video to edit in more orbs if you want to create a dream-like effect.

Discover the BEST way on how to clean a camera sensor using swaps, rocket blowers and pencil brushes to give your shots a dust-free finish!

Capture the magic of the night with our beginner’s guide to night photography. Learn tips and techniques for stunning results.

Master the art of solar eclipse photography with expert tips on equipment, settings, and precautions for stunning celestial images.
Learn the basics of photography – fast – with our FREE 60-Second Photographer online course. Each class is short and sharp with simple, actionable steps that give you immediate results.
x 30 lessons

© iPhotography™
Become a confident and competent photographer in less than 30 minutes!
Before you leave, make sure you’ve secured your FREE online photography course (worth £29.99)
Each class is just 60-seconds or less making it the fastest and easiest way to learn photography!