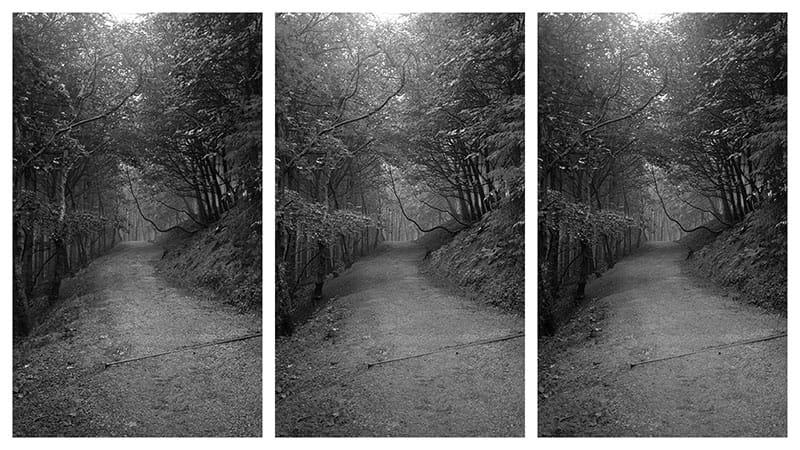
There are two ways to edit a photo into black and white – the right way, and the wrong way. Which way are you doing it?
iPhotography has got 2 great black and white photo editing videos for you to watch, depending upon whether you’re a Photoshop or Lightroom user. Time to find out on the tips you might be missing when editing your black & white photos.

Image: Desaturated version (left), using HSL sliders (centre) advanced editing (right)
For Photoshop users, it is possible to edit your black and white photos using Camera RAW as well as the main Photoshop workspace.
Try to avoid using a direct desaturation of an image from colour to black and white. Instead, use the dedicated black & white adjustment option under IMAGE>ADJUSTMENT>BLACK & WHITE.
In this tool, you’ll be faced with presets of black & white variations. Some are heavy on the contrast and others are a bit softer. Under these presets you can continue to customise the black & white finish further.
Using the colour channel sliders underneath adjust the appropriate ones (based on the colours in your original shot) to change their appearance in black & white.
You’ll start to see that editing black and white photos don’t start and finish with a simple desaturation. There are extra adjustments you can make to tone the image in a more stylised way.
In the same way as editing black & white photos in Photoshop has its own custom tools, so does Lightroom. And it’s not just Lightroom, if you edit in Luminar 4 then many of these processes will be similar.
At the top of your basic panel, there is a treatment option of colour or black & white. Choose black & white and scroll down to the B&W Mix panel. Here you’ll have access to colour channel sliders which allow you to tweak the colours from the original shot.
You’ll only need to adjust the colours that were present in your original photo. Have a go at making live tweaks to your shots and see what creative effects it can give you.
Hopefully, this quick guide to editing photos in black & white has given you a new approach. Just like a colour picture, black & white ones still need further adjustments to make those tones really pop.
Remember some colours, such as pink and yellow, don’t translate well into black and white so using these extra colour slider adjustments are perfect editing assistants to transform your monochrome photos!
If you’re an iPhotography member, don’t forget to share your photos in the gallery.
Discover the BEST way on how to clean a camera sensor using swaps, rocket blowers and pencil brushes to give your shots a dust-free finish!
Capture the magic of the night with our beginner’s guide to night photography. Learn tips and techniques for stunning results.
Master the art of solar eclipse photography with expert tips on equipment, settings, and precautions for stunning celestial images.
Learn the basics of photography – fast – with our FREE 60-Second Photographer online course. Each class is short and sharp with simple, actionable steps that give you immediate results.
x 30 lessons

© iPhotography™
Become a confident and competent photographer in less than 30 minutes!
Before you leave, make sure you’ve secured your FREE online photography course (worth £29.99)
Each class is just 60-seconds or less making it the fastest and easiest way to learn photography!