If you enjoy heading out to local or national air shows, then keen amateur aviation photographer Scott Dunham has got a great tutorial all about aviation photography.
Scott will give you his true experience on what it’s like for him photographing F-35 jets, and more, at the iconic Miramar airfield in California, USA.
I use a Canon EOS 7D with a Canon EF 100-400mm F4.5-5.6L IS USM lens for capturing aircraft in flight. Since my 7D is a crop frame camera that gives me an effective focal length of 160-640mm.
That also makes my recommended slowest shutter speed 1/640th at maximum focal length, which is an easy number to remember. I would like a newer model and perhaps even a mirrorless camera, so I would have less weight to lift since I have a bad shoulder and a tremor.
I carry a second body to photograph static displays (aircraft on the tarmac) because airfields can be dusty places and swapping lenses can get dust on your sensor. For that I use my old Canon EOS 40D and a Canon EF 24-105 F4L IS USM lens.
I am a big believer that if you want good photos, use good glass, and Canon L Series lenses have served me well. In the past when viewing or attending sporting events, it appeared that around 2/3 of the professional photographers were using Canon L Series lenses and that heavily influenced my purchase decision.
Ideally, I’d suggest to get a camera with a burst mode of 10FPS (frames per second) or higher. At ISO 800, my Canon 7D starts to get noticeably noisy and my typical shutter speed is 1/1250th to 1/1600th for crossovers and I can only shoot 7FPS.
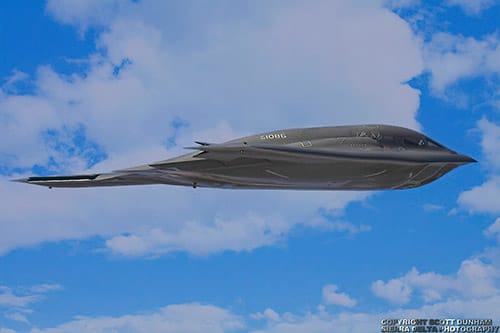
Image by Scott Dunham
I bought a battery pack for my Canon 40D, but that’s a lot of additional weight to be carrying and pointing up in the sky, especially towards the end of the day when the headliner usually flies and I’m a pensioner with several damaged parts.
Unless you are using Live View constantly or you do an excessive amount of chimping, 1 fully-charged battery will usually suffice and having a backup battery in your pocket is a much better and less weighty alternative.
Some jets will fly 4-5 miles and more from the field to finish and or set-up their next pass but pay attention. I also use a ND0 or ND10 neutral density filter, depending on the conditions, to reduce glare. ND filters have been compared to sunglasses for your camera.
The ND0 is more of a lens protector that you can take photographs through. On the subject of filters, another one of my mistakes to learn from is never use a CPL to photograph aircraft in flight.
I tried that at an air show that was all propeller aircraft thinking it would be alright because most of the planes were flying 200 mph or less. I wanted to reduce glare and intensify the saturation on many of the colourful or shiny aircraft and their nose art.
The text and numbers on the aircraft looked satisfactory on the camera screen, but at home on the computer almost all of my photographs were blurred.
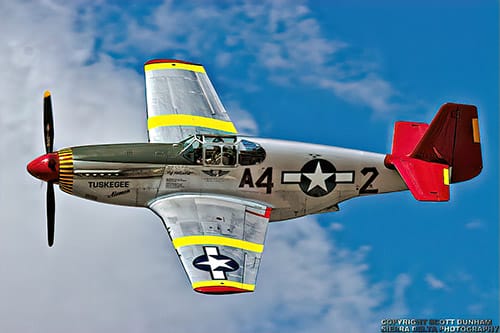
Image by Scott Dunham
It is also imperative to have high-speed memory cards. If your camera buffer backs up while you are trying to photograph a crossover or a manoeuvre like a stunt-pilot doing a hammer-head turn you could easily miss the shot.
I also recommend larger memory cards so that you’re not having to change them all the time and keep track of how much space you have left because you don’t want to be in the middle of the photo pass or the stealth fighter making a pass with the weapons bay open when a “card full” message pops up.
You will frequently have a minute or two between passes depending on the act, but Murphy’s Law suggests that won’t be the case when you need to change cards and yes that’s another mistake I’ve made.
I keep my next memory card outside of the case in the coin pocket of my blue jeans where it’s quick and easy to find. I’ve heard stories of counterfeit memory cards, but I have never had a memory card failure with over 200,000 captures.
This is because I have purchased quality cards through reliable sources and my 128GB Lexar Professional (160MB/sec) card is my favourite. If you have some slower cards, check the schedule and use them on the propeller aircraft that fly slower or acts that you don’t expect to take a lot of photos.
I have a monopod with a Manfrotto pistol grip, but I don’t recommend using one, unless you have a 600mm prime lens or something bigger, that is too heavy to be continually lifting.
Same for tripods with gimbals. If they’re allowed at the air show, they require a lot of space. If that’s your only camera setup, you may miss a lot of shots when the aircraft make ballistic climbs or approach from behind you.
I have used the monopod for afterburner passes and fireworks at night shows. It’s a good idea to check to see if such things will be allowed into the air show. There are also air shows where they limit how large of a telephoto lens you can bring unless you have a media pass.
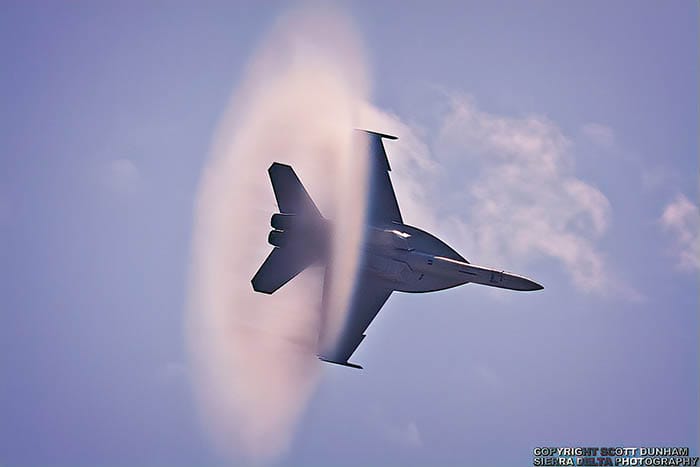
Image by Scott Dunham
Before the air show begins, it can be a good idea to pan around the field with your lens to see what obstructions are present. These light towers would be pretty easy to clone out if you don’t mind doing that, but it isn’t always that easy. At Miramar that have an old C-130 fuselage along the outer runway that is used for fire and rescue training and by now it looks like it crashed.
It is highly unlikely that they will ever take the time to polish it up. Another reason why it is preferable to take several shots so that you can discard shots like this.
Watch for speaker towers and other obstructions that might block your view or take over your camera’s focus.
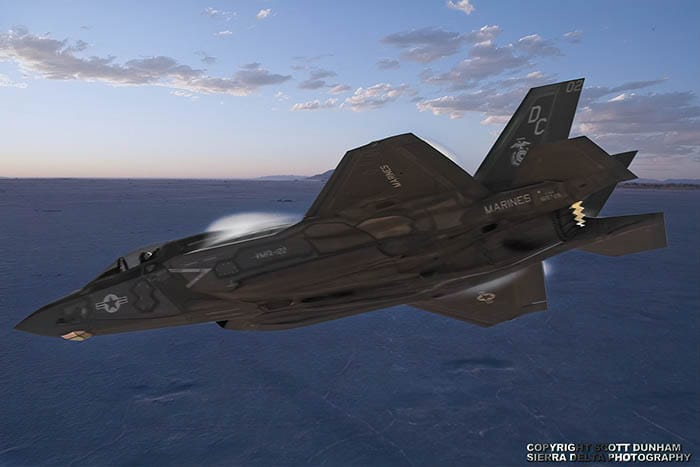
Image by Scott Dunham
While panning you might lose your subject or drop it partially out of frame. This is usually dependent on the size and speed of the aircraft and your lens, but it may be affected by the manoeuvre as well.
That applies if you are looking through the eyepiece. If you are trying to use the rear screen & there is a glare & you are using an automatic mode with a delay, good luck.
Before I bought my 1st DSLR in 2008, that was me, and unless the aircraft was moving very slowly, I almost never got more than part of an aircraft between 10 & 2 o’clock on a horizontal plane. That’s where the aircraft is moving fastest relative to your position.
The camera’s focus will vary from 1 frame to the next, especially when you are shooting aircraft moving at 300-600 mph. I see it all the time, and it usually isn’t evident when reviewing photos on the camera screen.
In a group of 10 photos, you may have 2 where the focus isn’t very sharp & maybe 1 that is blurred, 5-6 that are very good & 1-2 that are great. If you don’t have a stabilized camera body or lens, your results could be much worse. Canon adds stabilization to many of their lenses, but not the camera body on Canon DSLRs.
The light may change only slightly from 1 frame to the next, but it can change a great deal from 1 end of the flight path to the other, particularly when the runway/flight path is east to west.
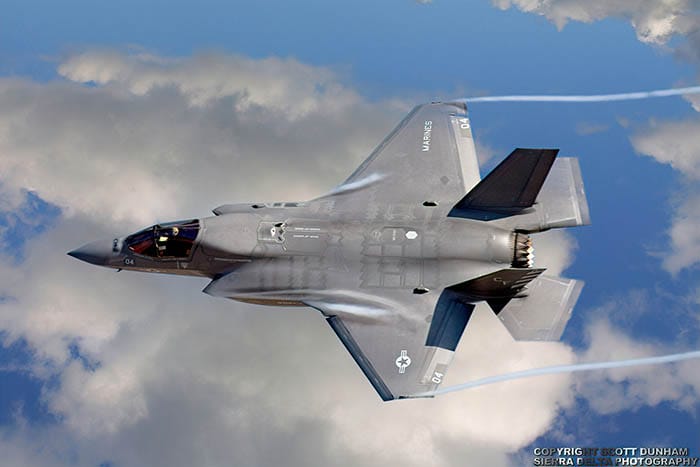
Image by Scott Dunham
I have found it beneficial to develop a feel for aircraft speed so that you can adjust your shutter speed to keep your photos sharp. For example, many propeller aircraft make slow passes around 150 mph and higher speed manoeuvres around 200-250 mph.
If your shutter speed is too slow, your photos will suffer. But how do you get a feel for the aircraft’s speed? Start by using an internet mapping program and determine the length of the runway.
Then find a landmark such as the tower or a taxiway that gives you an approximate midpoint for the runway. Most of the airfields where I attend air shows have runways about 2 miles long so the midpoint is about 1 mile. There is often an approach of 1 mile or more on either end too.
An aircraft travelling 150 mph is travelling 2.5 miles/minute or 1 mile in 24 seconds and it will seem like a very long time to cover that mile.
• 200 mph is 3.33 miles/minute or 1 mile in 18 seconds
• 300 mph is 5 miles/minute or 1 mile in 12 seconds
• 400 mph is 6.66 miles/minute or 1 mile in 9 seconds
• 500 mph is 8.33 miles/minute or 1 mile in 7.2 seconds
• 600 mph is 10 miles/minute or 1 mile in 6 seconds
That will almost spin your head to keep up with the aircraft as it passes. While that might seem complicated, all you need to remember is 9,8,7,6 for 100 mph increments from 400 to 600 mph.
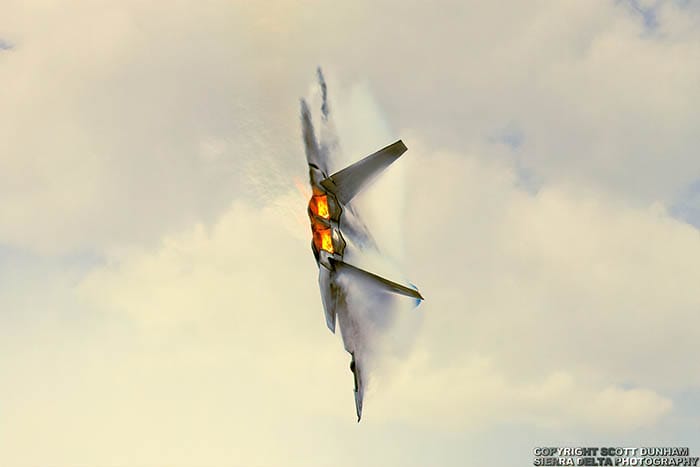
Image by Scott Dunham
You should also look for items that you might want to include in your photos, like the control tower, flags or a late setting/early rising moon. You may have to zoom out to include these items depending on your skill level.
You may just photograph them and add them as a composite layer. The latter is probably a better idea since they will probably be blurred as you pan with the aircraft in flight.
There is also a myriad of undesirable objects to avoid on photographs of static aircraft displayed on the tarmac, especially in the U.S. The earlier you arrive the fewer people will be in your photos.
In many fields, people put portable chairs under the wings and fuselages of aircraft on display to escape the sun. You might not mind this, I do. In addition, there can be everything from portable restrooms to food vendors and their vehicles, banners, grandstands and the list goes on.
I am also surprised by the number of people I see with reasonably expensive cameras that take pictures of the shaded side of the aircraft and sometimes shooting into the sun. Unless there is a bad glare or obstruction, or features like nose art on the shaded side that you want to capture, the sun is your friend, use the light.
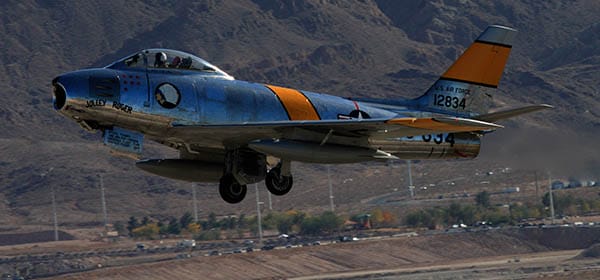
Image by Scott Dunham
In addition, there may be clouds in part of the flight path that may be an attractive feature or may reflect the sunlight & increase the total amount of light. The sun may also reflect off the cockpit &/or paint/finish, creating undesirable overexposed hot spots or sometimes starbursts that you might find attractive.
While it is usually preferable to have the sun at your back, at the two locations where the sun has been at my back, I have discarded a higher percentage of photos with hot spots than I did at any location where I was shooting into the sun.
Finally, the angle changes the photo as well as the lighting, especially when shooting multiple aircraft. However, it applies to a single aircraft as well, the wing may block the view of the cockpit or tail and the detail in nose art changes with the angle.
At most air shows I take at least 2,500 and sometimes 5,000+ photos each day. For a major act like the Blue Angels, Thunderbirds, Red Arrows or a top-line aircraft demo I often take 600-1,000 photos in 15-25 minutes.
I prefer to do my first review using Canon Digital Photo Professional (DPP) which came free with my Canon DSLRs for several reasons.
One of the challenges with photographing an air show is that you don’t get to select the weather and the conditions in the sky. From MCAS Miramar, a few miles from the Pacific Ocean to the RIAT at Fairford.
With white or grey skies, this is not an attractive group of photos. But that can be fixed. I made some minor adjustments to the photo below and I am relatively satisfied with the aircraft, but the sky is dreary and downgrades the look of the entire series of photos.
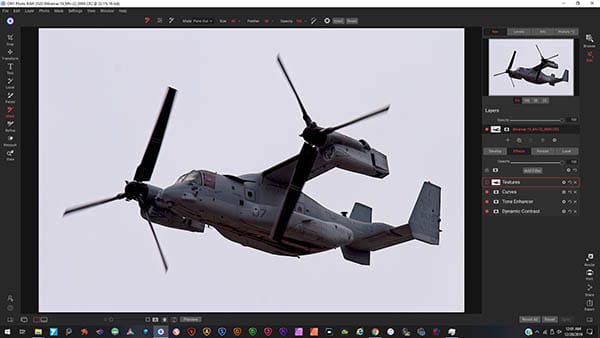
Image by Scott Dunham
Sky replacement can be done in many programs, most require adding a new layer and masking that layer in or out. Luminar has a sky replacement adjustment that is extremely easy to use.
On1 is my primary photo editing program for now and one of my favourite features of On1 (for sky replacement) is the Texture Filter. It comes with 6 different cloud configurations and the appearance can vary greatly depending on the blend mode selected.
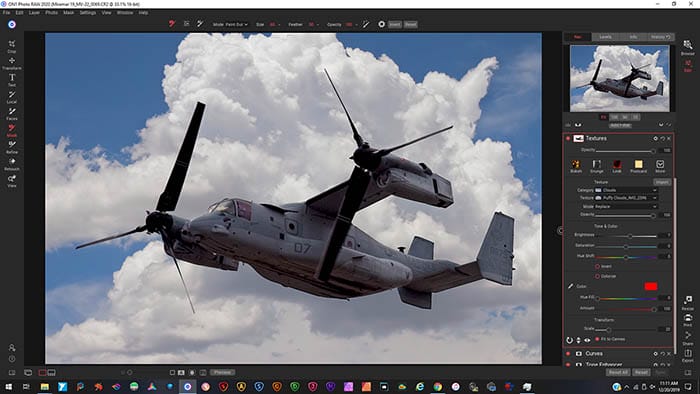
There are also scale, position, brightness, saturation and other adjustments. You can also upload your own skies and clouds. I’m going to use one of the sky photos that I think produces a very dramatic look.
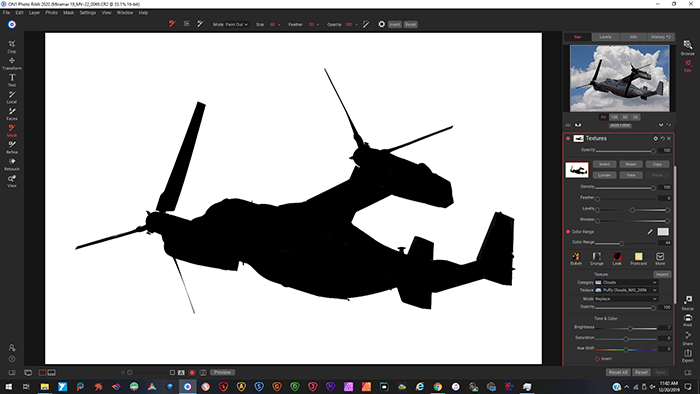
Image by Scott Dunham
I usually start by making a colour mask, but on this photo a luminosity mask would also work. Select the sky colour, adjust the colour range and levels, and then some brush work may be required.
After exporting the file, my final step is to run it through the AI Clear Adjustment in Topaz Studio. Some of you may note that I am using the old version of Topaz Studio for this photo. I frequently use it when I want to get something done quickly.
Below is an example of both reflection & glare. The sun is in what should be a relatively favourable position behind me and to my left, yet I have both a sunburst reflection on the cockpit and a very severe glare/reflection on the fuselage.
This is an extreme example of a sunburst reflection, and many smaller ones can be fixed with a heal tool or dodge & burn to fix or reduce the reflection. In some cases, some might even find them attractive. The reflection on the fuselage on this F-35 shows that reflections and glare don’t only occur with glossy paint. The F-35 is a dull grey-brown colour, but you can distinctly see the glare.
I do not use the highlight alert on my camera when photographing air shows, because it happens so often it becomes a distraction & some of those photos come out pretty well just the same.
Another focus issue illustrated here is that the jet exhaust can blur the focus on portions of the aircraft. In this capture, the left rear horizontal stabilizer and wing are blurred. Heat haze near the ground will also affect the focus on aircraft taking off on a hot day.
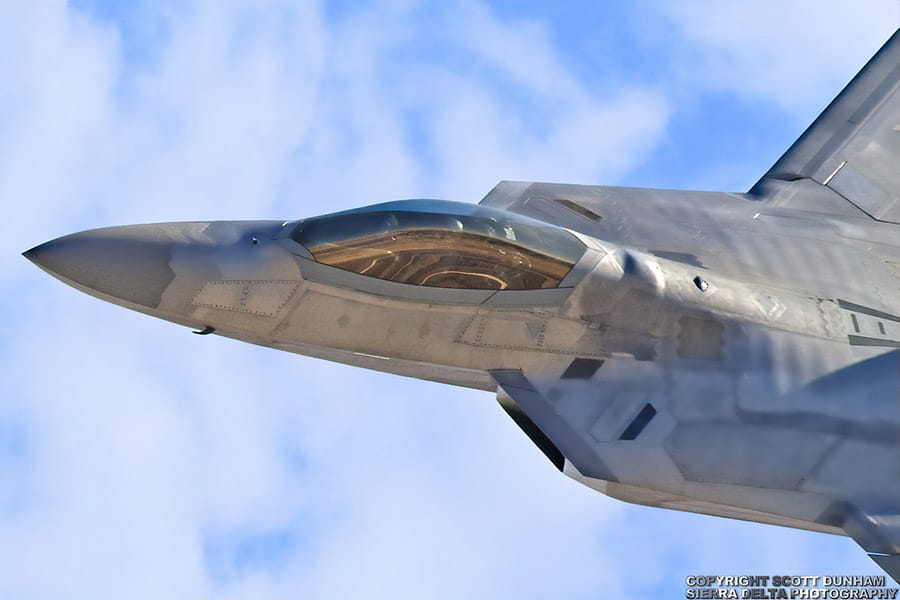
Image by Scott Dunham
Below is a more dramatic example of jet exhaust blurring a photo. I have magnified this so that you can’t see the entire wing at the top of the screen, but the blur extends from the fuselage to the tip of the wing and beyond.
The focus on the wing in the lower portion of the screen is relatively sharp. This happens most frequently when a jet makes a high-speed inside loop or turn, and afterburners magnify the effect.
It usually is not something you will notice through your viewfinder while you are shooting, so if you only take a few shots, they might all be rejects.
Jet exhaust isn’t always a bad thing. Most of the time it is barely perceivable unless there are clouds, terrain or portions of aircraft to make it more visible.
In the magnified portion of the photo below, you can see that the jet exhaust can extend quite a distance and add a sense of speed and movement. This is what over 40,000 pounds of thrust look like.
For those that remember the original ‘Top Gun’, the crash investigation determined that Maverick flew through Iceman’s jet wash and it caused one of his engines to flame out, and that put his aircraft into a flat spin that he was unable to recover from.
This should help illustrate what jet wash is, it could probably turn a steak into a charcoal briquette in a fraction of a second.
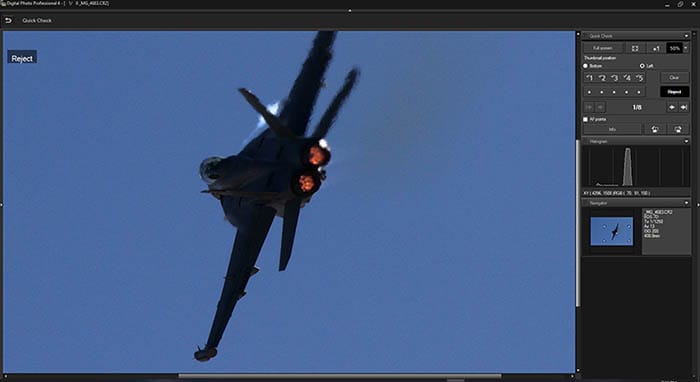
Image by Scott Dunham

Discover the BEST way on how to clean a camera sensor using swaps, rocket blowers and pencil brushes to give your shots a dust-free finish!

Capture the magic of the night with our beginner’s guide to night photography. Learn tips and techniques for stunning results.

Master the art of solar eclipse photography with expert tips on equipment, settings, and precautions for stunning celestial images.
Learn the basics of photography – fast – with our FREE 60-Second Photographer online course. Each class is short and sharp with simple, actionable steps that give you immediate results.
x 30 lessons

© iPhotography™
Become a confident and competent photographer in less than 30 minutes!
Before you leave, make sure you’ve secured your FREE online photography course (worth £29.99)
Each class is just 60-seconds or less making it the fastest and easiest way to learn photography!
