 Emily Lowrey
Astrophotography can be so challenging, yet so rewarding. There are a few different elements to consider, such as what equipment is needed, what time of the month is best, also where to point your camera and when.
There is a little more planning involved in capturing that perfect shot of the stars, but with that extra work comes a much higher reward when you get it right!
Astrophotography is one of the more advanced styles of photography, so it’s a good idea to only attempt this once you are familiar with how shutter speed, aperture, and ISO work.
In this article, I will cover the basics to get you started. However, astrophotography is a vast subject so definitely do some further reading if you’re super interested in this style of photography.
There will also be a companion video at the bottom of this post to go through the steps one more time in a simple way. We’d recommend reading the article then watching the video, and by the end you should be well on your way to shooting your first astrophotography photos!
Your camera doesn’t need to be expensive in order to shoot astrophotography, but it does need to have manual settings. We will be working entirely in Manual mode for astrophotography to give us the highest level of control.
A wide angle lens is best for astrophotography, and we will explain why later on. A “fast” lens, as in, a lens that lets a lot of light in with a wide aperture (e.g. F/2.8, F/1.8) will always work better for astrophotography.
For example, an ideal lens for astrophotography would be a 12mm, or a 24mm f1.8 prime lens. On the other hand, with the right techniques other lenses will work too, so don’t go splashing any unnecessary cash just yet!
You will need:-
• A camera with manual settings
• A wide angle lens (the widest focal length on your current lens will work)
• A tripod
• A torch or headlamp
• Probably a lot of patience!
This section involves a little bit of simple math, but don’t let that put you off!
Because the Earth is constantly rotating, we can’t just point our camera at the stars and leave our camera’s shutter open indefinitely. After a period of time, the stars will begin to blur. You can sometimes use this effect to your advantage, but for a traditional shot of the Milky Way, we need the stars to remain sharp.
To calculate the shutter speed, you can use with your lens, there is a rule known as the 500 rule.
If you have a full-frame camera, then the equation is very simple. For example, a 24mm lens would allow you a 20-second shutter speed (500 divided by 24) before the stars start to blur.
If your camera isn’t full-frame, then we have to calculate the crop factor first. This is just one small extra step. Your camera manual should tell you the crop factor of your camera. For example, a micro four-thirds camera (Olympus or Panasonic) will have a 2x crop factor. If you were using a 25mm lens on a Panasonic camera, you’d have to double that number to 50mm, and then do the calculation.
Therefore our new shutter speed will become 500 ÷ 50 = 10-second shutter speed.
To get great photos of the stars we want to have a clear night. It’s important to plan ahead so you can have the best chance of getting the results you want. It’s important to check the weather in the days leading up to your shoot regularly.
You should also plan to shoot on a new moon, where there is no moon in the sky. The moon is so bright it can make stars disappear, which is the last thing we want! A new moon, or at least a crescent moon, would be the peak time for astrophotography. This gives us a window of just a few days a month! So you can see why a bit more planning needs to occur.
Another consideration is light pollution. Man-made lighting, such as street lamps and house lights, cause light pollution. You might have noticed that when you’re in a city you can’t see many stars. There are light pollution maps available for free online. You can search local areas and choose a spot that isn’t too badly affected.
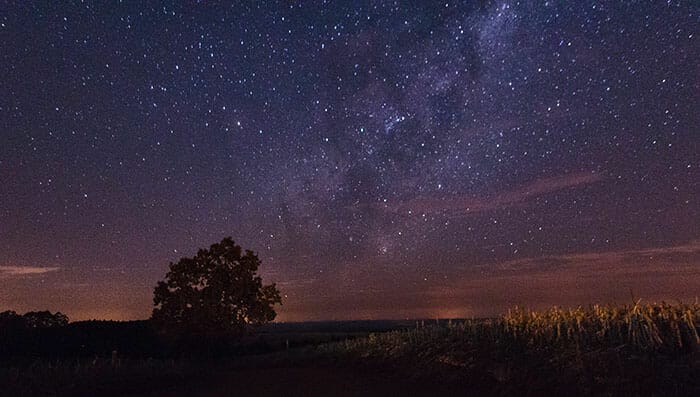
Lastly, one final thing to consider is where the Milky Way will be during your photo session, and at what time it might be most visible. It isn’t essential to focus on the Milky Way, but all the iconic astrophotography shots usually do. The Milky Way tends to be the most interesting thing in the sky.
Unfortunately, the Milky Way can show up at any time in the night. Even midnight or the early hours of the morning depending on its location! Sometimes we are lucky, and it appears earlier, and some nights it won’t rise above the horizon at all.
Luckily for us, there are many resources available to find out this information. A great app for iPhone is PhotoPills. This shows you exactly where the Milky Way is in the sky using augmented reality. You can simply point your phone at the sky and see exactly where it is.
PhotoPills can also project forward in time to show you where the Milky Way will be in a few hours’ time. This app is a paid-for app, but there are plenty of other free versions available.
So, now we’ve got the correct day of the month. We’ve picked a spot that is clear of light pollution. We have all the equipment we need. We know where the Milky Way is in the sky. Now let’s cover composition!
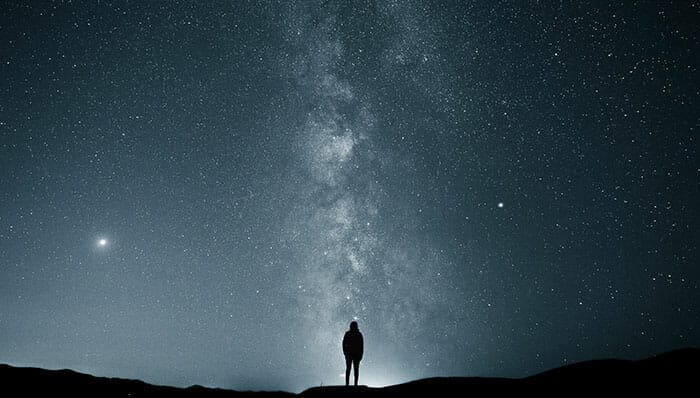
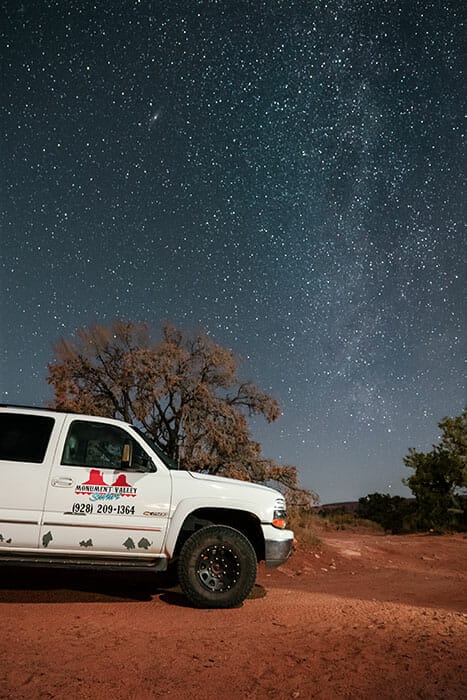
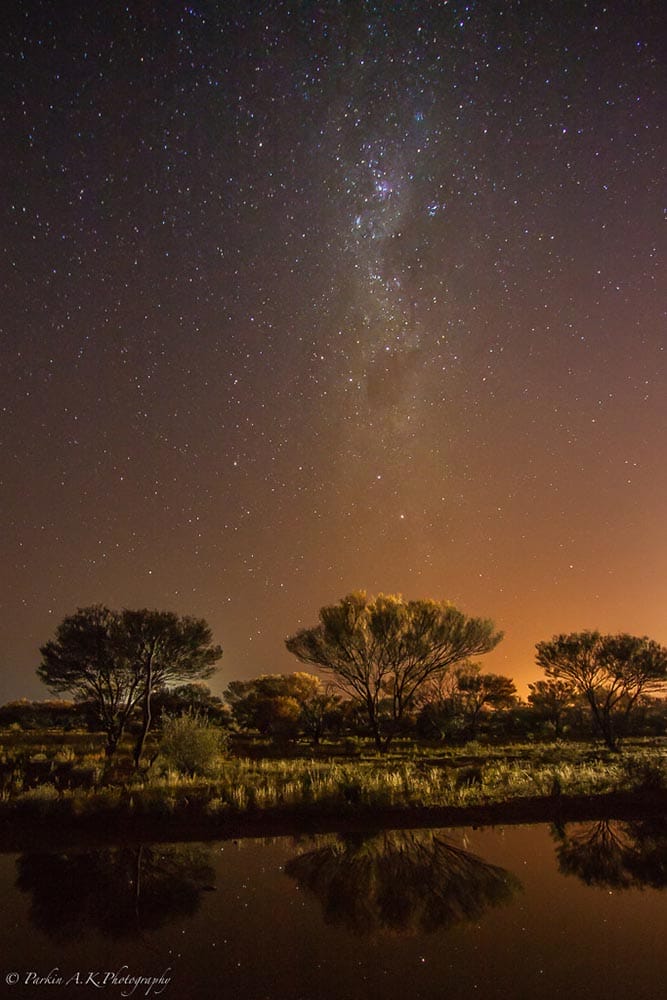
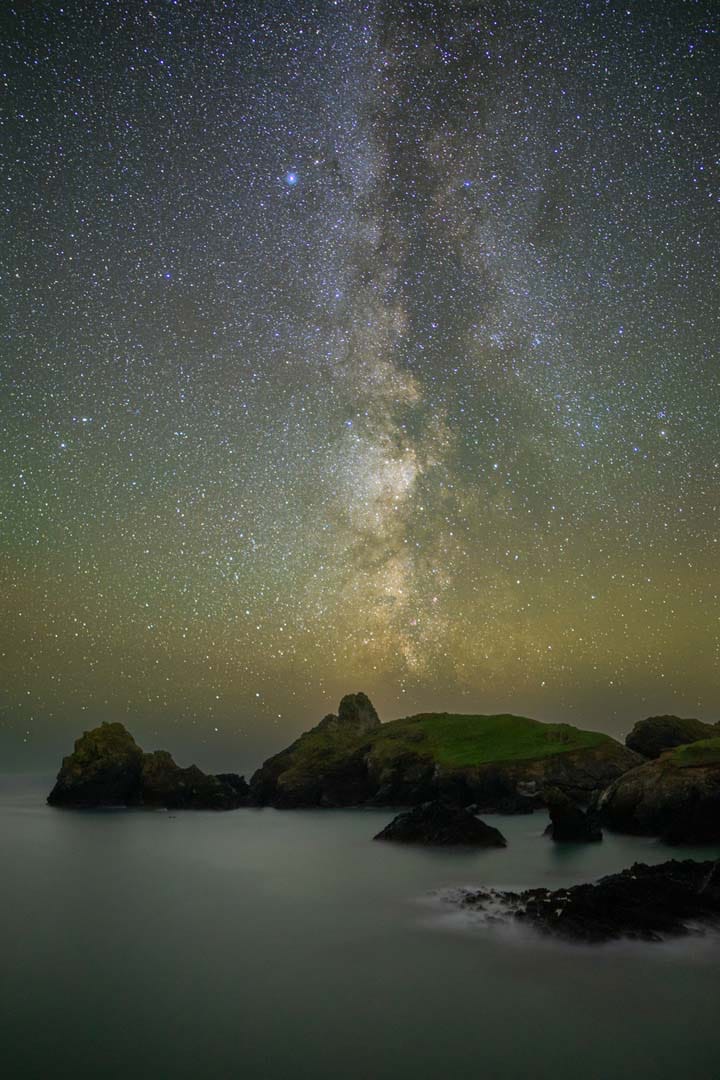
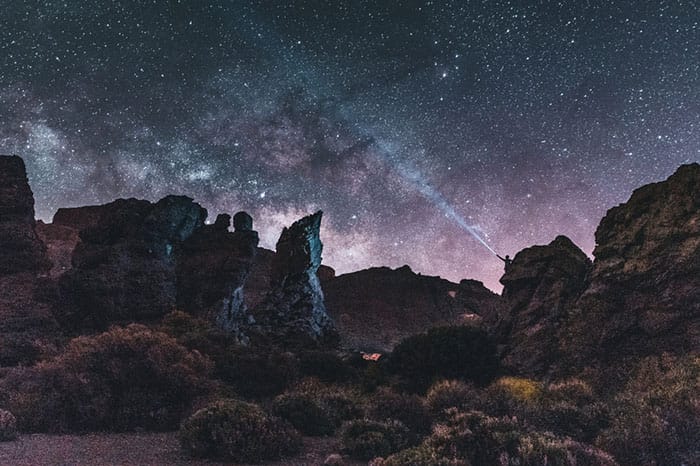
Getting a clear shot of the Milky Way isn’t enough. Just like all other forms of photography, we have to consider composition. The most effective astrophotography shots have a subject, or at least foreground interest, in them.
Try to set your camera up so that the Milky Way will be in frame behind an interesting subject. You could choose a derelict building, a car, or even a person. Just something to help add some scale and interest to your overall photo.
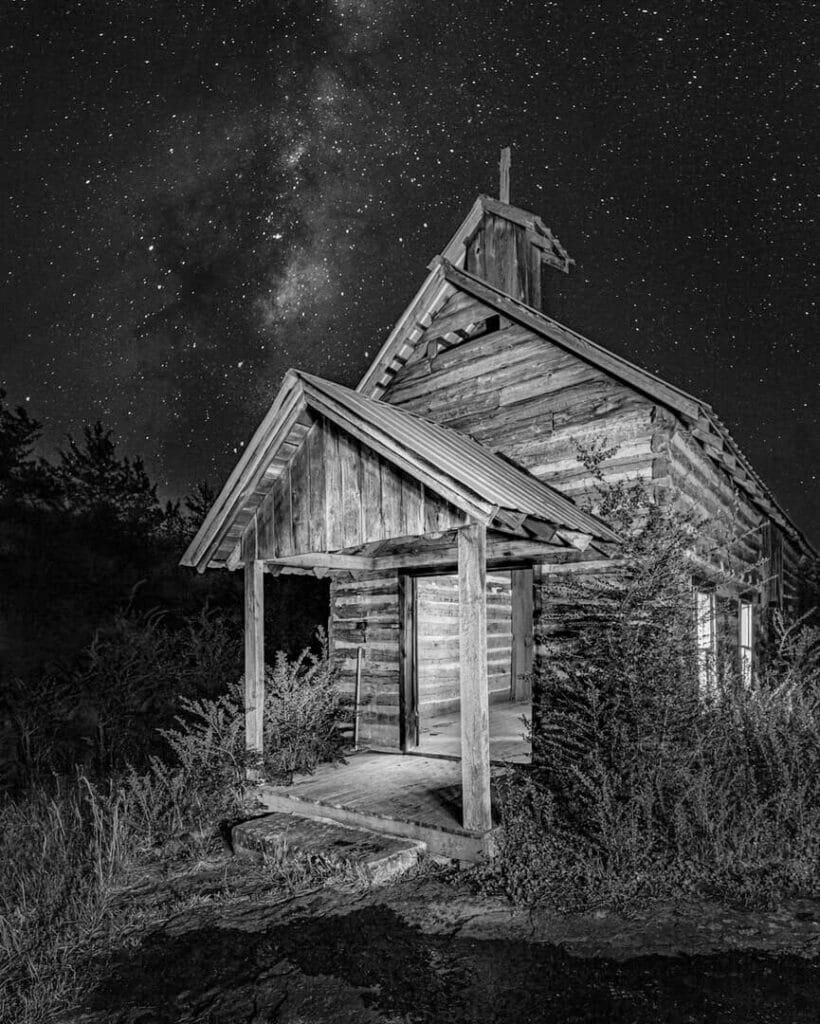
As you can see in the example below, the subjects really make the image something special. So how do we capture them? We’re working in the dark after all! There are two techniques:-
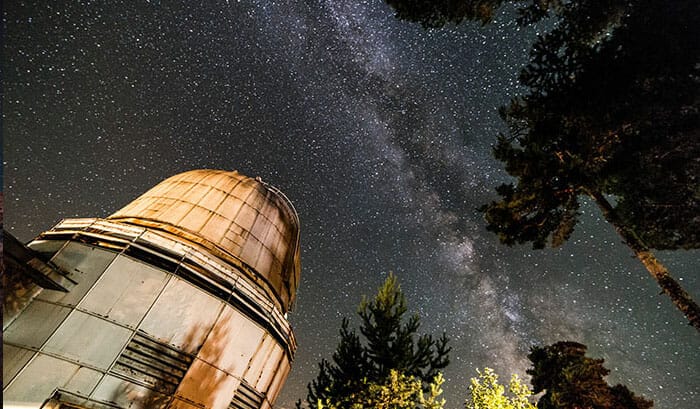
Using a torch, or even the light on your phone, wave the light over the foreground object to illuminate it when the photo is being taken. It might take a few attempts to get the effect of how you want, but it will work very well.
Composite two images:
Another, more advanced, technique is to composite two images together using an editing technique. One image will concentrate on getting the sky perfect, and the other image will concentrate on getting the foreground perfect. This could mean leaving the shutter open for a long time, until the foreground is fully exposed. Remember a longer shutter will make the stars blur, which is why we need two images.
Another variant of this is to shoot the foreground image at blue hour, just after the sun has gone down, and then shoot the stars later in the evening. This trick can ensure your foreground is crisp and noise-free, but it does mean keeping your tripod in exactly the same spot for several hours.
Shooting in the dark means that we can’t rely on autofocus. It’s best to shoot fully manually throughout for astrophotography.
How do you make sure your star photos are sharp?
To set up our manual focussing, use a torch to illuminate the foreground of your composition and then select a point in the frame to focus on. After this, change your camera to manual focus so that the focus locks once you’ve adjusted it.
Sometimes this doesn’t work as our foreground is much too far away for our torch to reach. In this instance, we should look to the stars to check that they’re pin-sharp.
If your camera has 2x or 4x magnification in manual focus, this is the perfect time to use it. We must zoom in (using the magnification setting on the camera, not using the zoom on the lens) to one particular star. When a star is in focus, it will grow small and pin-like on the back of your camera screen. This is when we know we’ve got the stars perfectly in focus.
A bit of trial-and-error, and lots of checking the results on the back of your camera, is always recommended! Sometimes it can be hard to see the images in the dark, so make sure you zoom in to really check you have nailed the focus.
In both of the above images the foreground was “light painted” to make sure the subjects stood out in the darkness.
You can no longer trust your eyes when you are working in the darkness. Every bit of light seems lighter than it really is. This is why we much consult our histogram as much as possible when shooting astrophotography.
It’s a fine balance between making sure the image is illuminated and making sure the stars don’t over-expose and become completely white. This will show up on the histogram as a peak at the far right side. So long as nothing touches the far right side of the histogram, everything will be recoverable.
It’s better to overexpose as much as you can, without blowing out the stars. This is because it’s much easier to make your image less bright in editing rather than upping the exposure. When you have to pull the exposure up in editing, all the digital noise will rise up with it. So, for astrophotography: overexpose wherever possible, so long as you don’t blow out your stars.
The histogram is your best friend!
1. Prepare, prepare, prepare! Planning is essential so you can get the most out of your trip. If you’re planning a camping trip, try and make it coincide with a new moon.
2. If the clouds are out, check every hour so you can seize the opportunity once they’ve moved.
3. Use the 2-second timer on your camera to take your photos. That way there will be no camera shake in your long exposures.
4. Check your images regularly. Zoom in and check that the stars are sharp and not streaking. Check that the foreground is in focus.
5. Use a red light if you have one. This will preserve your night vision, and if you’re going to a popular place where other night-time photographers maybe, it’s common courtesy to all use a red headlamp so you don’t ruin each other’s night vision.
6. Put your spare batteries in an inside pocket. Somewhere warm. The cooler temperatures will drain your battery life quickly.
Mastering astrophotography can take several attempts, so don’t get disheartened if your first venture doesn’t work 100%. Every time you try, you will learn something new. It is very satisfying to see our improvements over time!
Research as much as you can before venturing out. Getting your camera settings right is only one aspect of this particular genre of photography. You must have the right location, on the right date, with the right weather, at the exact right time!
Look at other people’s photos for inspiration to see which locations close to you have worked successfully.

Popular memory cards for photography – what’s the best SD card for your digital camera? Choose the right capacity and class speed in our guide

Discover the BEST way on how to clean a camera sensor using swaps, rocket blowers and pencil brushes to give your shots a dust-free finish!

Capture the magic of the night with our beginner’s guide to night photography. Learn tips and techniques for stunning results.
Learn the basics of photography – fast – with our FREE 60-Second Photographer online course. Each class is short and sharp with simple, actionable steps that give you immediate results.
x 30 lessons

© iPhotography™
Become a confident and competent photographer in less than 30 minutes!
Before you leave, make sure you’ve secured your FREE online photography course (worth £29.99)
Each class is just 60-seconds or less making it the fastest and easiest way to learn photography!